N7201A617E00_0317.pdf - 第297页
NPM-W 2 EJM7DE-MB-11M-00 11 - 1 -6 Old type head The old type head is fixed with three bolts. (For the current head, use four bolts to fix.) For details of the difference of the cu rrent head and old type head, see below…

NPM-W2 EJM7DE-MB-11M-00
11-1-5
Maintenance
11-1
After replacing the head, it is necessary to perform calibration and accuracy verification.
STEP Item Action Reference
STEP2
Head/Placement
Correction Z
Height measurement (→P.13-1-2, 13-4)
Dummy dispensing unit
height
*1)
(→P.13-1-2, 13-4)
STEP3
Jig station
Scan position
*2)
(→P.13-1-2, 13-10)
Head offset
*2)
(→P.13-1-2, 13-10)
Dispensing head
(option)
*1)
Head θ-axis origin (→P.13-1-2, 13-12)
Head offset (→P.13-1-2, 13-12)
Accuracy
verification
*3)
Placement accuracy Reflection (→P.13-1-2, 13-20)
Placement accuracy verification (→P.13-1-2, 13-20)
*1) To be performed only for the machines with that option
*2) It is not carried out for the dispensing head.
*3) Reflection (optional) and verification (optional) of dispensing head accuracy are carried out for the
dispensing head.
Head and nozzle
changer replacement 3
Calibration
NPM-W2 EJM7DE-MB-11M-00
11-1-6
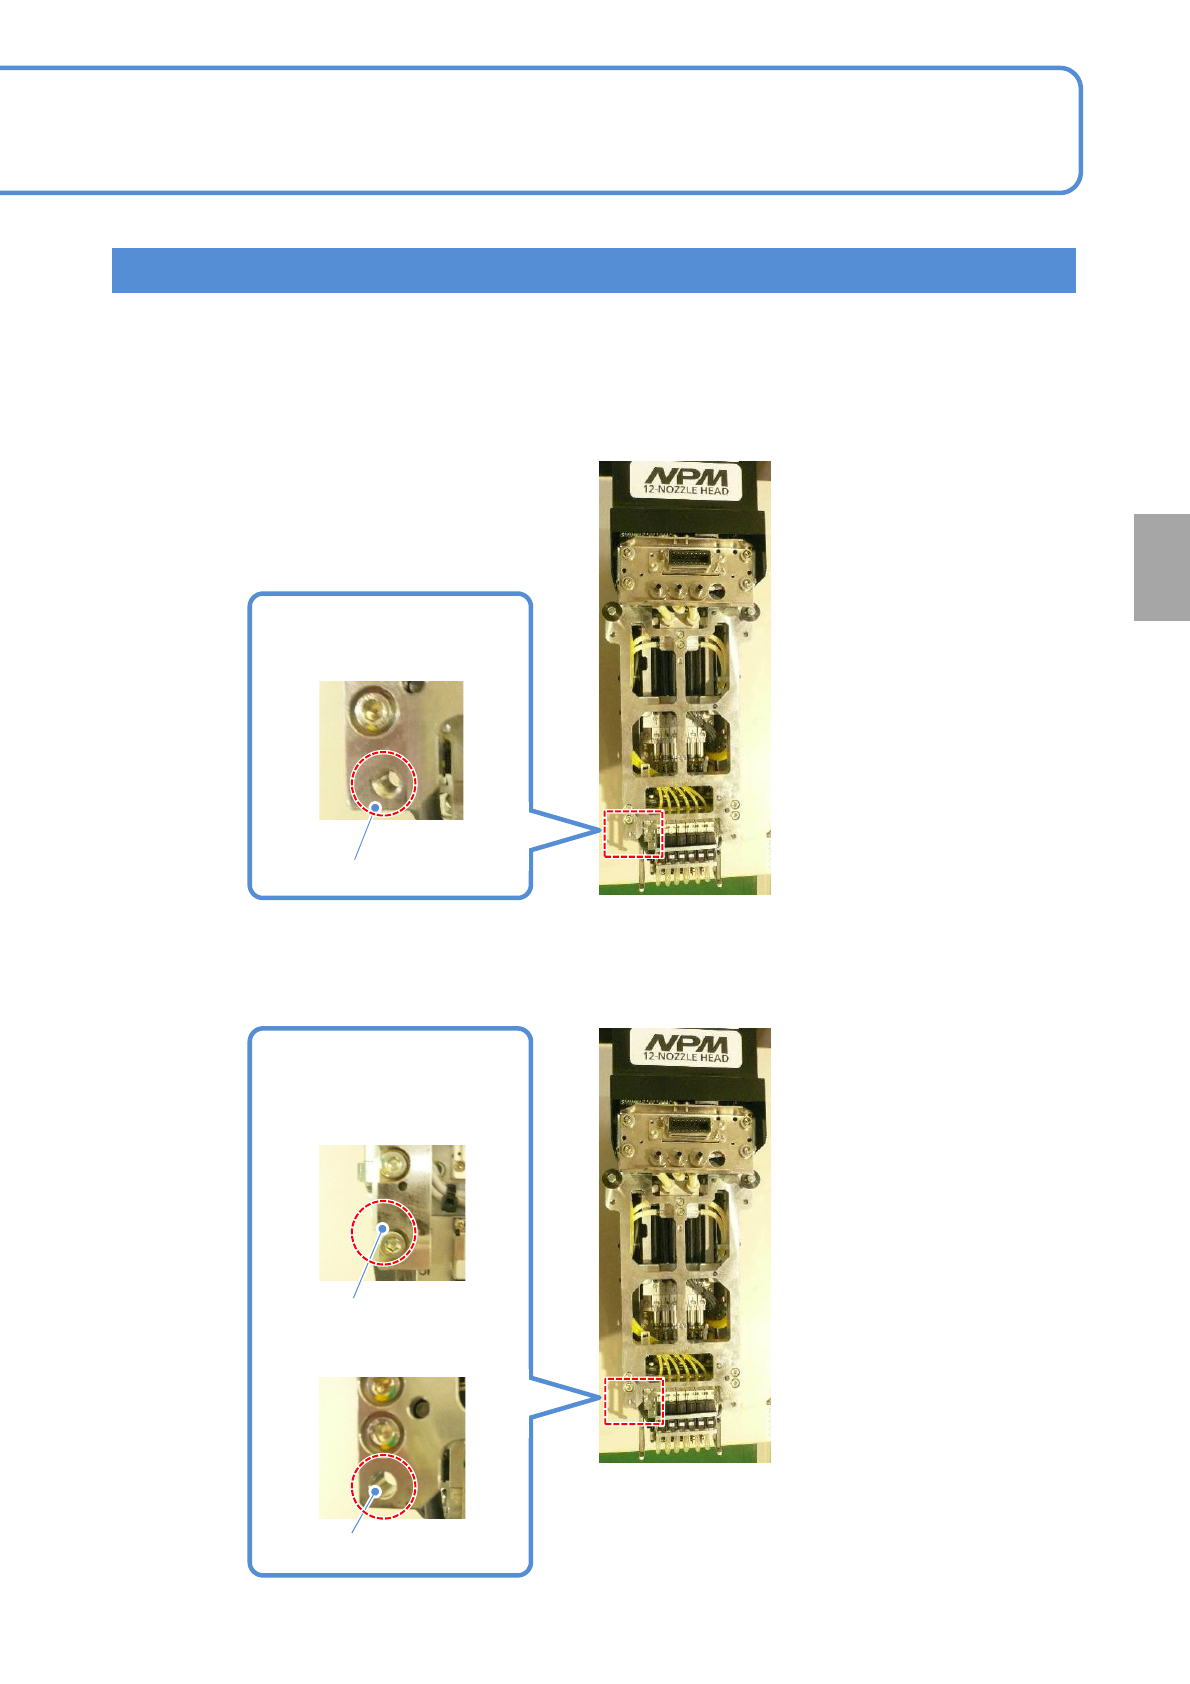
Old type head
The old type head is fixed with three bolts. (For the current head, use four bolts to fix.)
For details of the difference of the current head and old type head, see below.
When the old type head is attached on NPM-W2, you need to remove the unused fixing bolts.
For details, see the subsequent pages.
■For current head
■For old type head
Screw hole
No hole
Screw hole which locates the
lower left part viewed from the
head attachment face
No hole or circular hole
which locates the lower
left part viewed from the
head attachment face
Circular hole
Replacement
NPM-W2 EJM7DE-MB-11M-00
11-1-7
Head and nozzle
changer replacement 4
1
2
3
Maintenance
11-1
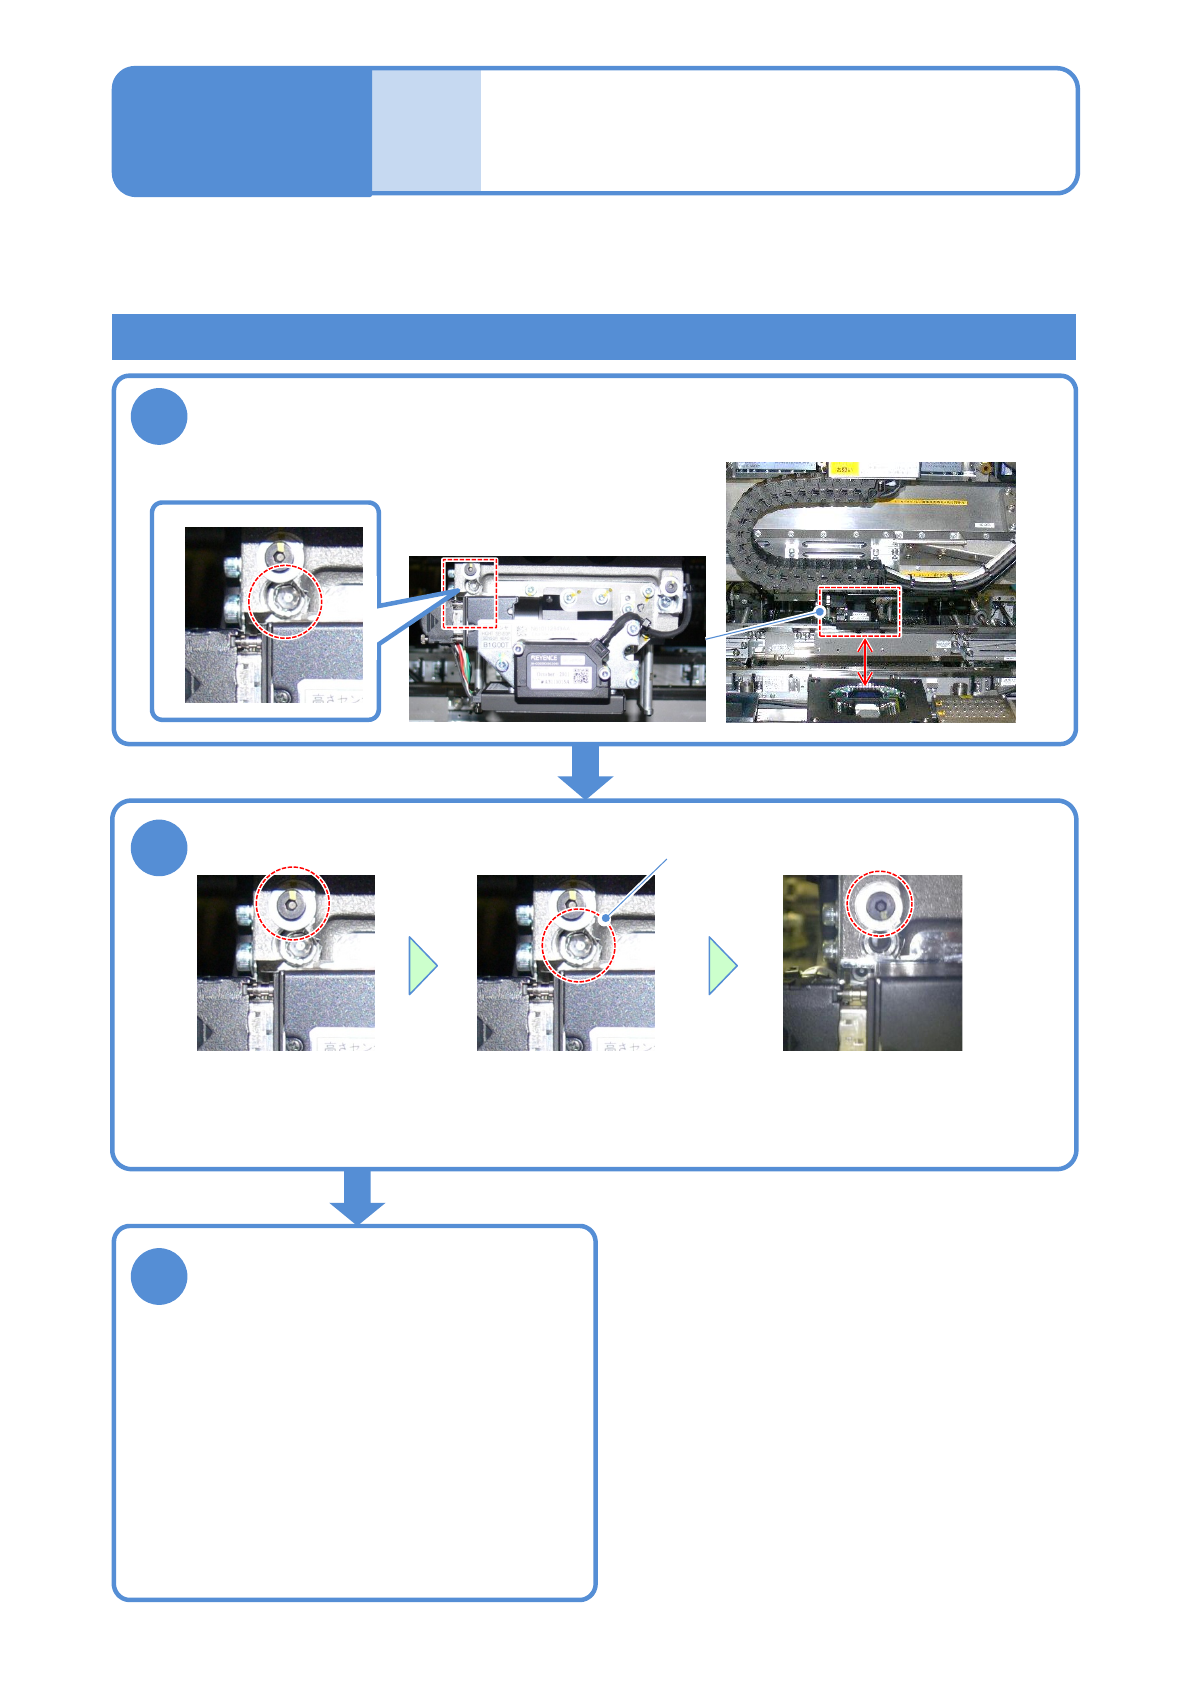
Attaching the old type head (Removing fixing bolts)
When the old type head is attached to NPM-W2, remove the unused fixing bolts before performing step 3 in
“Attaching a head” (→P.11-1-3) and fix the removed bolts to the storage place in the machine. The
operations are described here.
Tool used: Allen wrench (5 mm and 2.5 mm) Time required: 3 minutes
Move the head to the position where you can see the bolt
(Align the center of the head to the one of the multi-recognition camera)
Remove a fixing bolt
Lower left of a head
●Remove the upper bolt. ●Remove the lower fixing
bolt.
●Put the upper bolt to the
original position.
Fixing bolt
●You need to carry out the operation that the
fixing bolts are removed from the storage
position and put them back to the original
position. After the old type head is removed,
put the fixing bolts back to the original position
in the reverse order by referring to the
operation to remove the fixing bolts described
in this page.
■When the old type head is removed and
the current head is attached
Store the removed fixing bolt