N7201A617E00_0317.pdf - 第301页
NPM-W 2 EJM7DE-MB-11 M-00 1 1-3-1 -2 15 16 + (The PCB-support bl ock go es down) 19 Confirm the message 17 17 20 16 + (Returns to the lane switch screen) 19 + (The message whethe r or not to shut down the power is displa…
NPM-W2 EJM7DE-MB-11M-00
11-3-1-1
1
1
3
+
(The PCB-support block goes up so
that you can remove now)
(The message of removing the support
pin unit is displayed)
4
8
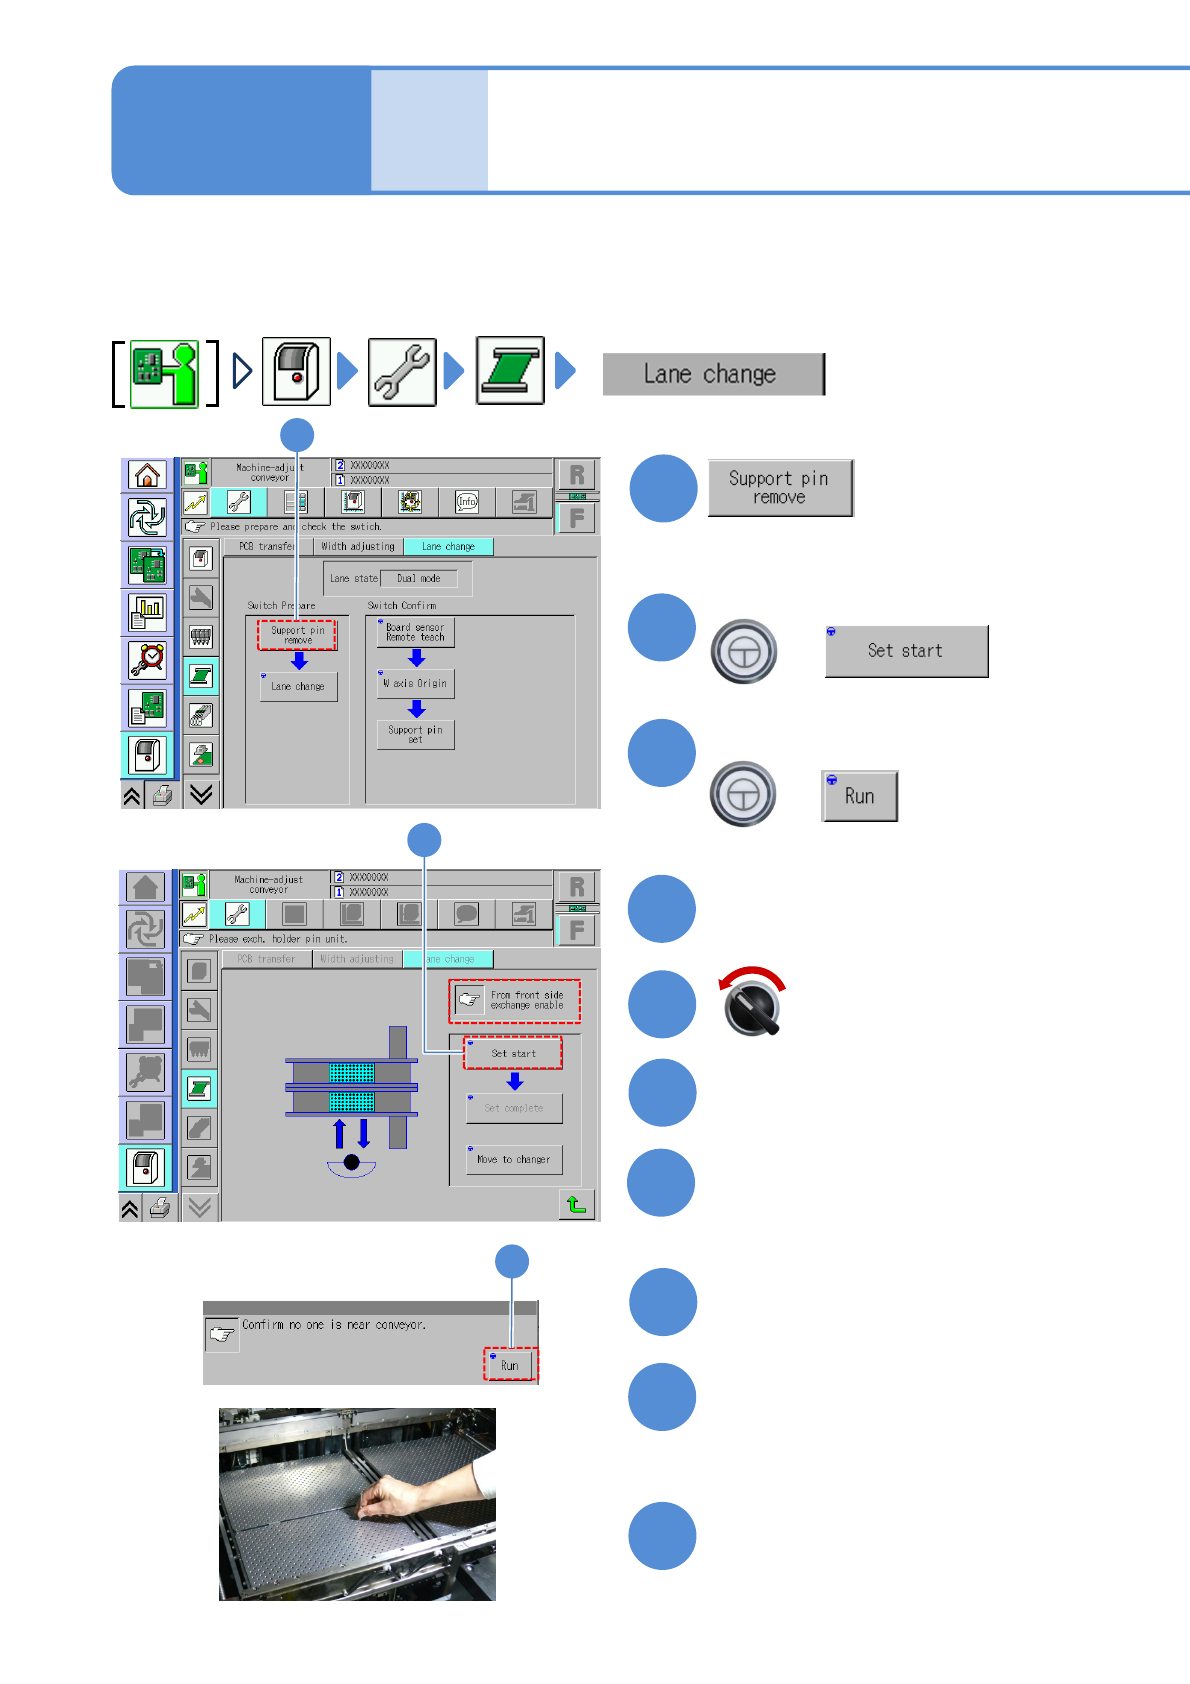
Detach the feeder cart
Confirm the message
2
3
+
(→P.3-2)
Cover the multi-recognition
camera with a cloth
10
2
Confirm the message
6
5
Servo switch OFF
Open the safety cover
7
9
Mode
switch
Maintenance
11-3-1
Switching to the single
lane mode
Remove the PCB-support plate
●It will keep foreign bodies from entering
the camera lens during the work.
●Be careful not to drop foreign bodies on
the multi-recognition camera (LED
lighting) or bump it.
When the machine specification is dual conveyor, switching the mode allows you to use the machine either for
single conveyor or dual conveyor.
●Follow the procedure below for switching. In this case, we explain to switch from dual conveyor to single
conveyor. Take the same procedure for switching from single lane mode to dual lane mode.
Replace the PCB-support block
(→P.5-3-2)
Fold the feeder table cover to the
back

NPM-W2 EJM7DE-MB-11M-00
11-3-1-2
15
16
+
(The PCB-support block goes down)
19
Confirm the message
17
17
20
16
+
(Returns to the lane switch screen)
19
+
(The message whether or not to shut
down the power is displayed)
18
14
Attach the feeder cart
(→P.3-2)
Servo switch ON
Close the safety cover
OFF
Turn OFF the main
power switch
11
12
13
Replacement
18
Remove the cloth with which
the multi-recognition camera
was covered
Return the feeder table cover
back
NPM-W2 EJM7DE-MB-11M-00
11-3-2-1
3
5
+
6
4
+
4
7
+
8
8
Confirm the message
Mode
switch
Maintenance
11-3-2
Confirming switch 1
3
5
7
6
Describes how to check switches in single lane mode after mode change.
Turn ON the main
power switch
1
2
ON