N7201A617E00_0317.pdf - 第309页
NPM-W 2 EJM7DE-MB-12 M-00 12-1 -4 10 Adjust the belt tension ( → P.6-5) 13 Attach the feeder cart ( → P.3-2) 14 15 Check the PCB transfer 11 Unlock the machine and ON ( → [Operating Proc edure] P.2-5-5) E F Movable side …
NPM-W2 EJM7DE-MB-12M-00
12-1-3
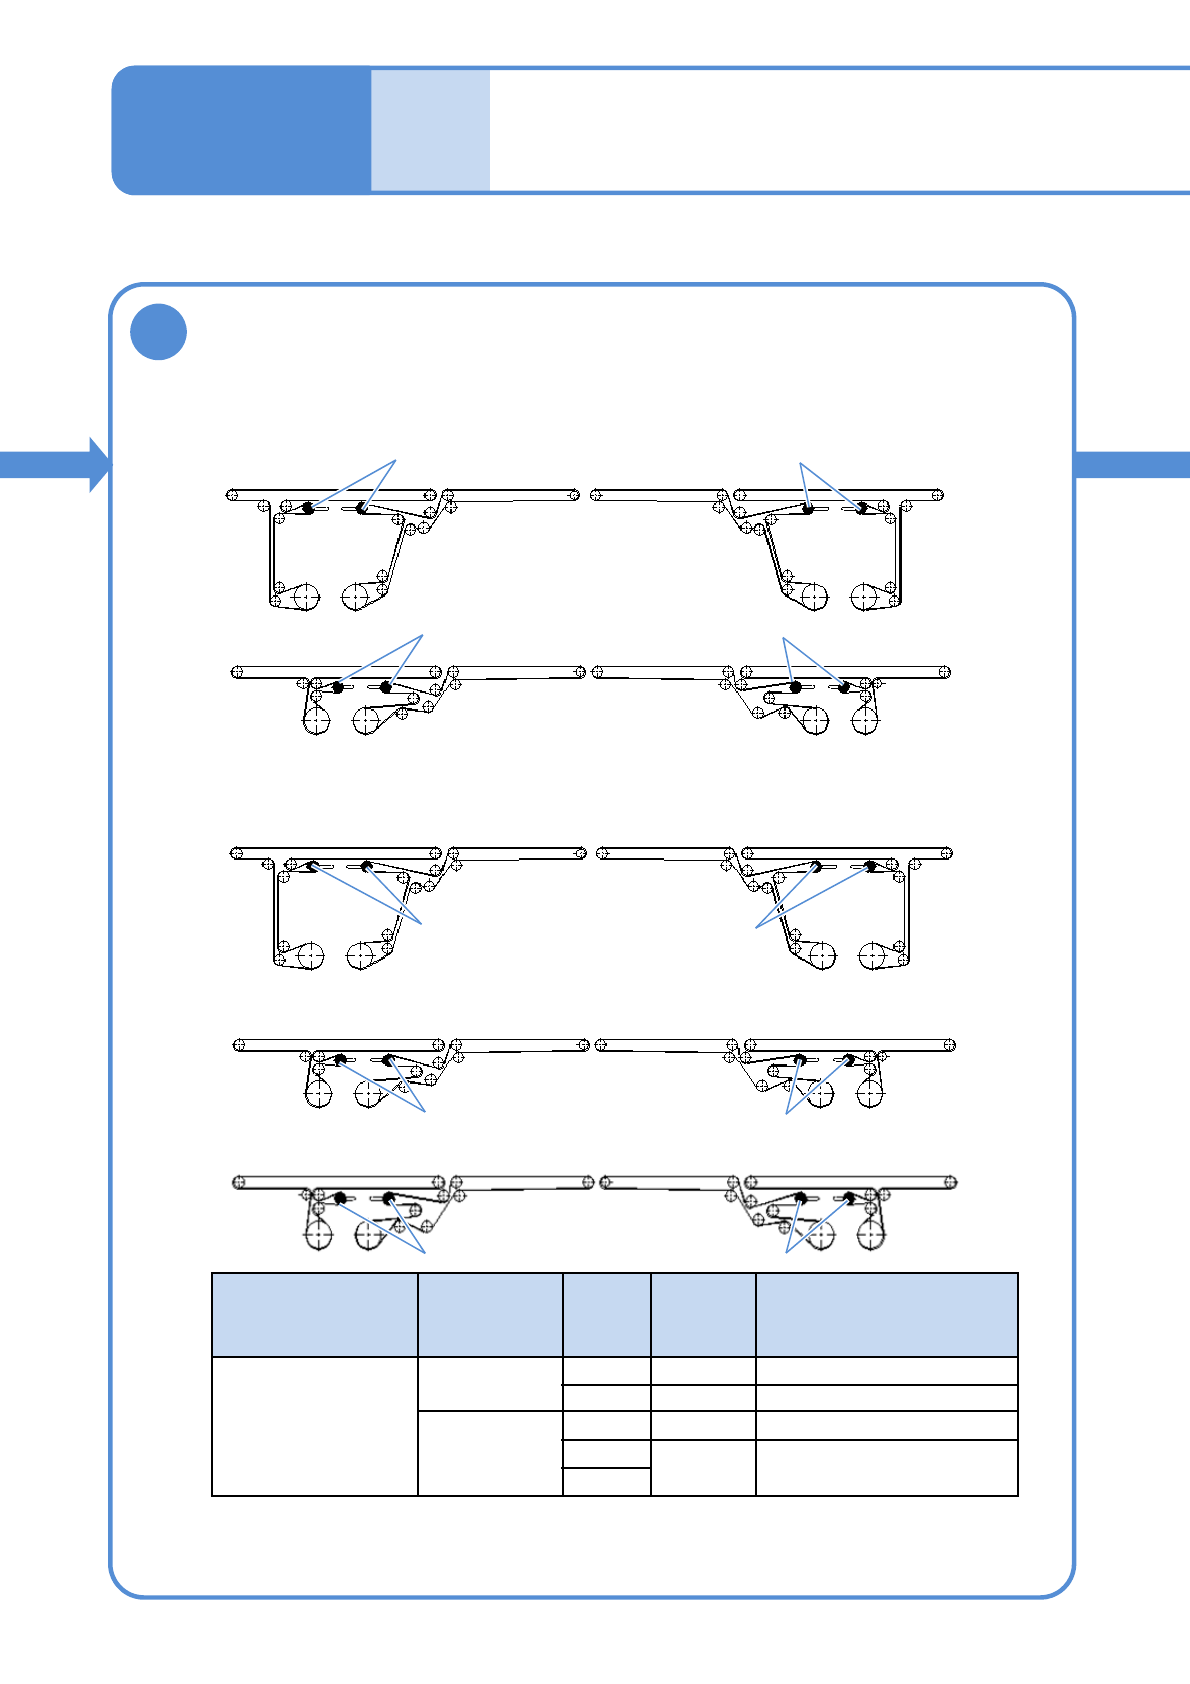
■Single conveyor: 8 belts
■Dual conveyor: 6 belts on each lane
Hook a new belt
●Loosen screws of the tension pulley in advance. (Four on each)
●Loosen screws of the tension pulley in advance. (Four on each)
●About the front and rear sides of the belt
Front side: No letter printed
Rear side: Letters are printed
●Install the belt so the belt front side shall be the PCB transfer side.
9
Fixed rail:4 belts
Movable rail:4 belts
A
B
C
D-1
D-2
A
B
C
Tension pulley Tension pulley
Tension pulley Tension pulley
Lane 1, Lane 2 Fixed rail:8 belts
A
B
A
B
C
D-1
D-2
C
C
D-2
D-1
C
Tension pulley
Tension pulley
Tension pulley
Tension pulley
Tension pulley
Tension pulley
Type Location No.
Belt
length
[mm]
Product No.
Common to both
single conveyor and
dual conveyor
Fixed rail
A 927 N510063692AA
B
1314.5 N510060975AA
Movable rail
C
727.5 N510060980AA
D-1
1174.5 N510060976AA
D-2
Replacing the transfer belt of
the PCB transfer conveyor 2
Maintenance
12-1
Lane 1 Movable rail:4 belts (Arrow E in P.12-1-4)
Lane 2 Movable rail:4 belts (Arrow F in P.12-1-4)
NPM-W2 EJM7DE-MB-12M-00
12-1-4
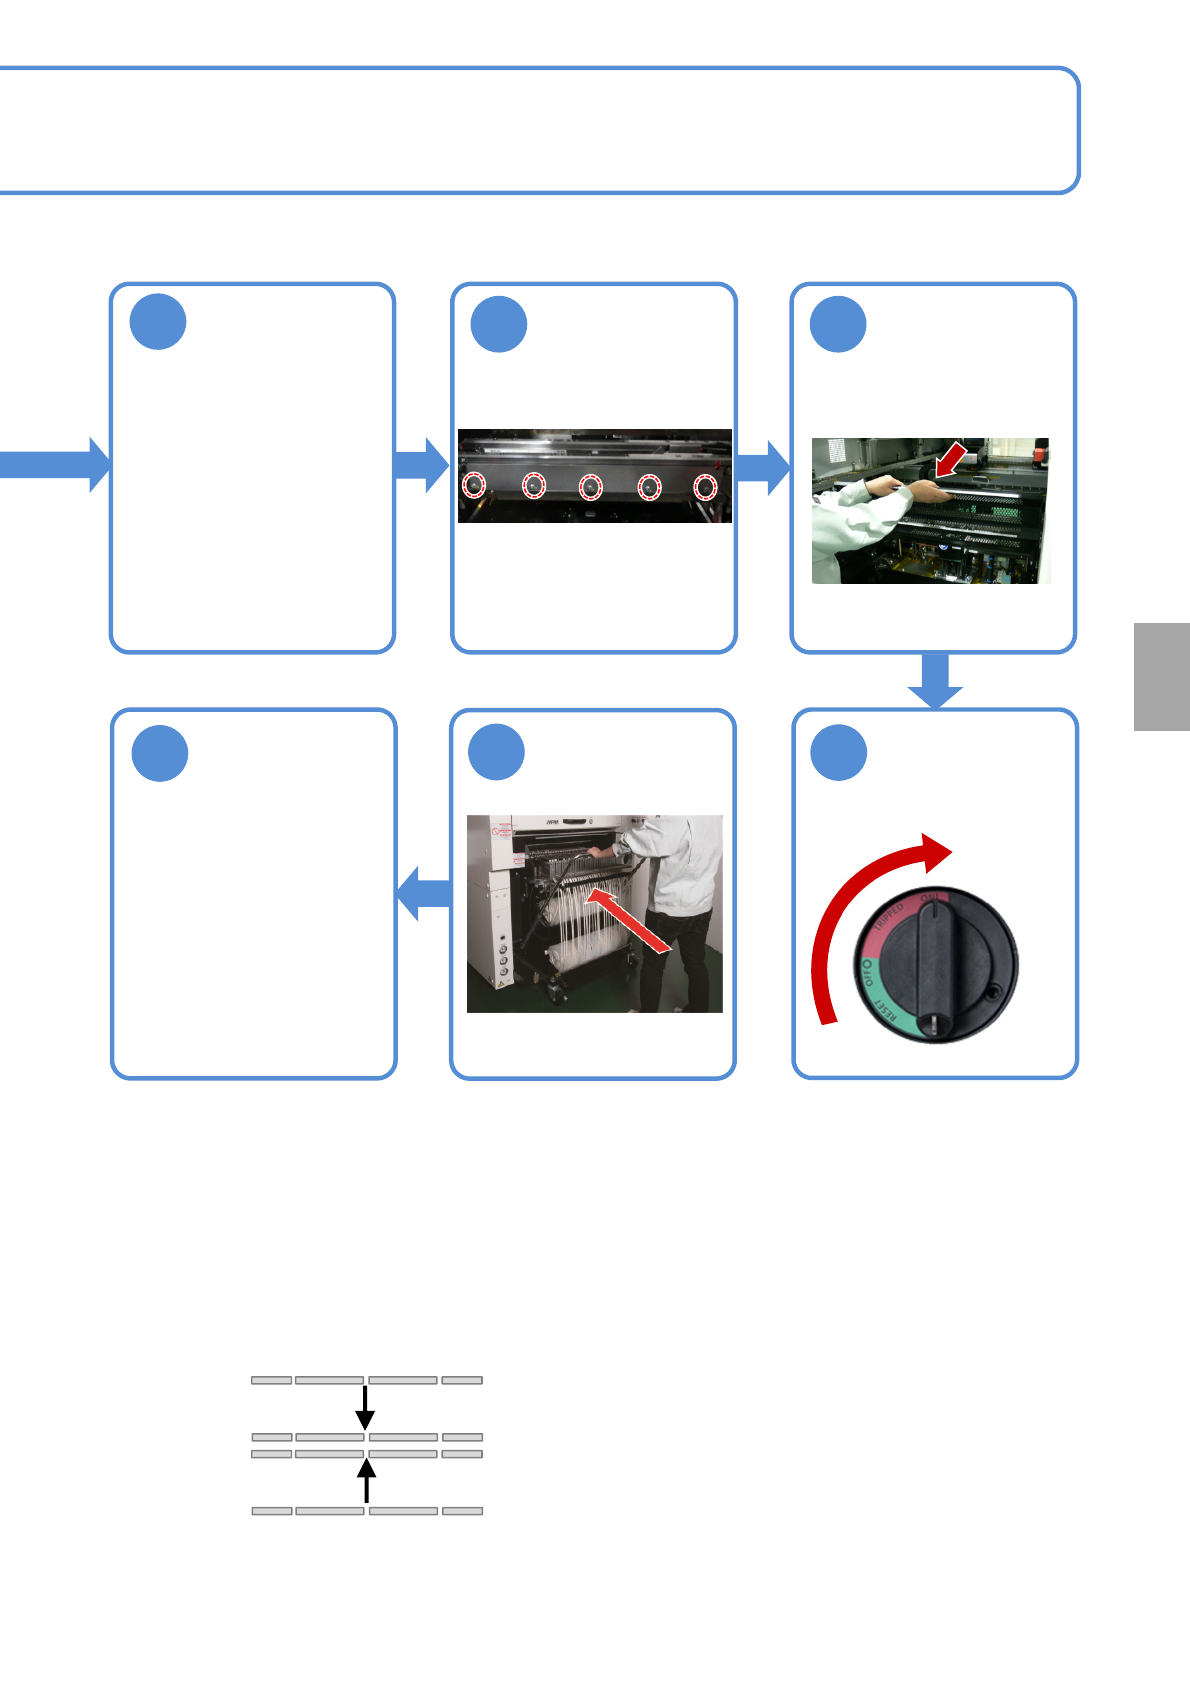
10
Adjust the belt
tension
(→ P.6-5)
13
Attach the feeder
cart (→P.3-2)
14
15
Check the PCB
transfer
11
Unlock the
machine and
ON
(→[Operating Procedure]
P.2-5-5)
E
F
Movable side
Fixed side
Movable side
Fixed side
Lane 1
Lane 2
Consumable parts
replacement
12
Place the feeder
table cover
(→P.3-3)
Attach the
clamper
●Screws(5)
●Arrows of PCB conveyor movable rail in step ⑨
●Be careful not to drop
screws
NPM-W2 EJM7DE-MB-12M-00
Replacing the PCB transfer
belt of the extension
conveyor (Option) 1
12-2-1
1
Detach the
feeder cart
(→P.3-2)
2
Set the conveyor
width to 150 mm
(To improve
workability)
Taking the front side as an example, the exchange method when the extension conveyor is equipped to the
downstream process is described here.
Tool used: Allen wrench (2 mm) Time required: 30 to 60 minutes
●If the transfer base is Front fixed, replace it at the front, and, for Rear fixed, at the rear after removing the
tray feeder. (→P.14-8)
Maintenance
12-2
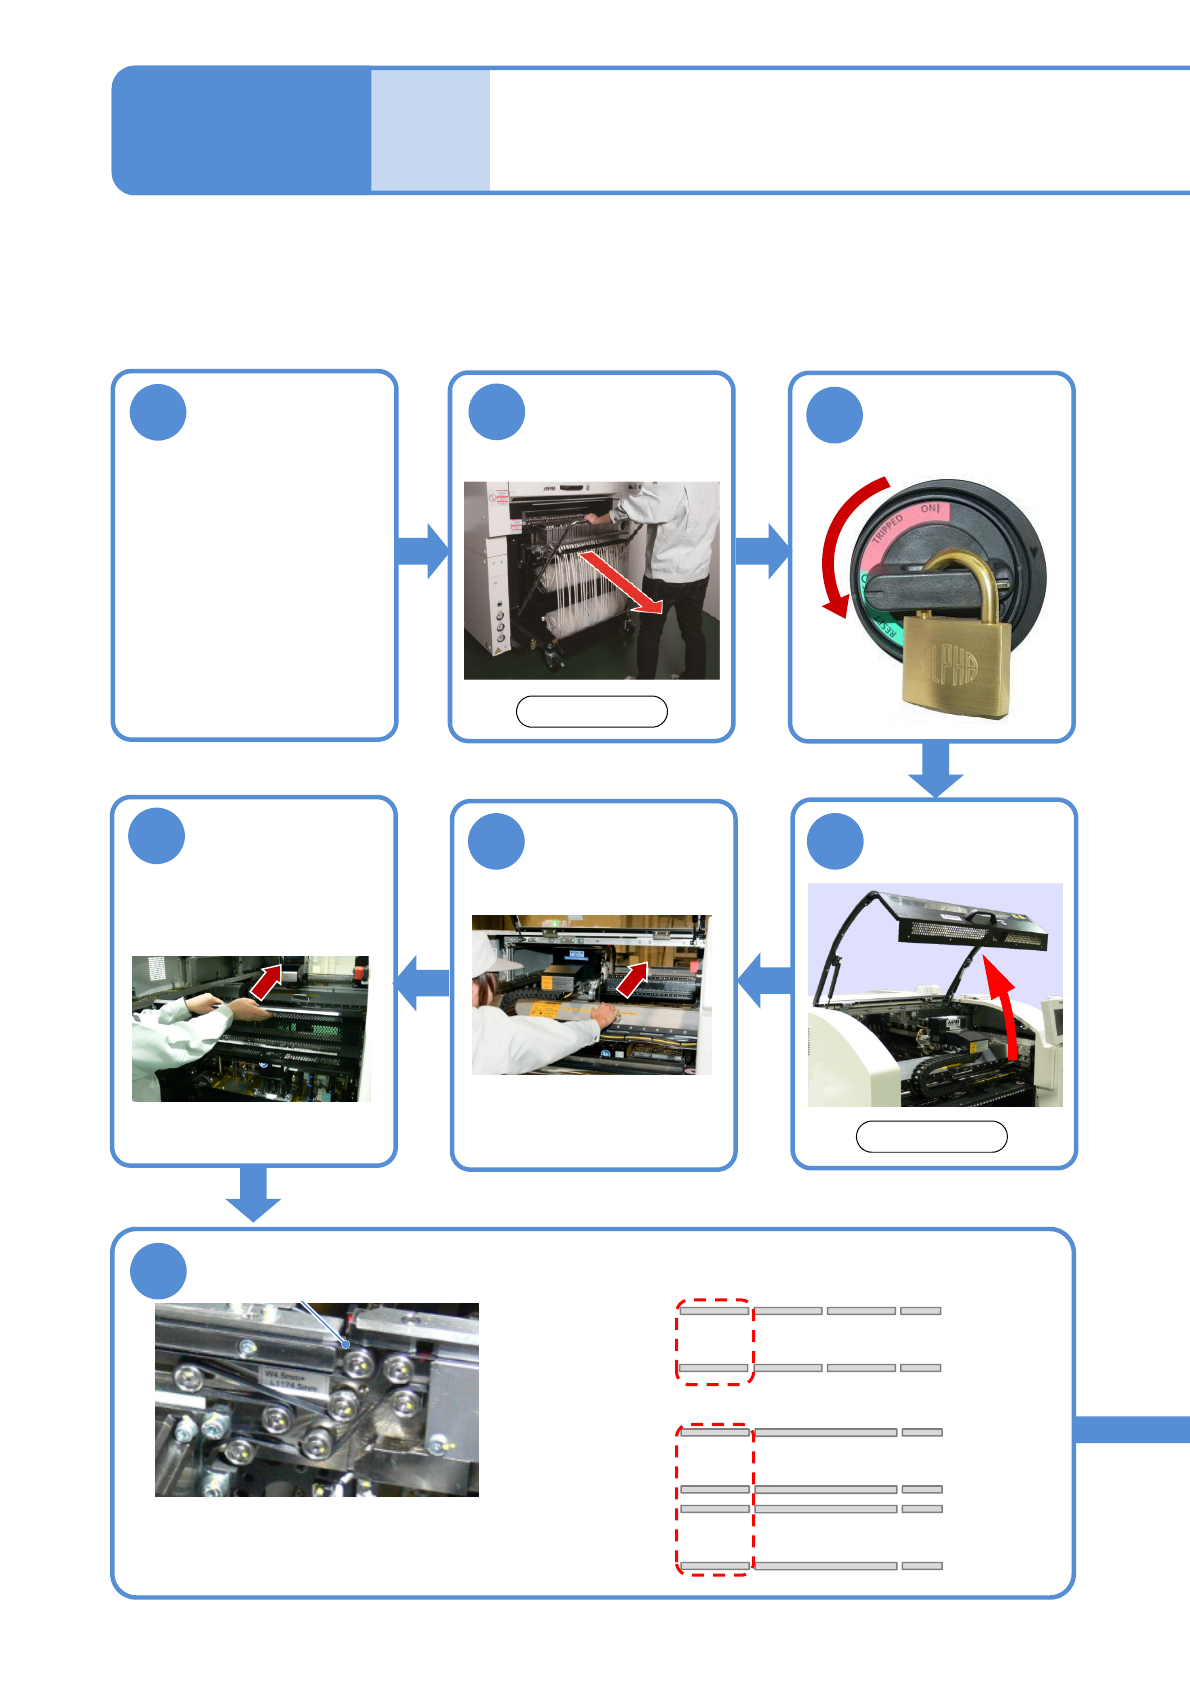
4
3
Turn OFF the
power and lock
the machine
OFF
45
6
Remove the
feeder table
cover
(→P.3-3)
7
Remove the belt
●Remove it, pulling out towards you.
●If disposing of the belt, you may cut it
with a wire cutter or nippers to remove.
Movable side
Fixed side
■single conveyor: 2 belts
■Dual conveyor: 4 belts (one on each lane)
Movable side
Fixed side
Movable side
Fixed side
Lane 1
Lane 2
Belt
Push the X-axis
inward
Front side
Front side
(→[Operating
Procedure] P. 2-5-4)