N7201A617E00_0317.pdf - 第319页
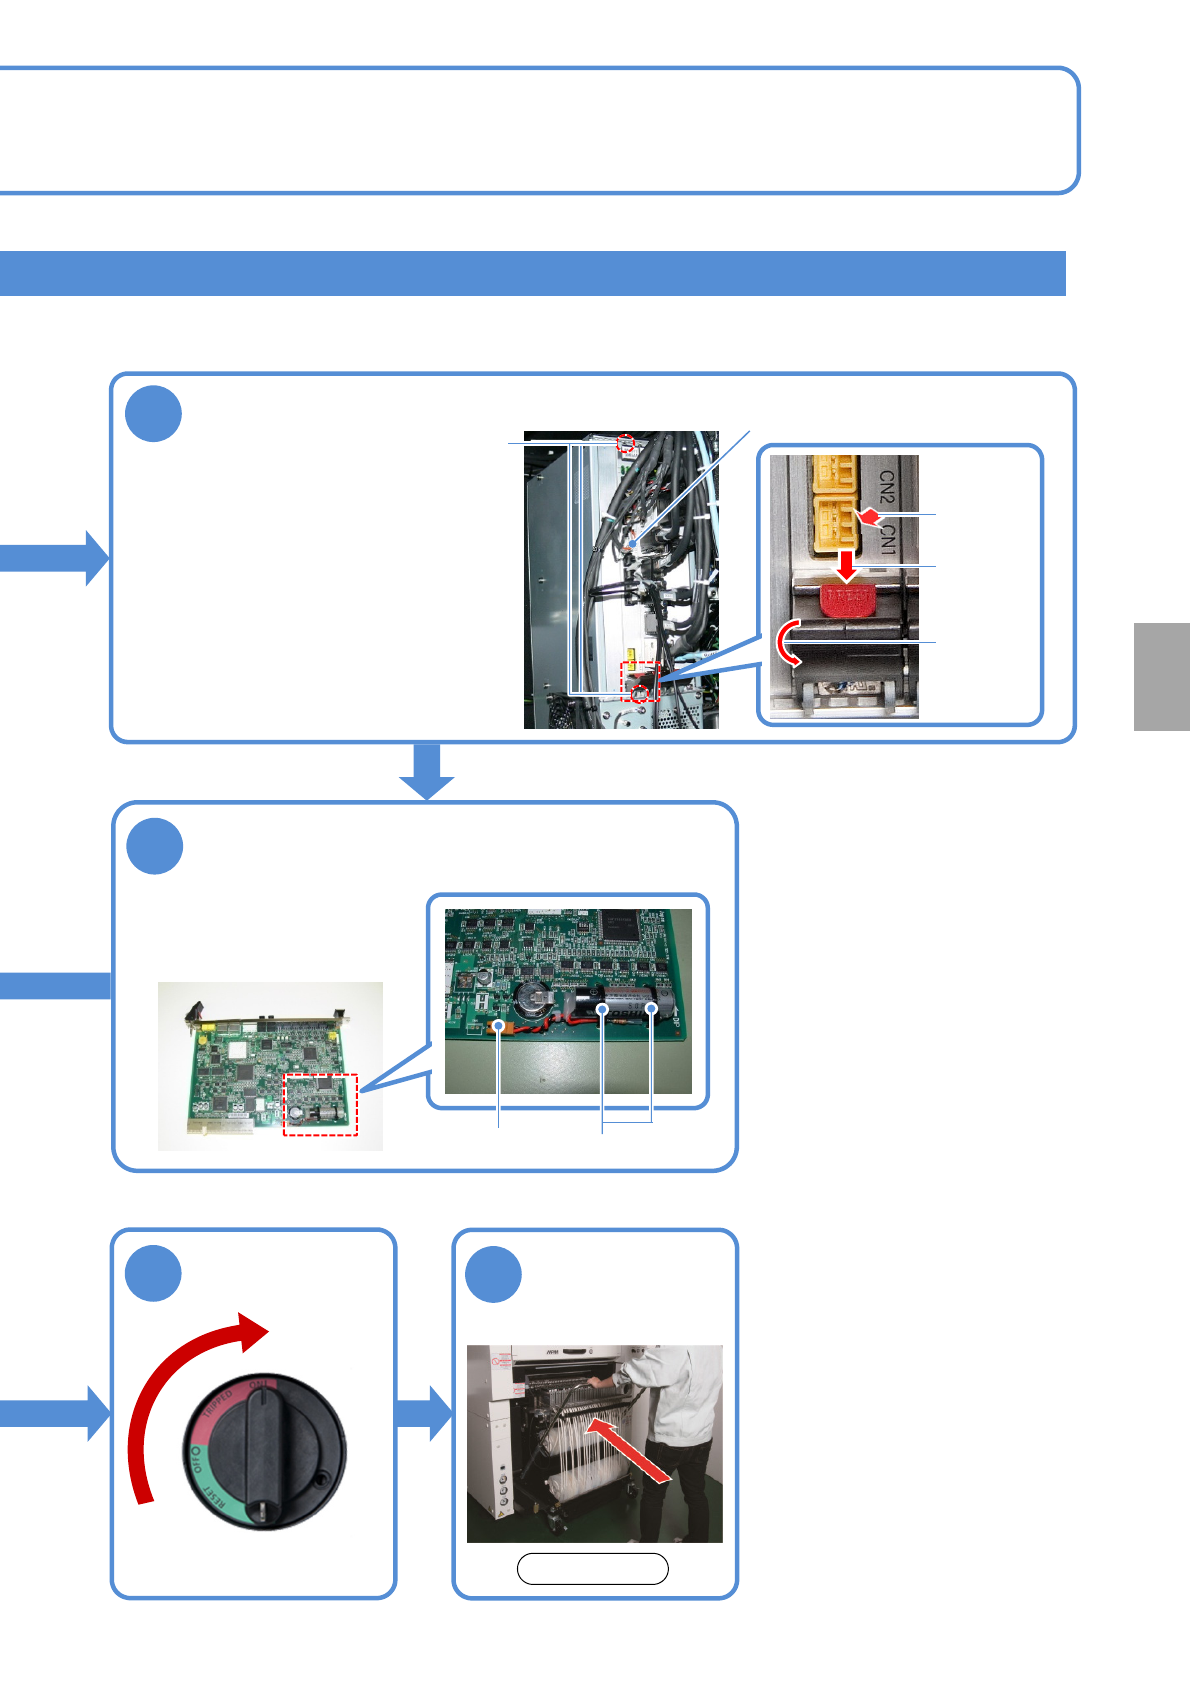
NPM-W 2 EJM7DE-MB-12 M-00 NCIO board 4 ● Disconne ct the cable. ● Loosen the screws securing the NCIO board. ● Pull out the board while holding down the red lock release buttons (PRESS) of the levers at the top and the b…
NPM-W2 EJM7DE-MB-12M-00
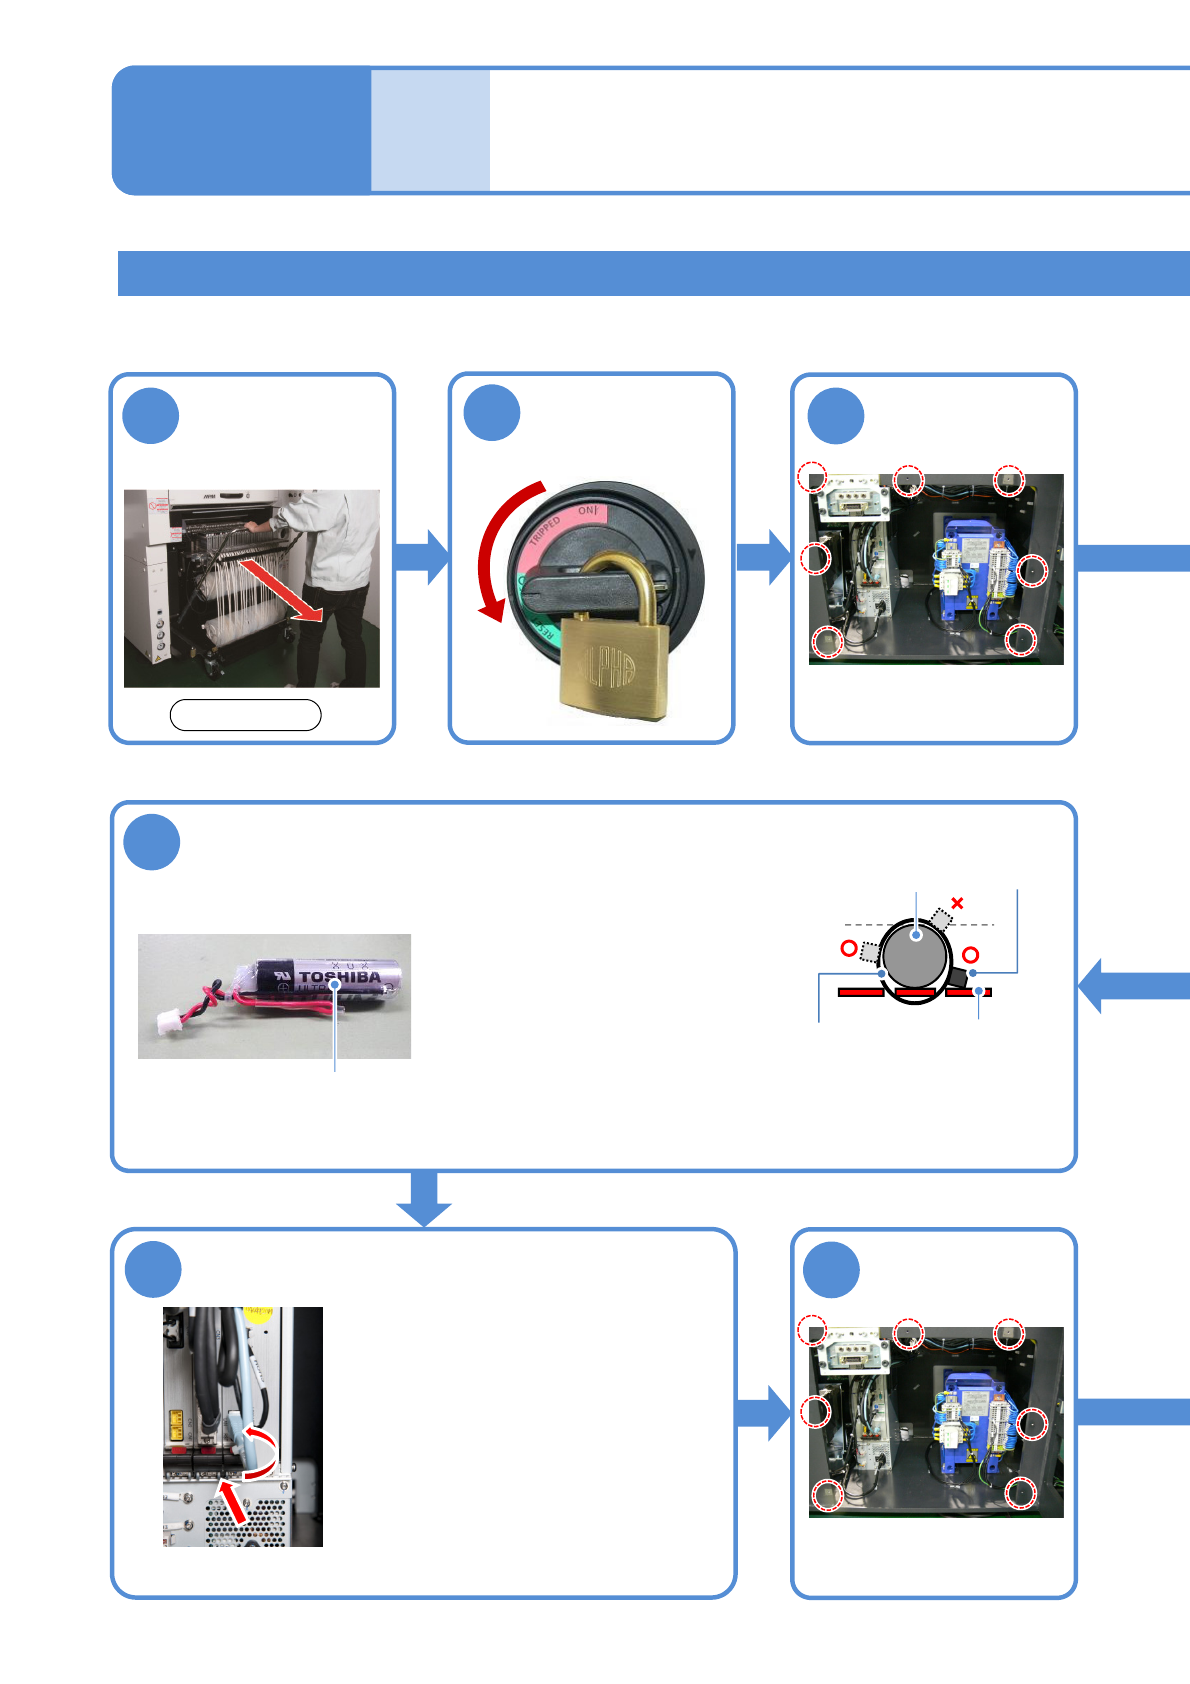
Detach the feeder
cart
(→P.3-2)
Replacing the NCIO board battery
Replacing the
batteries 3
7
Tool used: Phillips screwdriver , Allen wrench (4 mm) Time required: 30 minutes
●Please replace the battery within two hours.
●Slide the board onto the guide
and pull up the top and bottom
levers inwards to set it.
●Connect the cable.
●Screw (2 pcs) tightening torque:
240 ±20 cN·m
6
Replace the
battery with a
new one
Install the NCIO
board
●Use N610156136AA or
equivalent as a replacement
battery.
●Secure the new battery to the
board using two tie wraps
(2.5 mm or less in width, and
UL94V-0 rated (flameproof)
or equivalent).
●Connect the connector
Battery
3
●Screws(7)
1
12-3-5
Remove the
cover
8
●Screws (7)
Attach the cover
2
Turn OFF the
power and lock
the machine
OFF
Maintenance
12-3
Front side
■Connection cross-section
Tie wrap NCIO board
Battery
Tied part
●When you tie the battery, the tied part of the tie wraps should
not be higher than the battery.
●After tied, trim the excess tie wrap with a nippers.
NPM-W2 EJM7DE-MB-12M-00
NCIO board
4
●Disconnect the cable.
●Loosen the screws securing
the NCIO board.
●Pull out the board while
holding down the red lock
release buttons (PRESS) of
the levers at the top and the
bottom of the board and
moving the lever down.
Remove the NCIO board
12-3-6
Attach the feeder
cart (→P.3-2)
10
Screws (2)
9
5
Remove the battery case
●Disconnect the battery
connector.
●Cut the tie wraps (2) to
remove the battery.
Tie wraps
Connector
Press
Move the
lever down
Pull out the
board
Unlock the
machine and
ON
Consumable parts
replacement
Front side
NPM-W2 EJM7DE-MB-12M-00
12-3-7
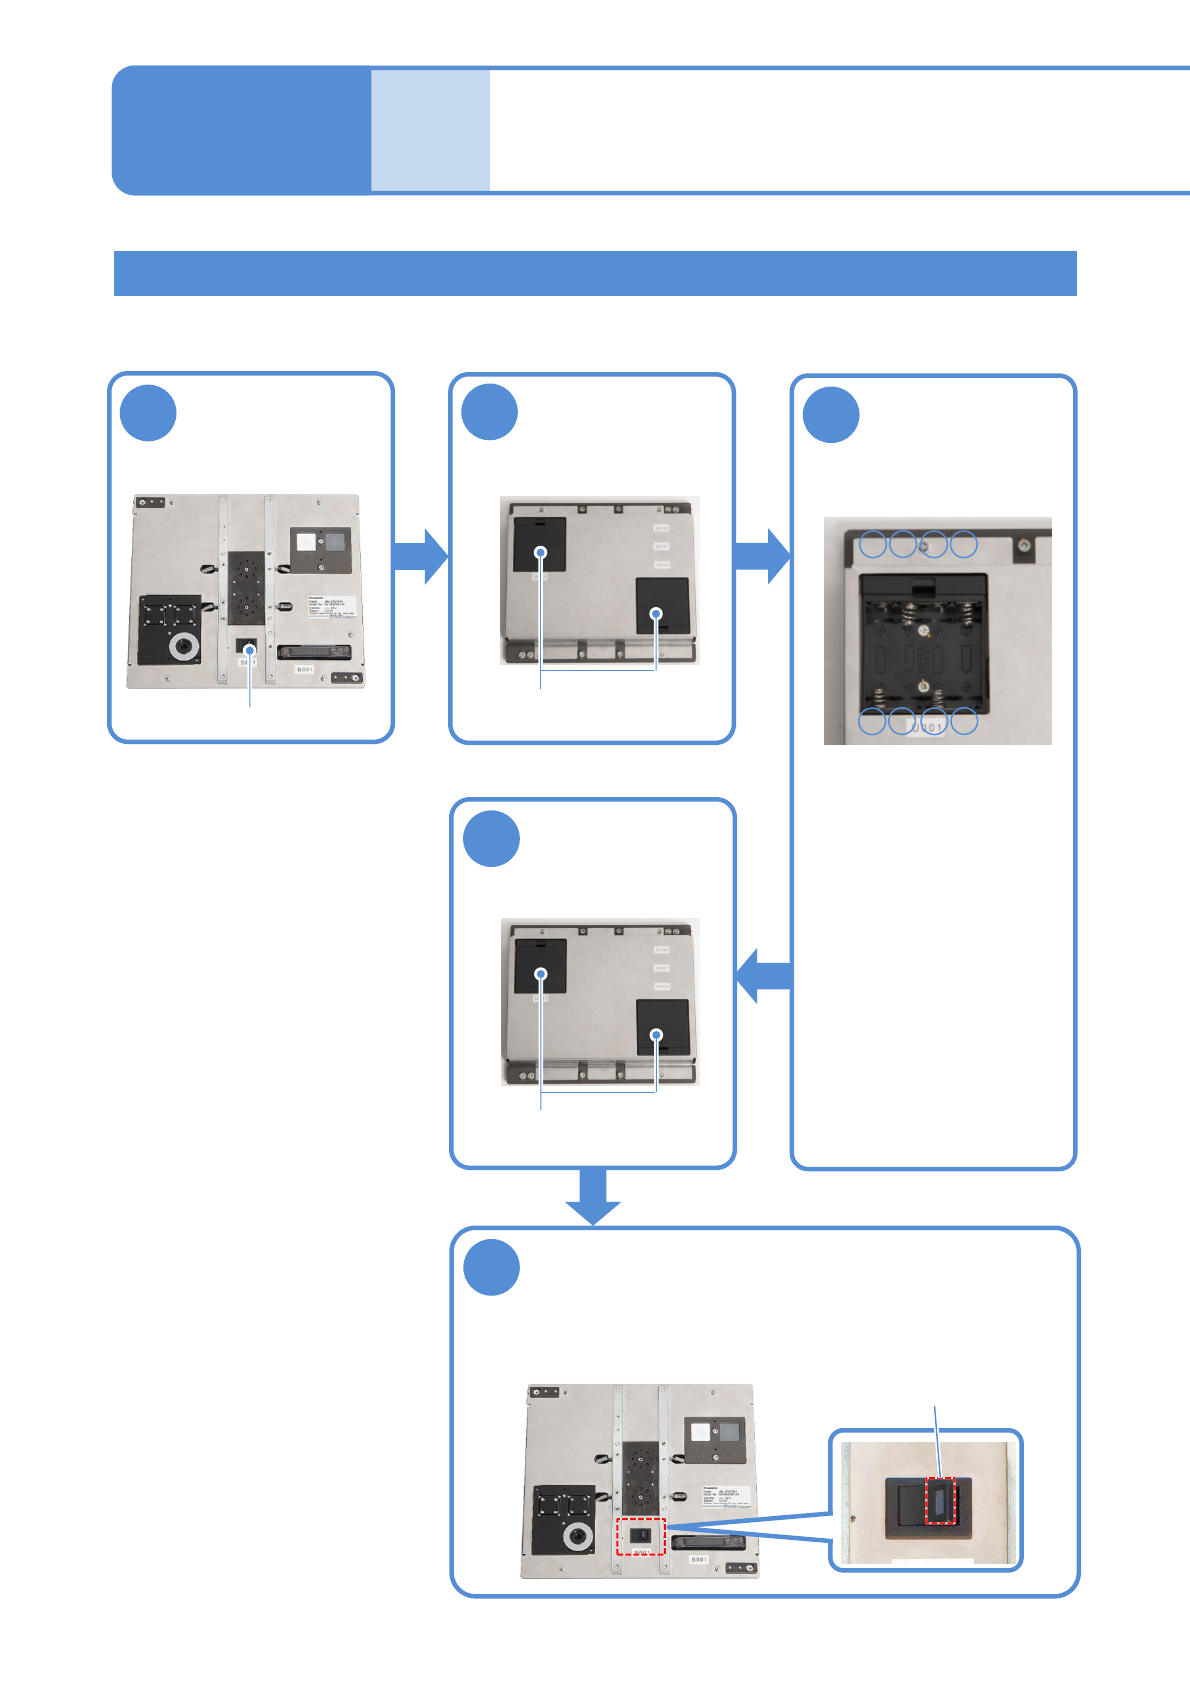
Replacing the batteries for the jig station
2
1
■Front face
■Rear face
3
●Replace all 8 AA size
batteries (4 batteries x 2
boxes)
●Be careful of the (+) and
(-) marks inside the
battery box when
replacing the batteries.
5
4
●Ensure that the LED lamp for the
power supply switch illuminates.
■Front face
Turn OFF the
power supply
switch
Open the battery
box covers
Replace the
batteries with
new ones
Close the battery
box covers
Turn ON the power supply switch
Time required: 2 minutes
Battery boxes
-+-
■Inside of the battery box
+
+--+
■Rear face
Battery boxes
Replacing the
batteries 4
Power supply switch
LED lamp
Maintenance
12-3