N7201A617E00_0317.pdf - 第321页
NPM-W 2 EJM7DE-MB-12 M-00 12-3 -8 Replacing the calendar backup batter y of the F A computer in the inspection box ● Replacement of the calendar backup battery requires BIOS setting which shou ld be carried out by person…
NPM-W2 EJM7DE-MB-12M-00
12-3-7
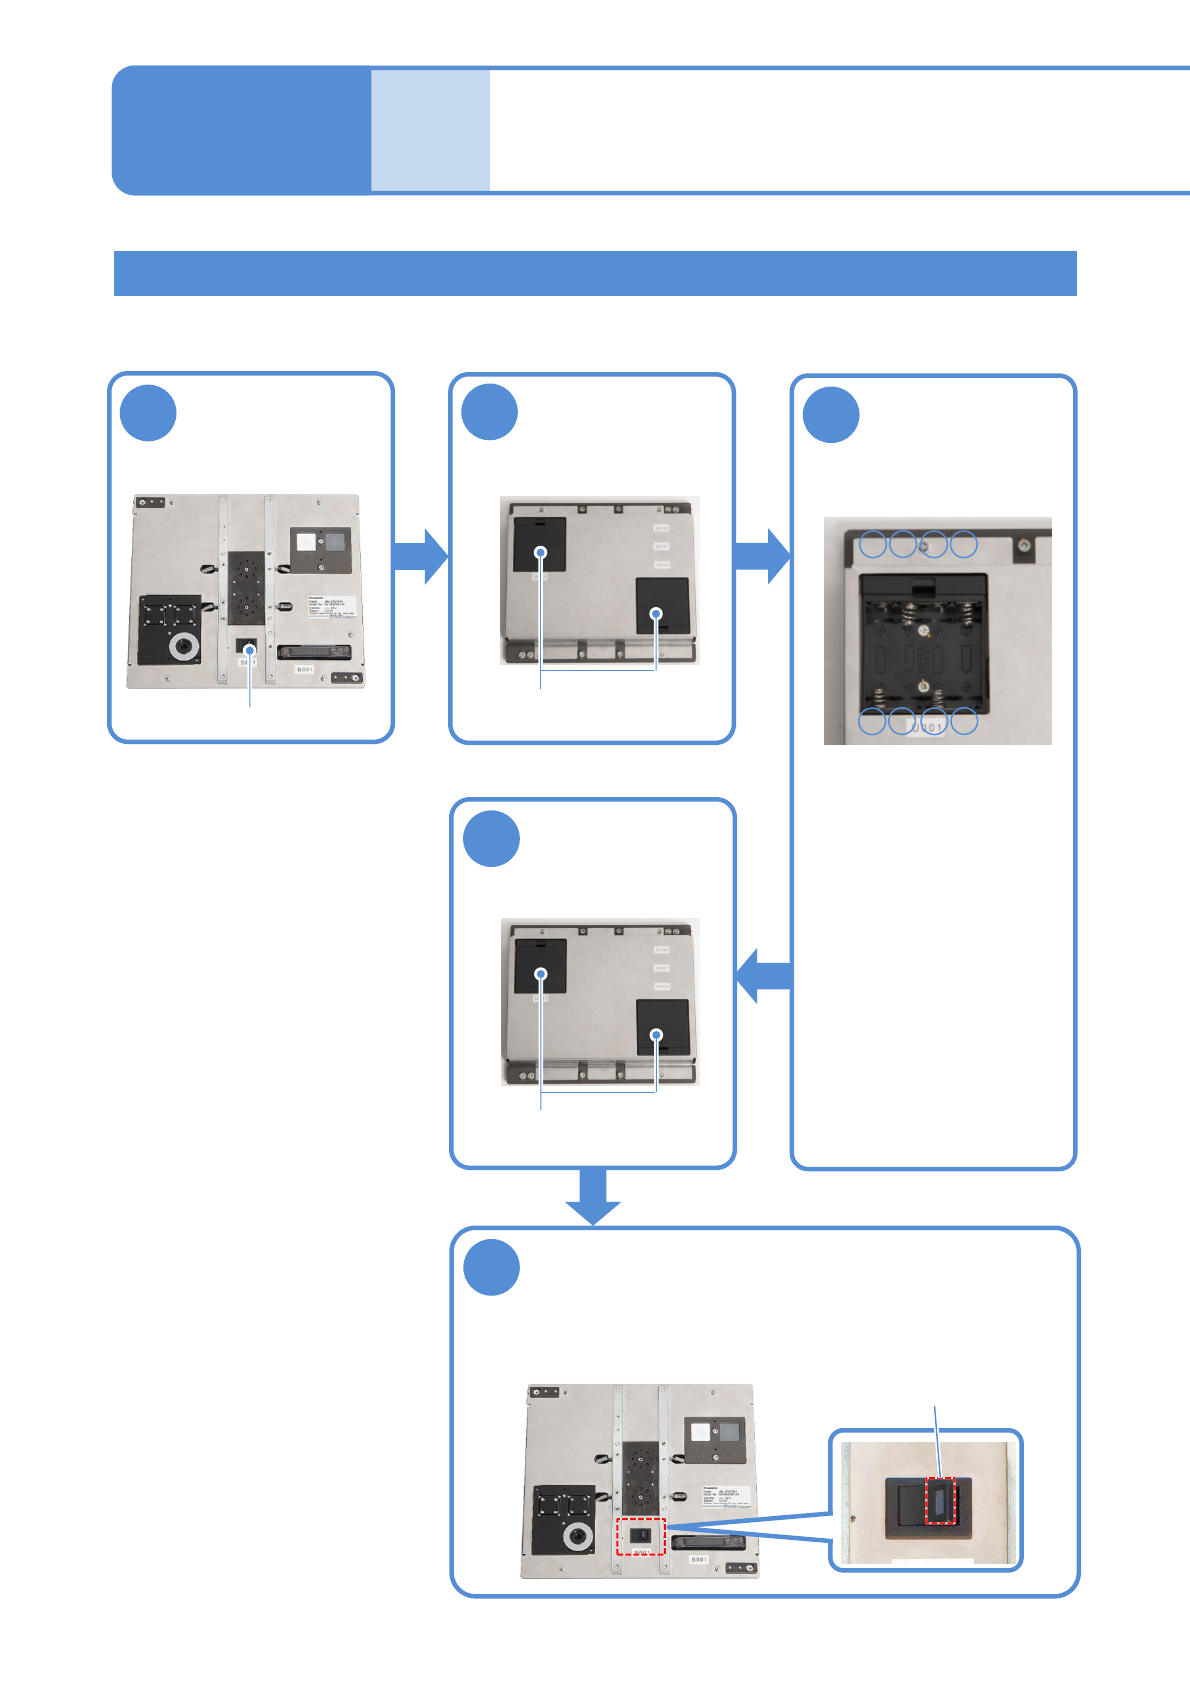
Replacing the batteries for the jig station
2
1
■Front face
■Rear face
3
●Replace all 8 AA size
batteries (4 batteries x 2
boxes)
●Be careful of the (+) and
(-) marks inside the
battery box when
replacing the batteries.
5
4
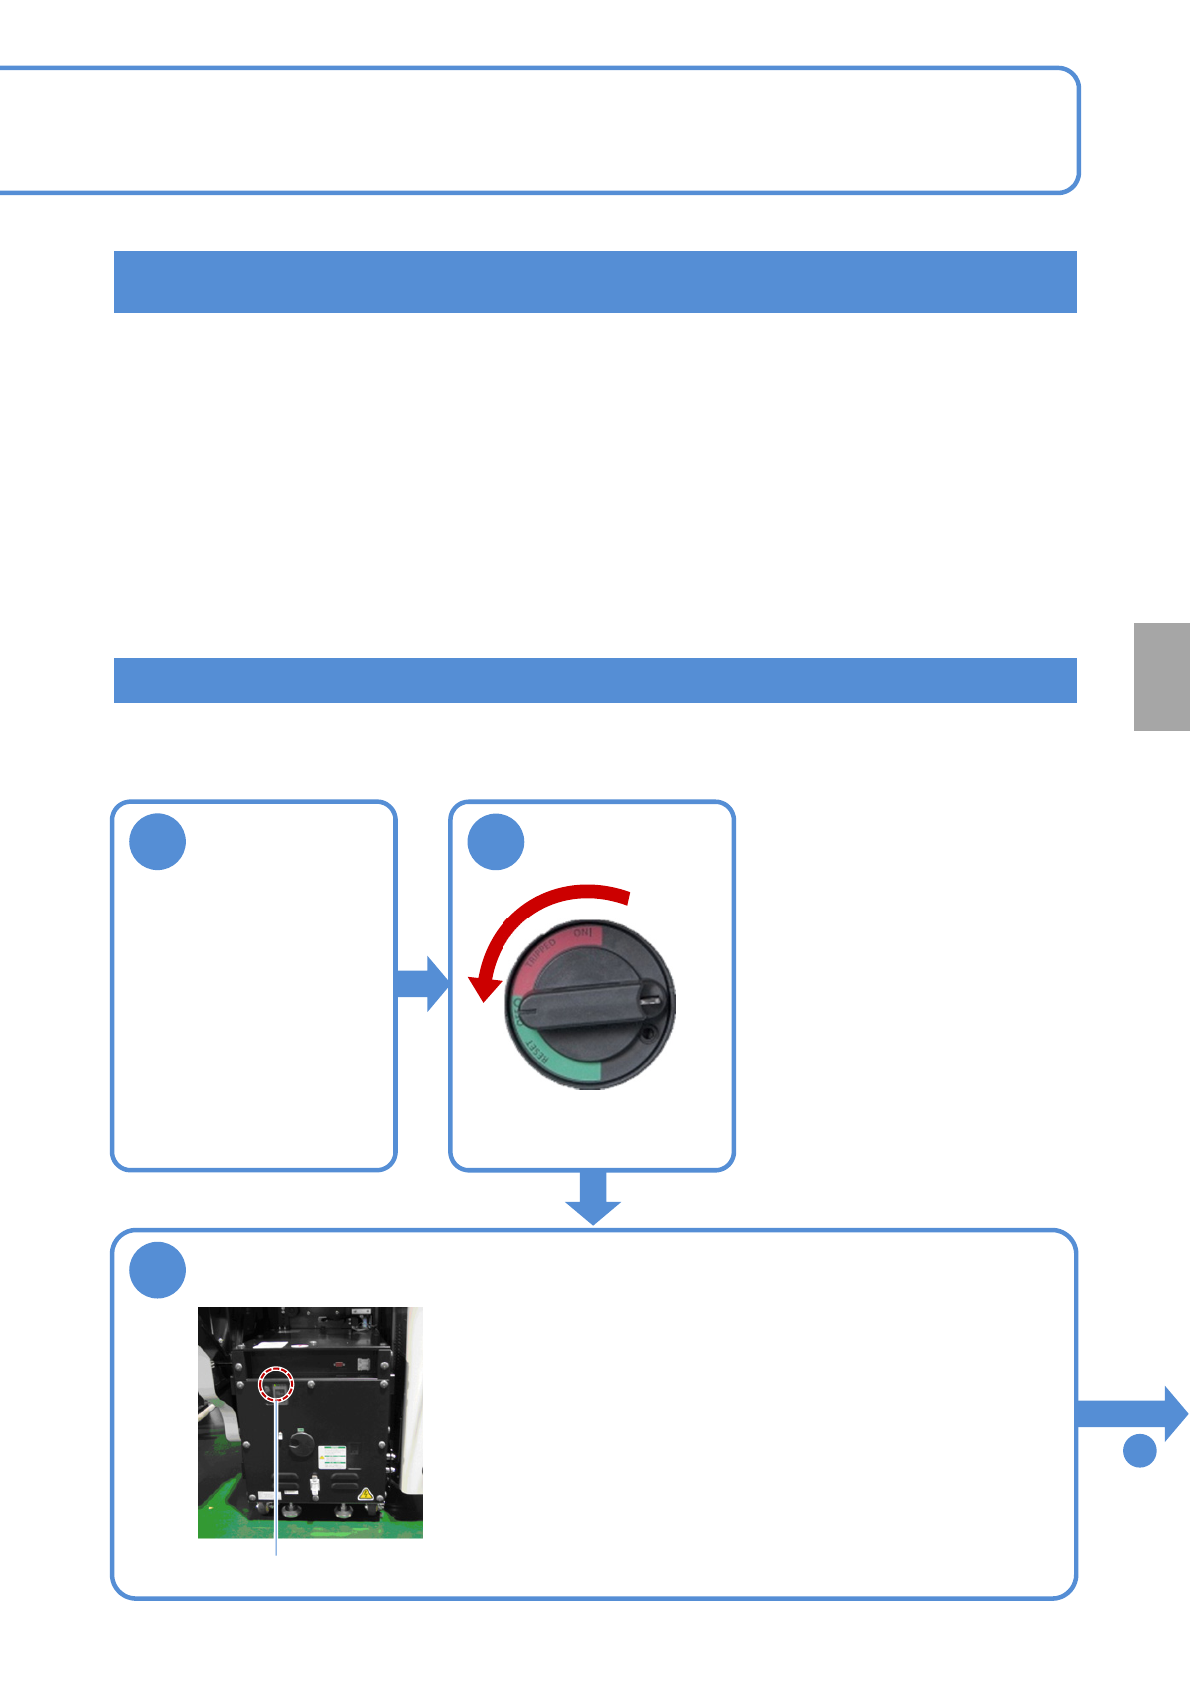
●Ensure that the LED lamp for the
power supply switch illuminates.
■Front face
Turn OFF the
power supply
switch
Open the battery
box covers
Replace the
batteries with
new ones
Close the battery
box covers
Turn ON the power supply switch
Time required: 2 minutes
Battery boxes
-+-
■Inside of the battery box
+
+--+
■Rear face
Battery boxes
Replacing the
batteries 4
Power supply switch
LED lamp
Maintenance
12-3
NPM-W2 EJM7DE-MB-12M-00
12-3-8
Replacing the calendar backup battery of the FA computer in the
inspection box
●Replacement of the calendar backup battery requires BIOS setting which should be carried out
by personnel with specialized expertise. Contact our service representative.
Replacing the UPS battery of the FA computer in the inspection box
●If a battery is used beyond its service life, the production information in the hard disk may be lost
or the hard disk may be damaged when power failure has occurred.
2
1
Shut down the
inspection box
3
Make sure that the UPS has stopped
●Make sure that the UPS of the FA computer in the inspection
box has stopped.
●Make sure that the power lamp on the FA computer is turned
OFF.
Even if it is turned ON, in about one minute after the power
supply switch of the machine is turned OFF, the UPS stops and
the power lamp goes out.
Power lamp
To
4
Consumable parts
replacement
OFF
NPM-W2 EJM7DE-MB-12M-00
12-3-9
Maintenance
12-3
4
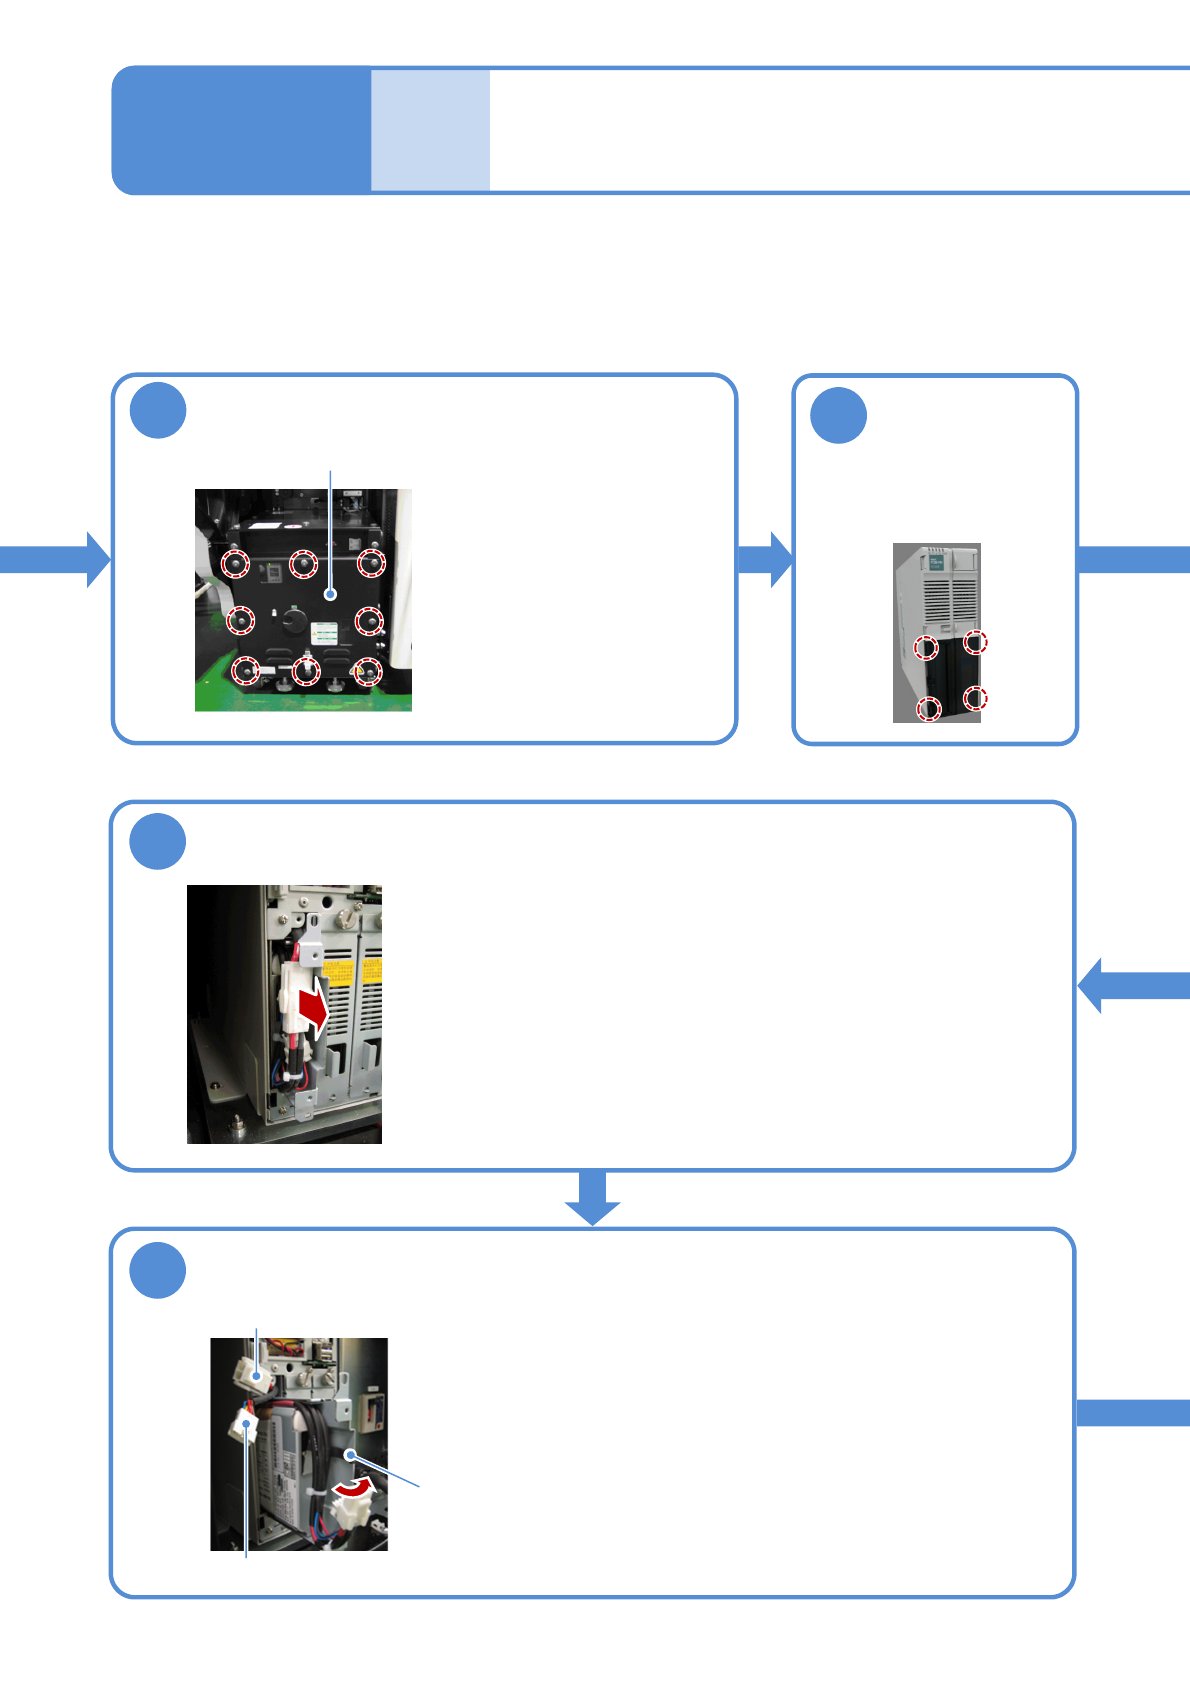
Remove the front cover of the inspection box
●Open the front cover of the
inspection BOX with an
Allen wrench.
The front cover is secured
with eight screws.
Front cover
Remove the
cover of the FA
computer
5
●The cover is secured with
four claws (inside the
cover).
10
Pull out the UPS battery
●Pull out t battery about 30 mm from inside the main body.
●Be careful not to draw it out too far because its internal cables
may be damaged. And also, take care not to pinch the cables.
Power cable (connector)
Wire sticker
Signal cable (connector)
11
Remove the UPS battery connector
●Open the wire sticker holding the connectors.
●Draw out the power and signal cables that are connected with the
battery, and pull out the connectors while pushing their locks.
Replacing the
batteries 5