N7201A617E00_0317.pdf - 第323页
NPM-W 2 EJM7DE-MB-12 M-00 12-3 -10 6 Remove the cover ● Pull the left side of the cover while pushing the button in the left side of the cover. ● Pull it carefully because the nail can be broken if you force it to open. …
NPM-W2 EJM7DE-MB-12M-00
12-3-9
Maintenance
12-3
4
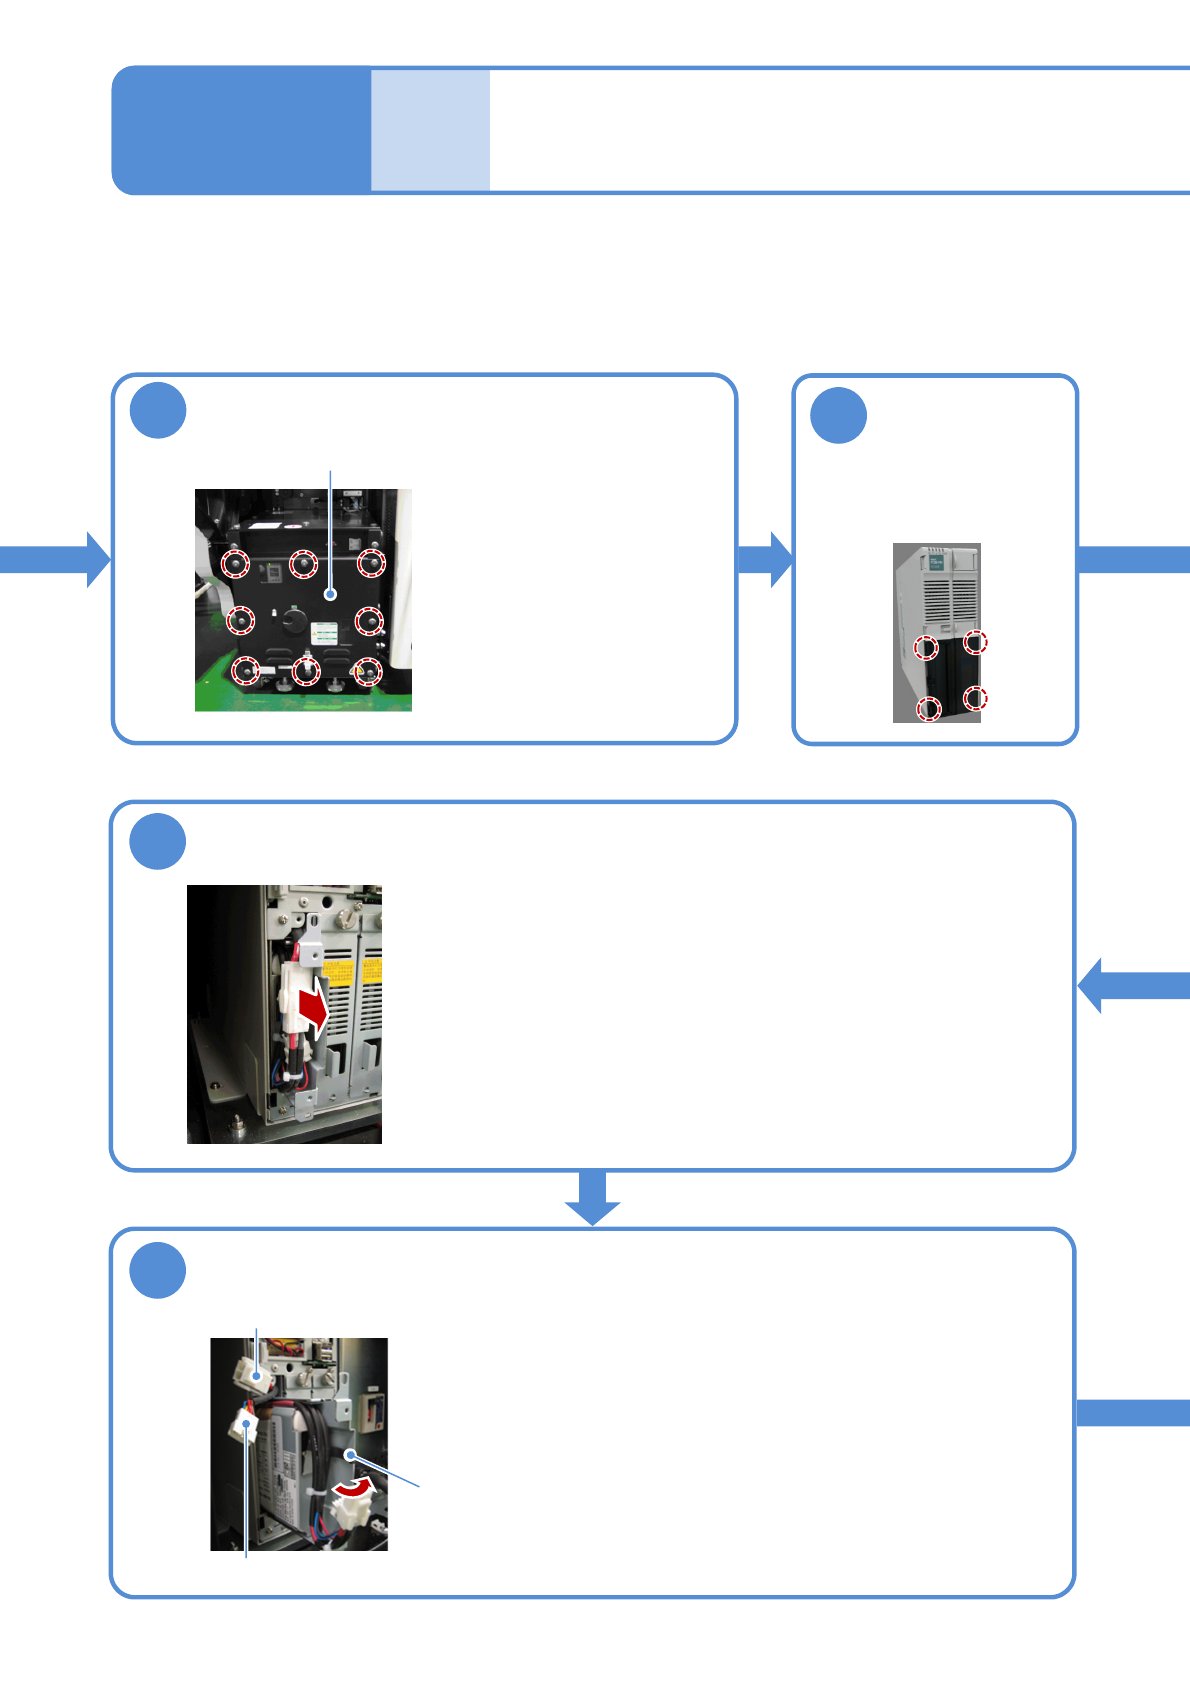
Remove the front cover of the inspection box
●Open the front cover of the
inspection BOX with an
Allen wrench.
The front cover is secured
with eight screws.
Front cover
Remove the
cover of the FA
computer
5
●The cover is secured with
four claws (inside the
cover).
10
Pull out the UPS battery
●Pull out t battery about 30 mm from inside the main body.
●Be careful not to draw it out too far because its internal cables
may be damaged. And also, take care not to pinch the cables.
Power cable (connector)
Wire sticker
Signal cable (connector)
11
Remove the UPS battery connector
●Open the wire sticker holding the connectors.
●Draw out the power and signal cables that are connected with the
battery, and pull out the connectors while pushing their locks.
Replacing the
batteries 5
NPM-W2 EJM7DE-MB-12M-00
12-3-10
6
Remove the cover
●Pull the left side of the cover while pushing
the button in the left side of the cover.
●Pull it carefully because the nail can be broken
if you force it to open.
Remove the
cover from the
FA computer
main body
7
●When the left side of the
cover is detached,
slide it to the left to
disengage its right nails,
and remove it from the FA
computer main body.
Remove the
UPS battery
cover
8
●Remove the screws
fixing the cover.
Remove the
UPS battery
9
●Remove the screws
fixing the battery.
12
Replace the UPS battery
●Pull out the battery.
●The replacement battery should be N510069573AA.
●Push the new battery into the FA computer main body (to the
position in step , and connect the power and signal cable
connectors.
●The cables should be placed on the battery sheet metal in such a
manner that the power and signal cables are located outside and
inside respectively.
●Holding the power and signal connectors with the wire sticker, push
the battery into the FA computer main body.
●At this time, take care not to pinch the cables.
To
13
UPS battery
10
Consumable parts
replacement
NPM-W2 EJM7DE-MB-12M-00
12-3-11
Maintenance
12-3
14
Attach the UPS battery cover
●Attach it with two screws.
●At this time, take care not to pinch
the cables that are connected with
the battery.
Secure the UPS
battery
13
●Secure it with two
screws.
Replacing the
batteries 6
ON
15
Attach the FA computer cover
● Fit two claws into
the right side and
the other three
claws into the left
side of the cover.
After that, push
the whole cover to
install it.
Attach the front
cover of the
inspection box
16
● Attach the front cover of
the inspection box with
an Allen wrench.
●Secure the front cover
with eight screws.
17