N7201A617E00_0317.pdf - 第325页
NPM-W 2 EJM7DE-MB-12M-00 12-3 -12 Consumable parts replacement
NPM-W2 EJM7DE-MB-12M-00
12-3-11
Maintenance
12-3
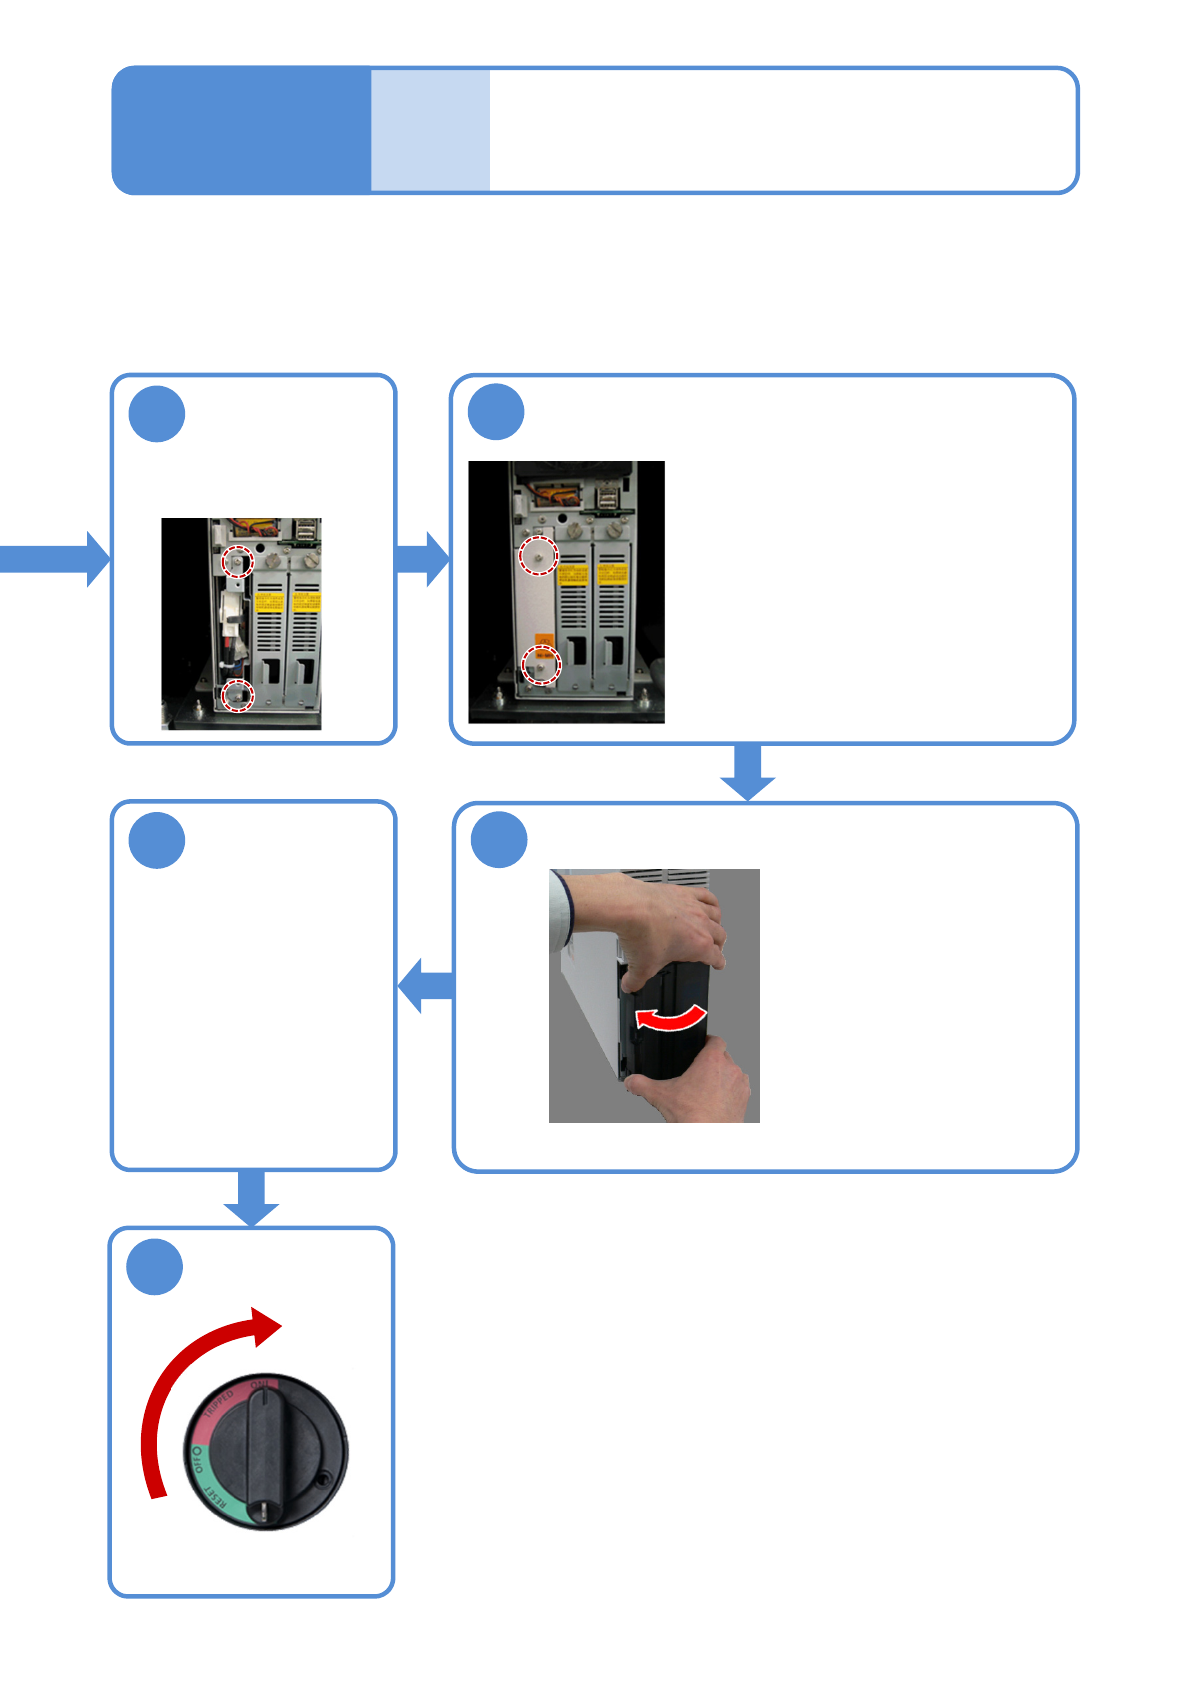
14
Attach the UPS battery cover
●Attach it with two screws.
●At this time, take care not to pinch
the cables that are connected with
the battery.
Secure the UPS
battery
13
●Secure it with two
screws.
Replacing the
batteries 6
ON
15
Attach the FA computer cover
● Fit two claws into
the right side and
the other three
claws into the left
side of the cover.
After that, push
the whole cover to
install it.
Attach the front
cover of the
inspection box
16
● Attach the front cover of
the inspection box with
an Allen wrench.
●Secure the front cover
with eight screws.
17

NPM-W2 EJM7DE-MB-12M-00
12-3-12
Consumable parts
replacement
NPM-W2 EJM7DE-MB-12M-00
12-3-13
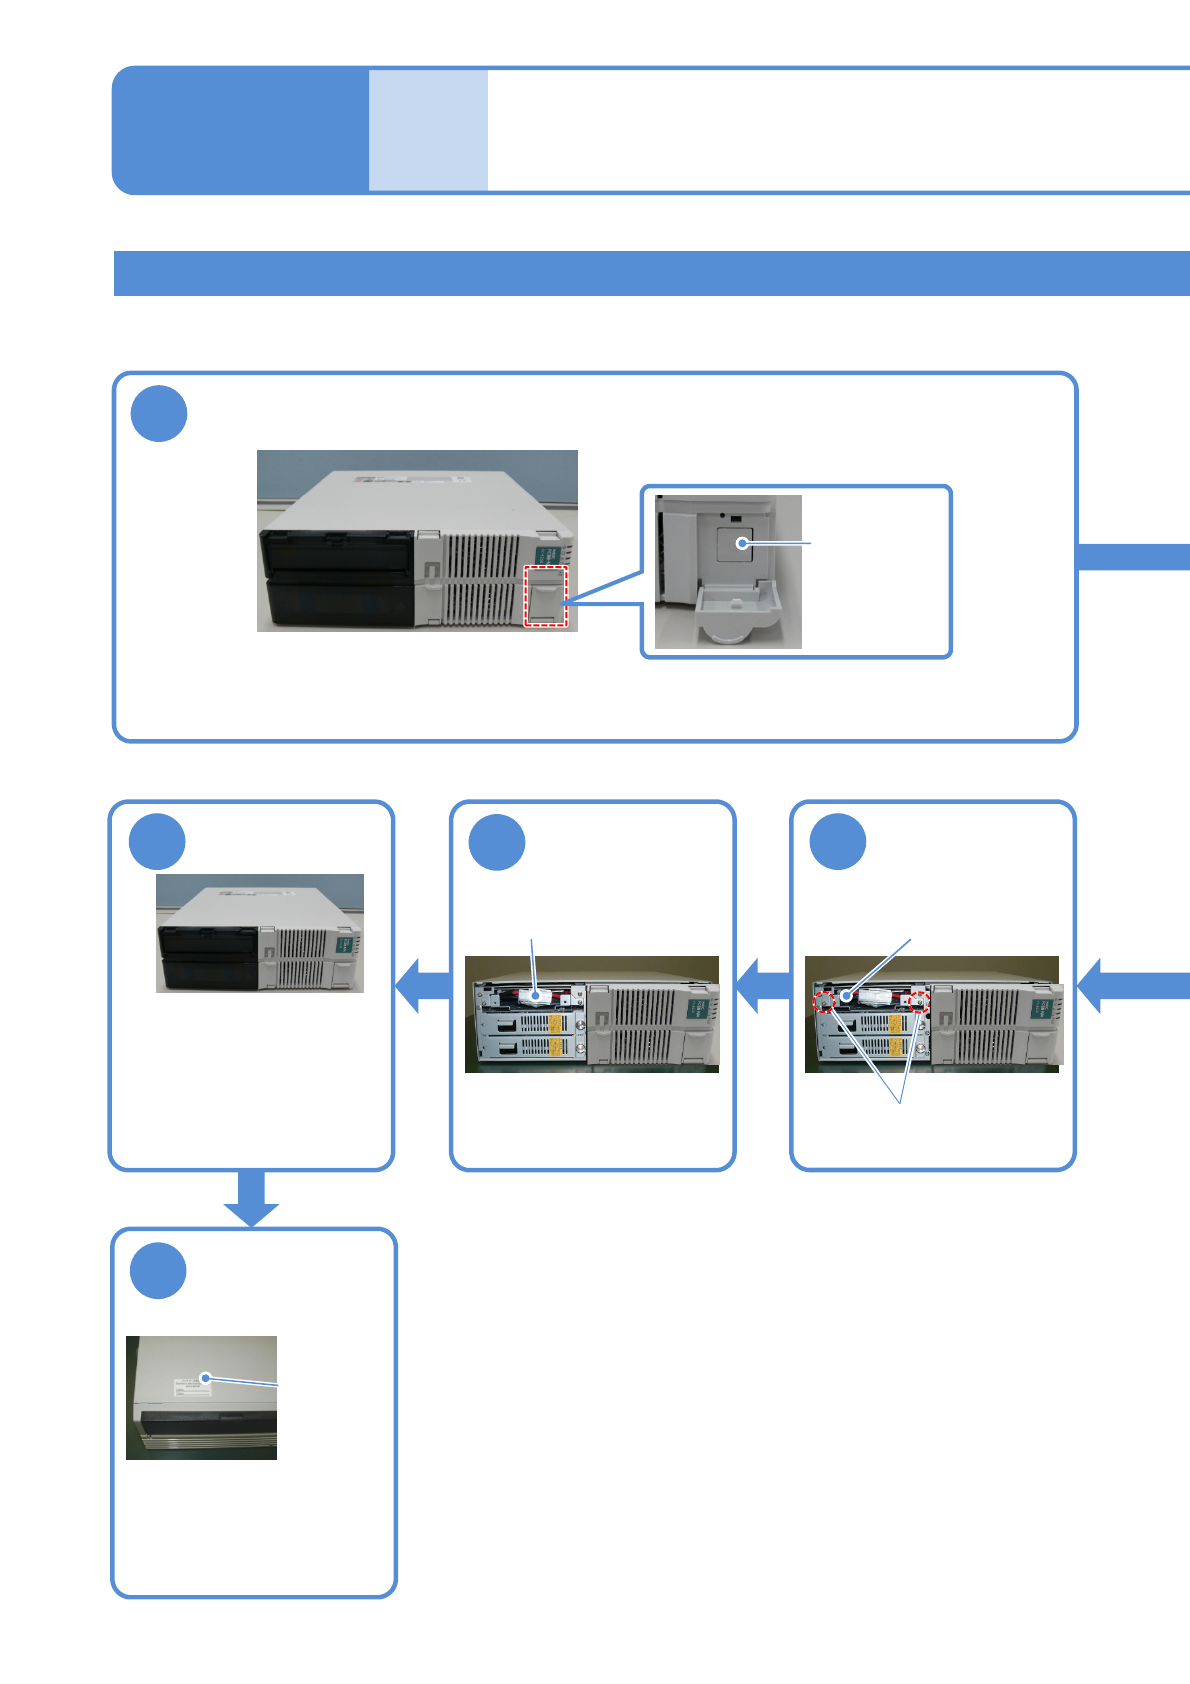
Replacing the UPS battery in FA PC
●The continued use of the battery beyond the end of its service life could cause production information to be
lost in the event of a power failure or cause damage to the hard disk.
Replacing the
batteries 7
Maintenance
12-3
6
Install the UPS
battery
UPS storage space
Screws (2)
7
Plug the
connector of the
UPS battery
Attach the front
cover
8
●Affix the label supplied with
the battery and enter the
date for the next
replacement (current
replacement date + 6 years).
9
Enter the date for
replacement of
the UPS battery
Replacement
date label
●Fit the 2 claws in the lower
portion of the front cover
into the case, and aligning
the 2 claws in the upper
portion with their original
places, press the whole
front cover into the case.
Connector
1
Turn OFF the power of the FA PC
●To end production, turn OFF the main power supply switches on the machine and then on the LNB.
(→”[LNB] 2.1 Operating Instructions of the Main Power Supply Switch at Production Start/End”)
Mainpower
supplyswitch