N7201A617E00_0317.pdf - 第327页
NPM-W 2 EJM7DE-MB-12M-00 12-3 -14 3 Unplug the connector of the UPS battery Connector 4 Remove the UPS battery UPS stor age space Screws (2) 5 Replace the UPS battery ● Replacement b attery: N510069573AA ● Take the batte…
NPM-W2 EJM7DE-MB-12M-00
12-3-13
Replacing the UPS battery in FA PC
●The continued use of the battery beyond the end of its service life could cause production information to be
lost in the event of a power failure or cause damage to the hard disk.
Replacing the
batteries 7
Maintenance
12-3
6
Install the UPS
battery
UPS storage space
Screws (2)
7
Plug the
connector of the
UPS battery
Attach the front
cover
8
●Affix the label supplied with
the battery and enter the
date for the next
replacement (current
replacement date + 6 years).
9
Enter the date for
replacement of
the UPS battery
Replacement
date label
●Fit the 2 claws in the lower
portion of the front cover
into the case, and aligning
the 2 claws in the upper
portion with their original
places, press the whole
front cover into the case.
Connector
1
Turn OFF the power of the FA PC
●To end production, turn OFF the main power supply switches on the machine and then on the LNB.
(→”[LNB] 2.1 Operating Instructions of the Main Power Supply Switch at Production Start/End”)
Mainpower
supplyswitch
NPM-W2 EJM7DE-MB-12M-00
12-3-14
3
Unplug the connector
of the UPS battery
Connector
4
Remove the
UPS battery
UPS storage space
Screws (2)
5
Replace the
UPS battery
●Replacement battery:
N510069573AA
●Take the battery out of
the case, remove the
connector, and replace it
with a new one.
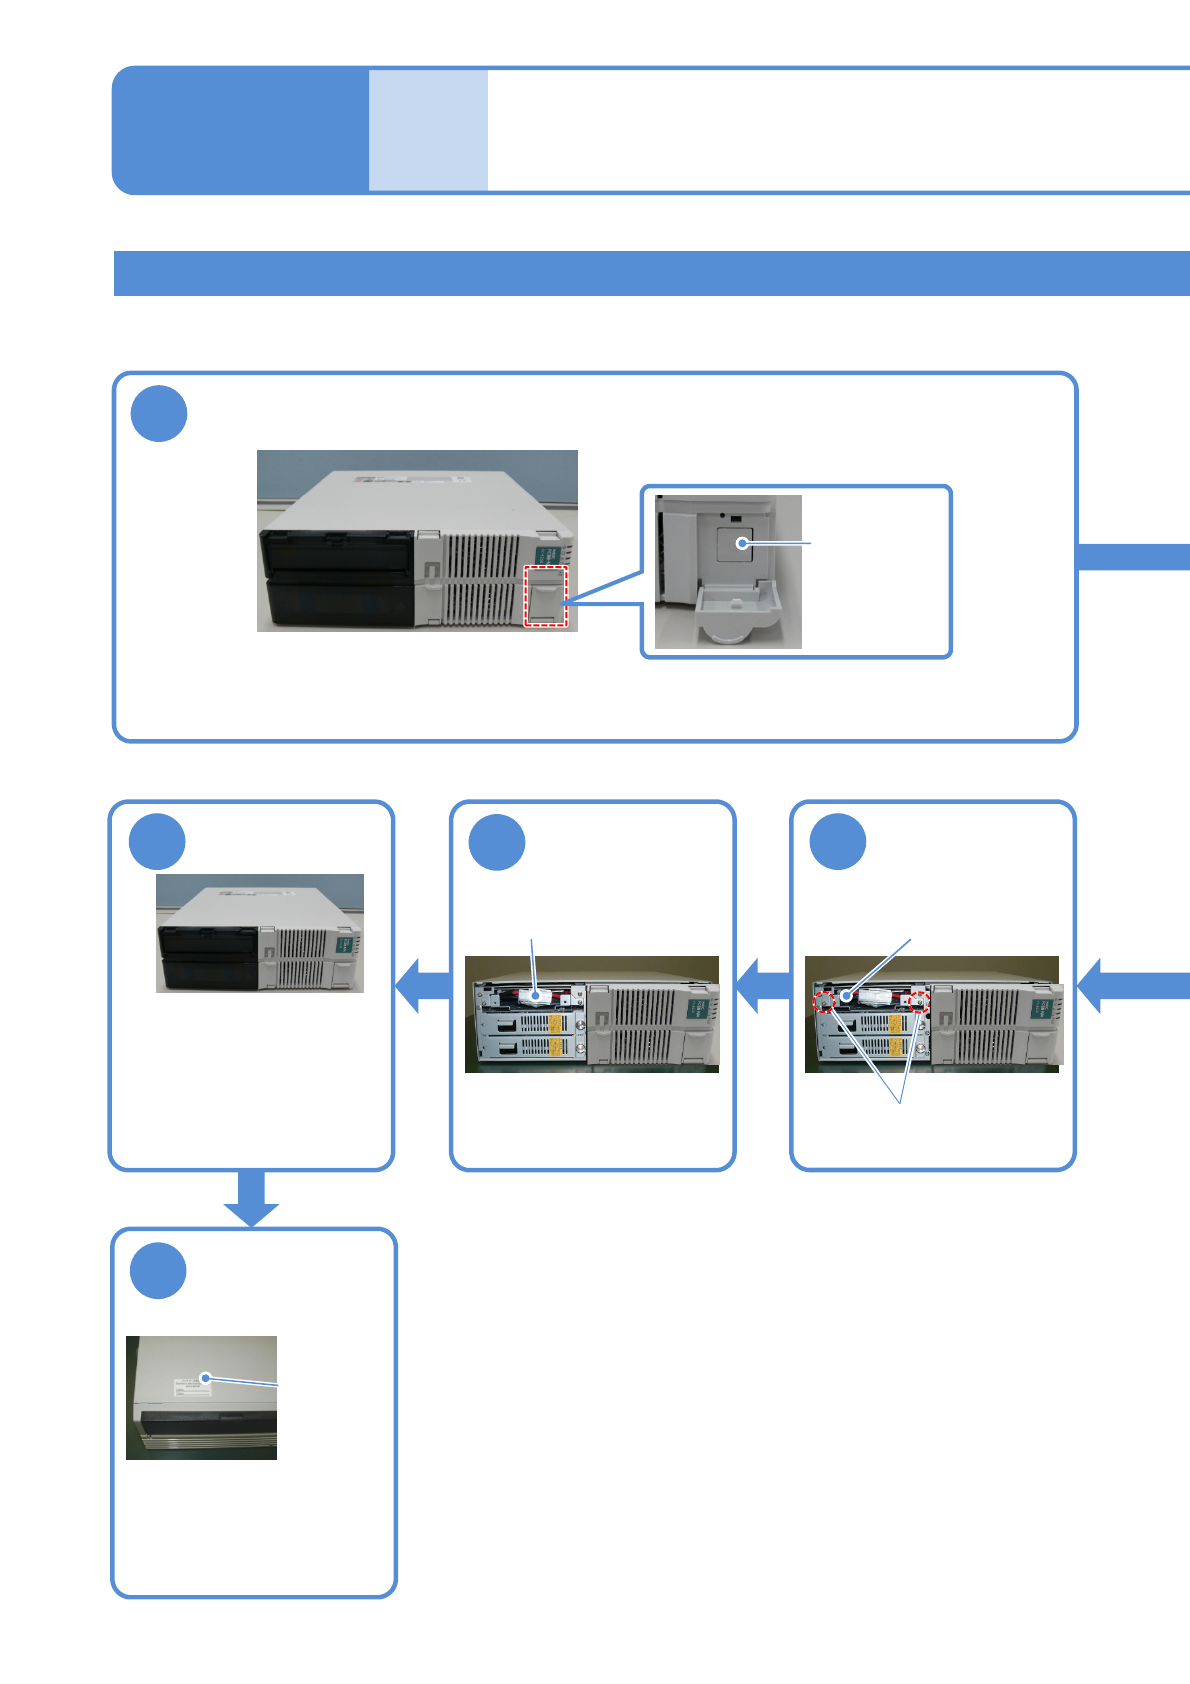
Replacing the calendar battery in FA PC
● Spacial skills such as BIOS settings are required for replacing the calendar battery. Please contact us.
Remove the cover from the FA PC
2
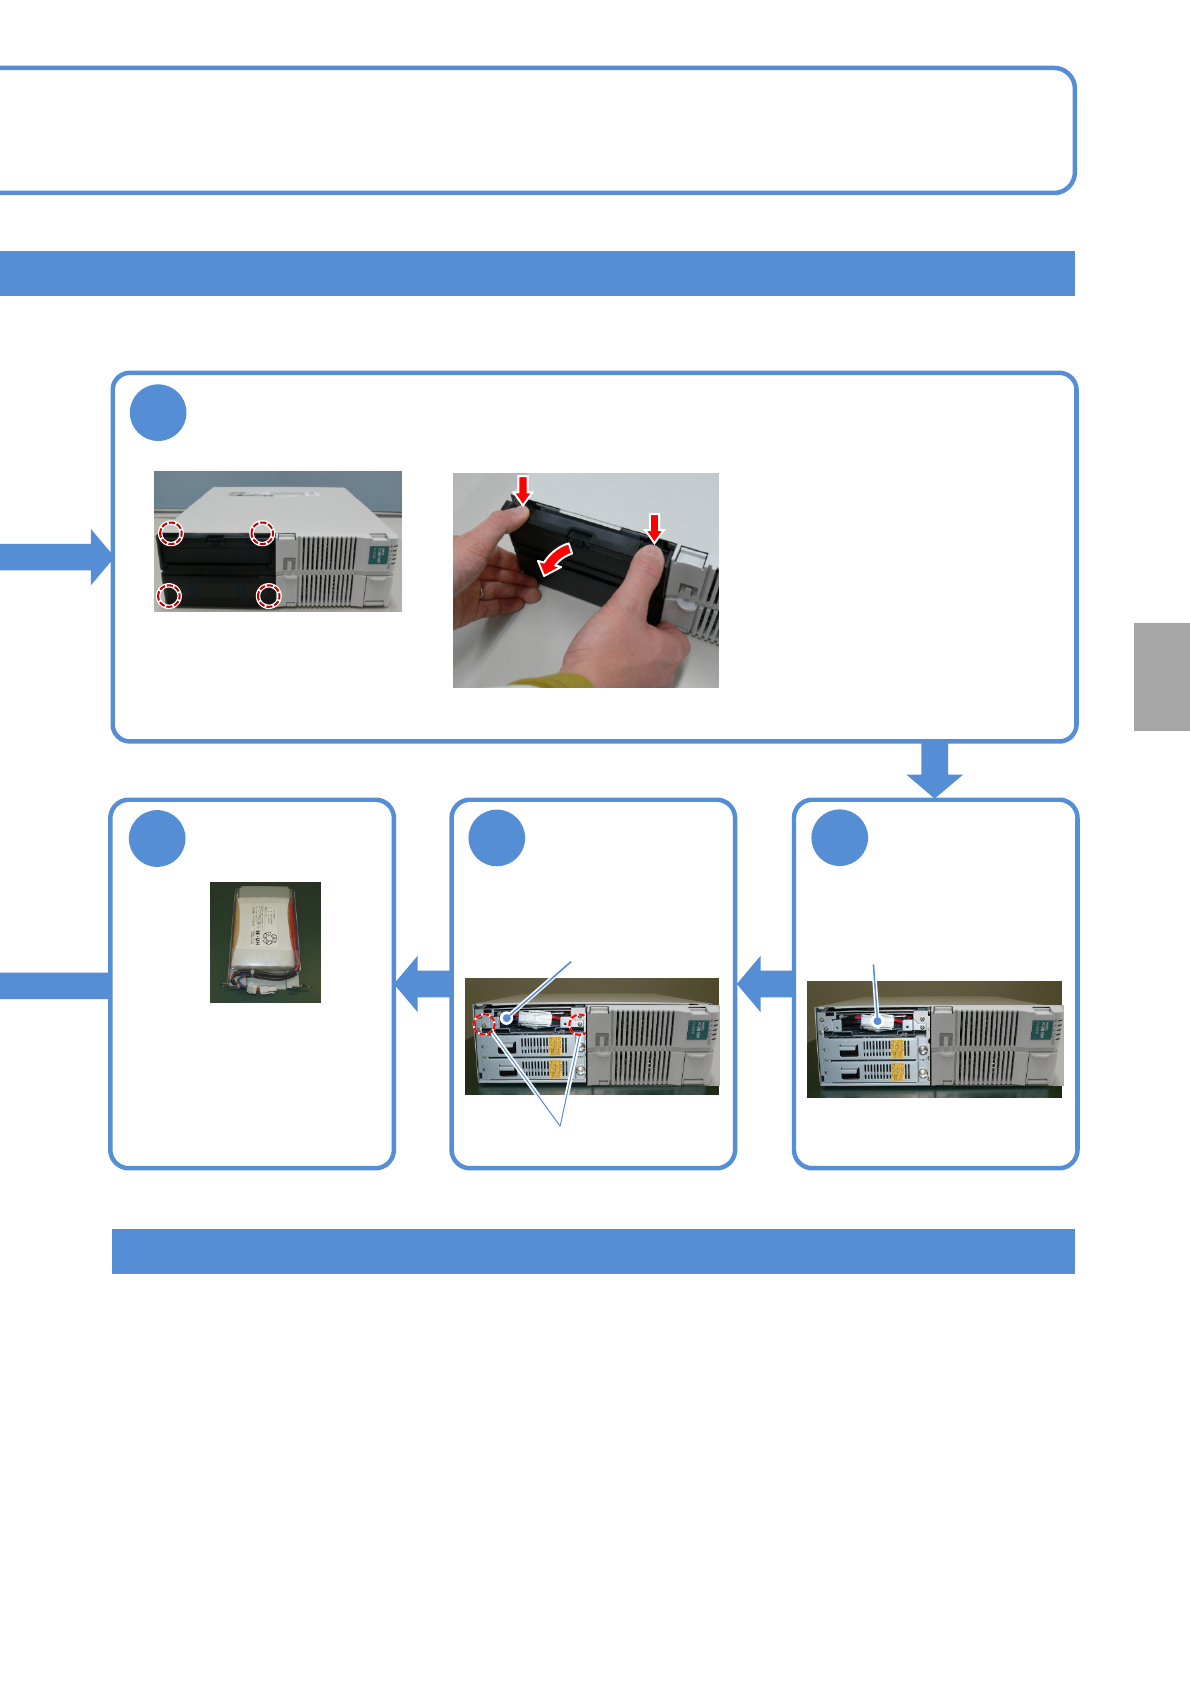
●The cover is fixed to the
FA PC with 4 claws
(inside the cover).
●While holding down the button in
the upper side of the cover, pull the
upper portion of the front cover
toward you.
●In doing so, be careful not to yank
the cover or the claw(s) may be
damaged.
Consumable parts
replacement
NPM-W2 EJM7DE-MB-12M-00
Tool used: None Time required:3分
12-4-1
Maintenance
12-4
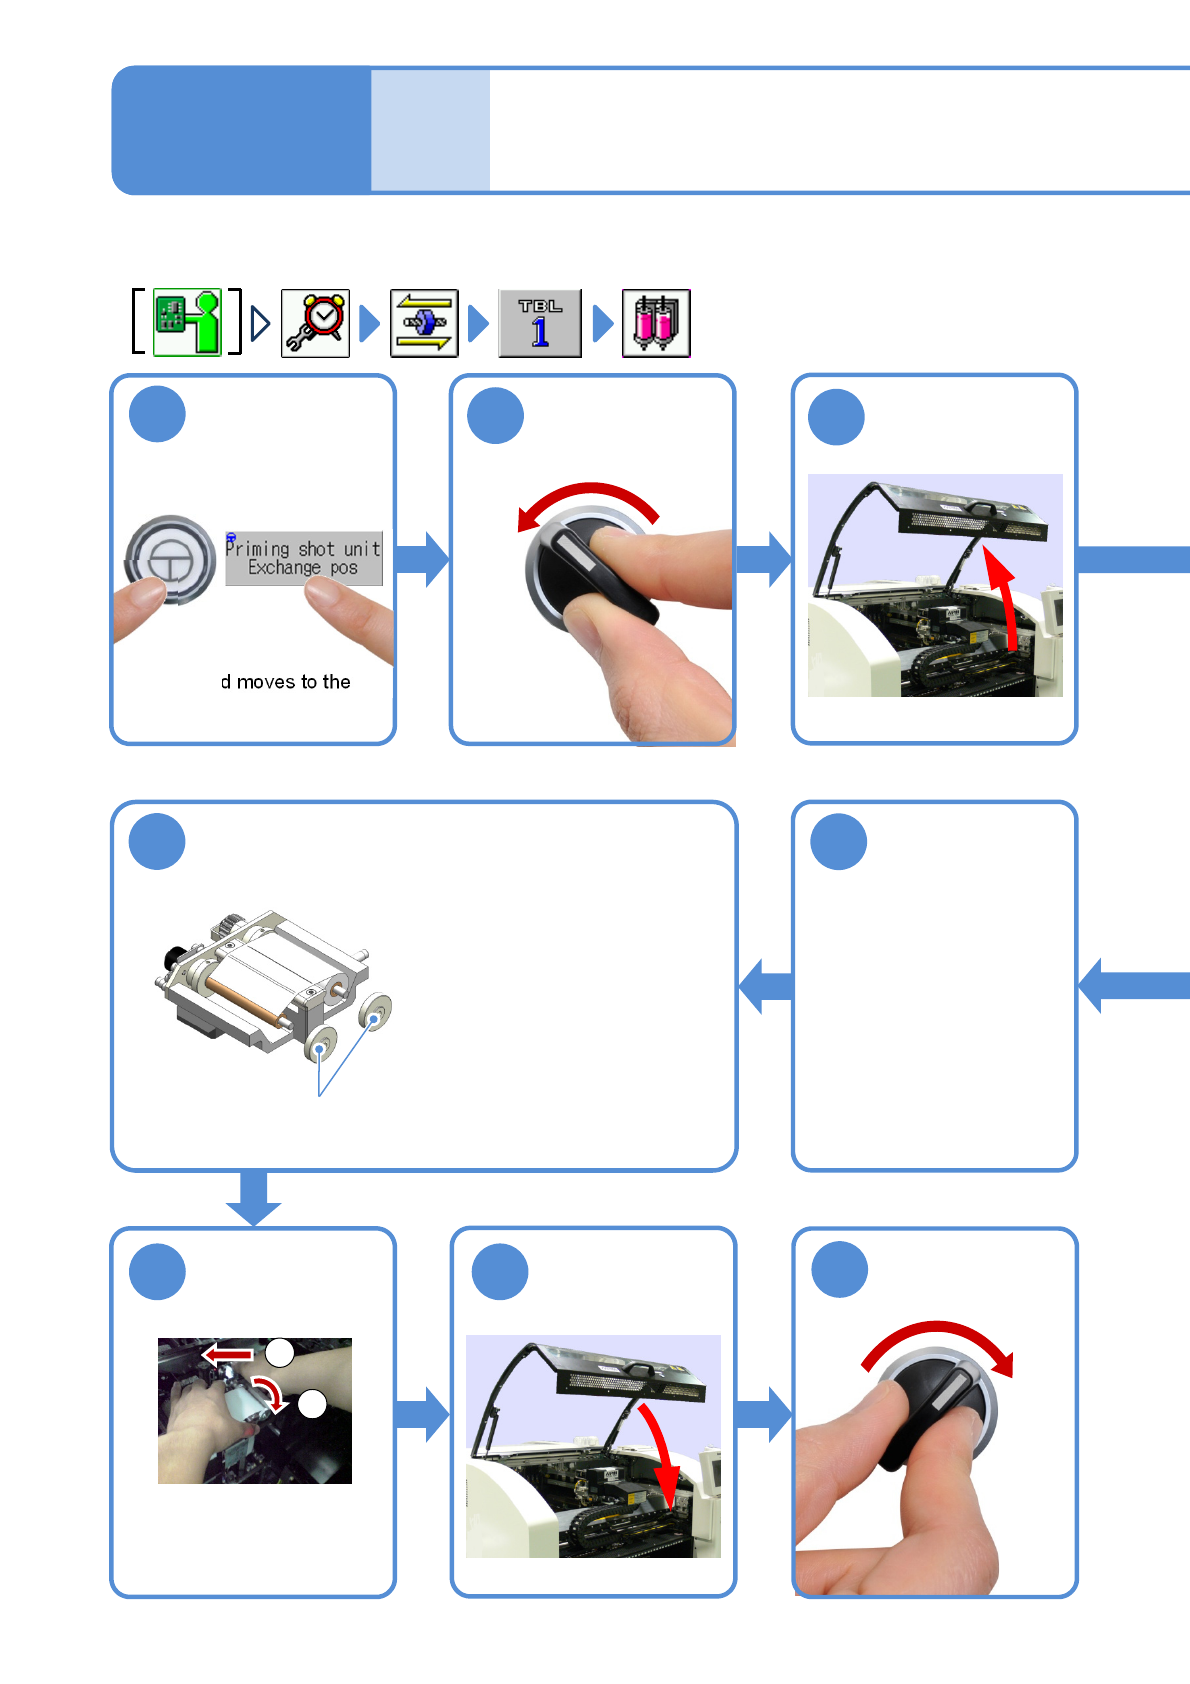
3
1
ENABLING
OFF
SERVO
2
●The head moves to the
exchange position.
Attach two stoppers
9
Secure the edge
of the dummy
dispensing tape
to the paper core
of the take-up
side with tape
●Be sure to tighten up the
stopper, otherwise
the tape slips.
10
Stopper
Attach the
dummy
dispensing unit
1211
SERVO
ON
13
Replacing the dummy
dispensing tape
(dispensing head(option))
1
2
①Tilt the attachment lever to
the left
②Attach the dummy
dispensing unit