N7201A617E00_0317.pdf - 第340页
NPM-W 2 EJM7DE-MB-12 M-00 12-9 -1 8 7 Limited-life(referen ce) : 6000[h] 1 6 Describes the proced ure for replacing the air f ilter element of the placement head (3-nozzle). Tool us ed: Allen wre nch (opposite s ide 2.5 …

NPM-W2 EJM7DE-MB-12M-00
Consumable parts
replacement
12
13
Attach the screws for the wiring fixing
bracket and attach the bracket
●Four screws (Two on each sides)
Tool used: Allen wrench (2.5 mm)
Attach the head
and perform
calibration
(→P.11-1)
●Four screws
12-8-2
3
4
6
5
Remove screws for the wiring
fixing bracket
Tool used: Allen wrench(2.5 mm)
●Four screws
Remove the tube
●8 locations
Tube
Remove the filter
●8 locations
Tool used: Spanner (7 mm)
Filter
Disassemble the filter
Tool used: Spanner (7 mm), Allen wrench(2 mm)
●Disassemble the filter using the spanner Allen wrench
●Condition after disassembly
Filter
Allen wrench
Spanner

NPM-W2 EJM7DE-MB-12M-00
12-9-1
8
7
Limited-life(reference):6000[h]
1
6
Describes the procedure for replacing the air filter element of the placement head (3-nozzle).
Tool used: Allen wrench (opposite side 2.5 mm) or Allen key driver (N510046569AA) included in the
maintenance jig set (option), swab
Time required: 10 minutes (per head)
Remove the caps
●Three locations
●Be careful about
dropping the caps.
Clean the filter
mount part with
a cotton swab
●Do not use an air blow gun.
●Three locations
●Be careful about dropping
the cap.
●Tightening torque
: 0.5 ±0.1 N・m
Maintenance
12-9
Replacing the air filter
element of the placement
head (3-nozzle)
Attach the caps
9
Cap
O-ring
Replace the air filter element
●Air filter element product
No.: N510059196AA
●Be careful of handling an air
filter element when replacing
it.(→P.12-6-3)
●O-ring product
No.: N510059865AA
●Confirm whether the O-ring is
deteriorated. If so, replace it.
Air filter element
NPM-W2 EJM7DE-MB-12M-00
12-9-2
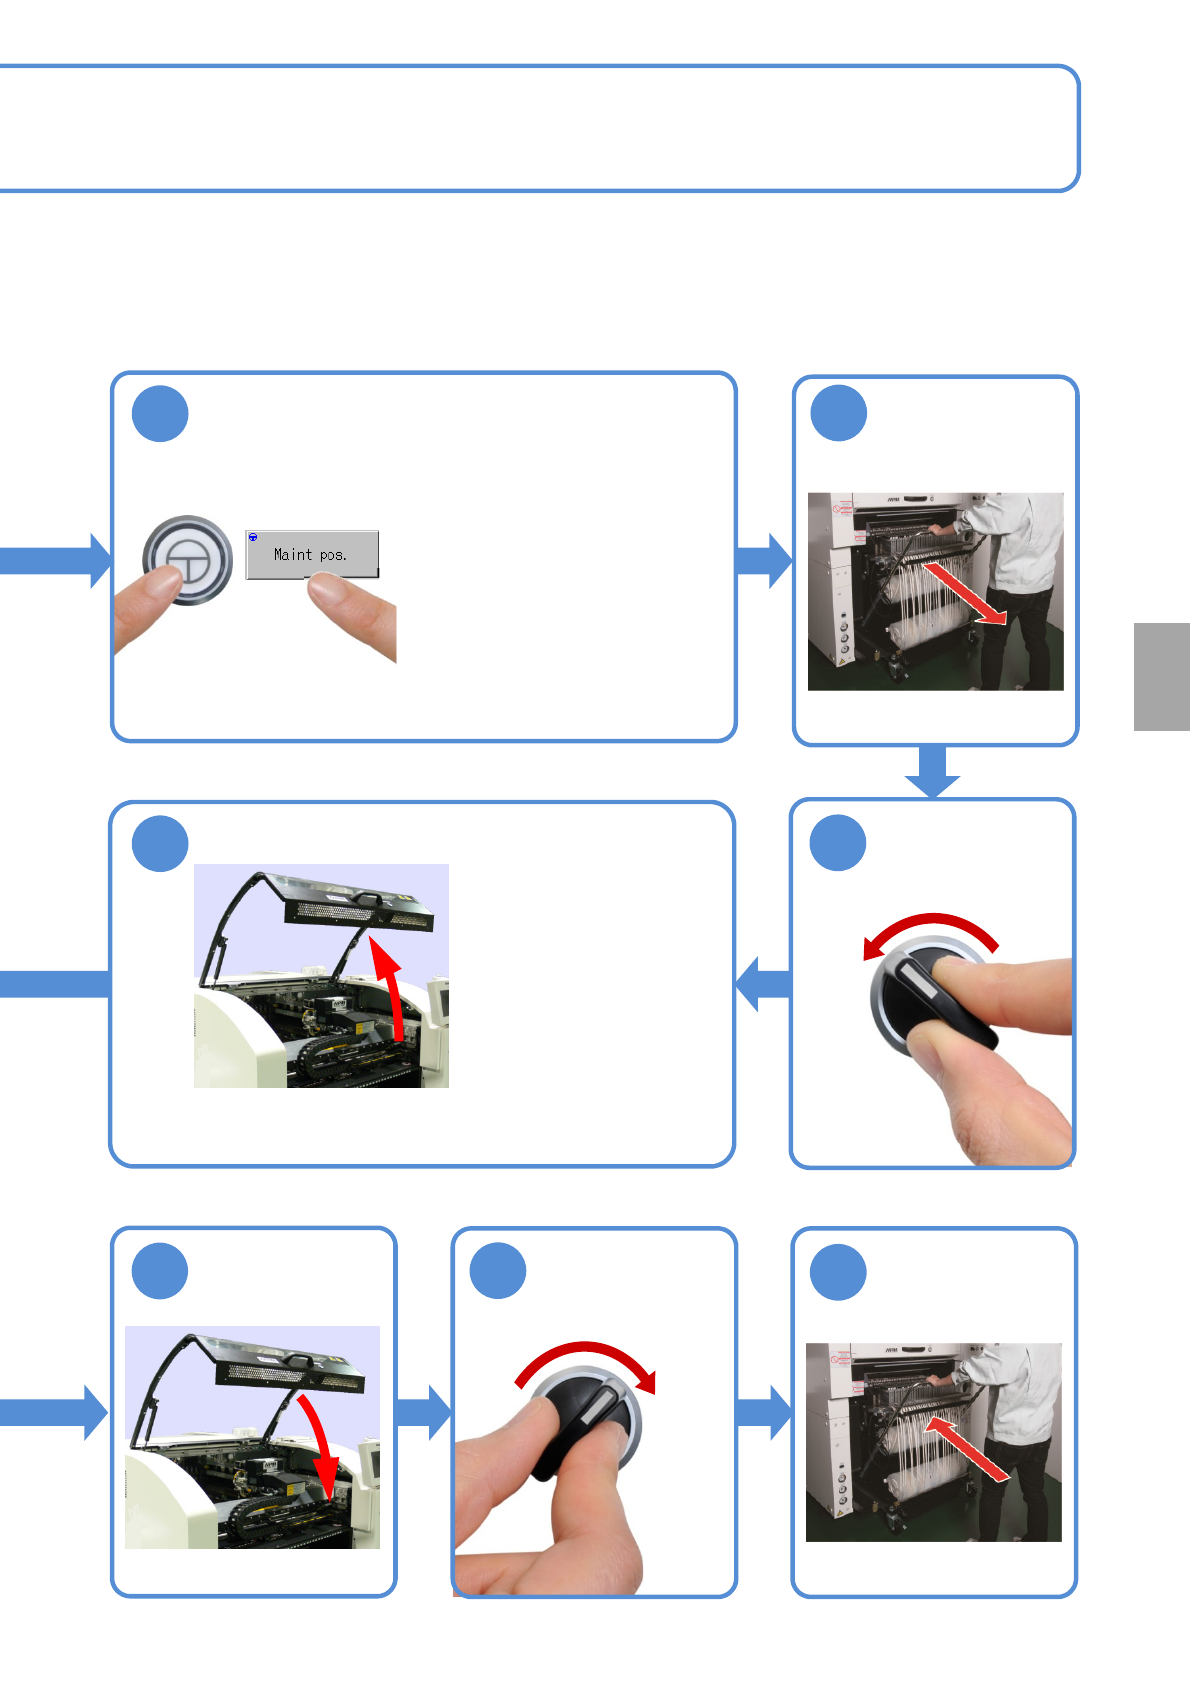
3
4
OFF
SERVO
2
●Y-axis of the front placement
head moves to the front side.
●For feeder cart specification, Y-
axis of the rear placement head
moves to the rear side, and for
tray feeder specification, it moves
to the front side.
5
●Work at the front side for front feeder cart specification
and rear tray feeder specification.
●Work at the rear side for rear feeder cart specification.
12
11
SERVO
ON
10
Detach the feeder
cart
(→P.3-2)
Attach the feeder
cart (→P.3-2)
Consumable parts
replacement