N7201A617E00_0317.pdf - 第371页
NPM-W 2 EJM7DE-MB-13M-00 9 Repeat steps from to until the above reference wi dth is achieved 8 10 (The offset value is set) 2 7 ■ When you do not save offset (The screen remains as it is in ) 9 Confirm the message 7 Adju…
NPM-W2 EJM7DE-MB-13M-00
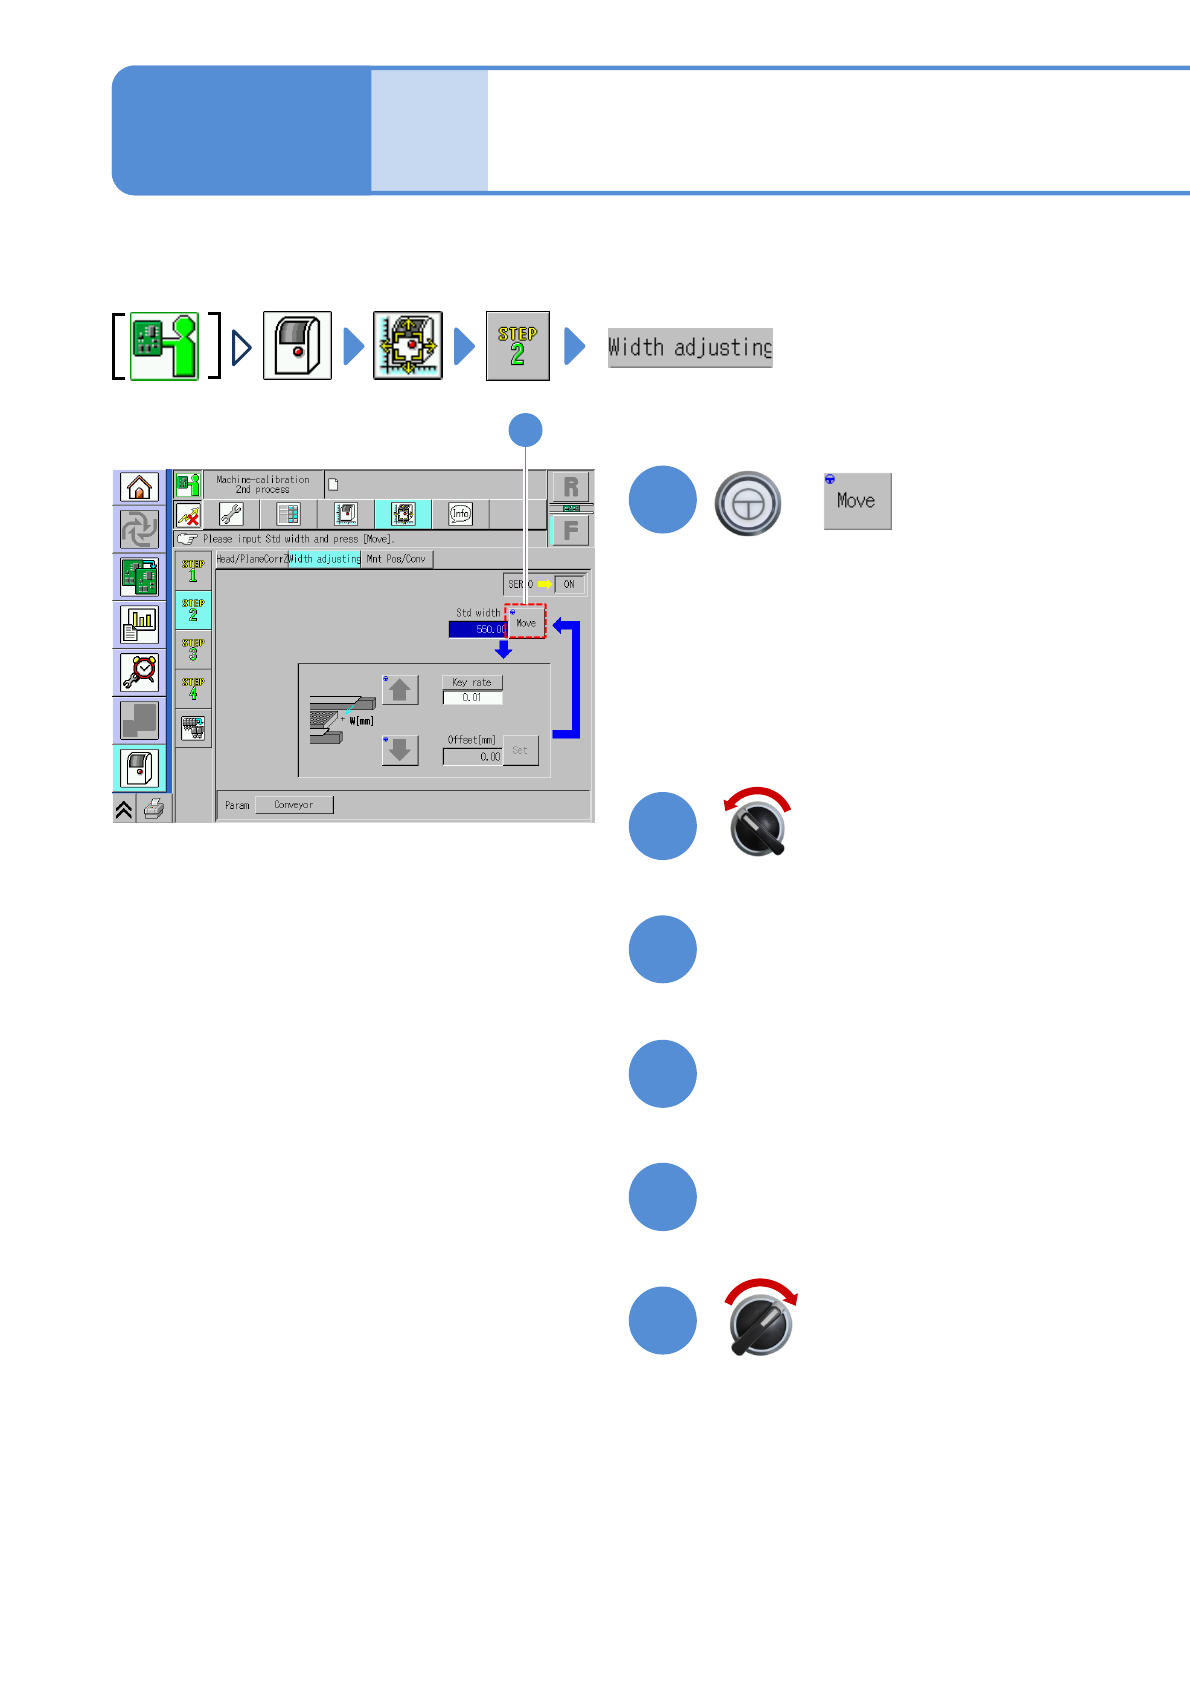
Width adjustment
1
4
3
2
+
(The conveyor width is adjusted to the
reference width of 550 mm.)
Open the safety cover
Measure the conveyor width
with a vernier caliper
5
6
Close the safety cover
1
13-5-1
Explains the method for calibrating the width adjustment of the transfer conveyor.
Maintenance
13-5
Servo switch OFF
Servo switch ON
NPM-W2 EJM7DE-MB-13M-00
9
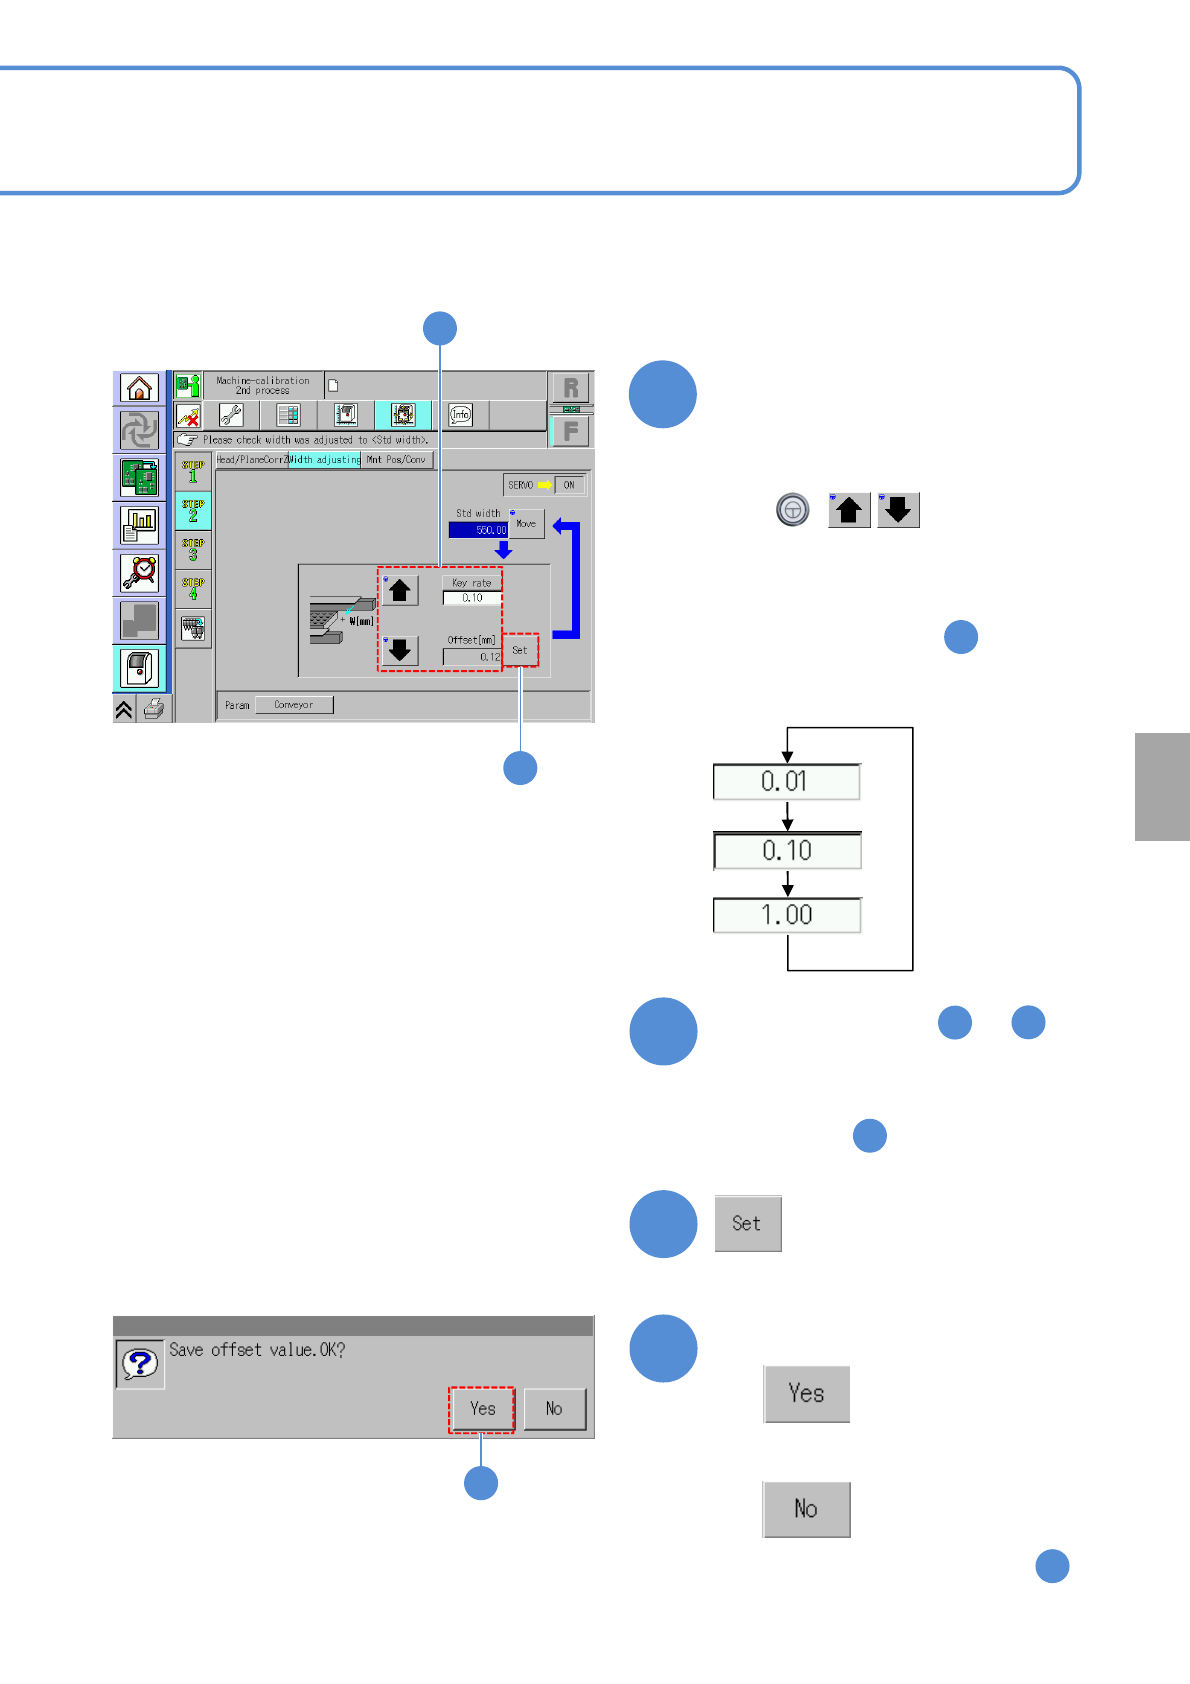
Repeat steps from to
until the above reference width
is achieved
8
10
(The offset value is set)
2
7
■When you do not save offset
(The screen remains as it is in )
9
Confirm the message
7
Adjust the transfer conveyor
width
10
13-5-2
9
Calibration
7
●When pressing [Key rate], you can
change the response.
①Use [Key rate] to set the moving
amount.
②Use to move the
conveyor.
4
+
●Adjust the value of “Offset” so that the
difference of the offset value and the
measured value in step
becomes 550.6 mm.
(The value is displayed in “Offset”.)
●Adjust the value so that the measured
value in step becomes between
550.5 and 550.7 mm.
4
NPM-W2 EJM7DE-MB-13M-00
1
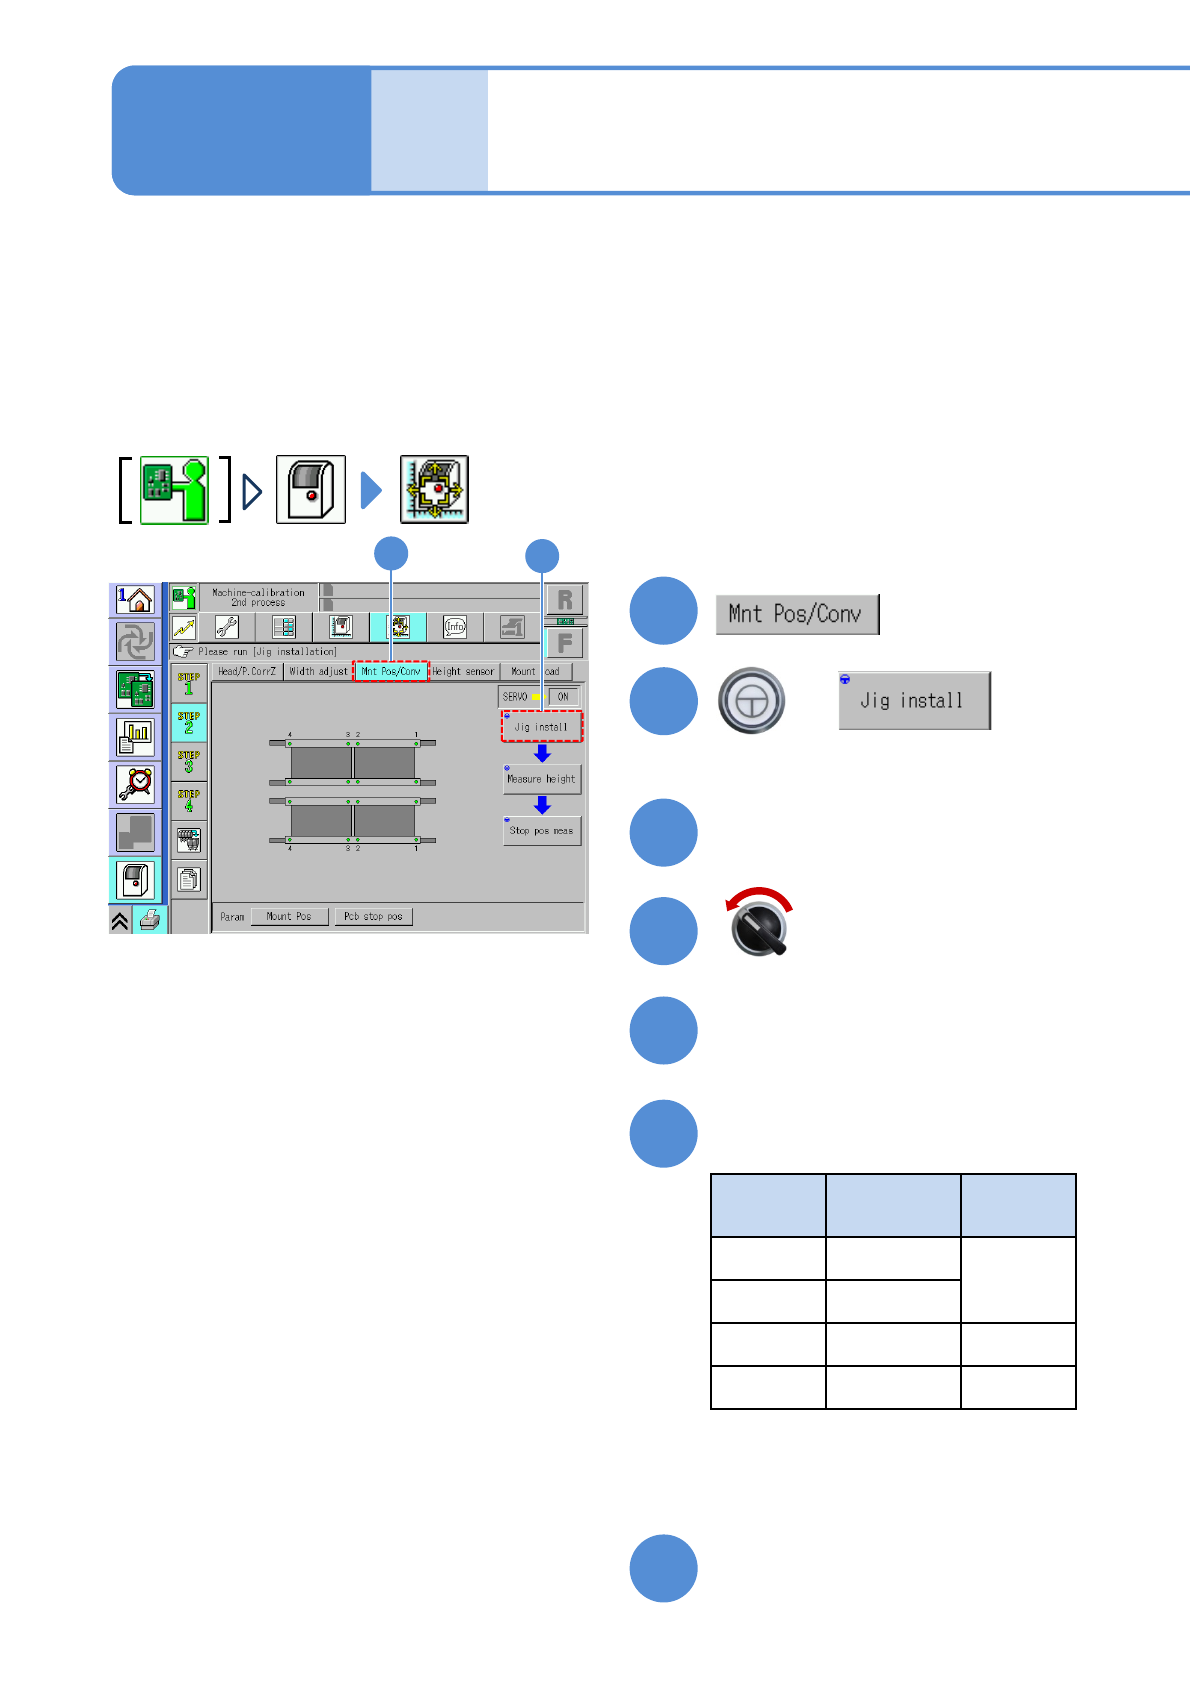
Placement position/
Conveyor 1
13-6-1
This operation procedure is also shared by the light weight 16-, 12-, 8-, 3-nozzle heads, and dispensing heads.
Maintenance
13-6
●For selecting a calibration target head , the head installed at the front side has a priority.
In NPM-W2, calibration is not performed by the dispensing head on the rear side.
If either placement head or dispensing head is installed to the front side, calibration is performed at the
front side. If neither placement head nor dispensing head is installed to the front side, but only the
placement head is installed to the rear side, calibration is performed at the rear side.
●For the dispensing head, the screw being set the calibration nozzle (No. 7202) must be installed to the
dispensing head in advance, and refill adhesives during ejection check. (→[Operating procedure] P.3-4)
Also before calibration is performed, ensure that no adhesive adheres to the nozzle tip.
1
2
2
+
(The head moves to the work position)
Prepare to install nozzles
Open the safety cover
Install nozzles
●Nozzle used
Head
type
Nozzle
position
Nozzle
type
16 No. 5
230CS
12 No. 4
8 No. 3 230C
3No. 21002
Close the safety cover
●For the dispensing head, it is necessary
to install the screw unit that a calibration
nozzle (nozzle no. 7202) is previously
set to the nozzle position 2.
Servo switch OFF
3
4
5
6
7