N7201A617E00_0317.pdf - 第385页
NPM-W 2 EJM7DE-MB-13M-00 13-8-1 -2 Calibration 7 Set the mount load measurement jig ● Place the jig against the reference side of the rail, and set it so that the right e dge of the jig is aligned with the end face of th…
NPM-W2 EJM7DE-MB-13M-00
Place-
ment
load
Placement load 1
The operation procedure is applicable only to the 3-nozzle head.
13-8-1-1
Maintenance
13-8-1
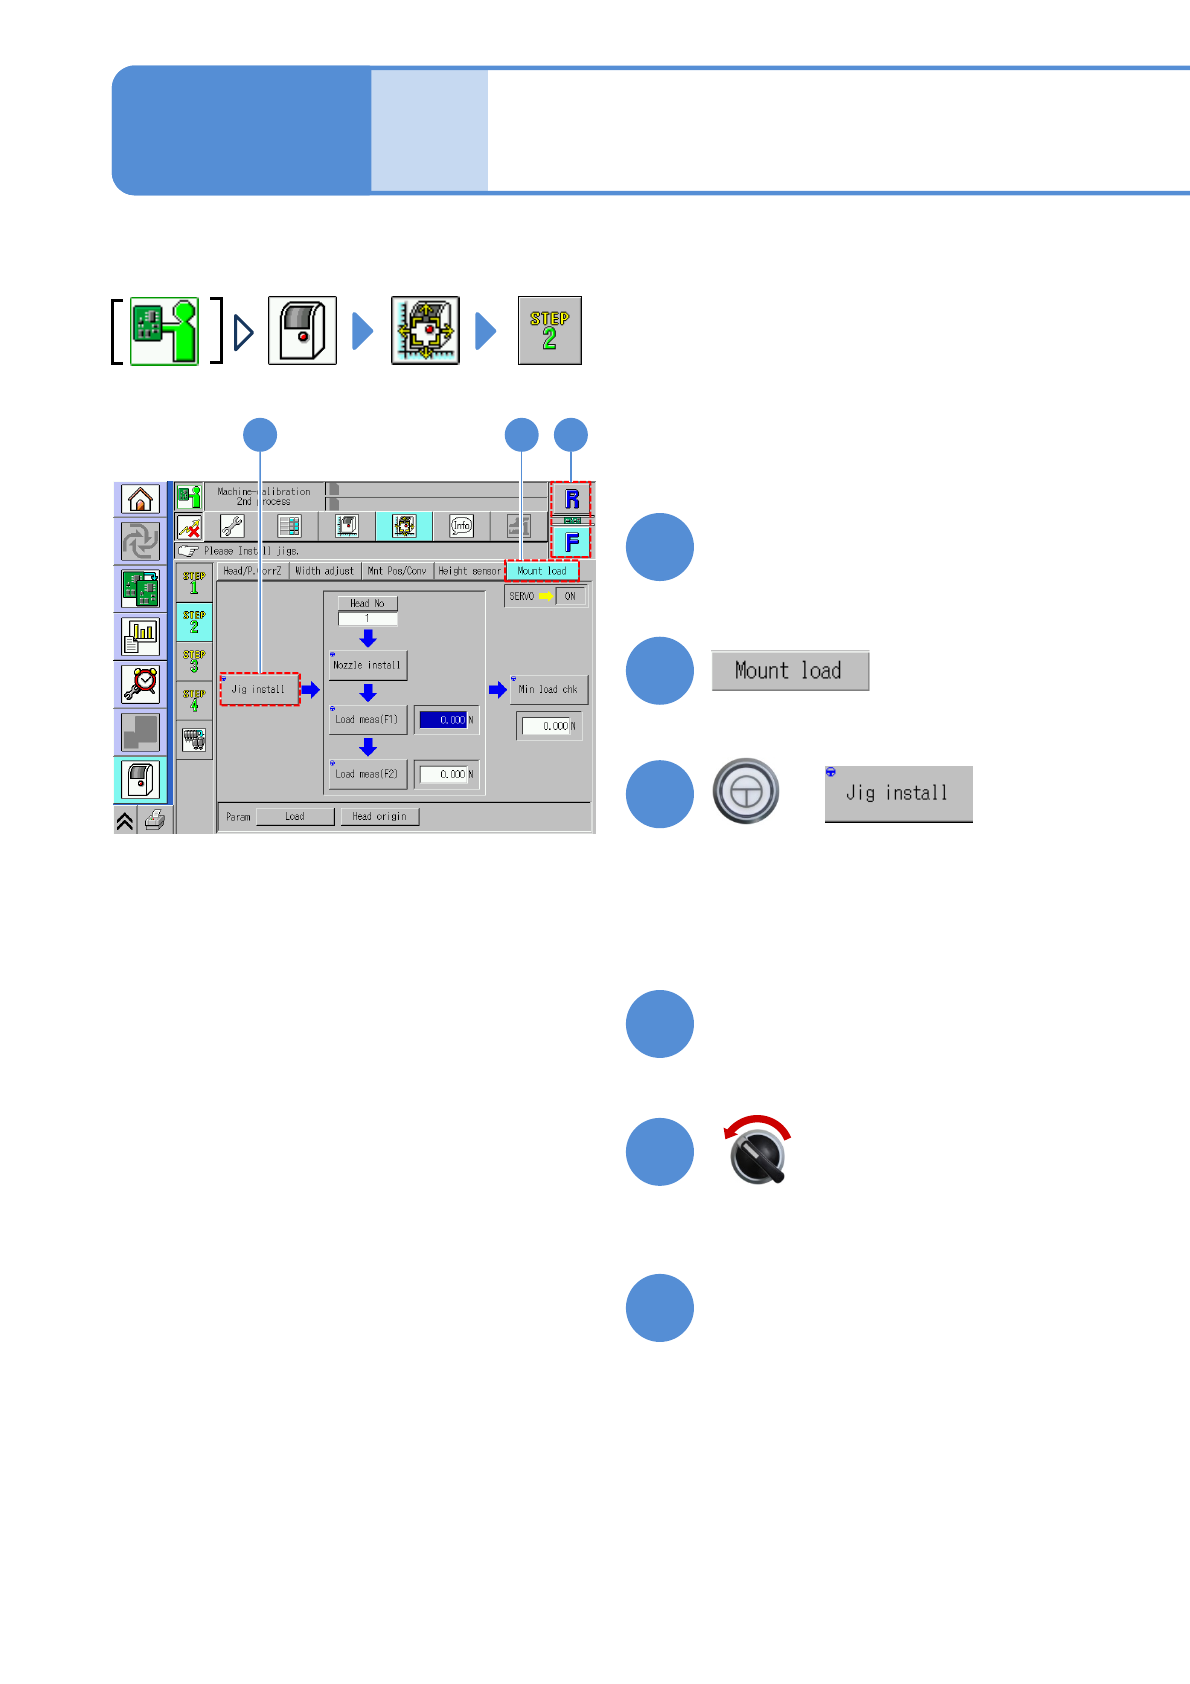
Choose a table
●Choose a table to calibrate.
2 13
+
Servo switch OFF
Open the safety cover
Prepare to remove a jig
1
2
3
6
5
4
(The width is adjusted)
(The head moves to the retraction position)
NPM-W2 EJM7DE-MB-13M-00
13-8-1-2
Calibration
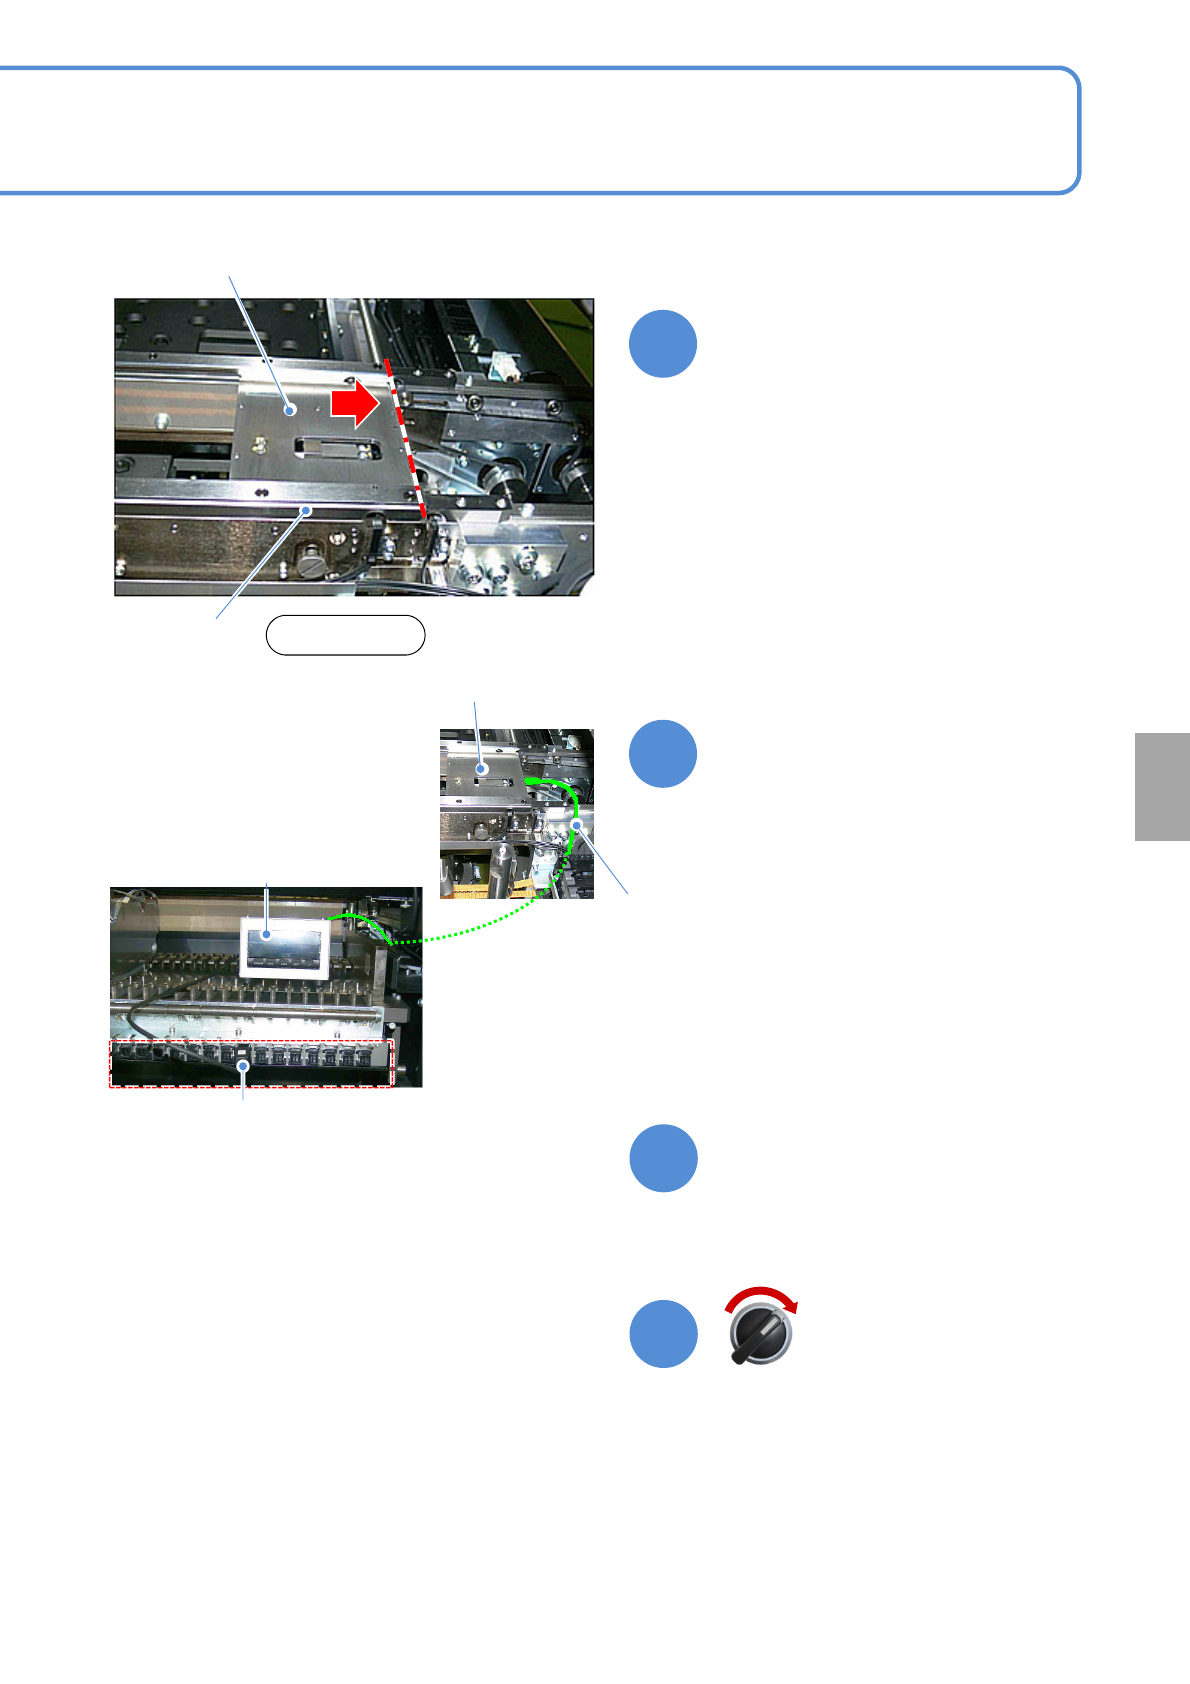
7
Set the mount load
measurement jig
●Place the jig against the reference
side of the rail, and set it so that the
right edge of the jig is aligned with the
end face of the conveyor’s PCB clamp.
Mount load
measurement jig
* The left figure is based on front reference.
Even if it is based on rear reference, the mount
load measurement jig faces in the same direction
as seen from the front of the machine.
8
Set the power code to any
connector of the feeder cart’s
power supply section
Power supply
section
Prevent the wire from interfering with the head.
(Pass it through the nozzle changer and the
cable carrier)
Load cell meter
Upper rail
Front
Mount load
measurement jig
9
10
Close the safety cover
Servo switch ON
NPM-W2 EJM7DE-MB-13M-00
Place-
ment
load
13-8-1-3
Placement load 2
+
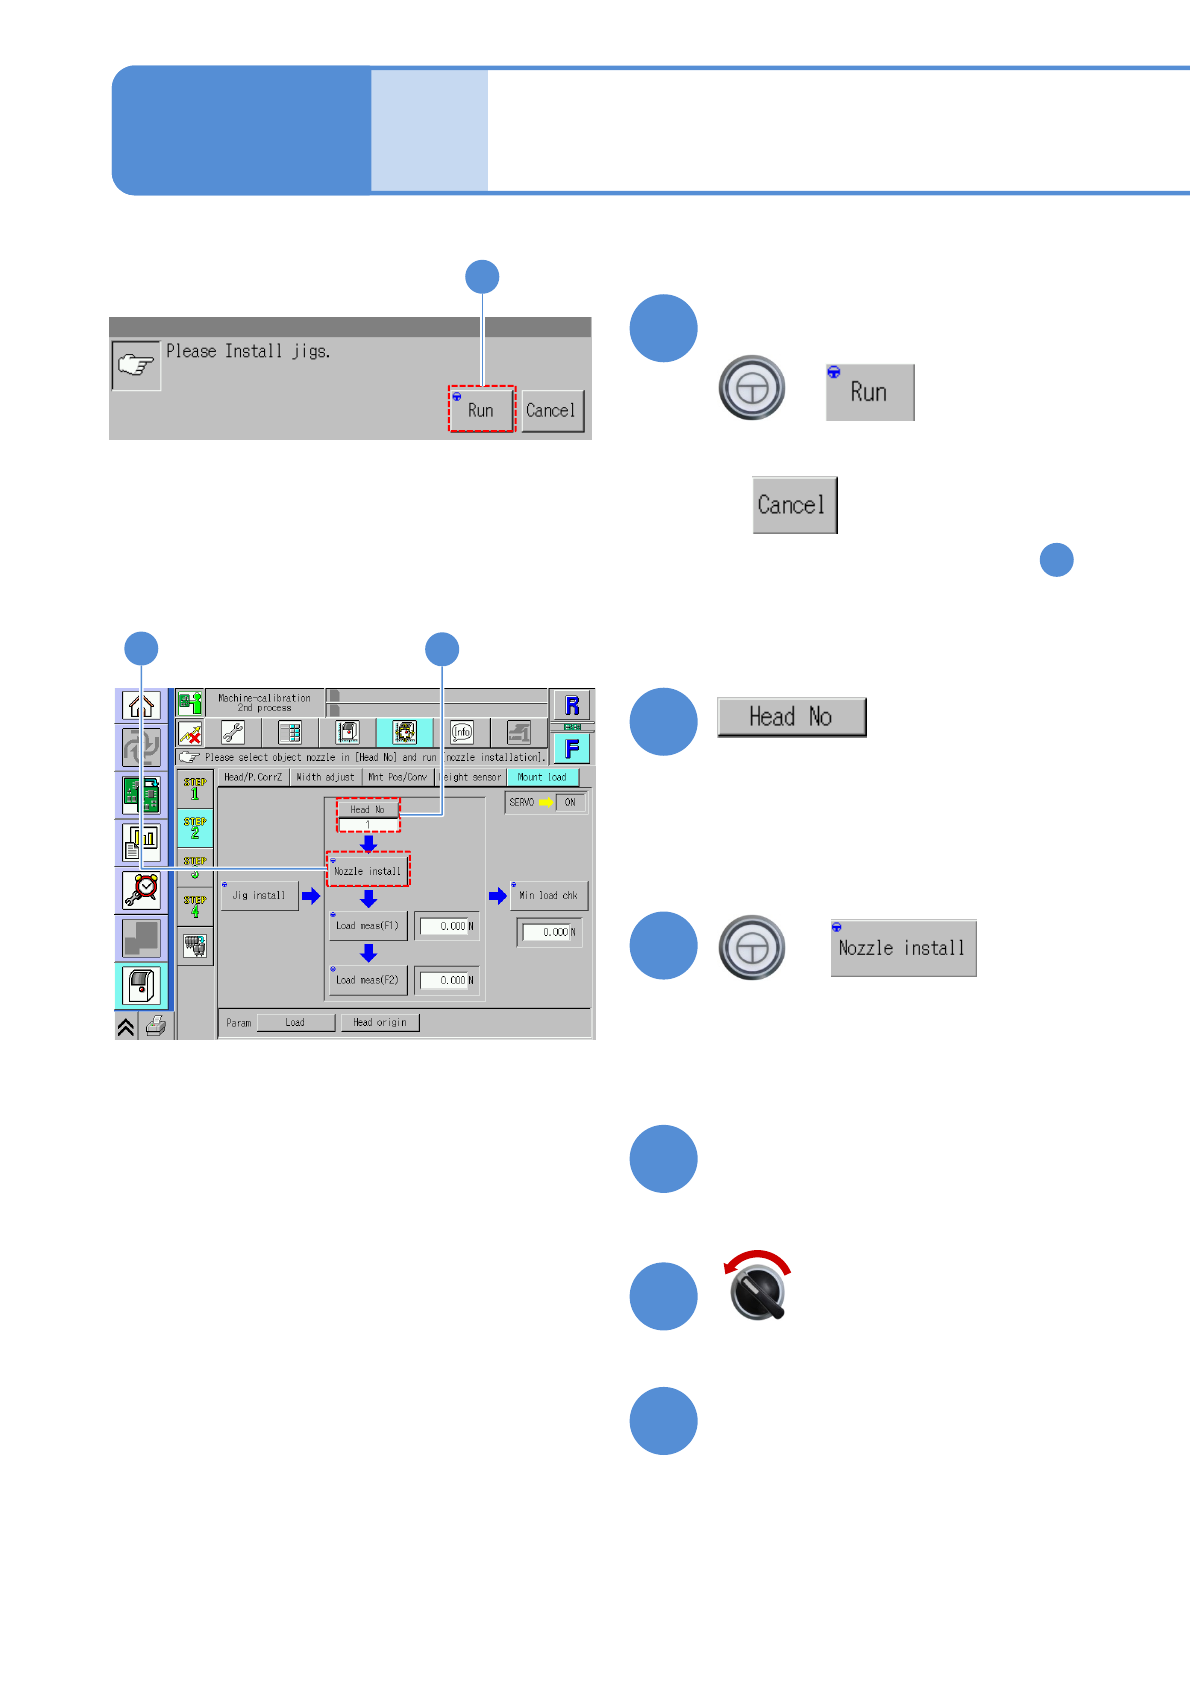
Confirm the message
●To cancel
(The screen remains as it is in )
1
(Each time you press it, the nozzle
position No. changes)
●Choose the position to perform
calibration.
+
Maintenance
13-8-1
Servo switch OFF
Open the safety cover
Prepare to install nozzles
11
12
13
15
16
14
11
12
13
(The head moves to the work position)