N7201A617E00_0317.pdf - 第410页
NPM-W 2 EJM7DE-MB-13M-00 13-10 -3 Set jig components and the light luminosity jig to the jig station ● Each of the two has no particular orientation by itself. Power su pply switch Jig storage unit ● Jig station Jig sta …
NPM-W2 EJM7DE-MB-13M-00
Explains the jig station operating method, taking for an example, the 12-nozzle head; however, the same
procedure can also be applied to the light weight16-, 8-, and 3-nozzle heads.
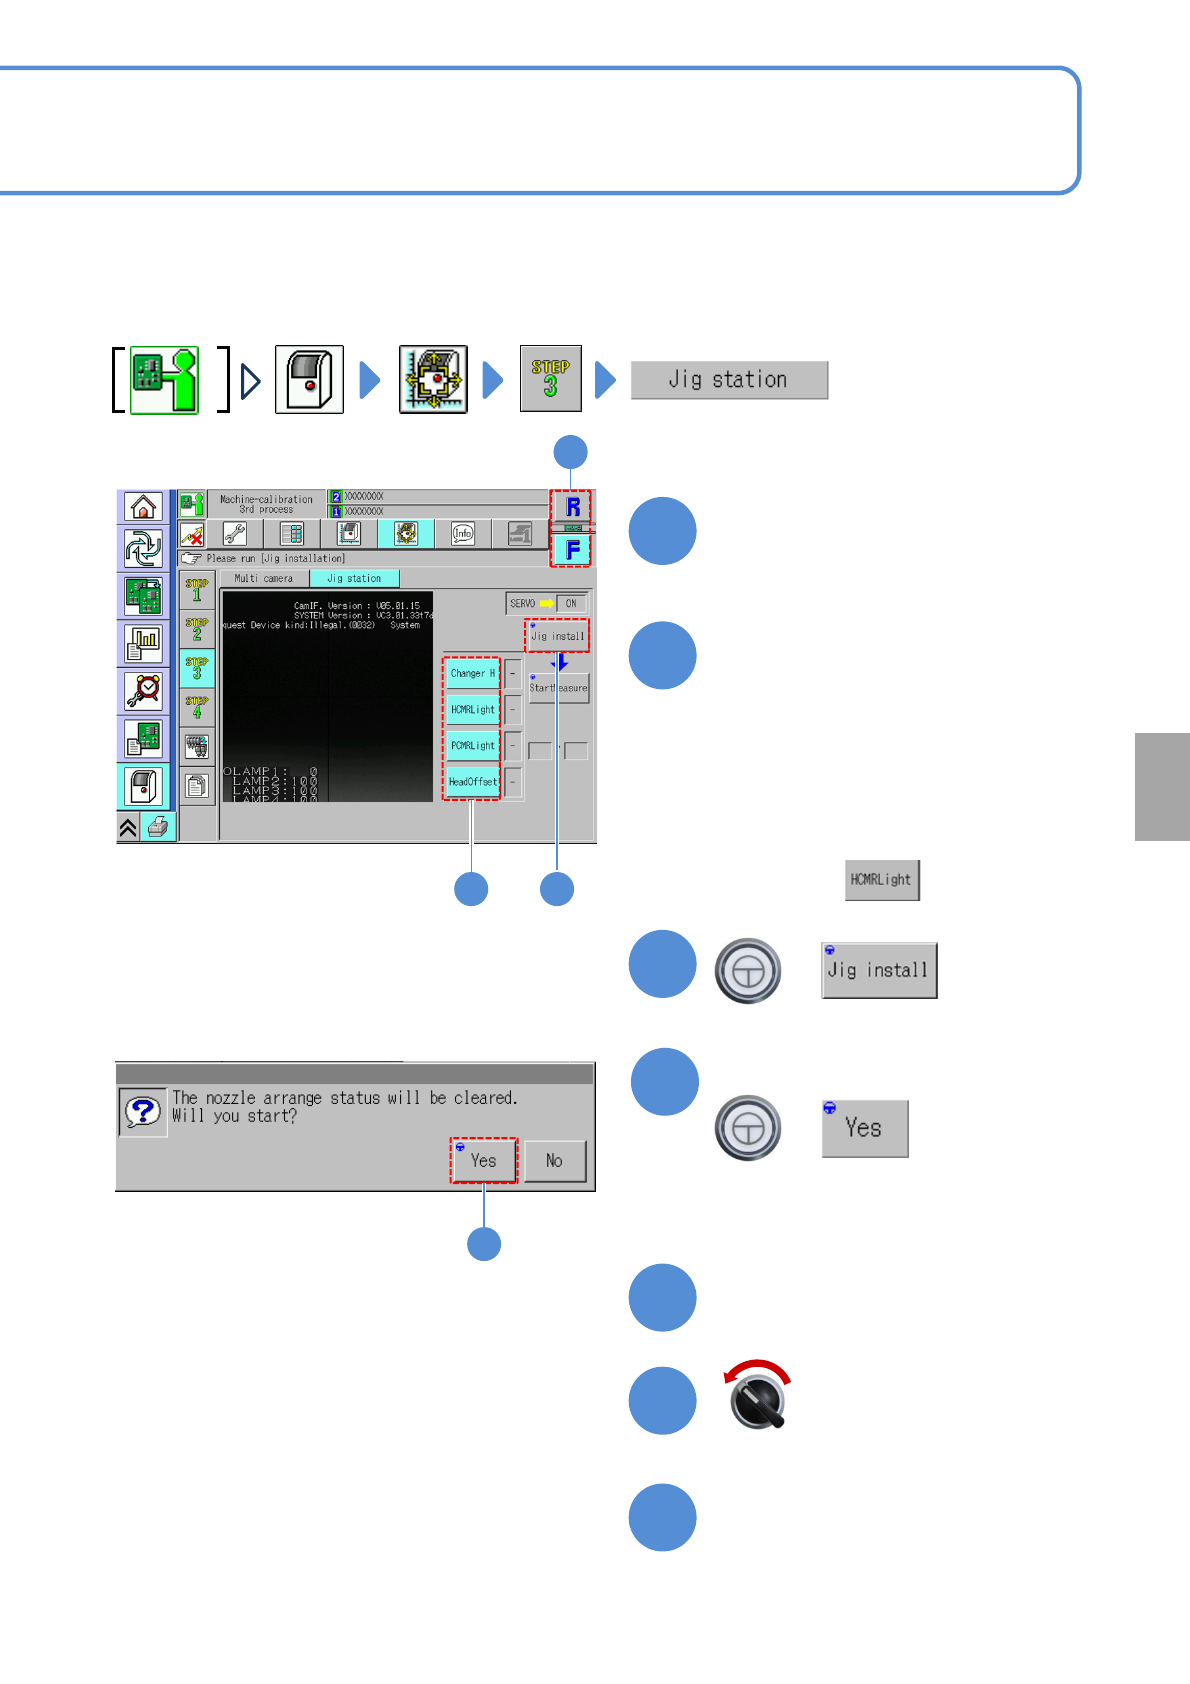
●Make sure that there are no nozzles present in the nozzle changer. Remove all the PCB support pins.
Choose a table
●Choose the table for calibration.
Choose a measurement item
(The selected items are displayed in
light blue color, and, all the rest, in
gray)
+
13-10-2
1
2 3
■For the placement head,
Choose all measurement items.
■For the dispensing head/2D inspection
head,
Choose only.
Calibration
Open the safety cover
Prepare to install the jig station
Servo switch OFF
3
2
1
7
6
5
4
4
(The width is adjusted)
(The head moves to the retraction position)
Confirm the message
+
NPM-W2 EJM7DE-MB-13M-00
13-10-3
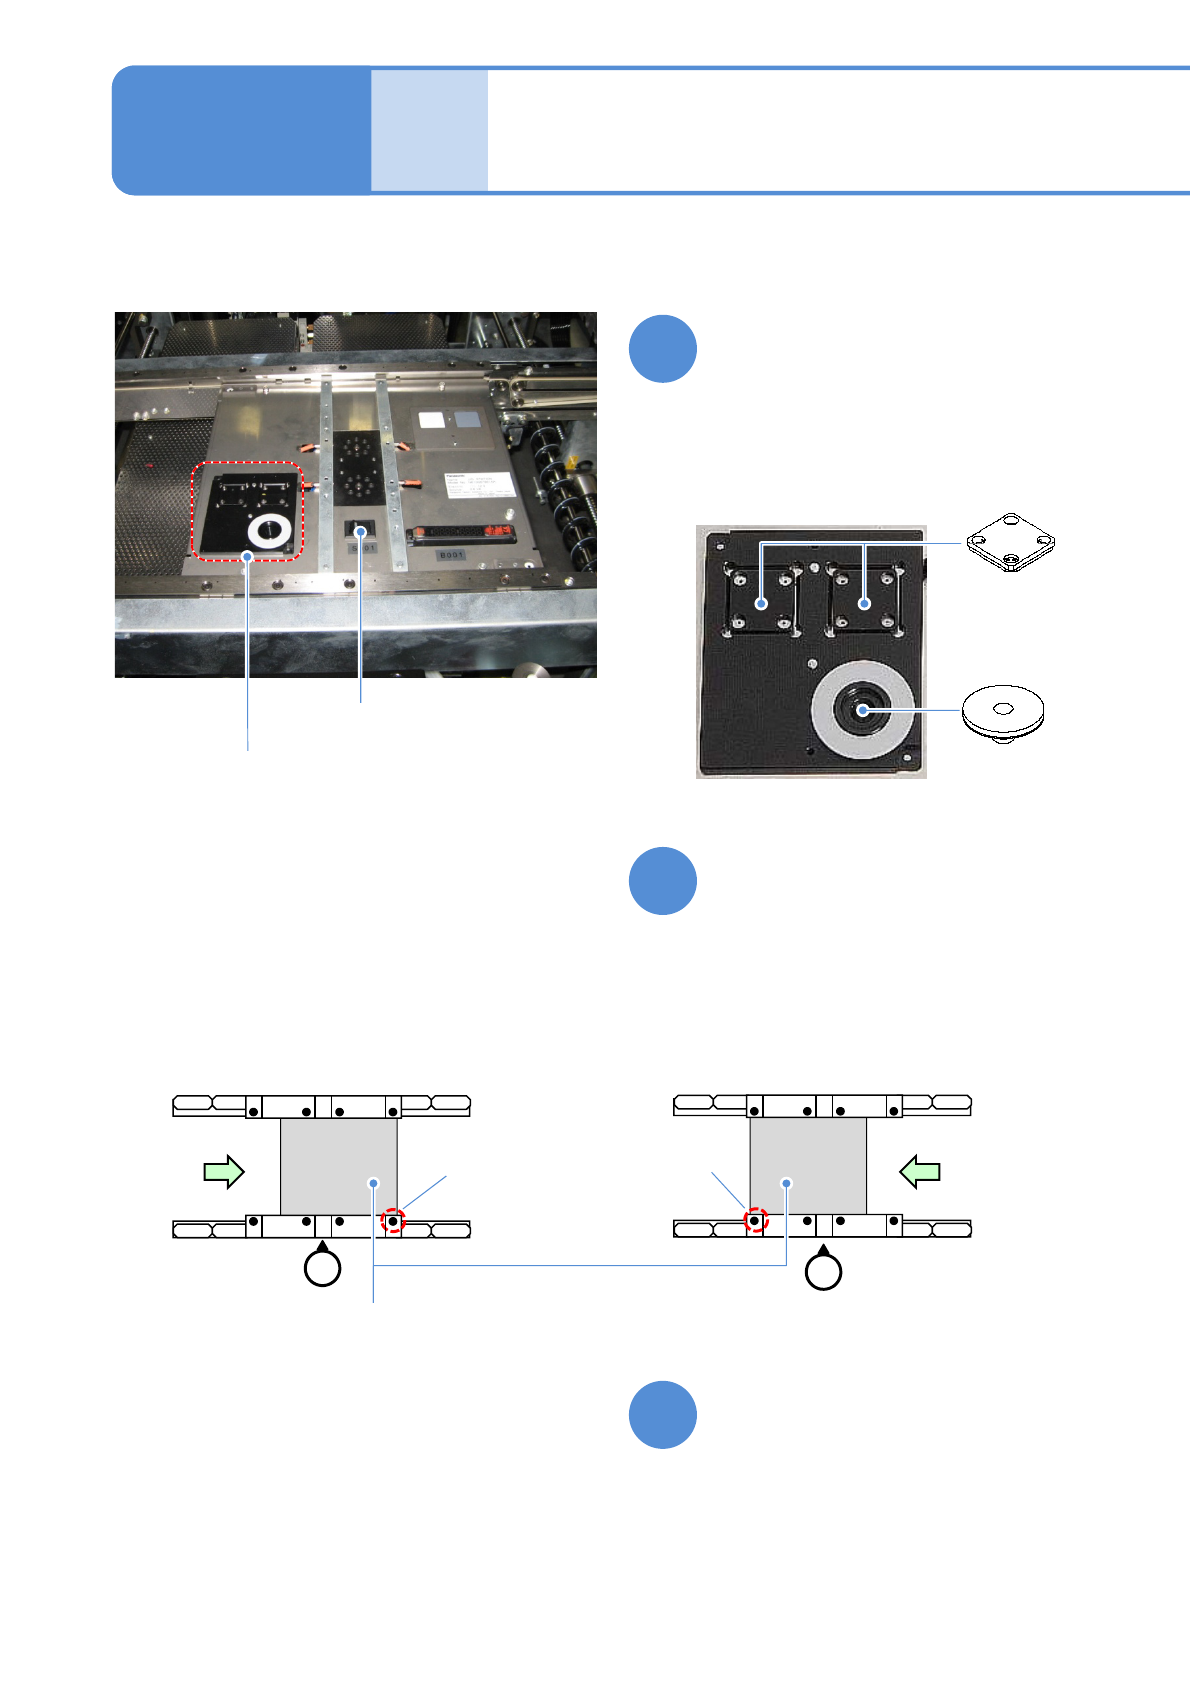
Set jig components and the
light luminosity jig to the jig
station
●Each of the two has no particular
orientation by itself.
Power supply
switch
Jig storage
unit
●Jig station
Jig station 2
Maintenance
13-10
Light
luminosity jig
Jig components
●Jig component, light and luminosity jig
storage unit.
●Check that the LED lamp is
illuminated.
Turn ON the power of the jig
station
Place the jig station on the
transfer conveyor
●Align the end face of the jig station
with the reference mark on upper
surface of the front rail.
●Make sure to place it in the right
direction.
8
9
10
●Left-to-right flow
Reference
mark
(φ1 hole)
Reference
mark
(φ1 hole)
●Right-to-left flow
Jig station
NPM-W2 EJM7DE-MB-13M-00
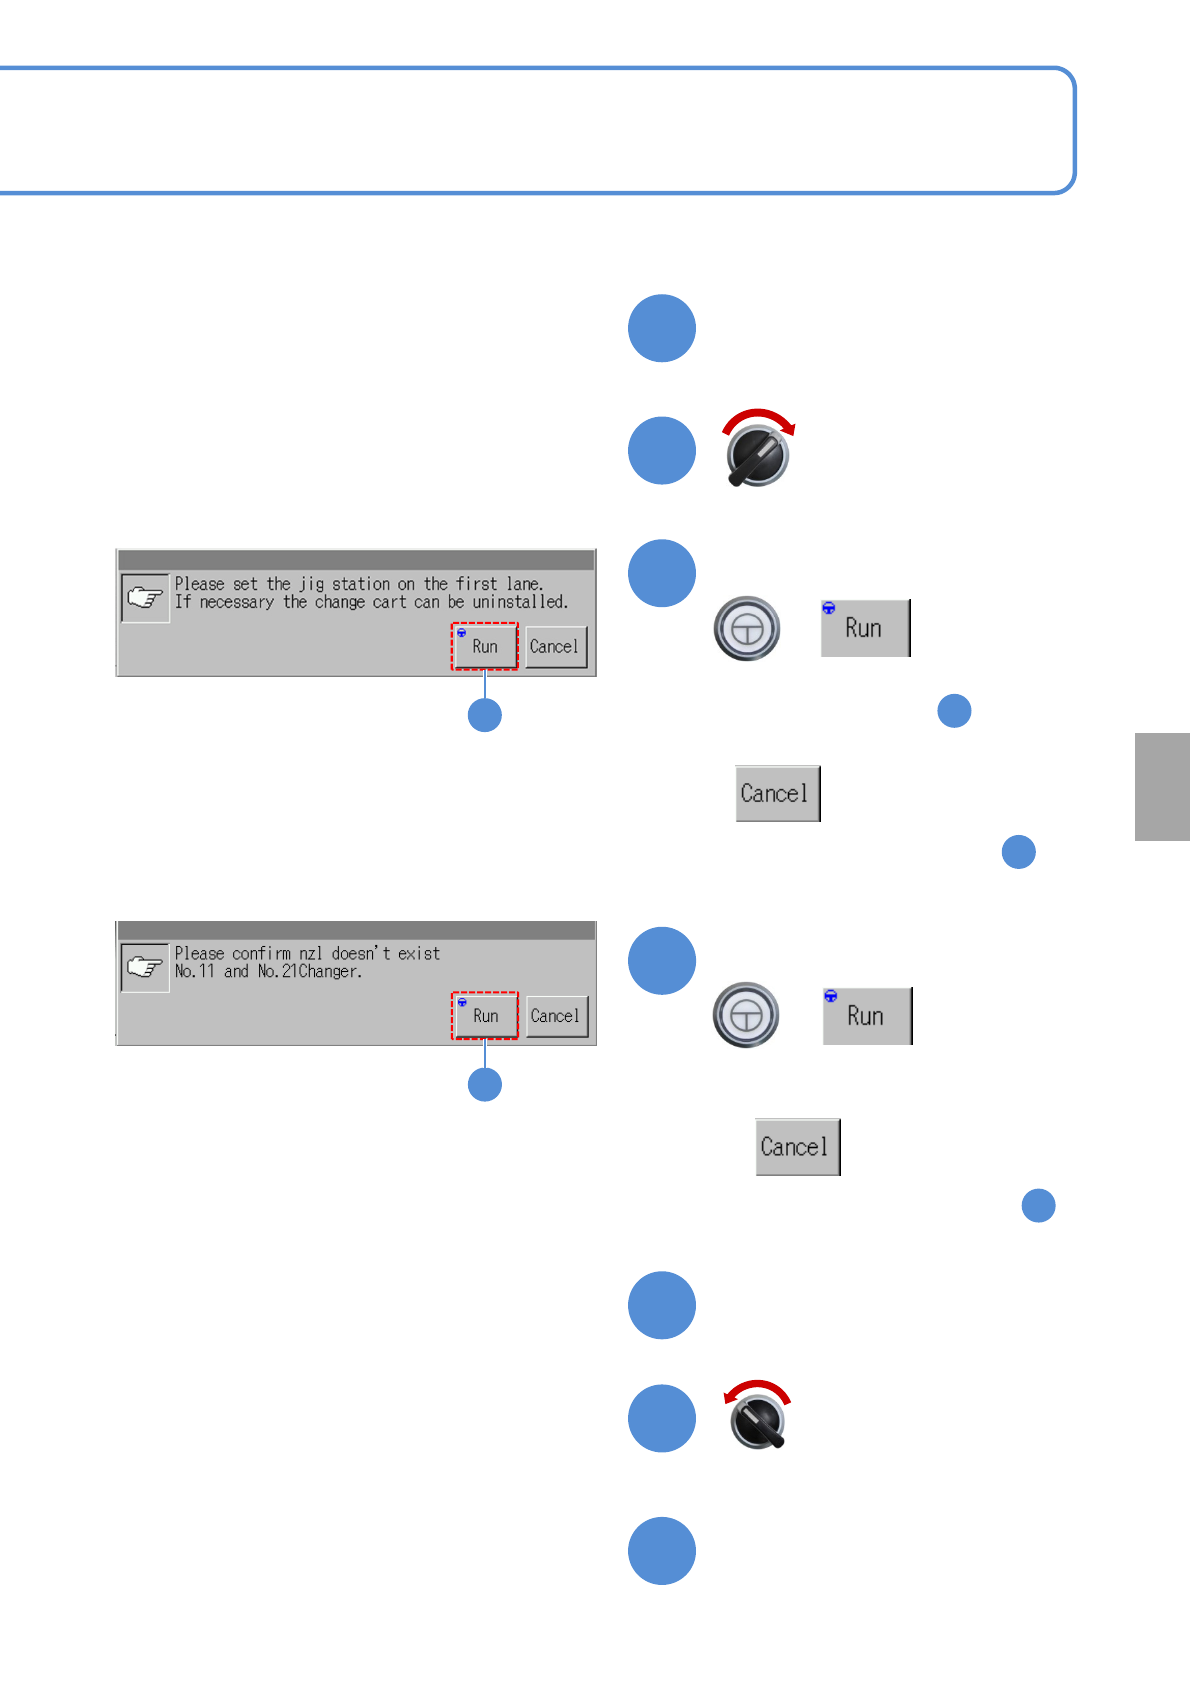
Close the safety cover
+
Confirm the message
■To cancel
(The screen remains as it is in )
13-10-4
Servo switch ON
Calibration
Open the safety cover
Prepare to install nozzles
Servo switch OFF
11
12
13
16
17
15
2
13
14
14
+
Confirm the message
■To cancel
(The screen remains as it is in )
2
(The head moves to the work position)
■For the dispensing head/2D inspection head,
・Perform after the step .
22