N7201A617E00_0317.pdf - 第419页
NPM-W 2 EJM7DE-MB-13 M-00 Open the safety cover 9 8 13 10 11 Place the multi-recognition camera jig to the predetermined head 13-1 1 -2 Confirm the message ■ When you do not retract (The screen remains as it is in ) 1 6 …
NPM-W2 EJM7DE-MB-13M-00
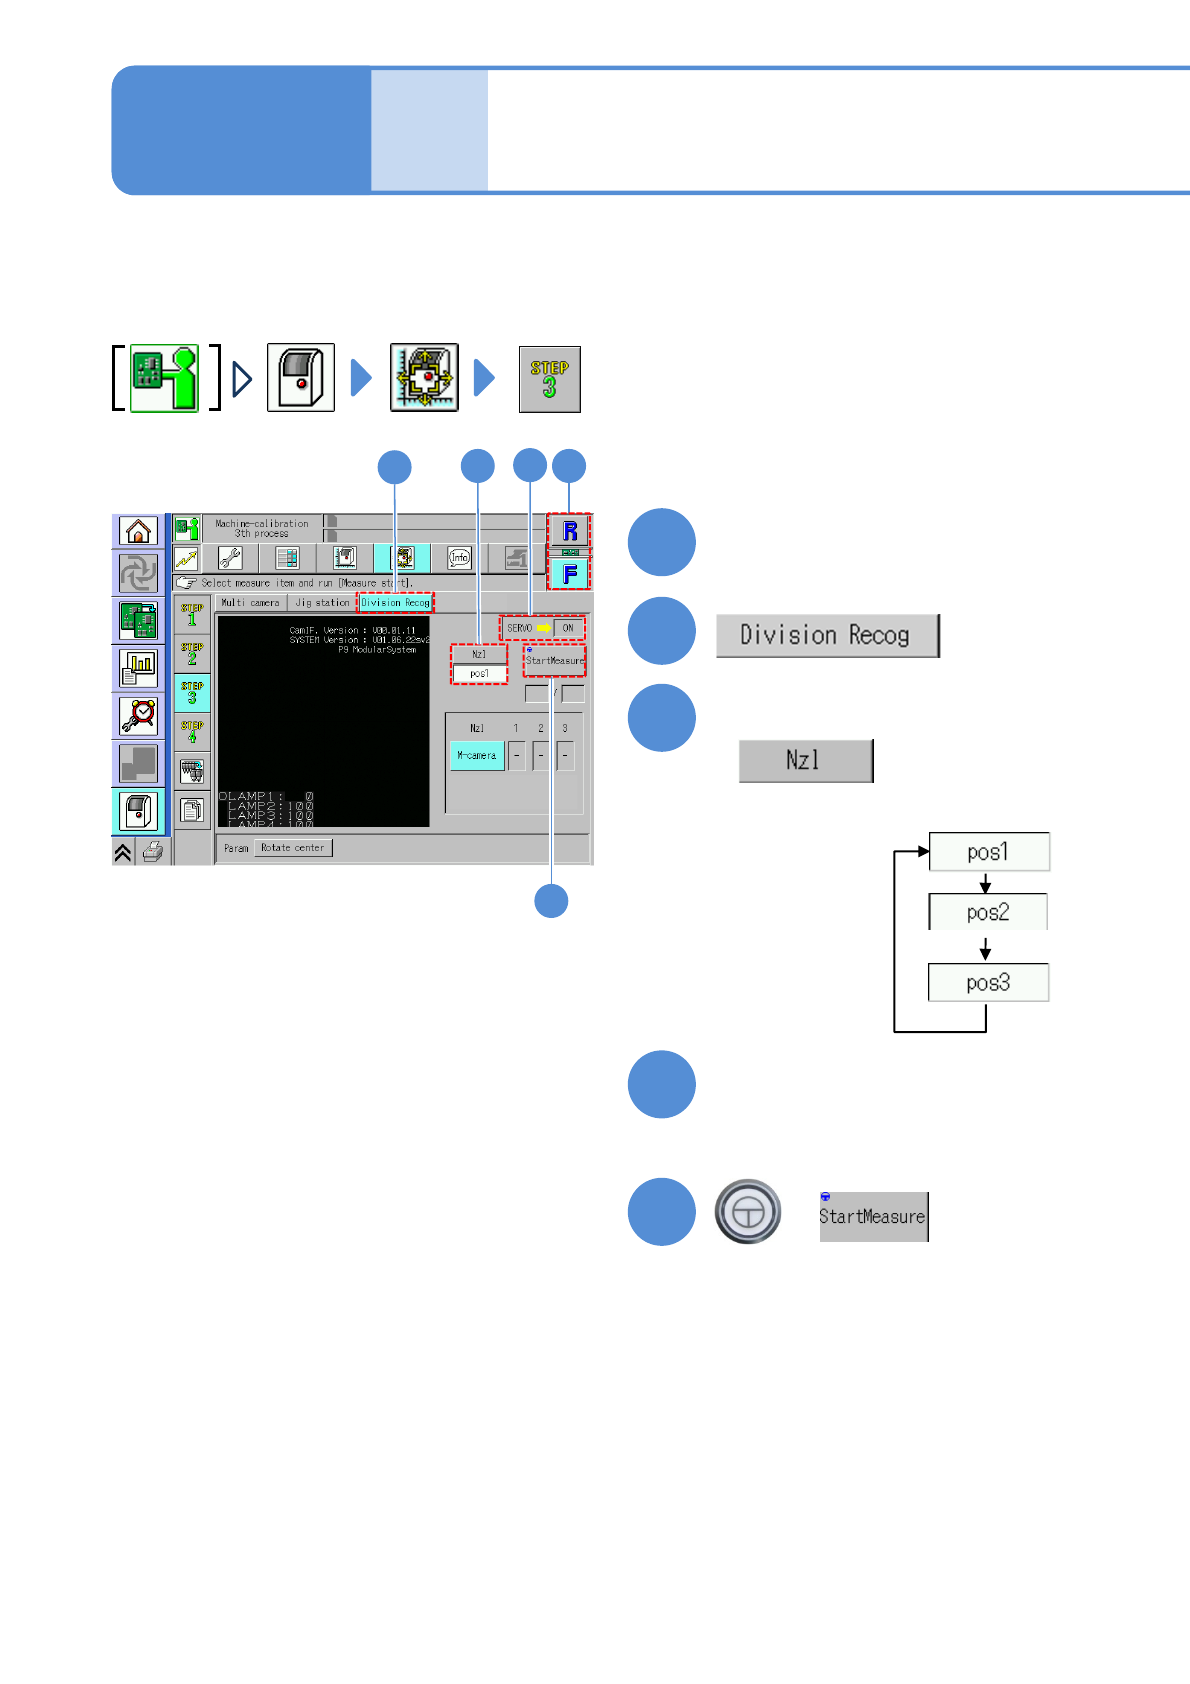
Split recognition (option) 1
This is used when the component to be recognized is larger than the standard one. The image is split and
recognized, and the correction value is calculated and PCB is mounted. (for 3-nozzle head only)
●QFP, connector X-direction: to 145.2 mm, Y-direction: 45 to 80 mm
●Components other than the above, X-direction: to 145.2 mm, Y-direction: 45 to 90 mm
1
13-11-1
Maintenance
13-11
2
Select a table
3
Select a nozzle
Select a nozzle to measure.
4
Confirm that the servo switch
is ON
(If OFF, change to ON)
5
+
(Select 3-nozzle head only)
1
2
3
4
5
NPM-W2 EJM7DE-MB-13M-00
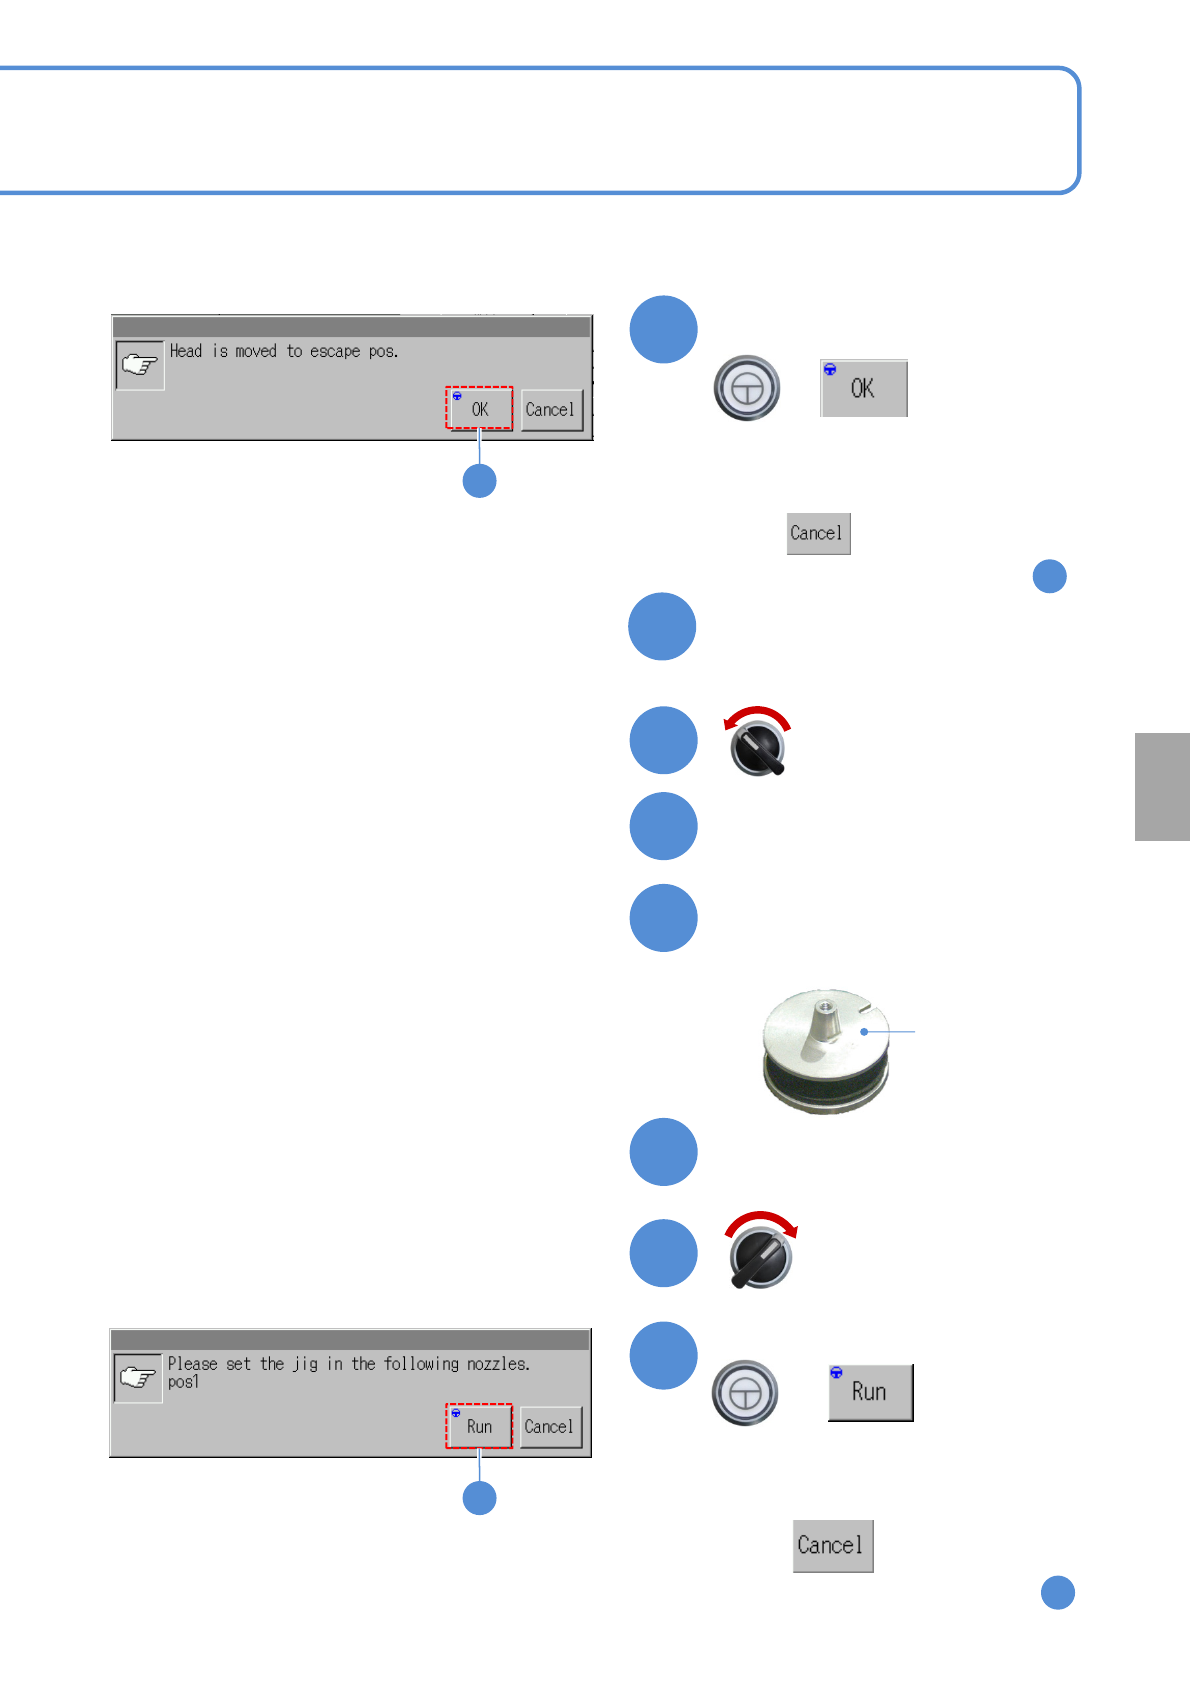
Open the safety cover
9
8
13
10
11
Place the multi-recognition
camera jig to the
predetermined head
13-11-2
Confirm the message
■When you do not retract
(The screen remains as it is in )
1
6
(The head moves to the retraction
position of the feeder cart side
6
+
12
Close the safety cover
13
multi-recognition
camera jig
(for 3-nozzle
head)
Confirm the message and
prepare for installing the multi-
recognition camera jig
■When you do not install the multi-
recognition camera jig
(The screen remains as it is in )
1
7
(The head performs recognition operation)
+
Confirm the message
Calibration
Servo switch OFF
Servo switch ON
NPM-W2 EJM7DE-MB-13M-00
Split recognition (option) 2
13-11-3
Maintenance
13-11
14
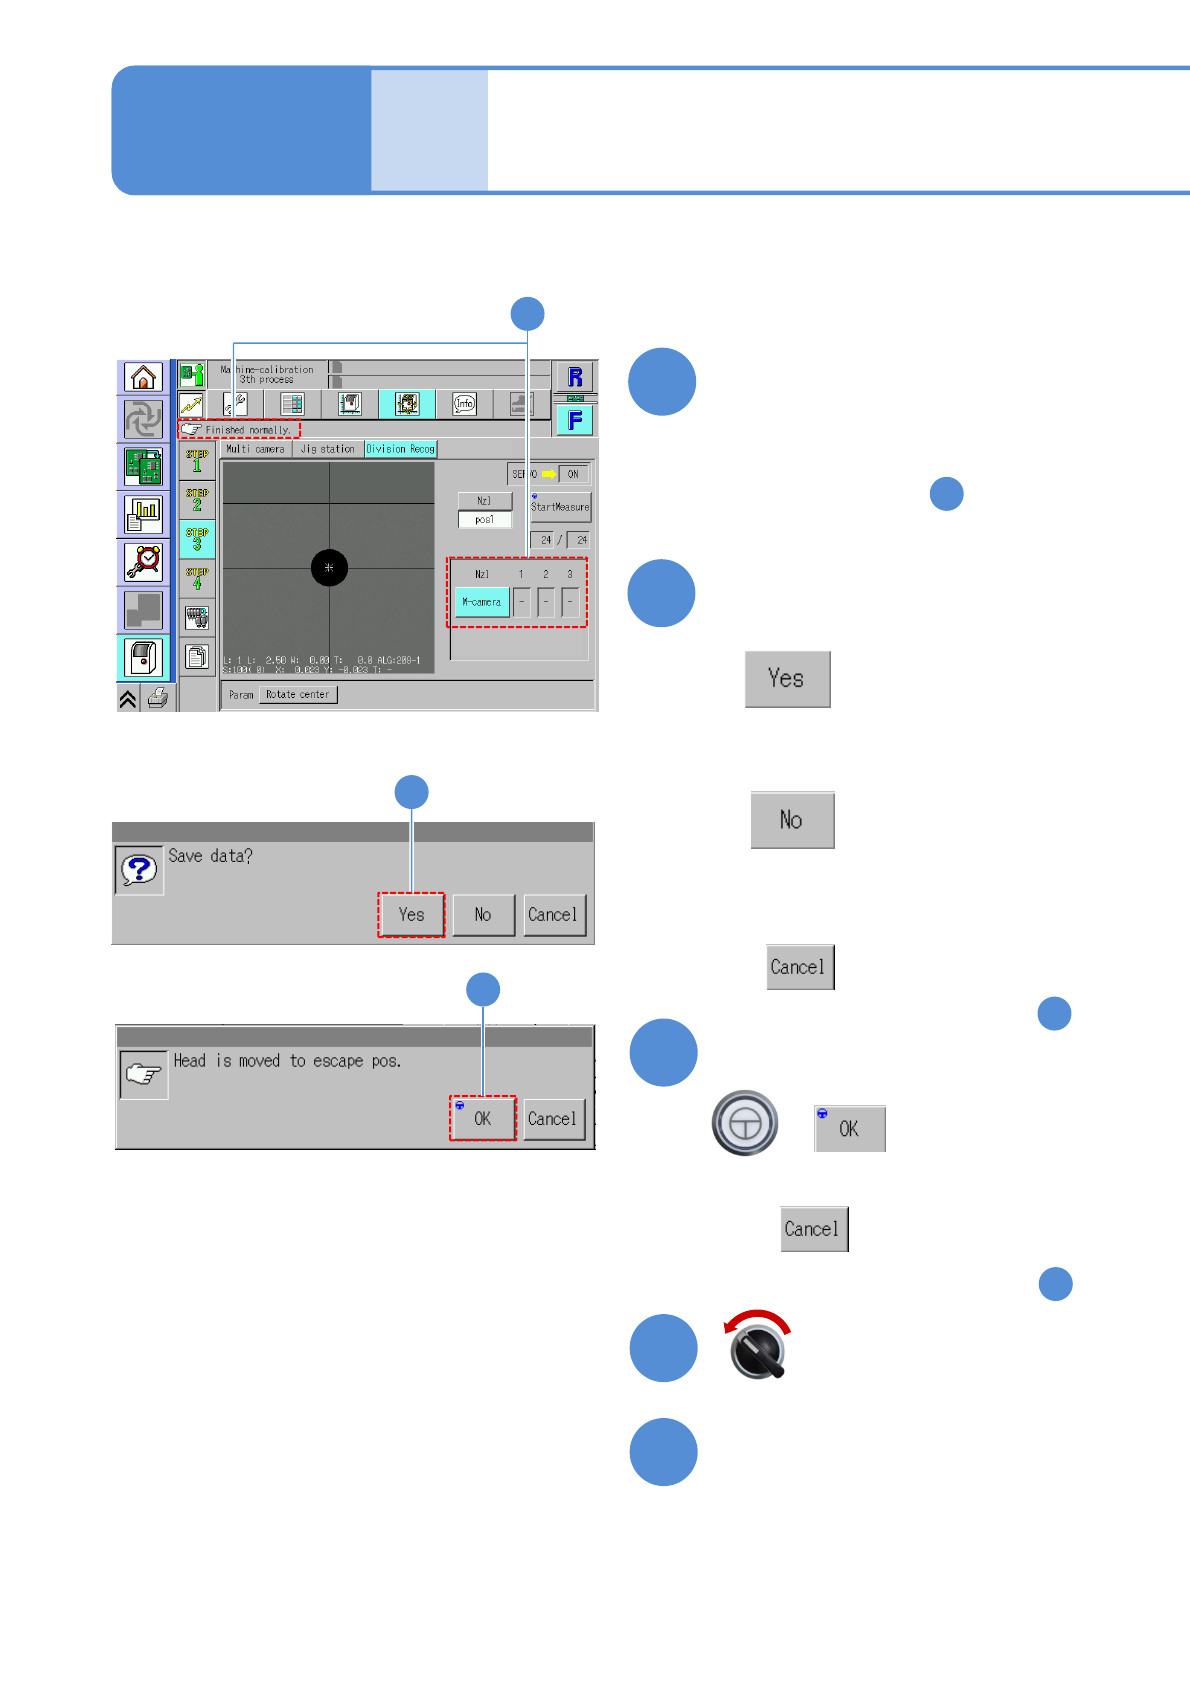
Confirm the measurement result
OK: When the result is successfully
completed
NG: If measurement results in error,
(perform from the step )
- :Unmeasured
5
15
Pressing other menu screen
appears confirmation message
of data save
(The data obtained by calibration is
cleared
(The data obtained by calibration is
saved)
■When you do not save
■To cancel
(The screen remains as it is in )
14
15
+
16
Confirm the message
■When you do not retract
(The screen remains as it is in )
14
16
Open the safety cover
18
17
Servo switch OFF
14