N7201A617E00_0317.pdf - 第432页
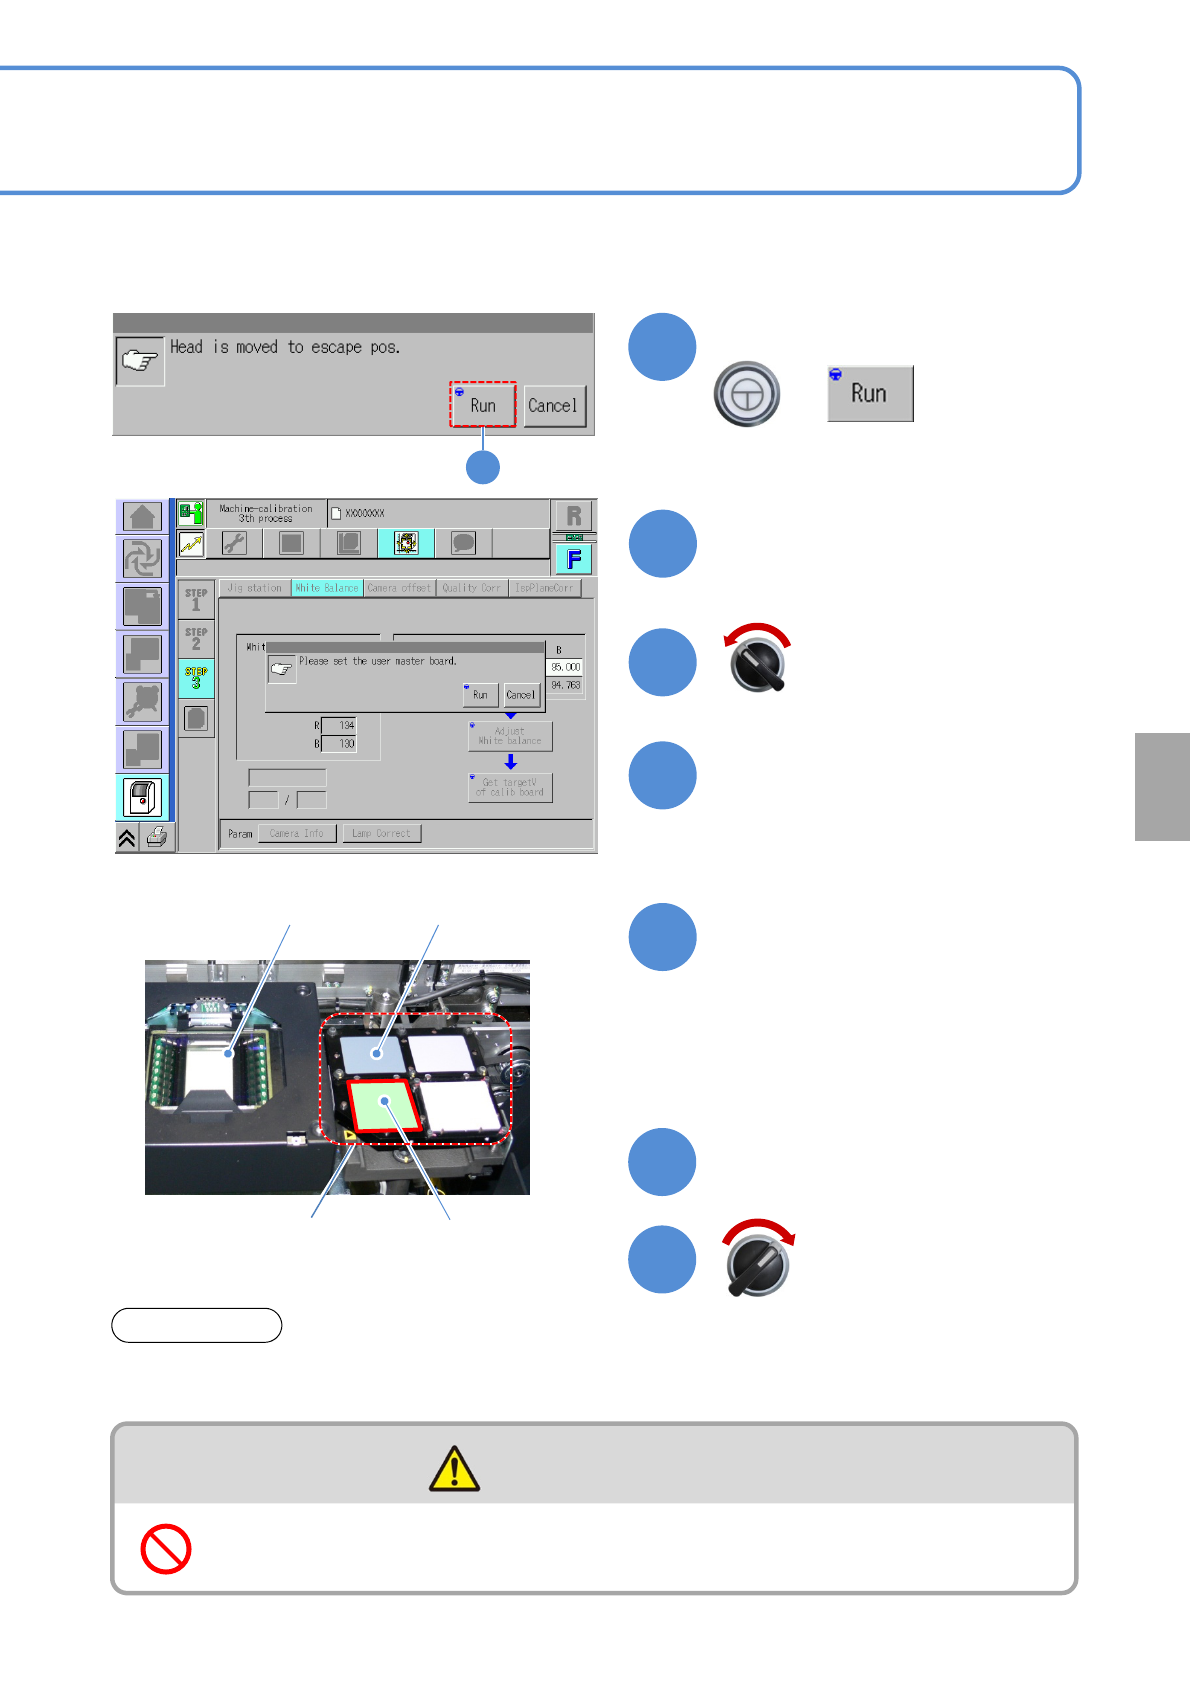
NPM-W 2 EJM7DE-MB-13M-00 13-14 -3 Maintenance 13-14 12 12 Confirm the message + 13 13 + (The head moves to the retraction position.) 14 Open the safety cover 15 Remove the user master board from the left front of the cal…
NPM-W2 EJM7DE-MB-13M-00
5
5
Confirm the message
+
(The head moves to the retraction
position.)
Open the safety cover
User master plate
Close the safety cover
13-14-2
Calibration plateMulti-recognition camera
Calibration jig
8
7
9
11
10
6
Confirm the message and
prepare for installing the user
master plate
Place the user master plate to
the right side of the calibration
jig
CAUTION
Do not climb on equipment, peripheral devices and moving parts
●Calibration jig, Multi-recognition camera
Do not touch the user master plate and calibration plate directly with your bare hands. Doing so they may
get dirt.
ATTENTION
Servo switch ON
Servo switch OFF
Calibration
●Do not touch the surface of the user
master plate with your bare hands.
●Before setting up the user master
plate, move it to the center of the
calibration jig.
NPM-W2 EJM7DE-MB-13M-00
13-14-3
Maintenance
13-14
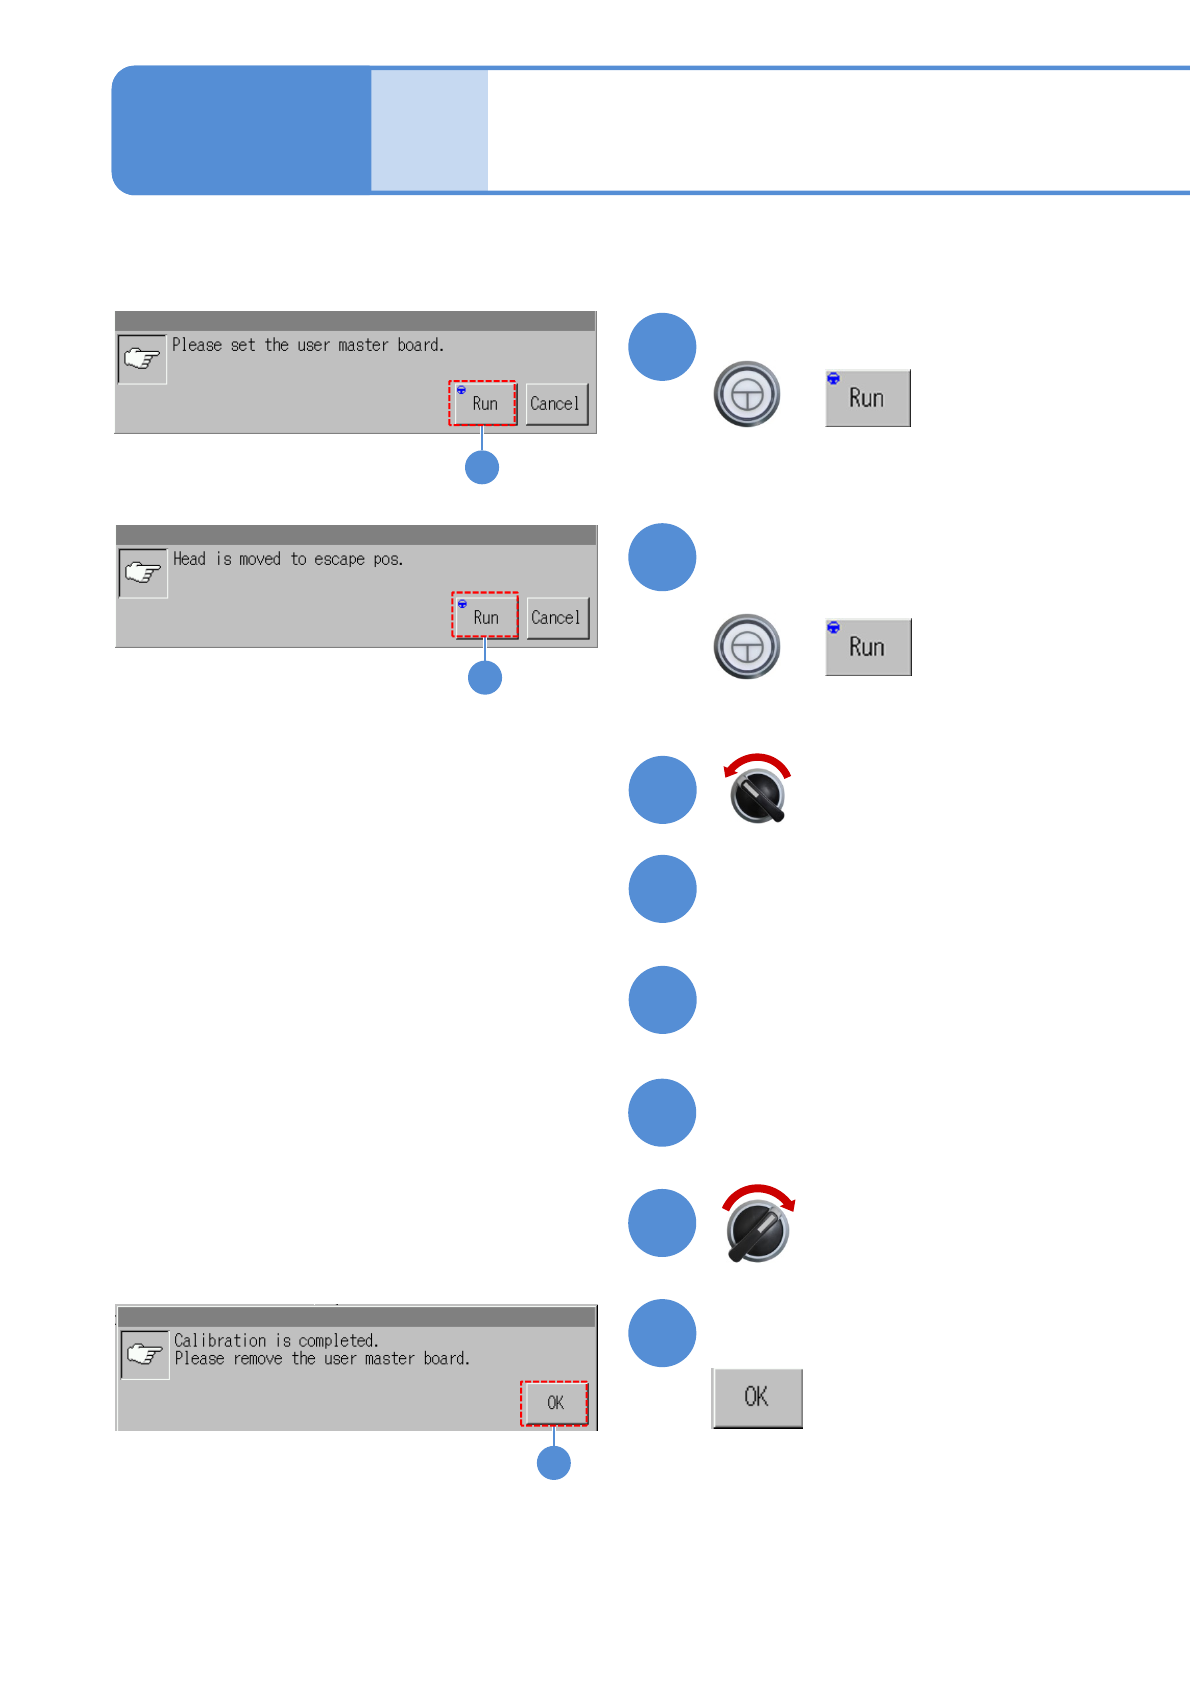
12
12
Confirm the message
+
13
13
+
(The head moves to the retraction
position.)
14
Open the safety cover
15
Remove the user master board
from the left front of the
calibration jig
16
18
17
Close the safety cover
19
19
Confirm the message
White balance 2
(2D inspection head)
Servo switch ON
Servo switch OFF
●The white balance adjustment
processing is performed.
Upon completion of the white
balance adjustment,
Confirm the message
NPM-W2 EJM7DE-MB-13M-00
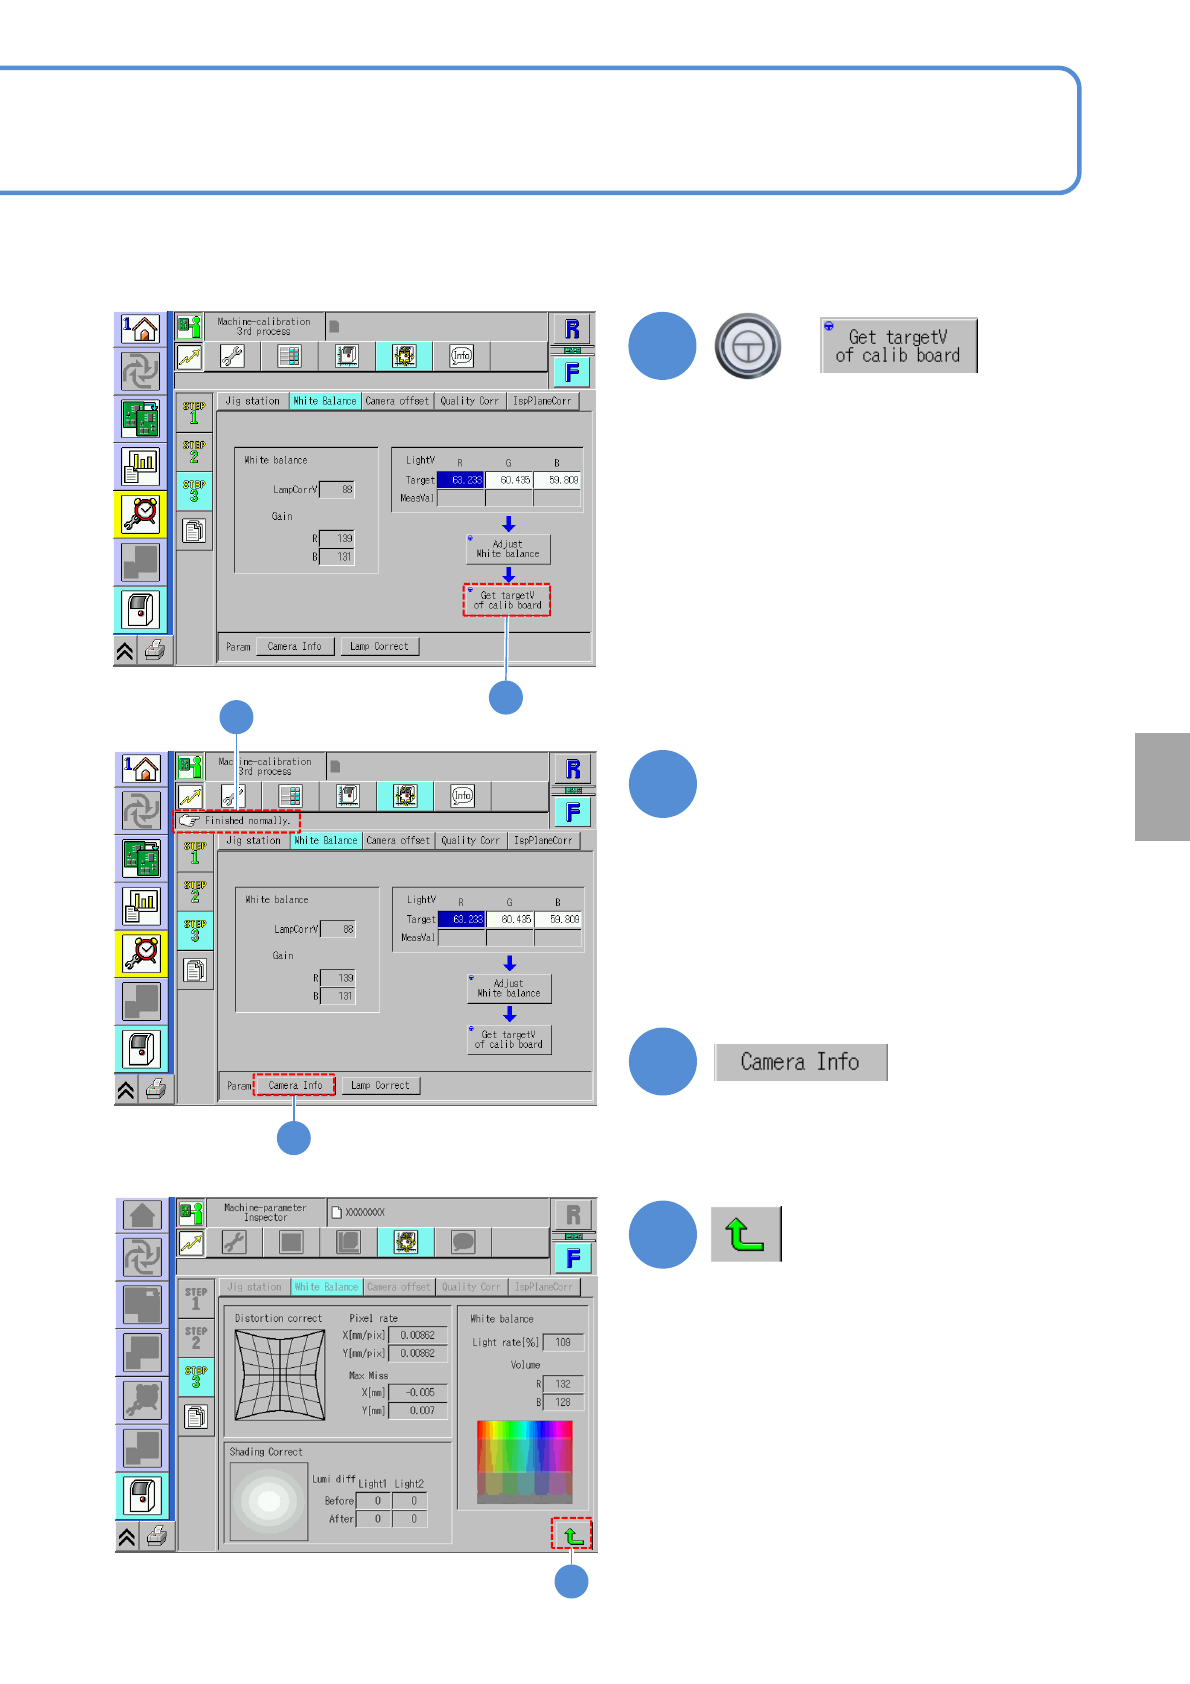
20
+
20
22
21
Confirm that it has been
successfully completed
13-14-4
(The inspection head activates and the
measurement value of the calibration
jig is entered)
(The adjusted white balance values are
displayed.)
23
23
Calibration
22
21
● If an error occurs, clean the user
master plate with a blower brush.
Then set the user master plate in
manner of step ⑨ in P.13-14-2.
●If you fail to correct the error with the
above method, contact us.