N7201A617E00_0317.pdf - 第518页
NPM-W 2 EJM7DE-MB-14 M-00 14-8 -1 Ho w to handle the tr ay f e eder (option) 1 Maintenance 14-8 Attachment procedure 3 2 7 Connect the power cable, communication cable and air piping Attach the tray feeder Air piping Com…
NPM-W2 EJM7DE-MB-14M-00
14-7-2
PCB transfer condition in each setting
Installation
PCB flow
Unloading PCB
Pre process
machine other
than NPM-W2
PCB flow
Unloading PCB
Pre process
machine other
than NPM-W2
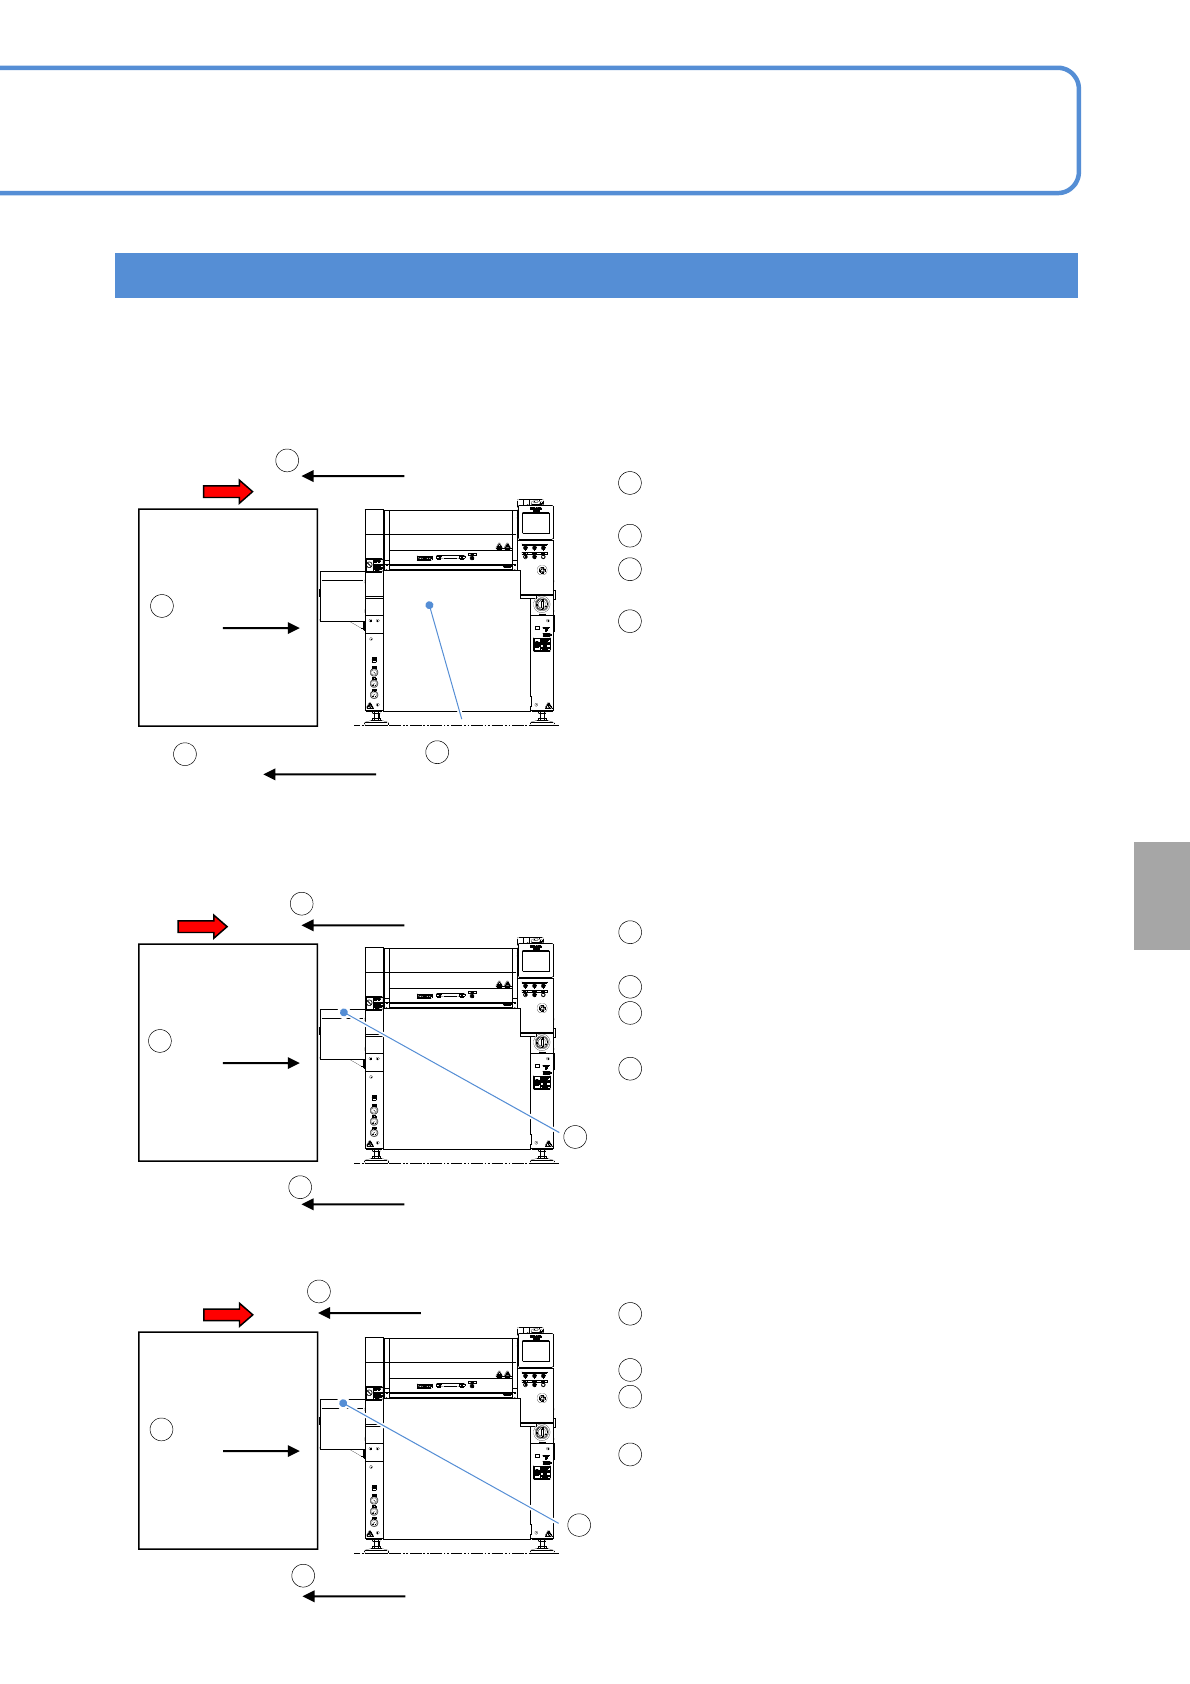
■Normal setting (default): [Pre process other company M/C joint] is turned [OFF], and
[Pre process other company M/C joint2], [OFF]
PCB flow
Unloading PCB
Pre process
machine other
than NPM-W2
NPM-W2
■Option setting: [Pre process other company
M/C joint] is turned [ON]
■Option setting: [Pre process other company M/C joint2] is turned [ON]
PCB detection sensor
Placement position
[ON]
PCB request signal [OFF]
After unloading a PCB, NPM-W2’s PCB request
signal is turned [ON].
PCB is unloaded from the pre process machine.
NPM-W2’s PCB detection sensor (placement
position) is turned [ON].
NPM-W2’s PCB request signal is turned [OFF].
PCB request signal [ON]
* PCBs are normally unloaded as the PCB request
signal switches from the [OFF] state the [ON]
state. So it cannot cause double PCB transport
and others to malfunction because it remains set
as default.
However, if the pre process machine does not
support our machine specifications, it may
continue unloading PCBs, with the PCB request
signal turned [ON]. In that case, NPM-W2’s PCB
transfer settings need to be changed.
PCB request signal [ON]
PCB request signal [OFF]
After unloading a PCB, NPM-W2’s PCB request
signal is turned [ON].
PCB is unloaded from the pre process machine.
The extension conveyor’s PCB detection sensor
(pre process side) is turned [ON].
NPM-W2’s PCB request signal is turned [OFF].
PCB request signal [OFF]
After unloading a PCB, NPM-W2’s PCB request
signal is turned [ON].
PCB is unloaded from the upstream machine.
The extension conveyor’s PCB detection sensor
(pre process side) switches from [ON] [OFF].
NPM-W2’s PCB request signal is turned [OFF].
1
2
3
4
1
2
3
4
1
2
3
4
1
2
4
3
1
2
4
PCB request signal [ON]
PCB detection sensor in
Pre process switches from
[ON] to [OFF]
(extension conveyor)
1
3
PCB detection sensor
Pre process [ON]
(extension conveyor)
3
2
4
●[Pre process other company M/C joint ] and [Pre process other company M/C joint2] cannot be turned [ON]
at the same time.
NPM-W2
NPM-W2

NPM-W2 EJM7DE-MB-14M-00
14-8-1
How to handle the tray
feeder
(option) 1
Maintenance
14-8
Attachment procedure
3
2
7
Connect the power cable, communication
cable and air piping
Attach the tray
feeder
Air piping
Communication cable
(Rear side)
Power cable
Tool used: Two spanner (30 mm), Allen wrench (3 mm)
●Be careful not to bump it
against the main unit.
6
Remove the
cover
●Screws (3 pcs)
8
Attach the
cover
●Screws (3 pcs)
Describes how to handle the single and the twin tray feeders. You can handle the screen at the front/rear.
The tray feeder can be attached or detached at the rear.
(Rear side)
9
(Rear side)
4
1
Turn OFF the
power and lock
the machine
OFF
10
Unlock the
machine and
ON
NPM-W2 EJM7DE-MB-14M-00
14-8-2
1
2
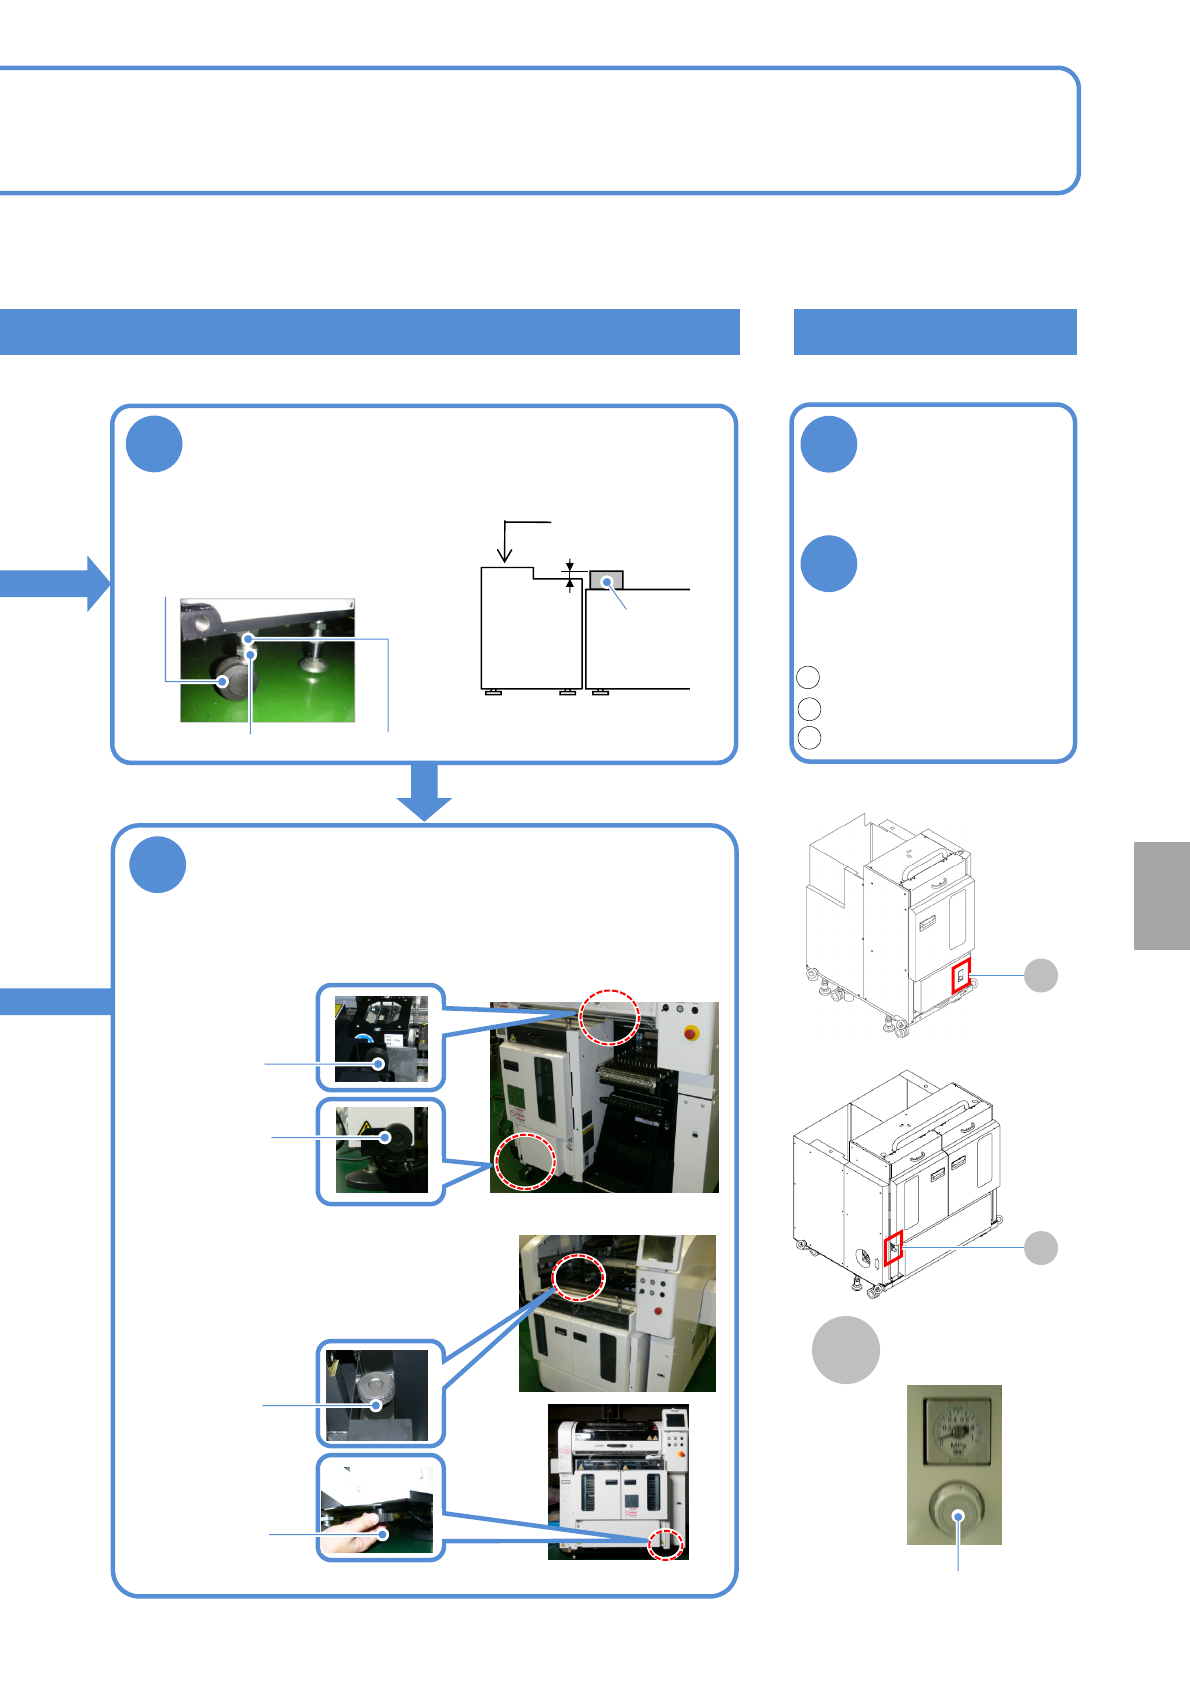
Checking the air pressure
Check the air
pressure
●Air pressure:
0.30 to 0.35 MPa
If it is outside the
specified range,
adjust the air
pressure by
turning the
regulator knob
Unlock.(pull it forward)
Adjust the pressure.(rotate)
Lock.(push it rearward)
4
Adjust the height
1. Loosen the lock nuts.
2. Adjust the height using the
adjustment nuts.
3. Tighten the lock nuts.
19 mm 2 mm
Tray feeder
Mult-
recognition
camera
Level gauge
●Adjust the height/level of
the feeder as shown in the
figure below
Regulator
Lock nut
Adjustment nut
1
2
3
■Single tray feeder
■Twin tray feeder
A
A
A
Air pressure gauge
■For the twin tray feeder
●The bubble should stay
within 1 division (0.1 mm/m)
●Casters: 4 pcs
5
Secure the tray feeder with joint screws
●Secure the tray feeder to the machine with joint screws (A, B).
■For the single tray feeder
Joint screw B
Joint screw A
Joint screw B
Joint screw A
Installation