N7201A617E00_0317.pdf - 第524页
NPM-W 2 EJM7DE-MB-14M-00 14-9 -4 Maintenance 14-9 Connecting peripheral equipment Descr ibes how to connect the p eripheral equipment. 1 Connect the display Remove the connector c ap of the MO NITOR connector o n the ins…

NPM-W2 EJM7DE-MB-14M-00
■Mouse
●Applicable OS : Windows XP
●Connection interface : USB 1.1 / 2.0
●Connecting cable : Certified according to the USB standards of the mouse to use
5 m or less in length
*The maximum current derived from the USB connector on the inspection box is 500 mA (DC+5V).
■Network
●LAN type : IEEE802.3ab(1000BASE-T)
Use connecting cables and network equipment that comply with the above
standards.
14-9-3
Installation

NPM-W2 EJM7DE-MB-14M-00
14-9-4
Maintenance
14-9
Connecting peripheral equipment
Describes how to connect the peripheral equipment.
1
Connect the display
Remove the connector cap of the MONITOR connector on
the inspection box, and connect the monitor cable.
Tighten the two locking screws of the cable connector to
secure it.
MONITOR connector
3
Connect the network
Open the ETHERNET connector cover on the inspection
box, and connect an Ethernet cable to the RJ-45 jack.
Do not connect the inspection box to a network other than
the one LWS is connected to.
ETHERNET connector
2D inspection head 3
(option)
NPM-W2 EJM7DE-MB-14M-00
14-9-5
2
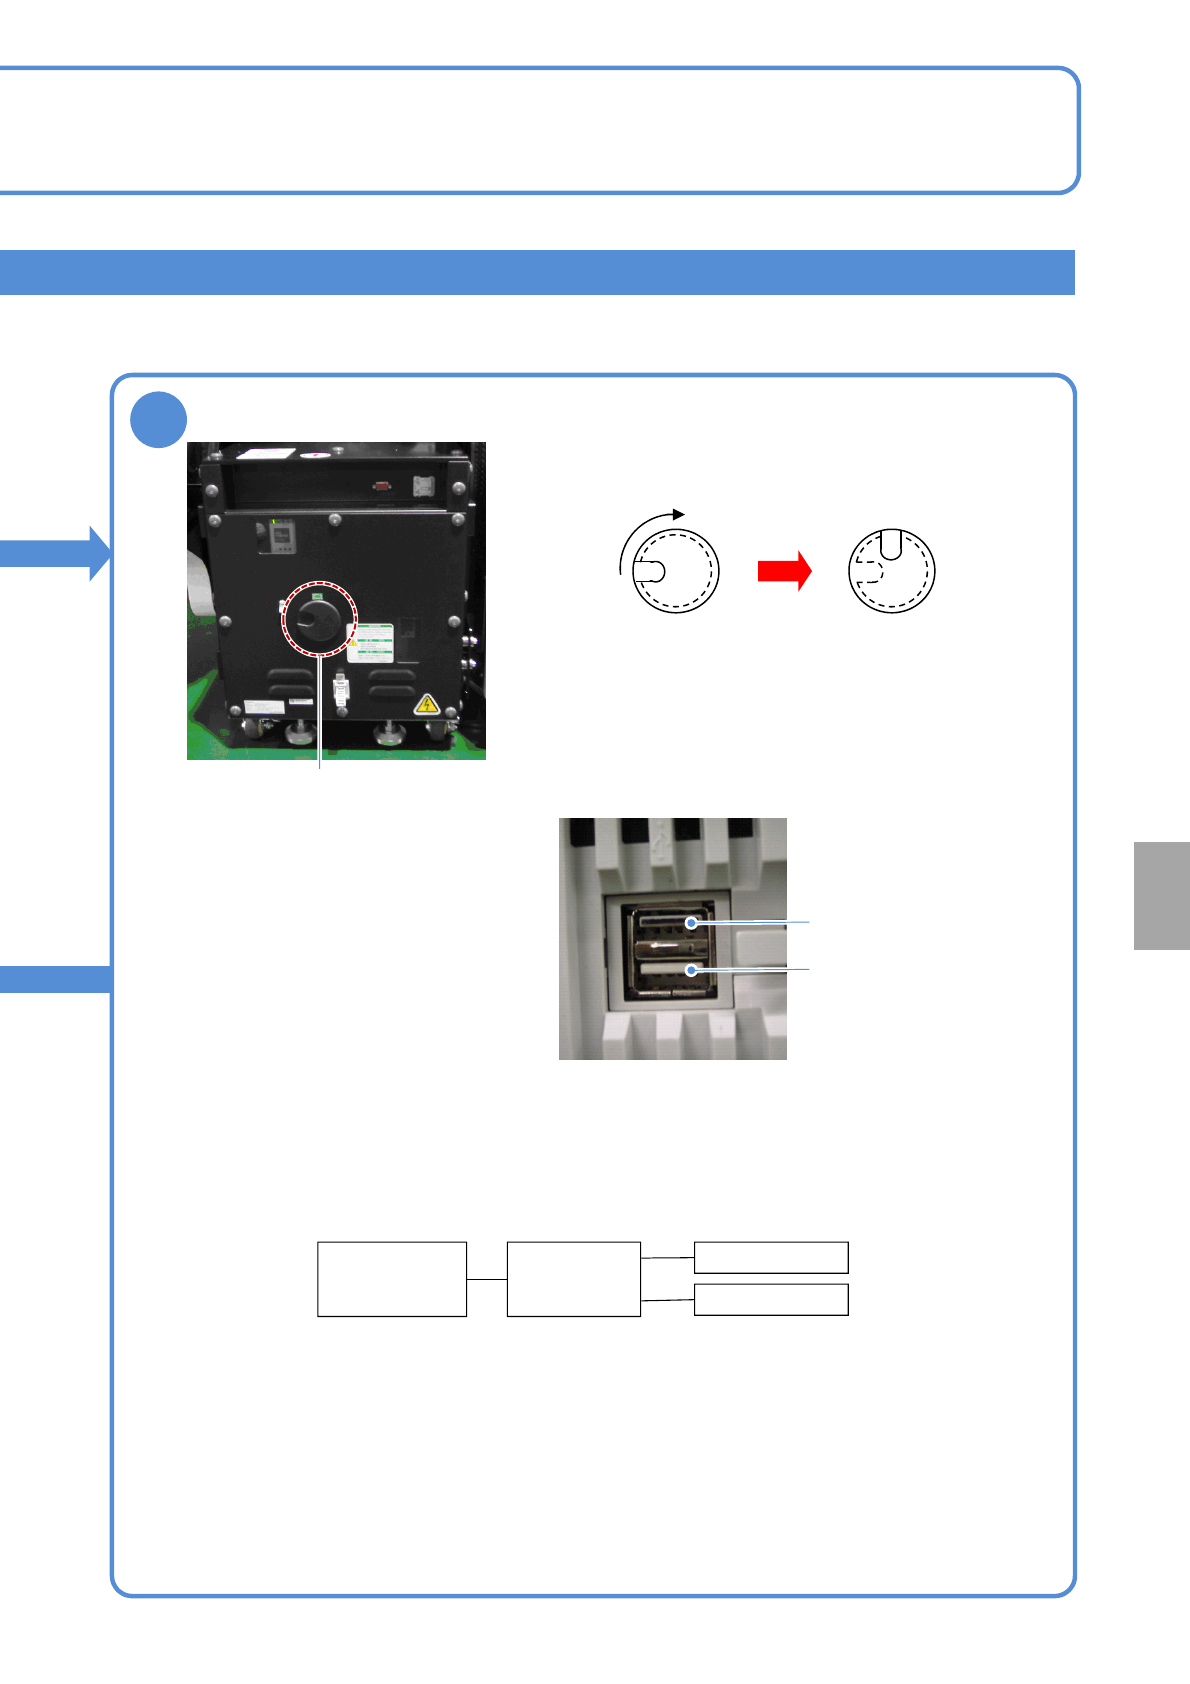
Connect the keyboard and mouse
Turn the USB connector cap on the inspection box to the
right by 90 degrees to open the connector hole.
USB connection
Put your finger into the catch hole, and remove the cap.
Connect the USB cable connector to the USB connector of
the inspection box FA computer via the cap-removed
opening. Although there are two USB connectors arranged
one above the other, use the lower connector for connection.
The upper connector painted in black does not work.
After connecting the USB cable, put the cap back in such a
manner that the route of the cable and catch hole align.
*1) Self-powered USB HUB is recommended. In this case, power needs to be supplied to USB HUB
separately.
To use a bus-powered HUB, the total current consumed by the HUB, keyboard, and mouse needs to be
500 mA or lower.
Connection unavailable
Connect the USB cable
To connect both the keyboard and the mouse, USB HUB is required between the inspection box and the
keyboard / the mouse. USB HUB should be obtained separately.
Inspection
box
USB HUB
*1)
Keyboard
Mouse
When connecting both the keyboard and mouse
Installation