LmrXP142机械手册.pdf - 第132页
Adjusting the Air Pressure 1. Loosen the screws and open the cover. 2. Raise the regulator knob to unlock it. Adjust the air pressure to the correct value. Air pressure: 0.5 MPa 3. Push the knob down to lock it. 4. Close…
2. Connecting the Air
Point
Connect the air hose to the machine and adjust the pressure regulator to the correct value
(0.5 MPa).
Note: The hose is not supplied by Fuji.
Procedure
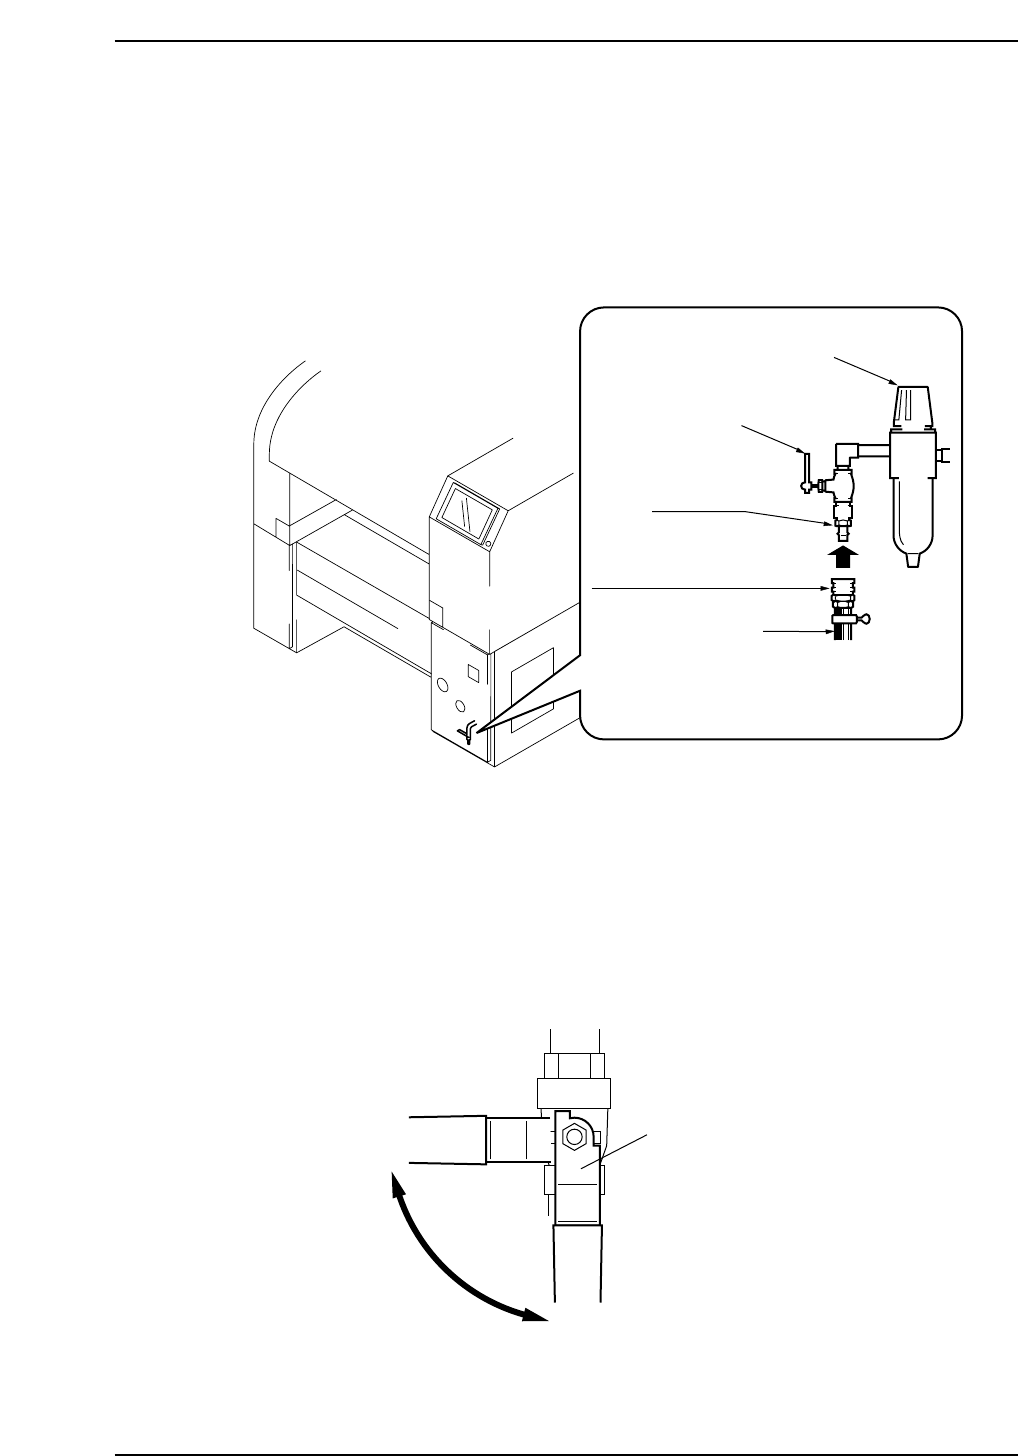
Connecting the Air Supply Hose
1. Close the air valve lever.
2. Connect the air supply hose.
3. Open the valve lever.
Valve lever
Open
Close
XP1MS202E
XP1MS201E
30SH socket (for 3/8" hose)
0.5 MPa
or more
Hose
30PM plug
Lever
Knob
Part 6 Chapter 2 Connecting the Air
Edition 3.0 6-2-1 XP-142E Mechanical Reference
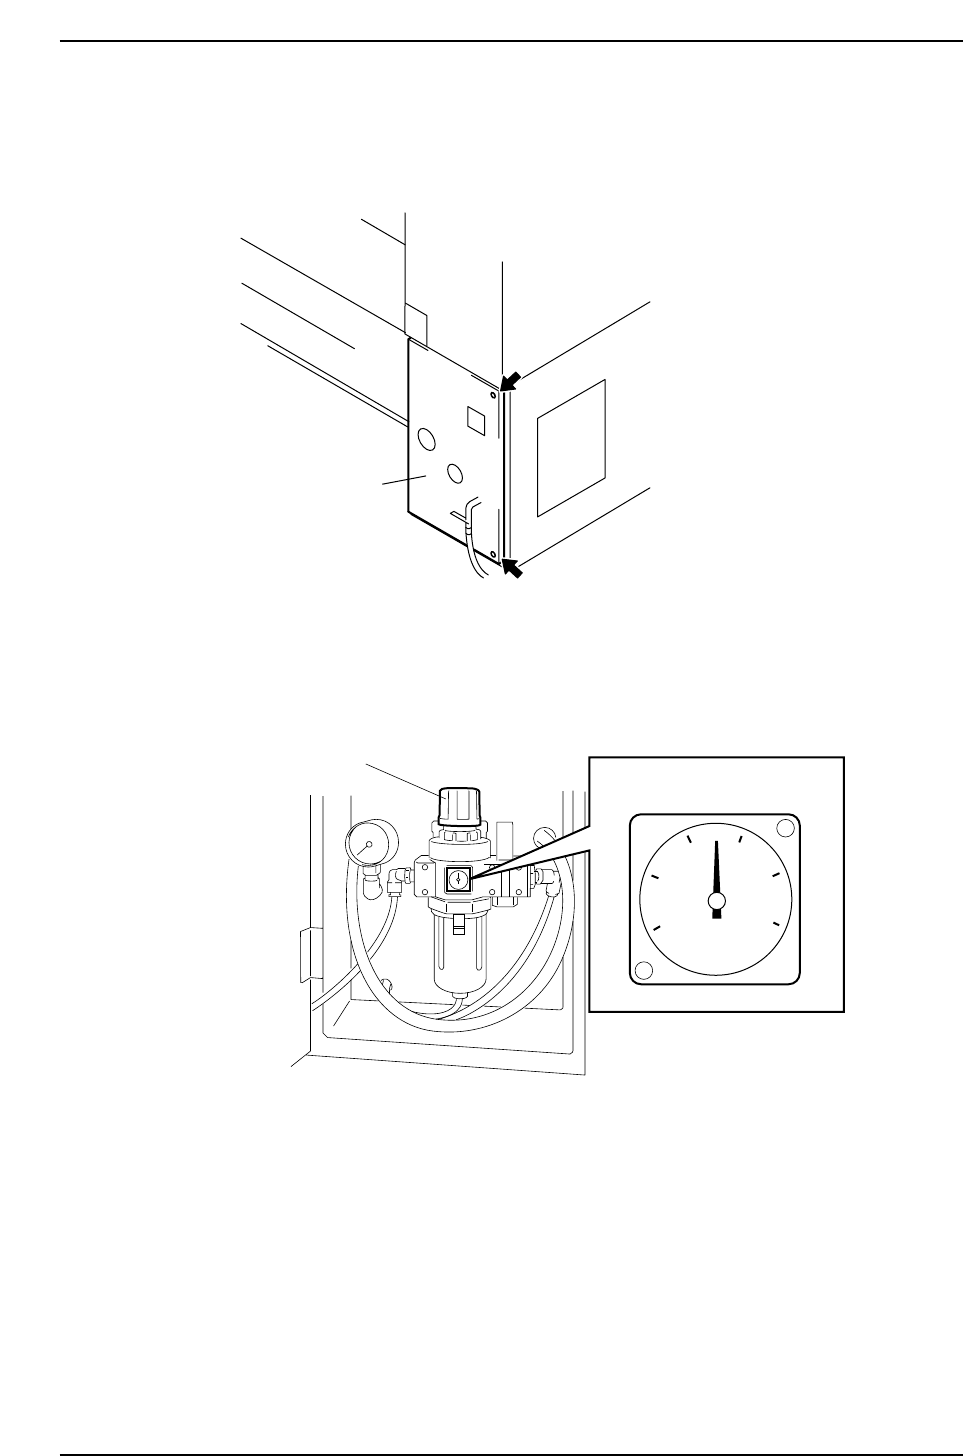
Adjusting the Air Pressure
1. Loosen the screws and open the cover.
2. Raise the regulator knob to unlock it.
Adjust the air pressure to the correct value.
Air pressure: 0.5 MPa
3. Push the knob down to lock it.
4. Close the cover.
XP1MS203E
Knob
Pressure gauge
XP1MC211E
Cover
Part 6 Chapter 2 Connecting the Air
Edition 3.0 6-2-2 XP-142E Mechanical Reference
Part 6 Chapter 3 Electrical Power Supply & Transformer Wiring
Edition 3.0 6-3-1 XP-142E Mechanical Reference
3. Electric Power Supply & Transformer Wiring
Point
Wire the transformer inside the machine so that its voltage matches the supplied voltage.
Power consumption is 4.0 kVA. Ensure that the power supply is equal to or greater than
4.0 kVA.
Procedure
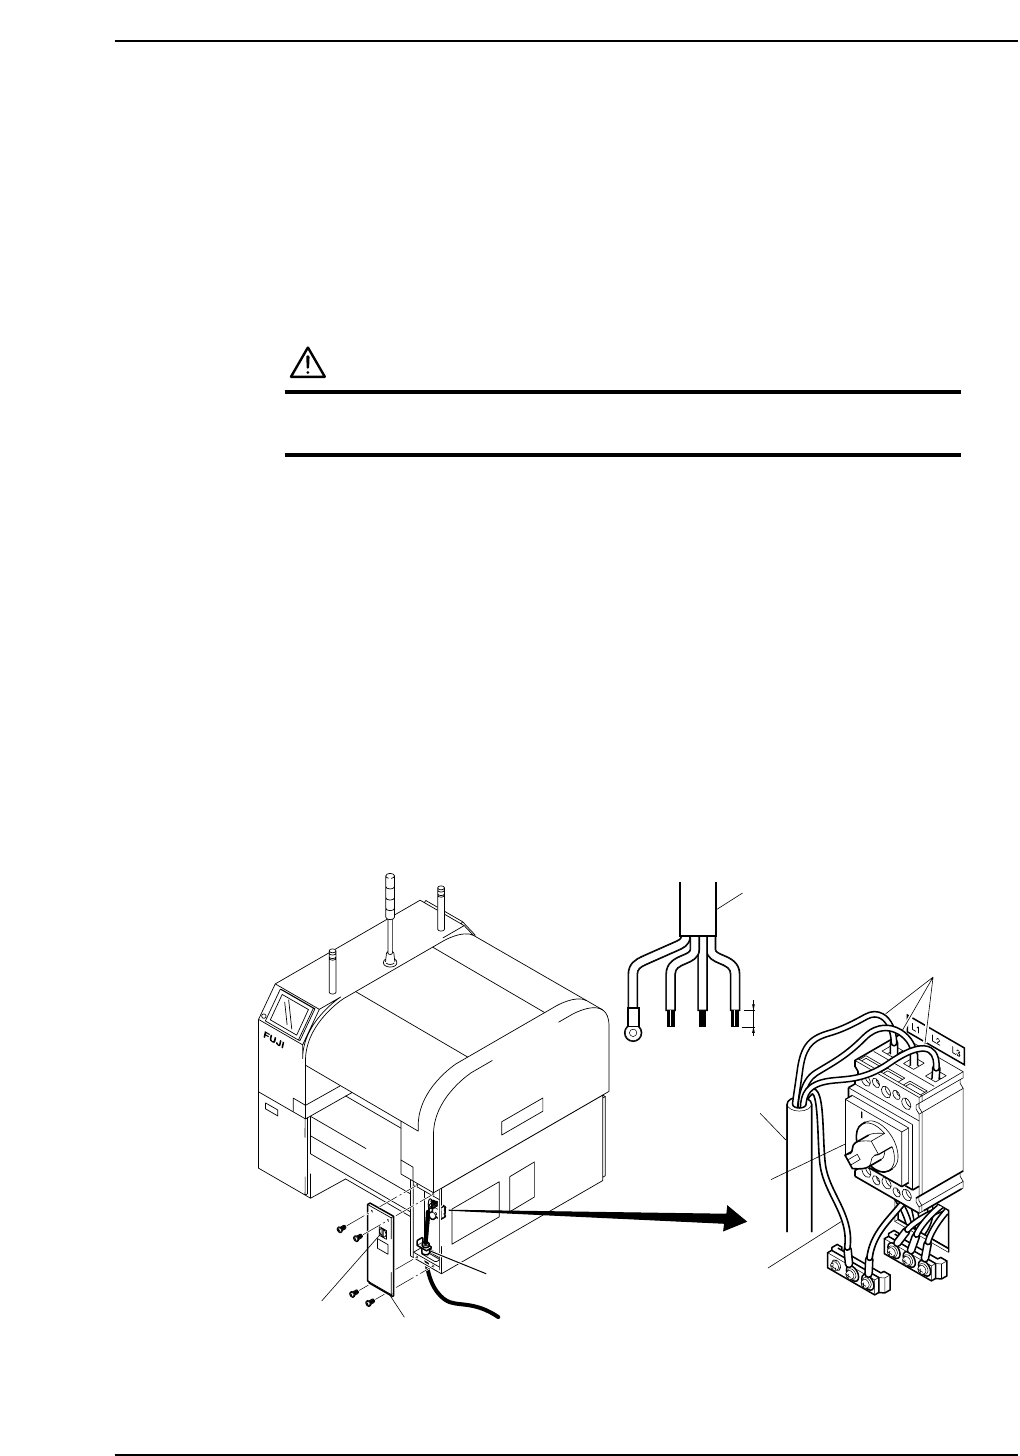
DANGER
Make sure that the external power supply is switched off
before attempting this procedure.
Connecting the Power Supply
1. Detatch the MFU from front side (side 1) of the machine.
2. Turn the breaker switch off. Loosen the cover mounting screws (four) and remove
the cover.
3. Pass the power cable through the cable inlet under the machine to the main switch.
4. Connect the ground wire to the ground terminal.
5. Connect the three-phase wires to the main switch, using the specified screw
tightening torque.
Terminal screw tightening torque: 5.8 N·m
Note: After disconnecting the power supply and confirming that it is off, check the screw
torque periodically.
6. After connecting the wires, fasten them with the cable lock nut.
Cable lock nut tightening torque: 7.5 N·m
14 mm
Ground
Breaker
switch
Cover
Power cable
Power cable
Main breaker
XP1MS204aE
Recommended driver: Blade 8 X150 mm
Cable clamp
3-phase wire