N7201A653E.pdf - 第149页
EJM1EJ-MB-06 M-02 NPM-TT2 Grease nipple 4 Apply grease to the w idth-adjustment ball screw from grease nipple ● Apply grease via each grease ni pple (on the mo vable rail) w ith the grease gun. (2 locations on each lane)…
EJM1EJ-MB-06M-02NPM-TT2
6-1-1
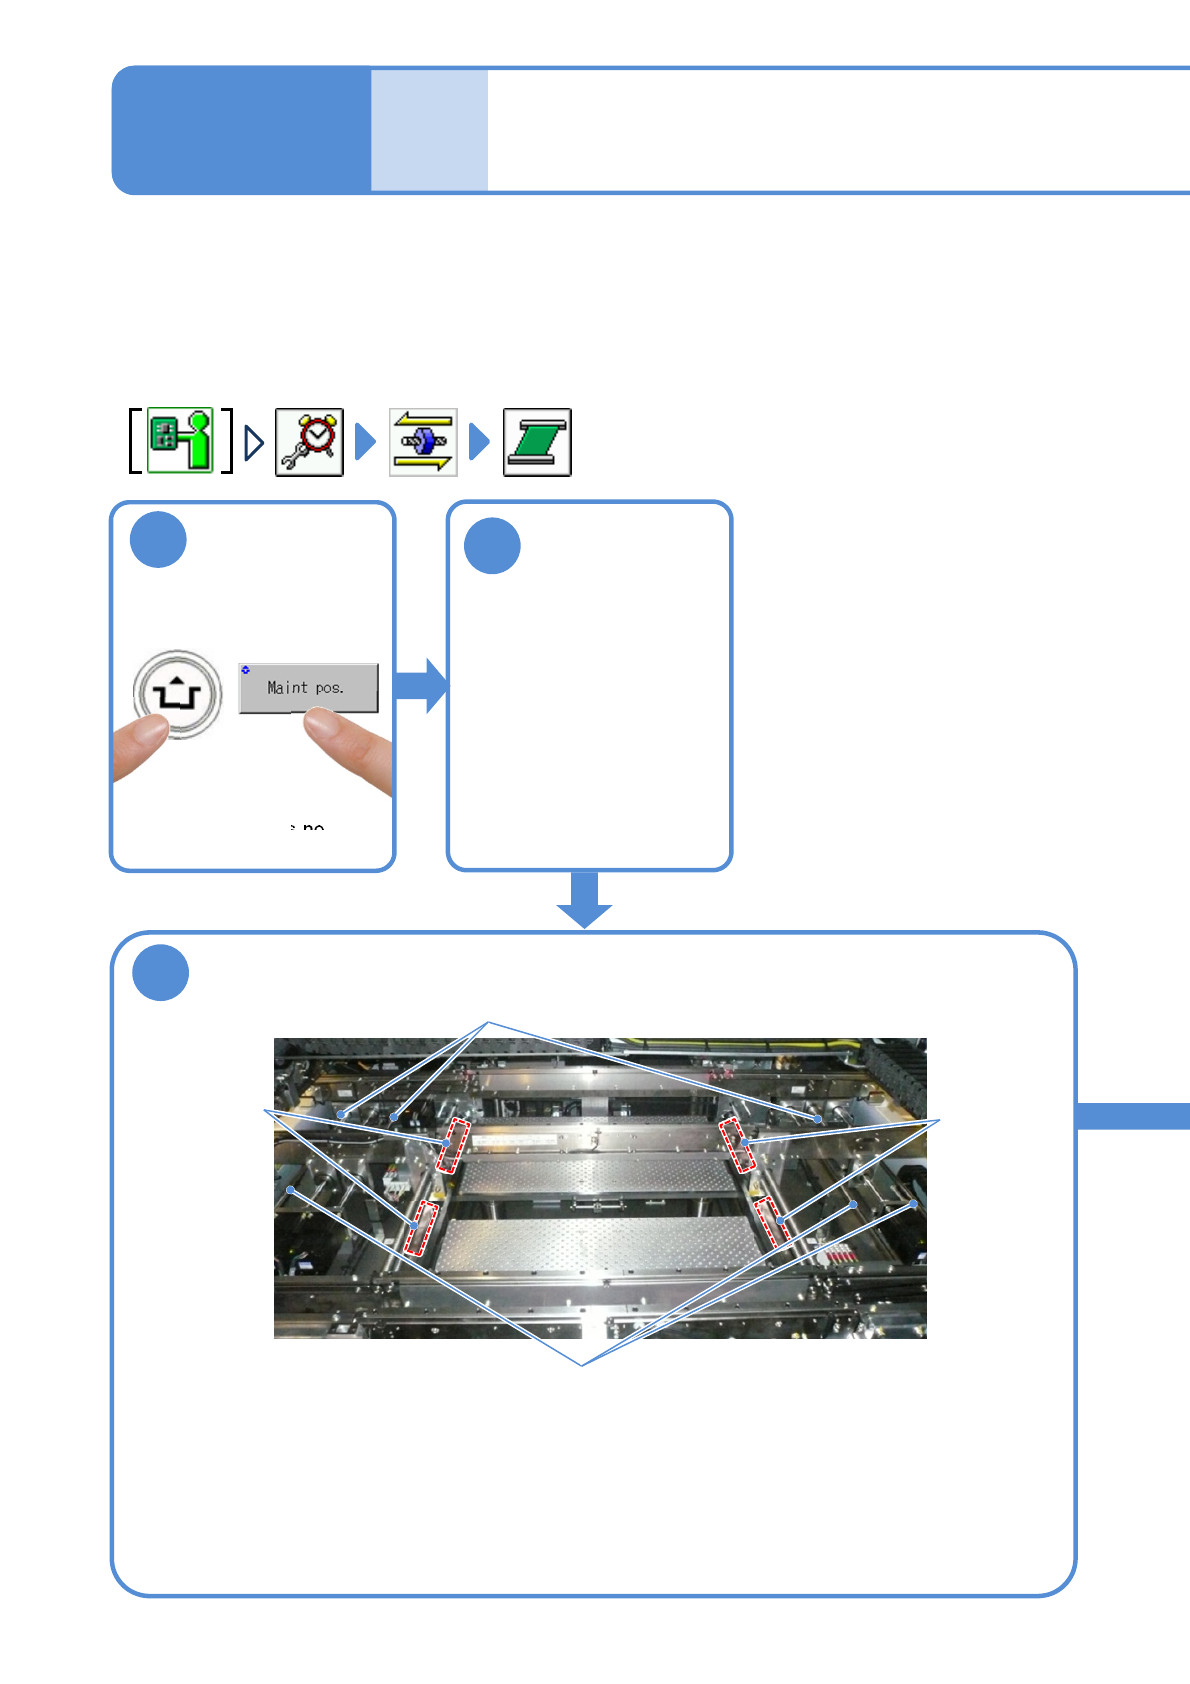
1
Apply grease to the linear guides and ball splines
3
●Confirm there is no
support pins before work.
Greasing the PCB
conveyor 1
Describes the method for greasing the PCB conveyor.
Tool used: Grease gun, Time required: 25 minutes
●Apply grease to the width-adjustment ball screws and linear guides of the PCB conveyor.
●We recommend you to work in dual lane mode. (→ P.11-2-1)
2
Detach the tray
feeder or the
feeder cart
●For a tray feeder
(→ P.14-8)
●For a feeder cart
(→ P.3-2)
Linear guide
Linear guide
Ball spline
Ball spline
For a linear guide rail
●Apply grease directly the linear guide rail.
●Grease: LCG100
For a ball spline
●Apply grease directly the center of the ball spline.
●Grease: LCG100
Maintenance
6-1
ACTIVATION

EJM1EJ-MB-06M-02NPM-TT2
Grease nipple
4
Apply grease to the width-adjustment ball
screw from grease nipple
●Apply grease via each grease nipple (on the movable rail) with the grease gun.
(2 locations on each lane) (about 0.9 cm
3
per pump)
●Grease: LCG100
6-1-2
To
5
Width-
adjustment
ball screw
Width-
adjustment
ball screw
Every
560
hours
PeriodicPeriodicPeriodicPeriodic
inspection
EJM1EJ-MB-06M-02NPM-TT2
6-1-3
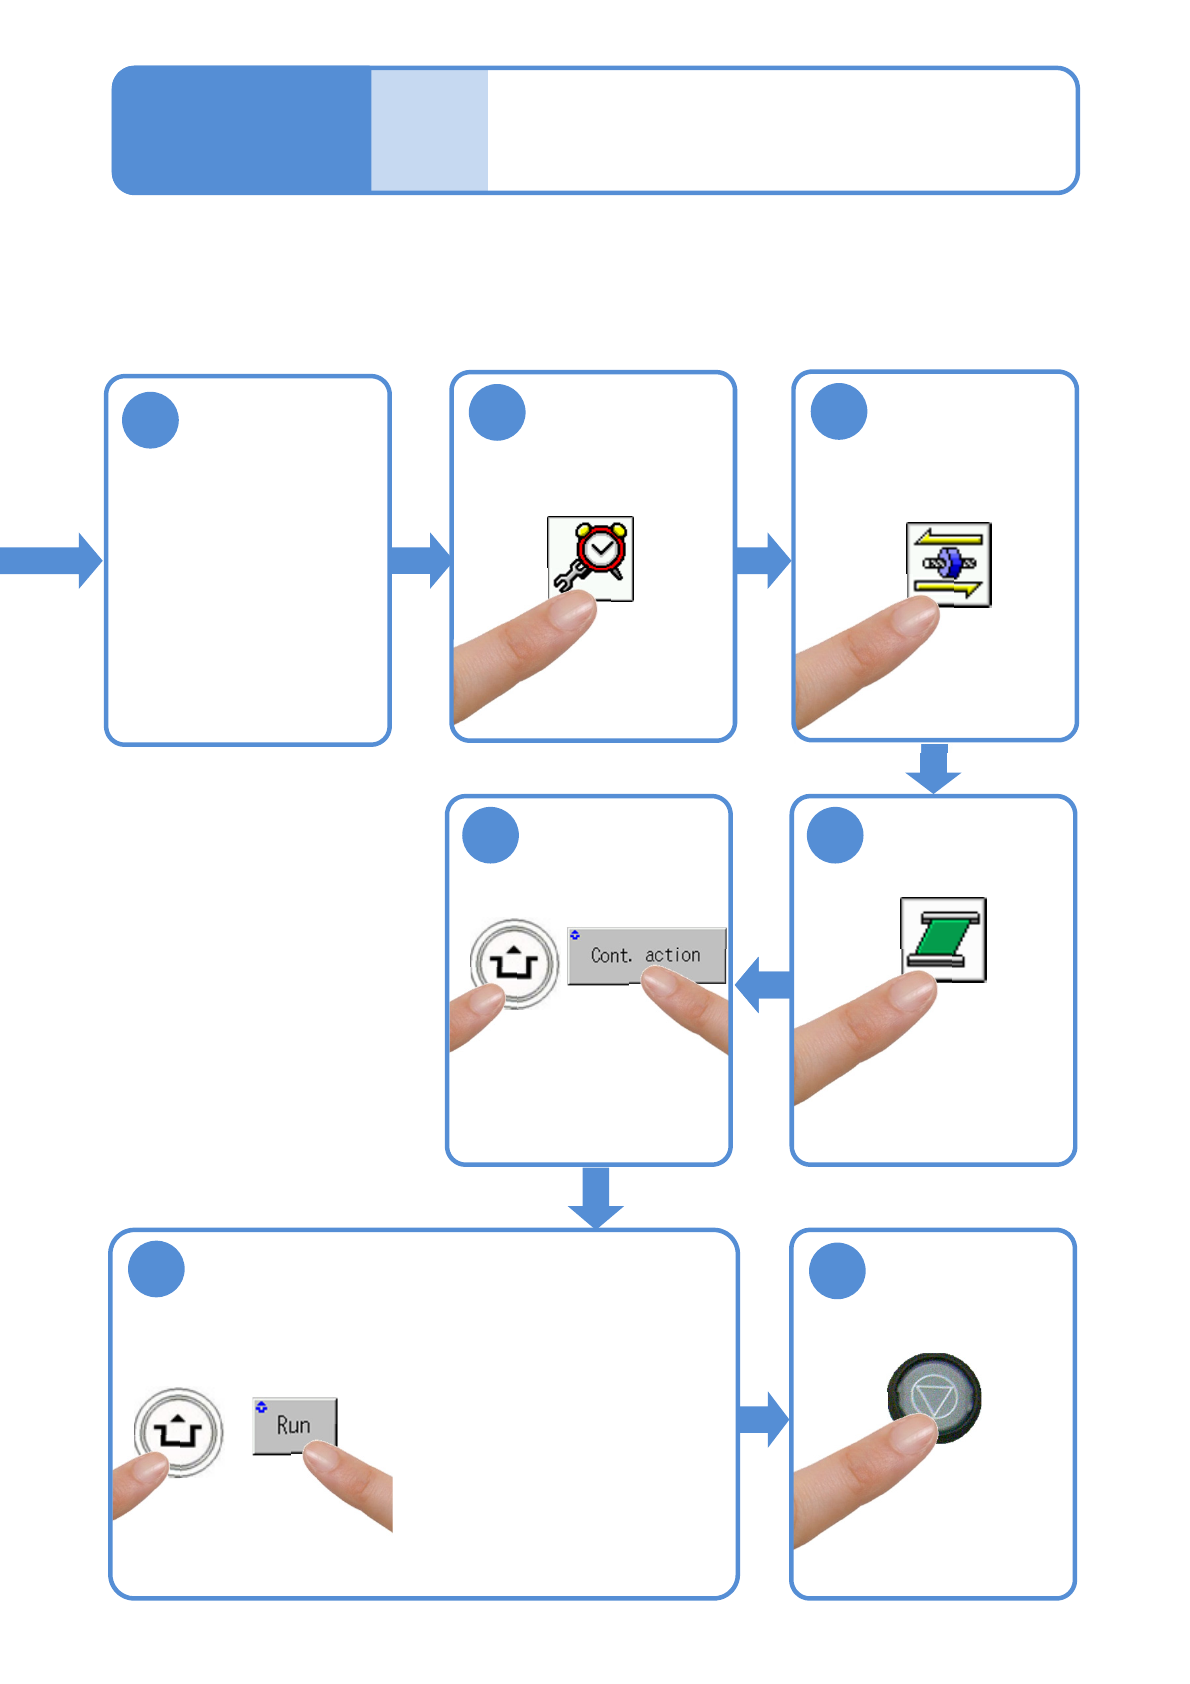
5
●Make sure that there is no pin on
the PCB plate.
●Continuously moves the width
adjustment axis of the transfer
conveyor at least five round.
8
ACTIVATION
7
Confirm the message
6
Greasing the PCB
conveyor 2
Maintenance
6-1
11
STOP
10
ACTIVATION
9
Attach the tray
feeder or the
feeder cart
●For a tray feeder
(→ P.14-8)
●For a feeder cart
(→ P.3-2)
■Select a lane;
W1 or W2