N7201A653E.pdf - 第152页
EJM1EJ-MB-06 M-02 NPM-TT2 Describes the method for greasing the XY-axis linear guide of t he XY unit. Tool used: Grease gun, lint free cloth Time required: 24 min utes ● Grease the front and rear sides Gr easing the XY -…

EJM1EJ-MB-06M-02NPM-TT2
6-1-4
Every
560
hours
PeriodicPeriodicPeriodicPeriodic
inspection
EJM1EJ-MB-06M-02NPM-TT2
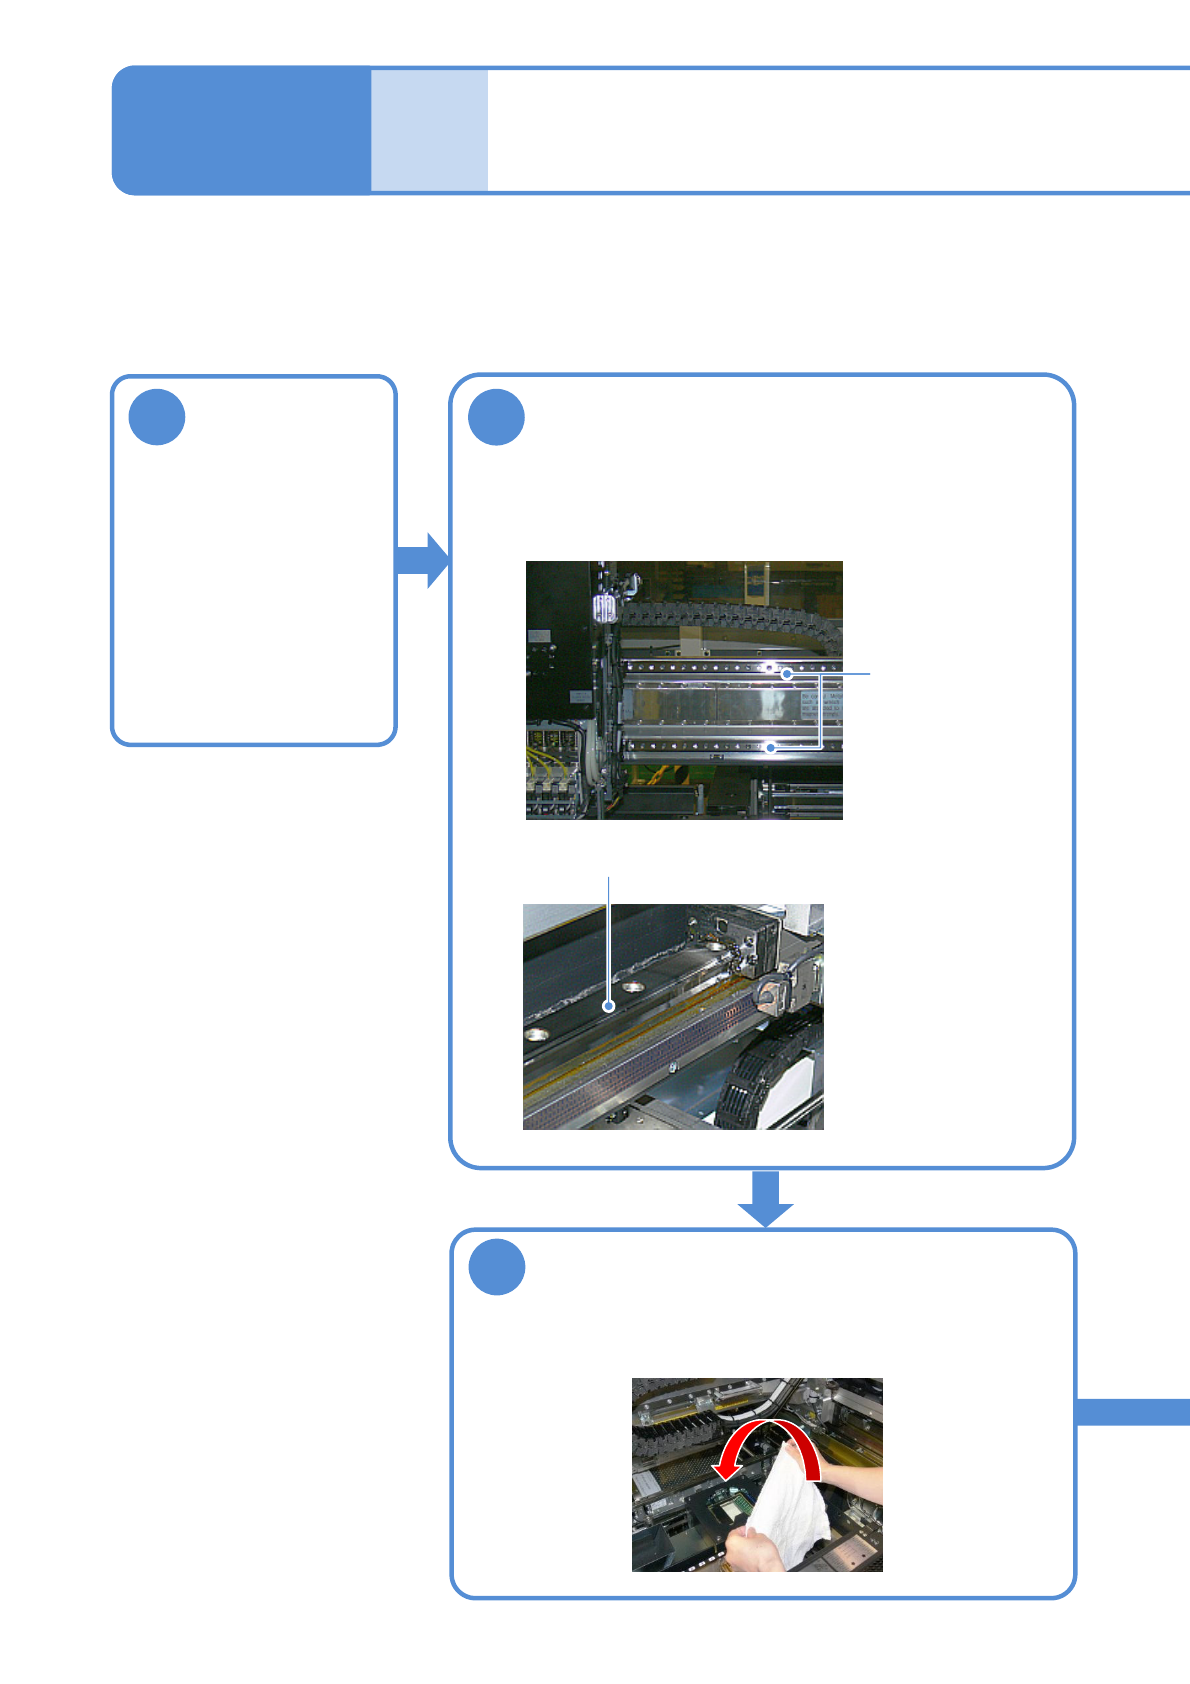
Describes the method for greasing the XY-axis linear guide of the XY unit.
Tool used: Grease gun, lint free cloth Time required: 24 minutes
●Grease the front and rear sides
Greasing the XY-axis
linear guide 1
6-2-1
1
2
Wipe away the old grease
●Wipe the old grease off the X-and Y-axis linear
guides with a clean lint free cloth.
X-axis linear
guide
Y-axis linear guide
Maintenance
6-2
Detach the tray
feeder or the
feeder cart
●For a tray feeder
(→ P.14-8)
●For a feeder cart
(→ P.3-2)
3
Cover the multi-recognition camera with a
lint free cloth
●To prevent adhesion of grease dropped onto the camera
lenses during maintenance)
EJM1EJ-MB-06M-02NPM-TT2
6-2-2
To
5
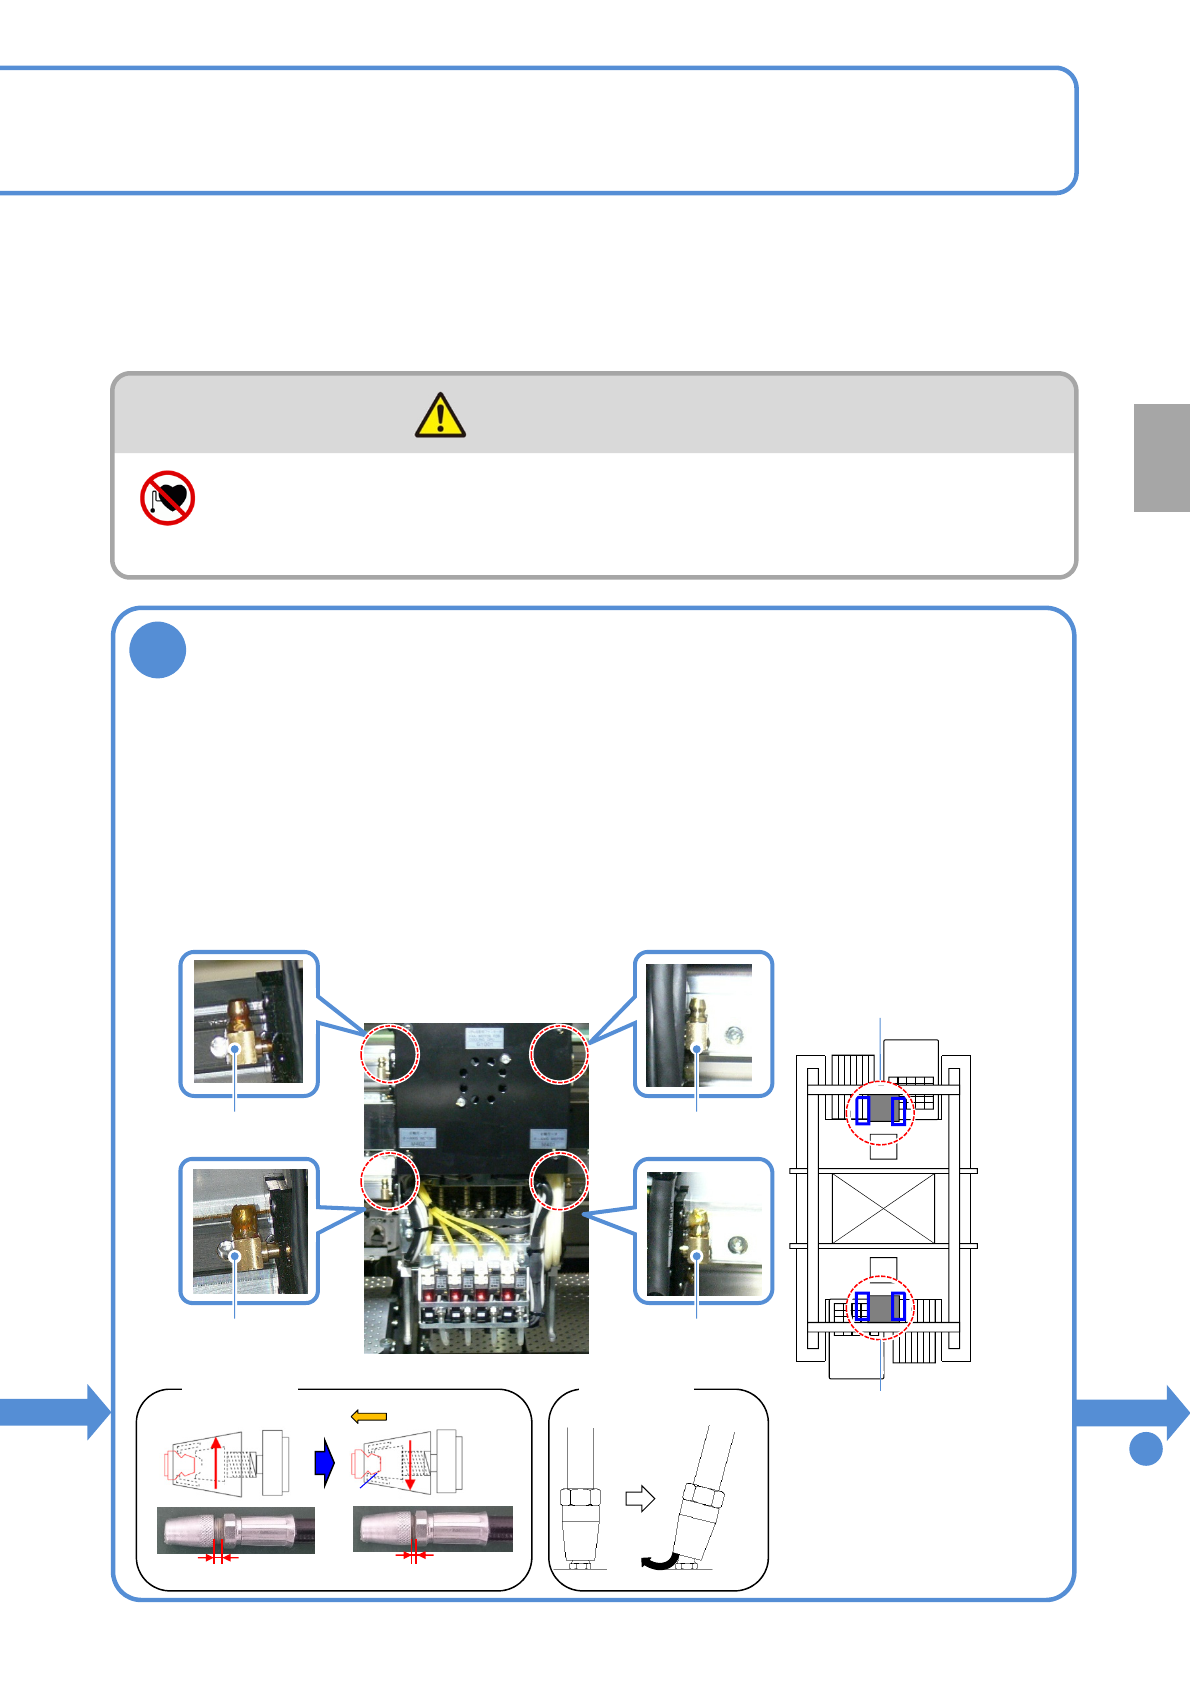
Apply grease to the X-axis linear guide
●Grease: LCG100
●Please note that the tip of grease gun should not be drawn into the magnetic linear
motor.
(X-axis linear motor stator (magnet) of the cover may cause deformation.
●Apply grease to both top and bottom grease nipples in the following steps.
① Loosen the grease gun tip, fit it onto a grease nipple, and then tighten it while pressing it
against the grease nipple. (See Figure 1.)
② Give one quarter pump. (about 0.25cm
3
)
③ Move the X-axis 100mm with your hands.
④ Repeat ② and ③ twice.
⑤ Tilt the grease gun tip to reduce the internal pressure, then loosen and remove it. (See Figure 2.)
⑥ After greasing, wipe off the grease adhered to the grease nipple.
4
Grease nipple
●Top and bottom grease
nipples (4 locations)
Grease nipple
Grease nipple
Grease nipple
●Top and bottom grease
nipples (4 locations)
Every
560
hours
PeriodicPeriodicPeriodicPeriodic
inspection
Personnel with pacemakers should keep away from the linear
motor
(Risk of accidents caused by errors in operation due to magnetic force)
WARNING
Widen
Narrow
Figure 1
Internal
pressure
Figure 2
Loosen
Insert
Press and tighten
Catch in the tip