N7201A653E.pdf - 第173页
EJM1EJ-MB-06 M-02 NPM-TT2 6-5 -6 Inspecting the belt tension of the PCB conveyor ● Enter the following numerica l values to the frequ ency measuring instrument (Acoustic belt tensio n meter provided by a belt manuf actur…
EJM1EJ-MB-06M-02NPM-TT2
Inspecting the belt tension
6-5-5
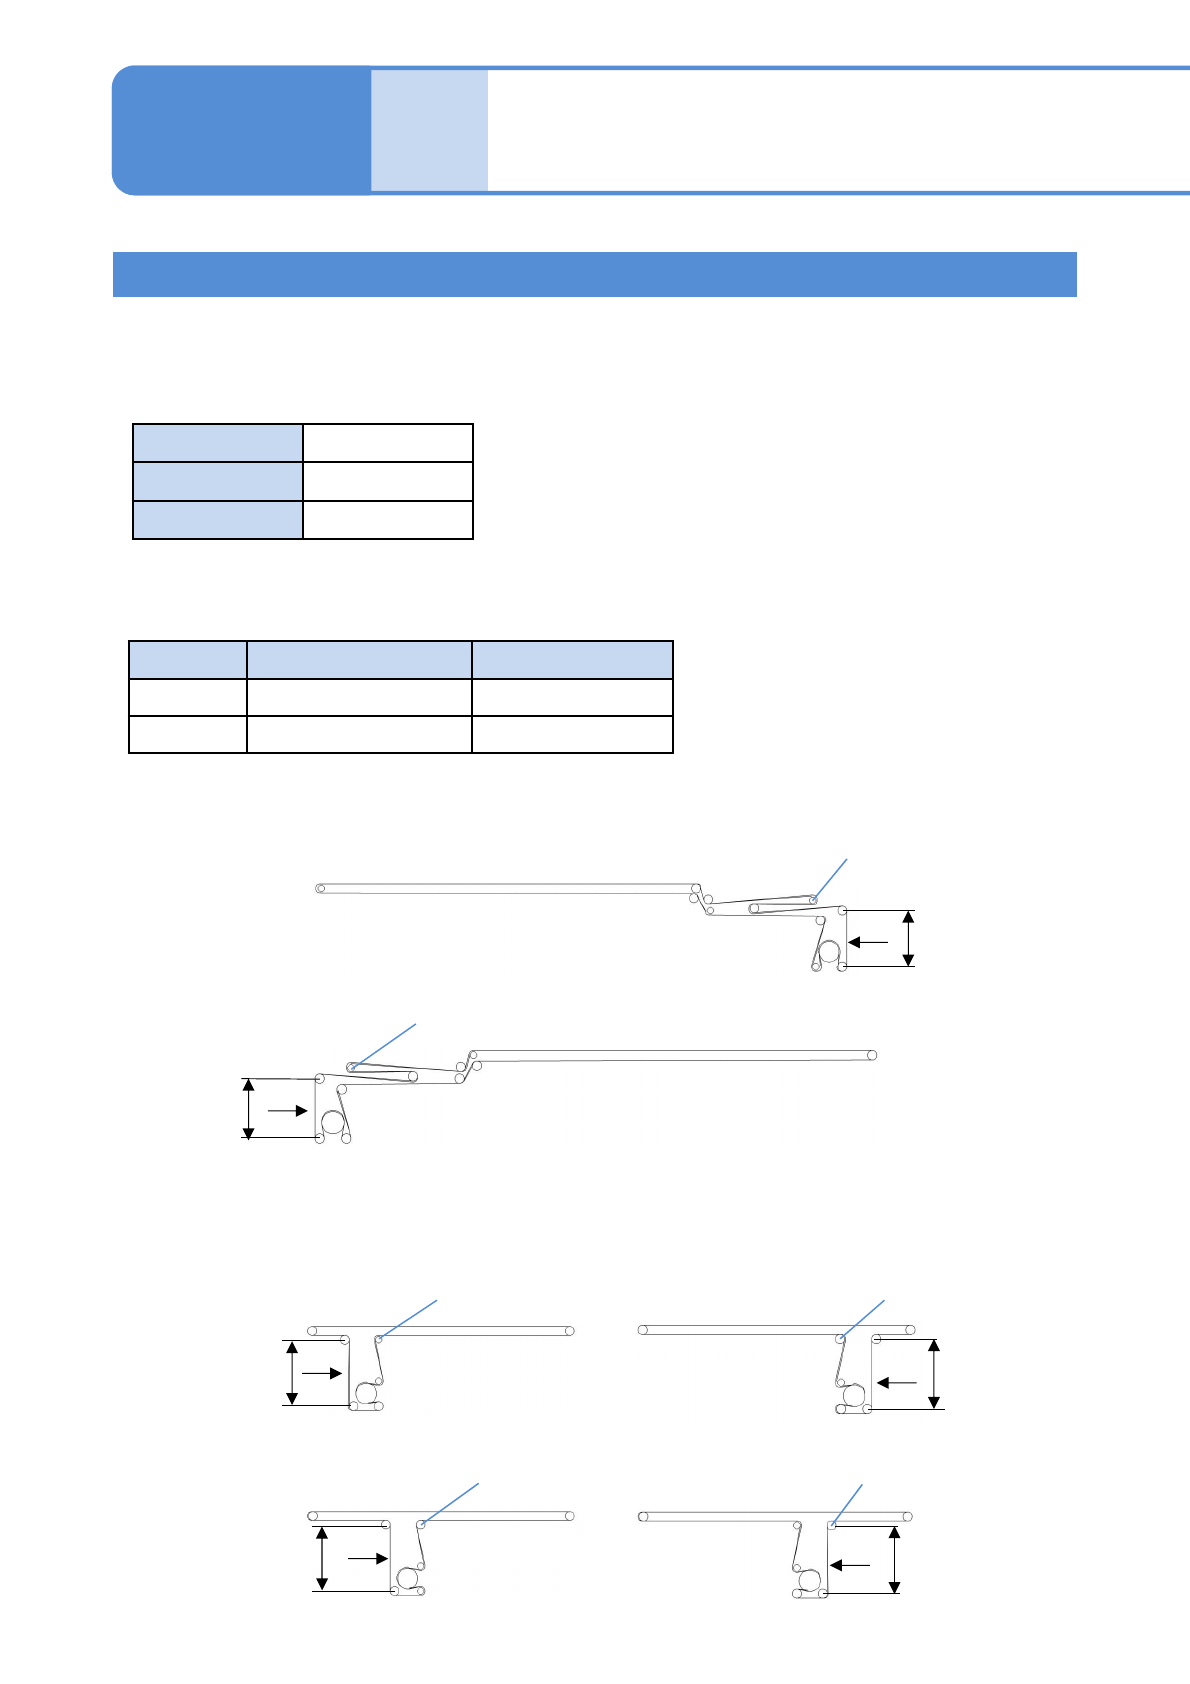
●Enter the following numerical values to the frequency measuring instrument (Acoustic belt tension meter
provided by a belt manufacturer) in advance. Flicking your fingers at the center section (P shown in the
drawings below) of each span, measure the natural frequency with the frequency measuring instrument.
■Input value
●Adjust and fix the tension pulley if the measurement value falls under the prescribed value.
■Prescribed value
Maintenance
6-5
Belt unit mass 0.7 g/m
Belt width 4.5 mm
Span length See below
Mount section Standby section
Lane 1 515 to 565 Hz 430 to 470 Hz
Lane 2 515 to 565 Hz 430 to 470 Hz
Inspecting the PCB /
extension conveyor
(option) 3
● Mount section (fixed rail/movable rail): 2 rails on each
Lane 1
Lane 2
●Standby section (upstream/downstream in common): 4 rails on each
Lane 1
Lane 2
78 mm
P
78 mm
P
94 mm
P
94 mm
P
94 mm
P
94 mm
P
Tension pulley
Tension pulley
Tension pulley
Tension pulley Tension pulley
Tension pulley
EJM1EJ-MB-06M-02NPM-TT2
6-5-6
Inspecting the belt tension of the PCB conveyor
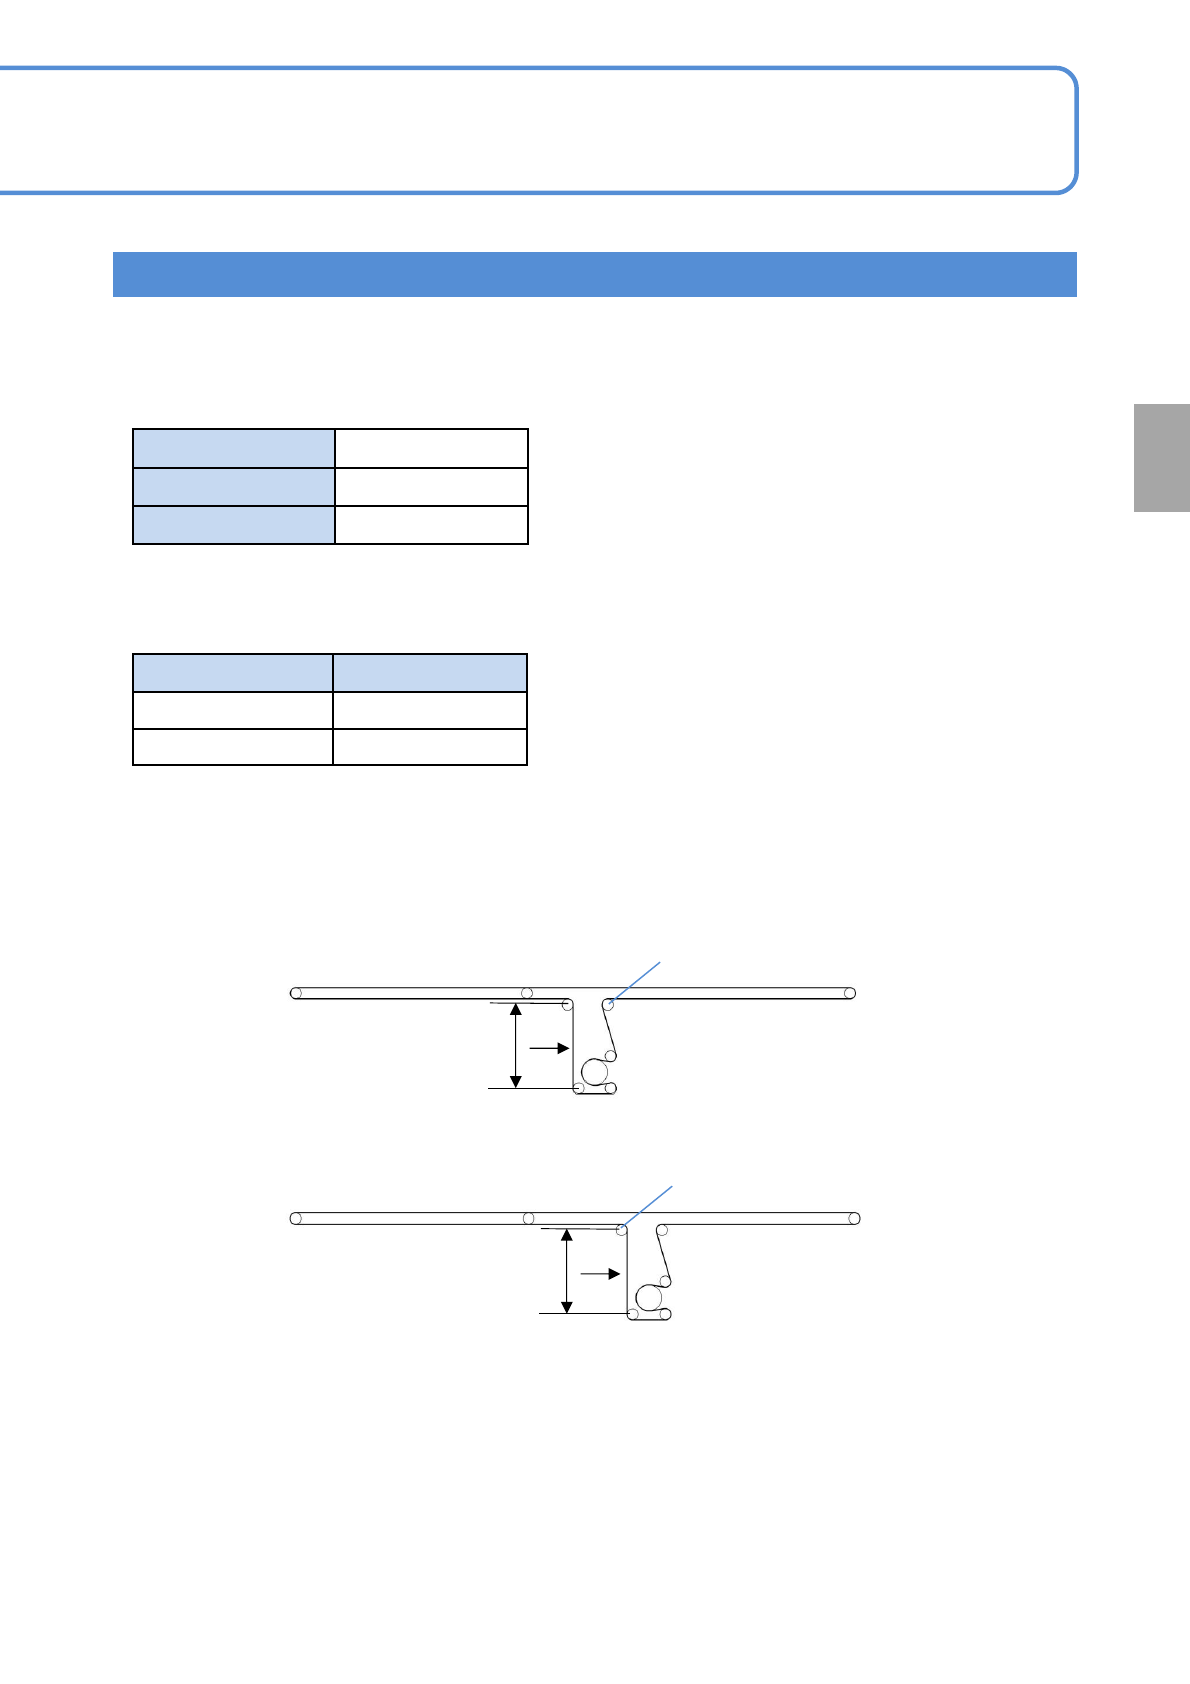
●Enter the following numerical values to the frequency measuring instrument (Acoustic belt tension meter
provided by a belt manufacturer) in advance. Flicking your fingers at the center section (P shown in the
drawings below) of each span, measure the natural frequency with the frequency measuring instrument.
■Input value
●Adjust and fix the tension pulley if the measurement value falls under the prescribed value.
Belt unit mass 0.7 g/m
Belt width 4.5 mm
Span length See below
■Prescribed value
● Standby section (upstream/downstream in common) :2 rails on each
Lane 1
Lane 2
Standby section
Lane 1 430 to 470 Hz
Lane 2 430 to 470 Hz
Tension pulley
Tension pulley
Every
560
hours
PeriodicPeriodicPeriodicPeriodic
inspection
94 mm
P
94 mm
P
EJM1EJ-MB-06M-02NPM-TT2
6-6-1
3
4
1
2
ACTIVATION
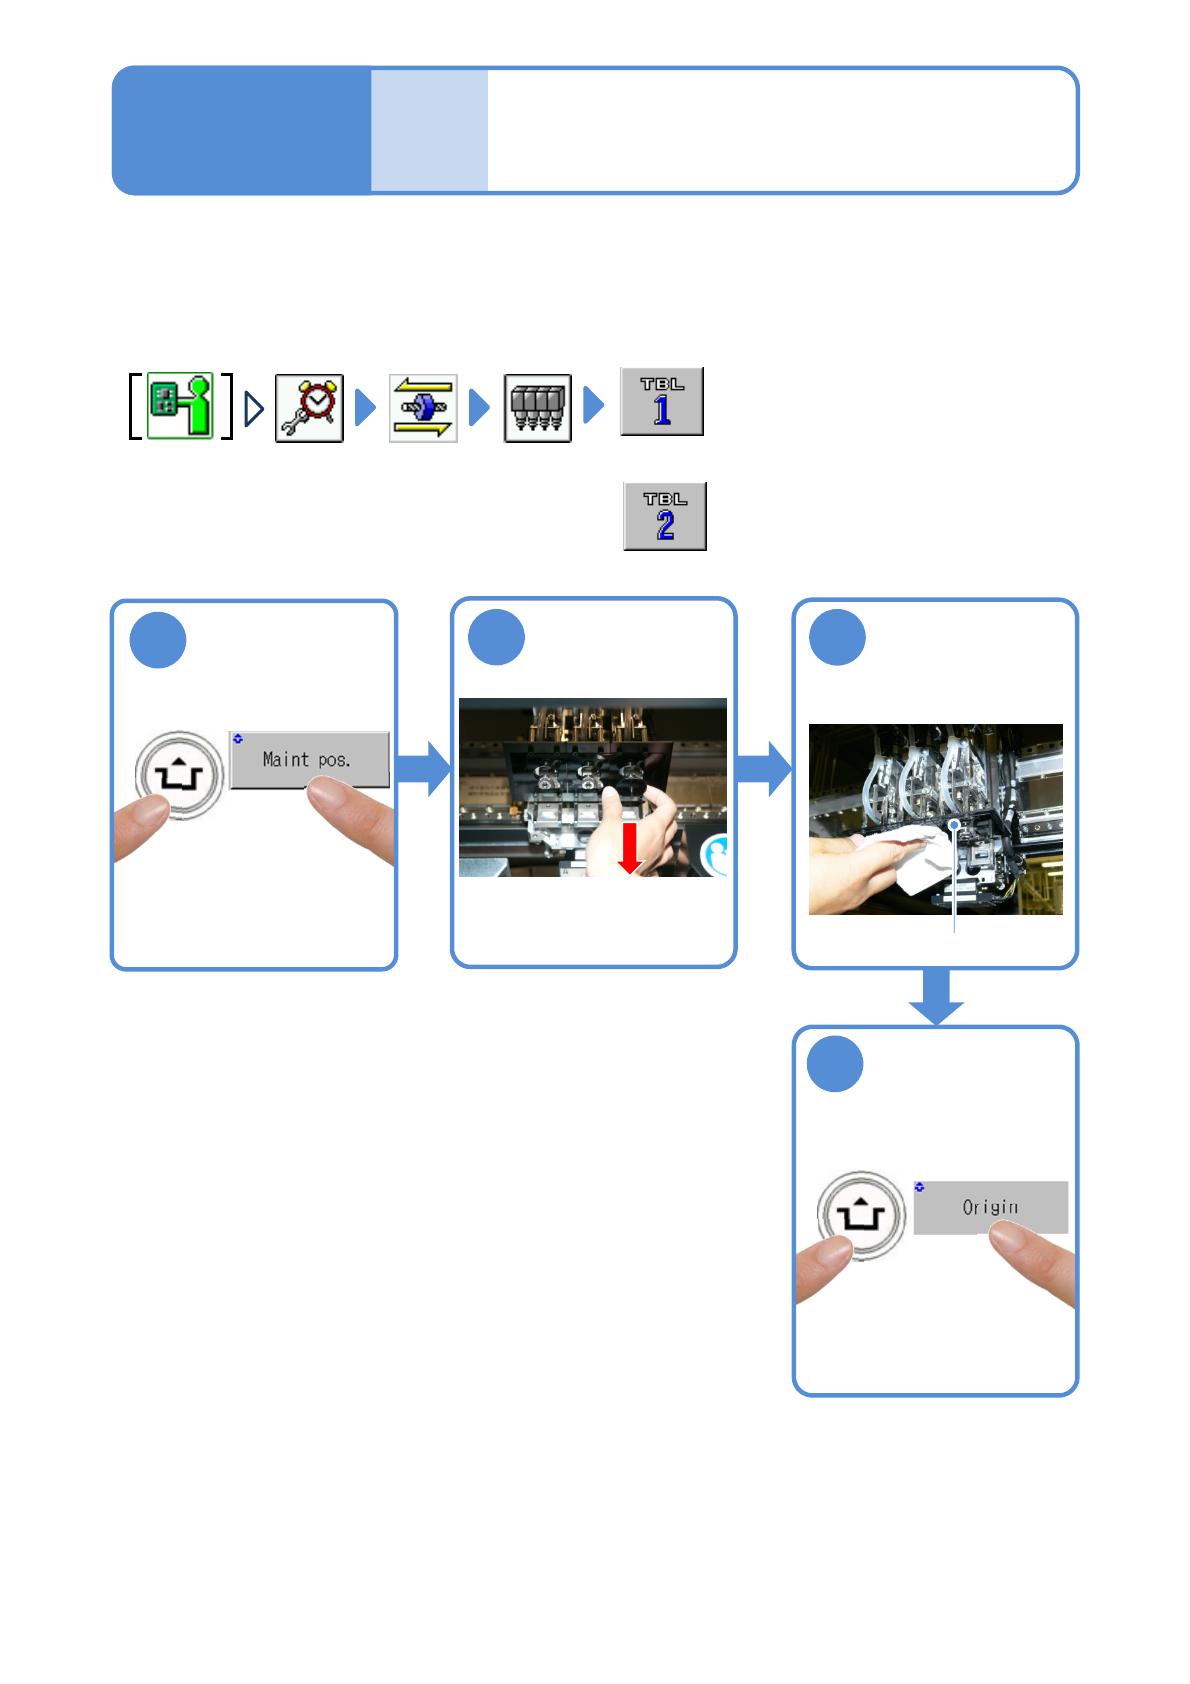
Describes how to clean the large reflector.
Tool used: Lint free cloth Time required: 15 minutes
●Leaving the large reflector dirty results in an recognition error.
Cleaning the large
reflector
(3-nozzle head (option))
Maintenance
6-6
●Pull the nozzle out and
down.
Wipe the large
reflector with a
clean lint free
cloth
Large reflector
●For the rear side,
Remove the
nozzle from the
placement head
ACTIVATION