N7201A653E.pdf - 第190页
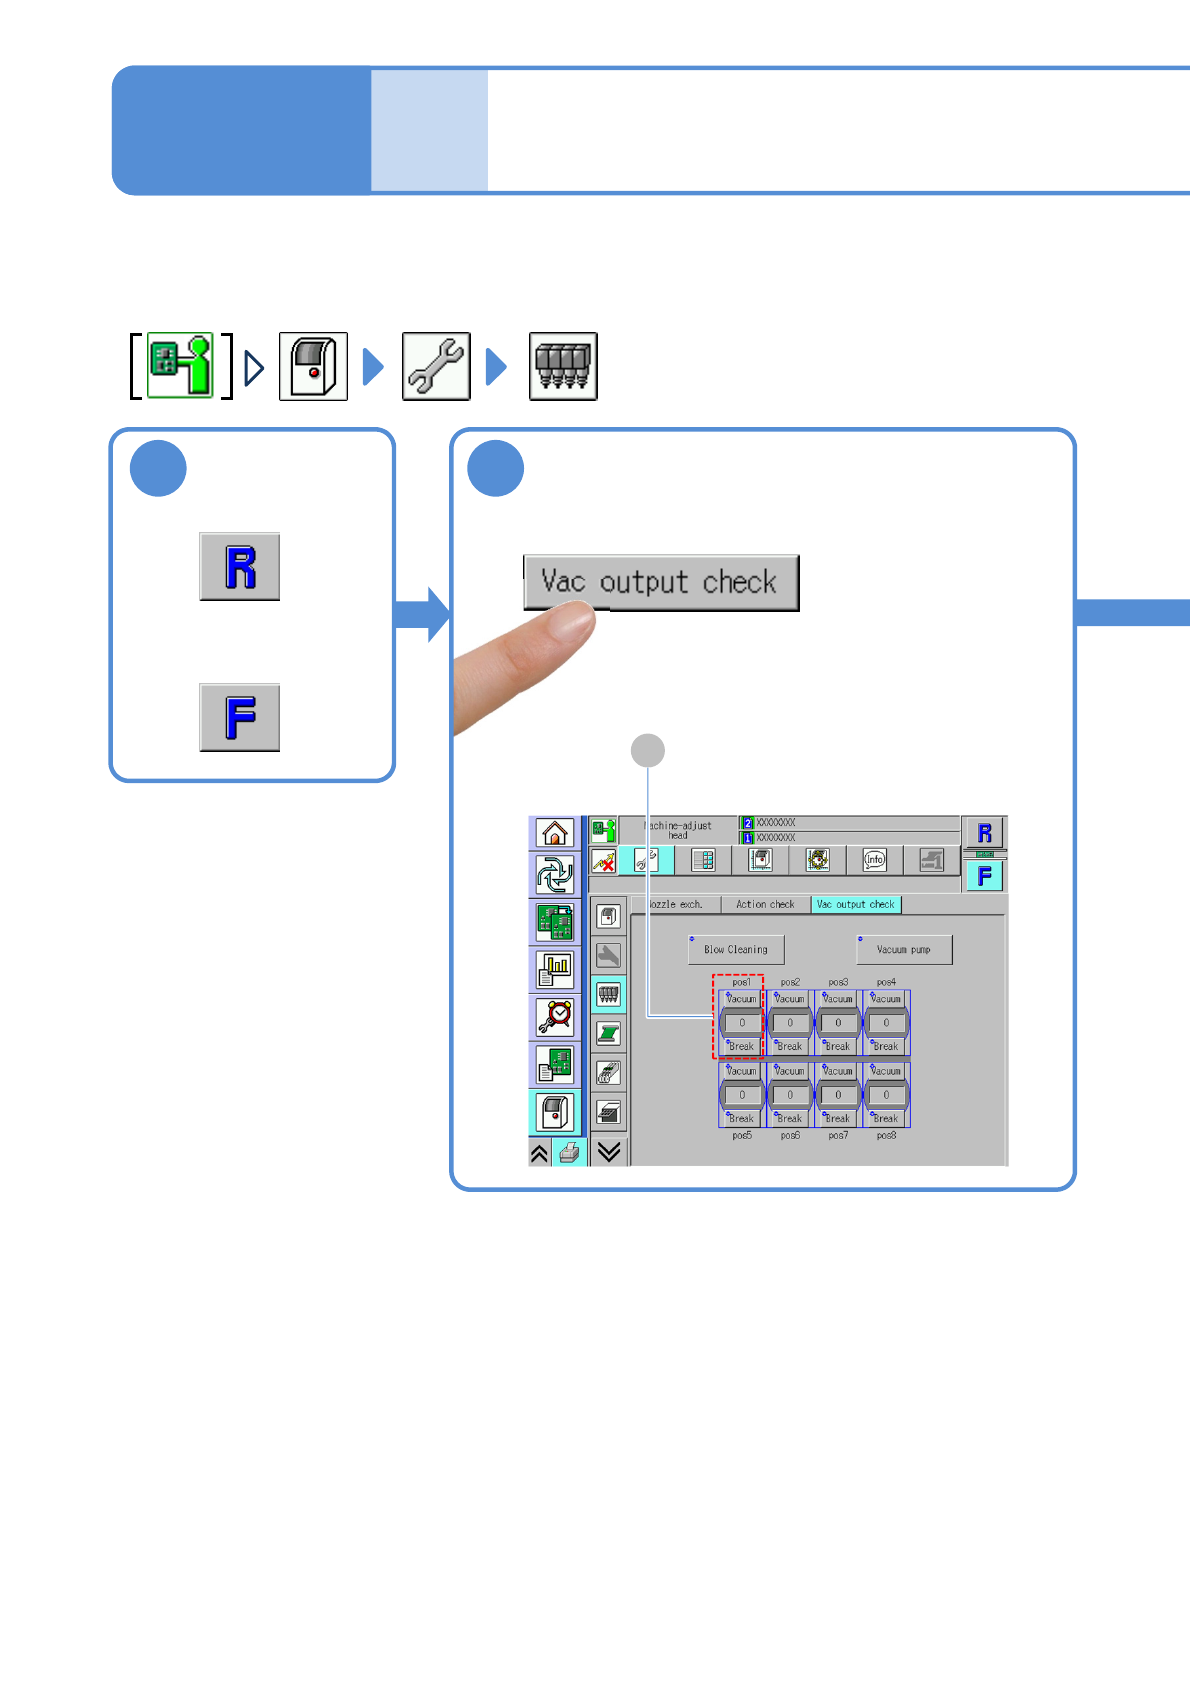
EJM1EJ-MB-06 M-02 NPM- TT2 Inspecting the vacuum air pa th (placement head (option)) 6-10 -1 Describes how to inspec t the vacuum air path. Tool used : None Time required: 2 minutes (per stage) Maintenance 6-10 1 or 2 A
EJM1EJ-MB-06M-02NPM-TT2
5
Detecting
section
6
7
SERVO
ON
6-9-8
Every
560
hours
PeriodicPeriodicPeriodicPeriodic
inspection
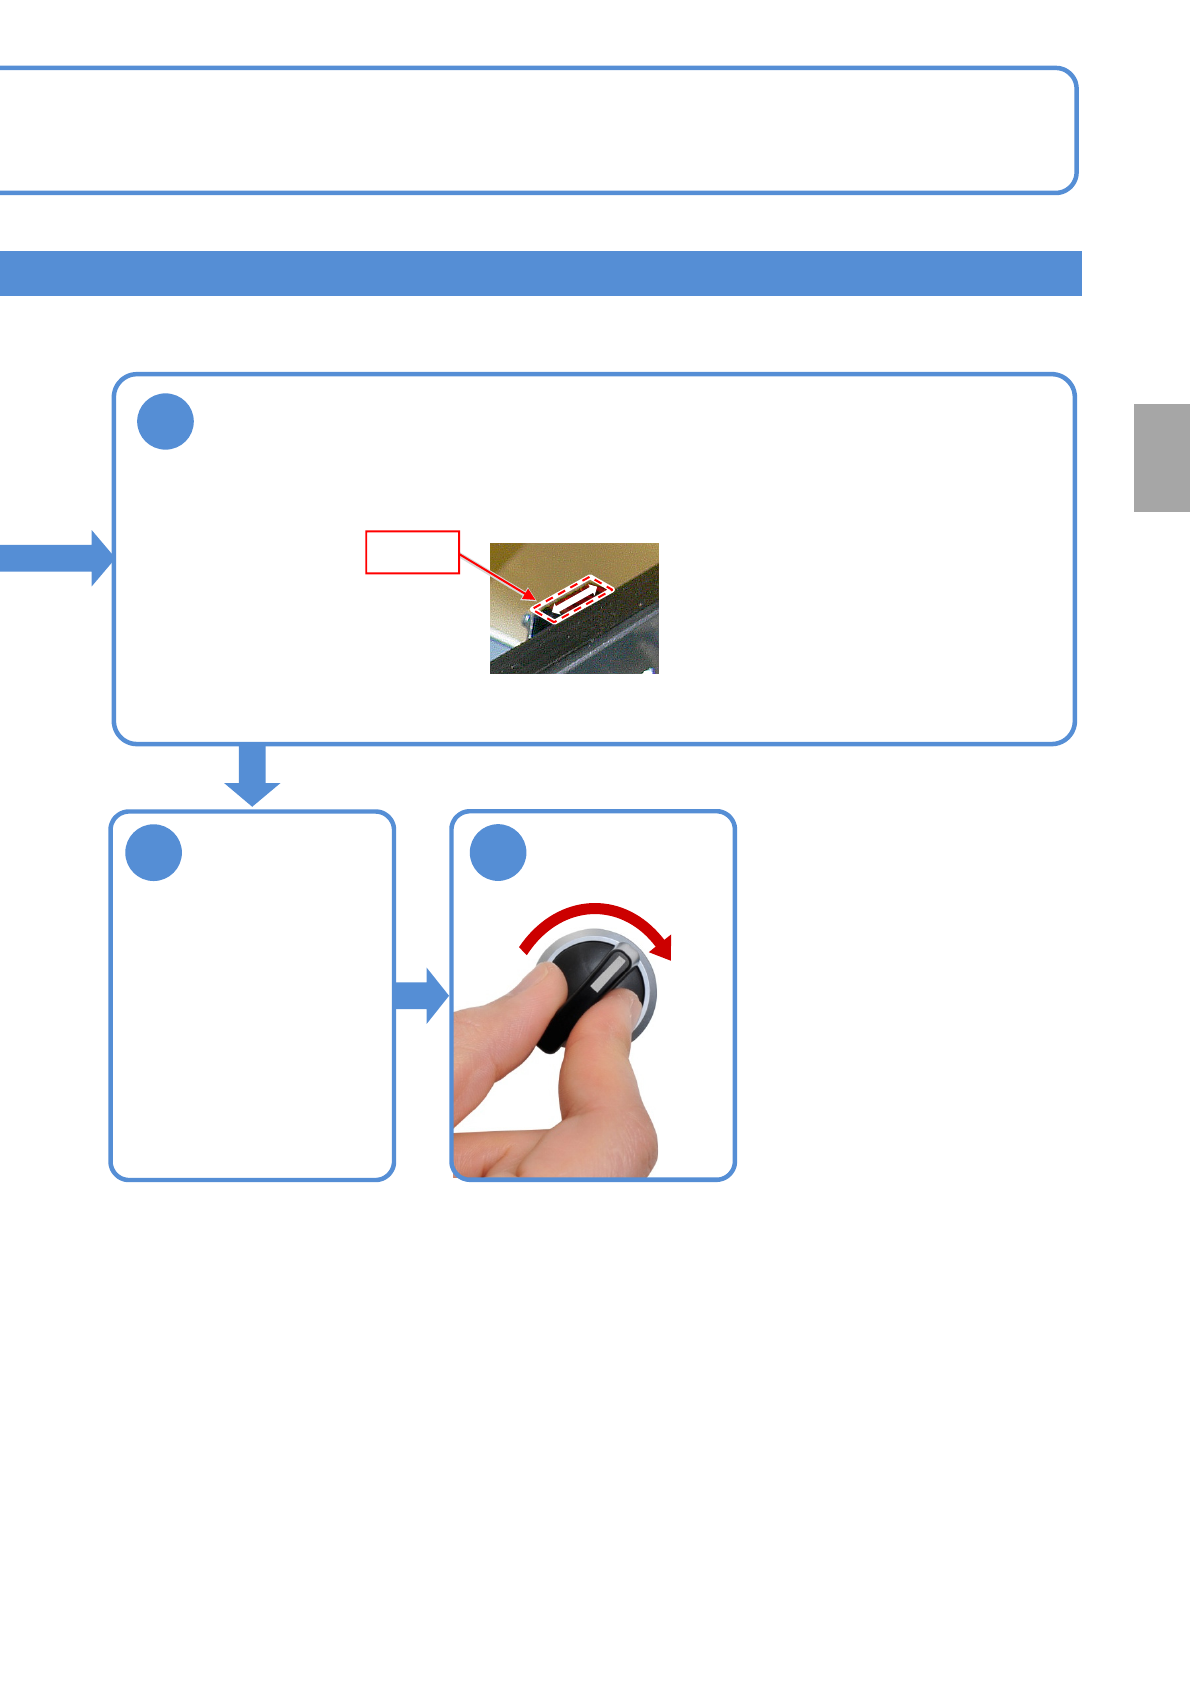
Clean the PCB detection sensors
Attach the
upper cover
●Secure the bolts of the
cover with the Allen
wrench.
●Touch the swab tip to detecting section of the PCB detection sensor (reflection type) and
move it as shown below to remove any stain.
EJM1EJ-MB-06M-02NPM-TT2
Inspecting the vacuum
air path
(placement head (option))
6-10-1
Describes how to inspect the vacuum air path.
Tool used: None Time required: 2 minutes (per stage)
Maintenance
6-10
1
or
2
A
EJM1EJ-MB-06M-02NPM-TT2
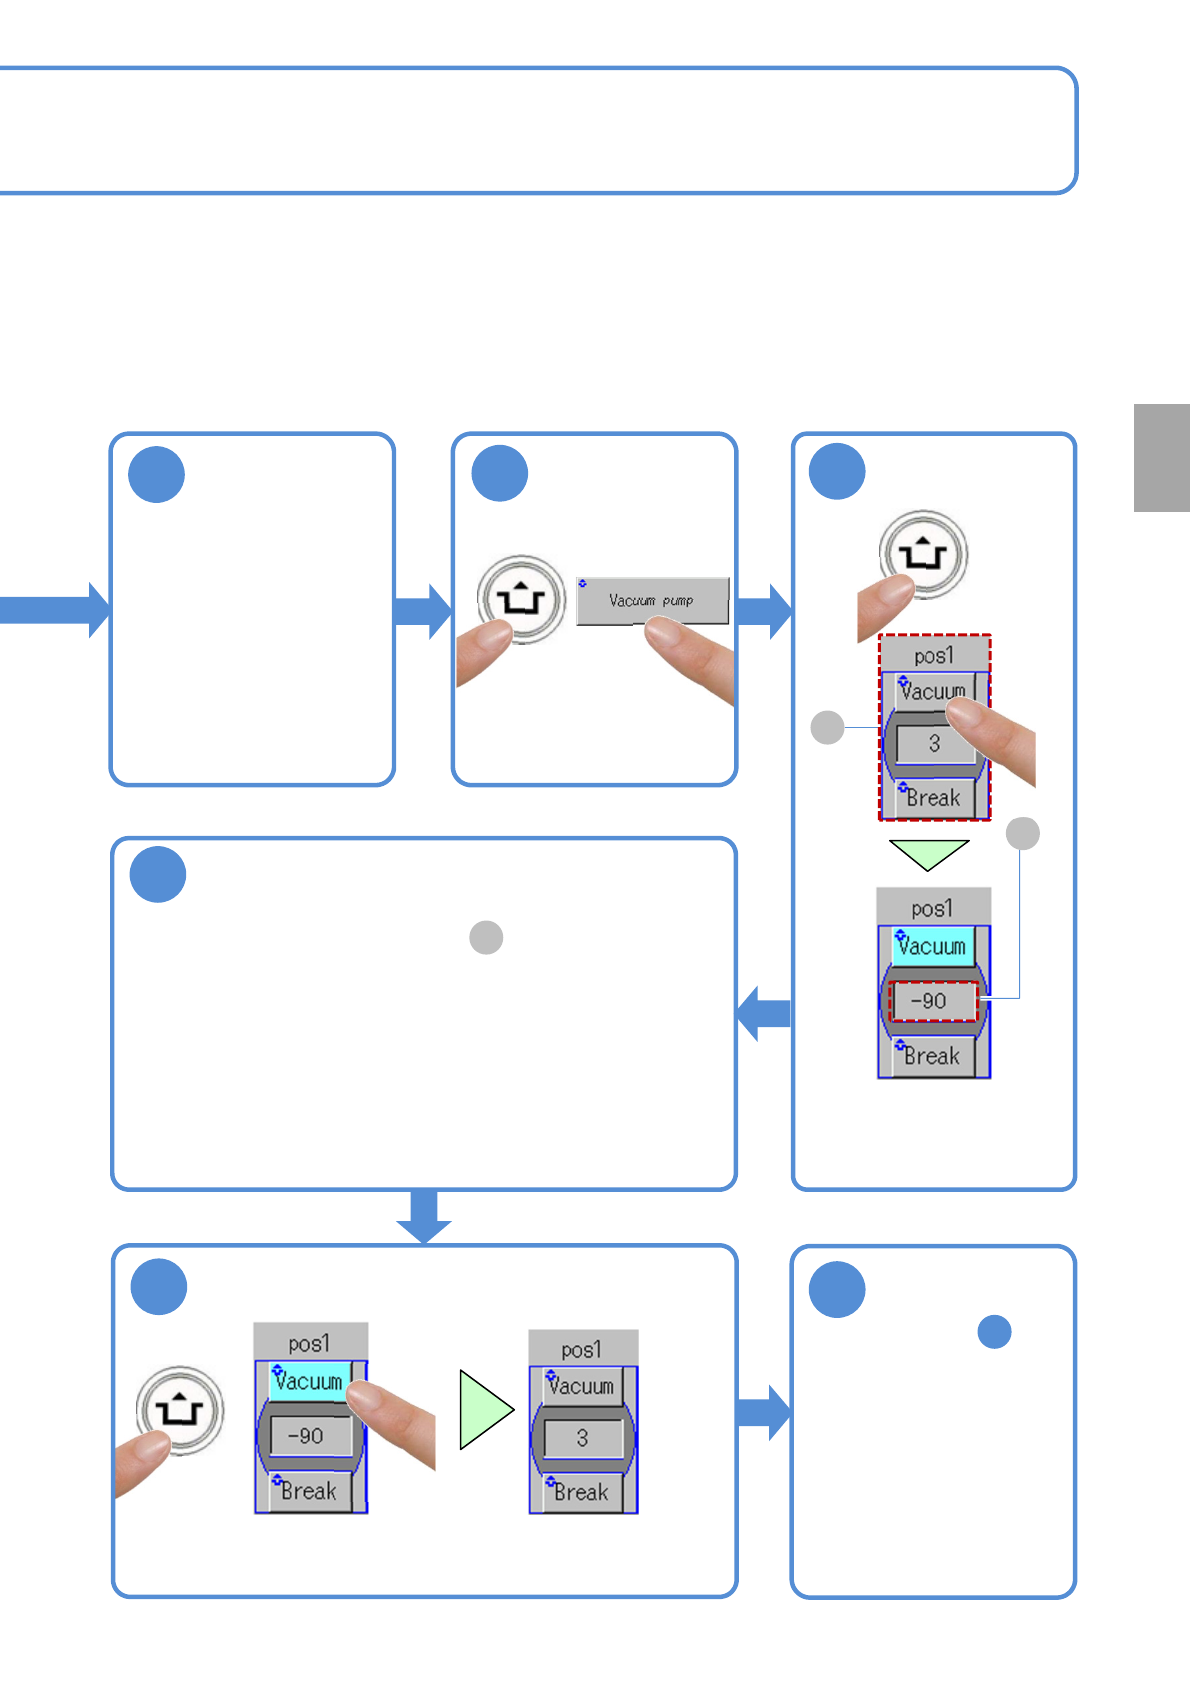
6-10-2
(The display color changes from the
light blue to the gray, and the vacuum
suction ends)
Return to step
and repeat the same
procedure for each
pos
5
Ensure that the
nozzles are
absent from the
head
●Detach if any.
ACTIVATION
3
ACTIVATION
4
5
(The display color changes
from gray to light blue,
and the vacuum suction
starts)
ACTIVATION
A
B
6
Ensure the [pos1] is within the prescribed
value
●If the display value is not within the prescribed value range,
・Check the supply pressure of the vacuum pump (→P4-1-1)
・Clean the nozzle holders (→P5-2, 7-1)
●If it still stays out of the prescribed value range, contact us.
●Prescribed value: value in the frame is less than "-85".
B
8
7
Every
560
hours
PeriodicPeriodicPeriodicPeriodic
inspection