N7201A653E.pdf - 第228页
NPM- TT2 EJ M1EE-MB-08M-0 1 1 Rear side of FA PC Cleaning the filter of the F A computer 8-2 -1 Cleaning the filter of the F A computer 1 (LNB(option)) Main power supply swit ch ● To end production , turn OFF the main po…
NPM-TT2 EJM1EE-MB-08M-01
Remove the filter
Main controller
Handle
●Pull it forward with holding
the projection A.
Projection
A
8-1-2
4
Every
3000
hours
PeriodicPeriodicPeriodicPeriodicPeriodic
inspection
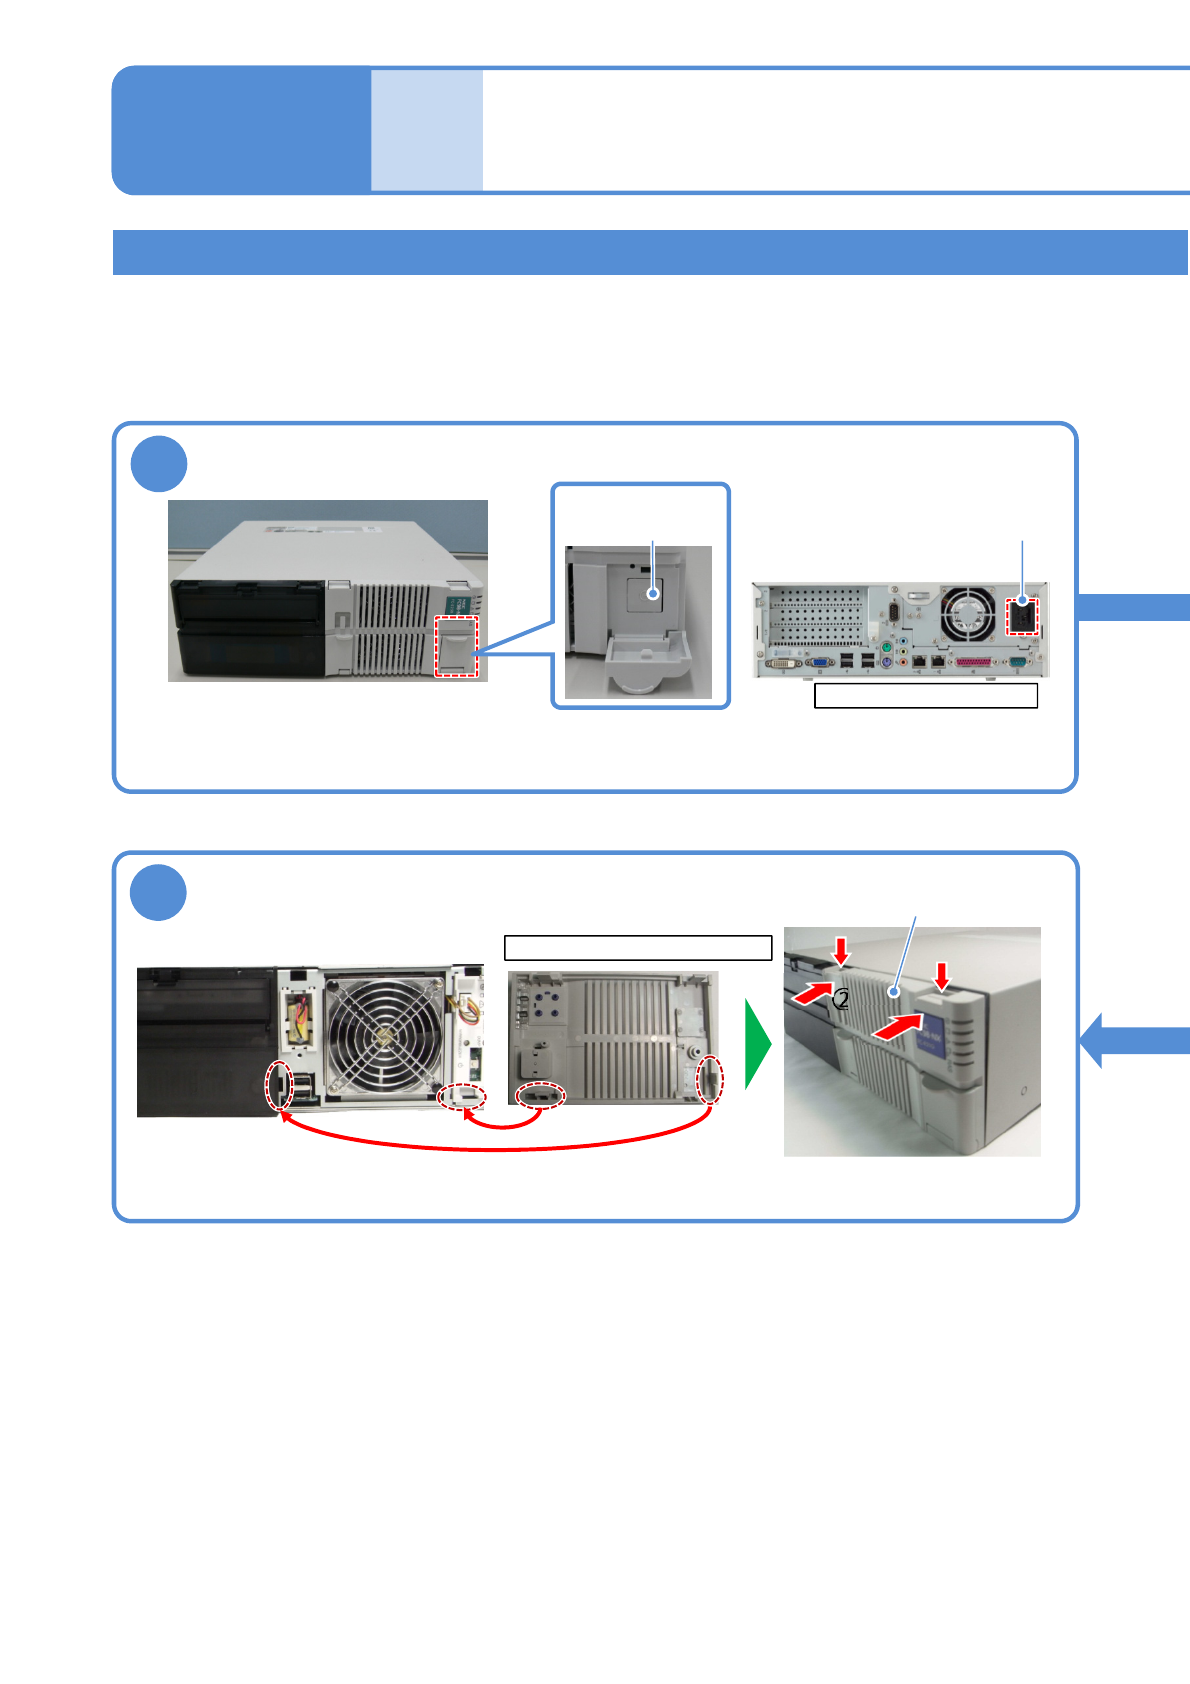
Remove the cover
●Five screws
Cover
3
Front side
NPM-TT2 EJM1EE-MB-08M-01
1
Rear side of FA PC
Cleaning the filter of the FA computer
8-2-1
Cleaning the filter of
the FA computer 1
(LNB(option))
Main power
supply switch
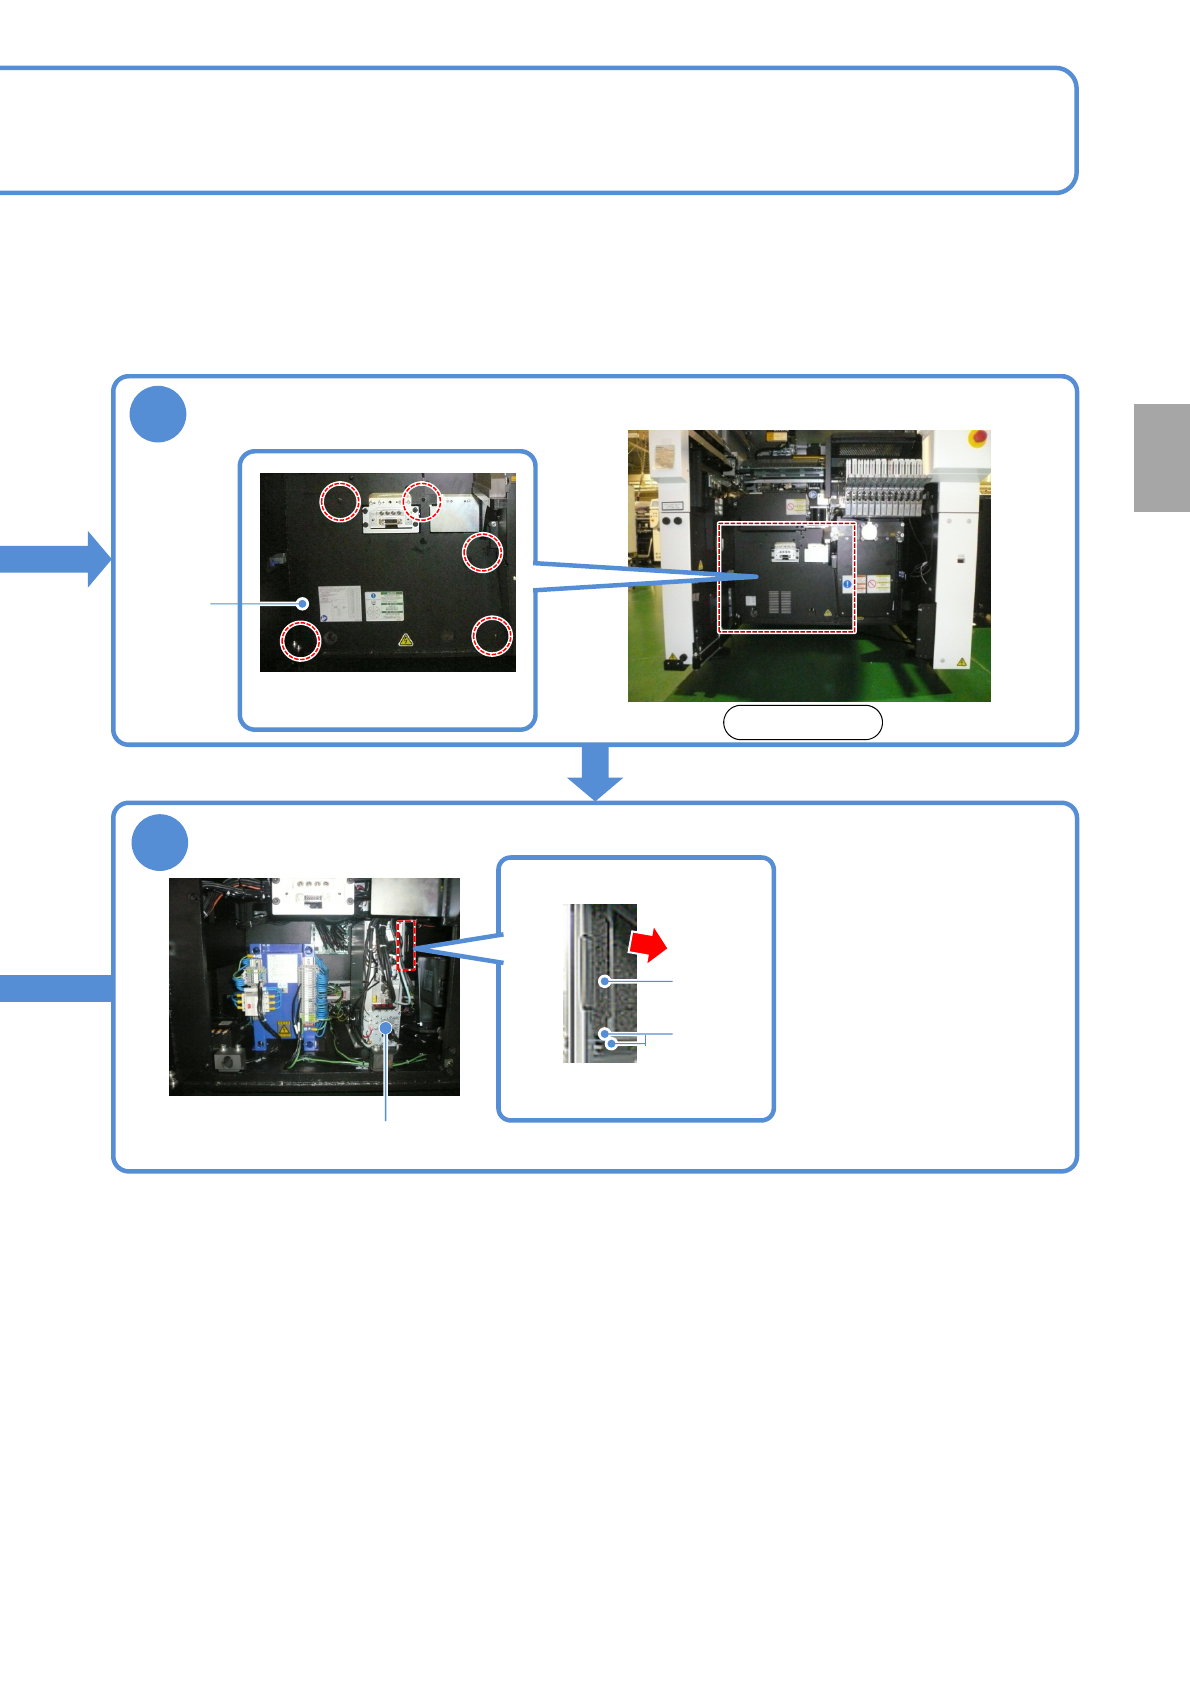
●To end production, turn OFF the main power supply switches on the machine and then on the LNB.
(→”[LNB] 2.1 Operating Instructions of the Main Power Supply Switch at Production Start/End”)
Turn OFF the power of the FA PC
AC power
connector
Maintenance
8-2
6
Rear side of the front cover
①
①
②
②
Front cover
●Align claws on the front cover with holes in the PC.
●Push down the tip of the claws
and push the front cover .
Attach the front cover
Describes how to clean the filter set on the FA computer
Tool used: vacuum cleaner Time required: 15 minutes
●The FA PC model may look different than the images used in this manual. Perform operation or
maintenance based on your FA PC model.
NPM-TT2 EJM1EE-MB-08M-01
8-2-2
Every
3000
hours
PeriodicPeriodicPeriodicPeriodicPeriodic
inspection
2 3
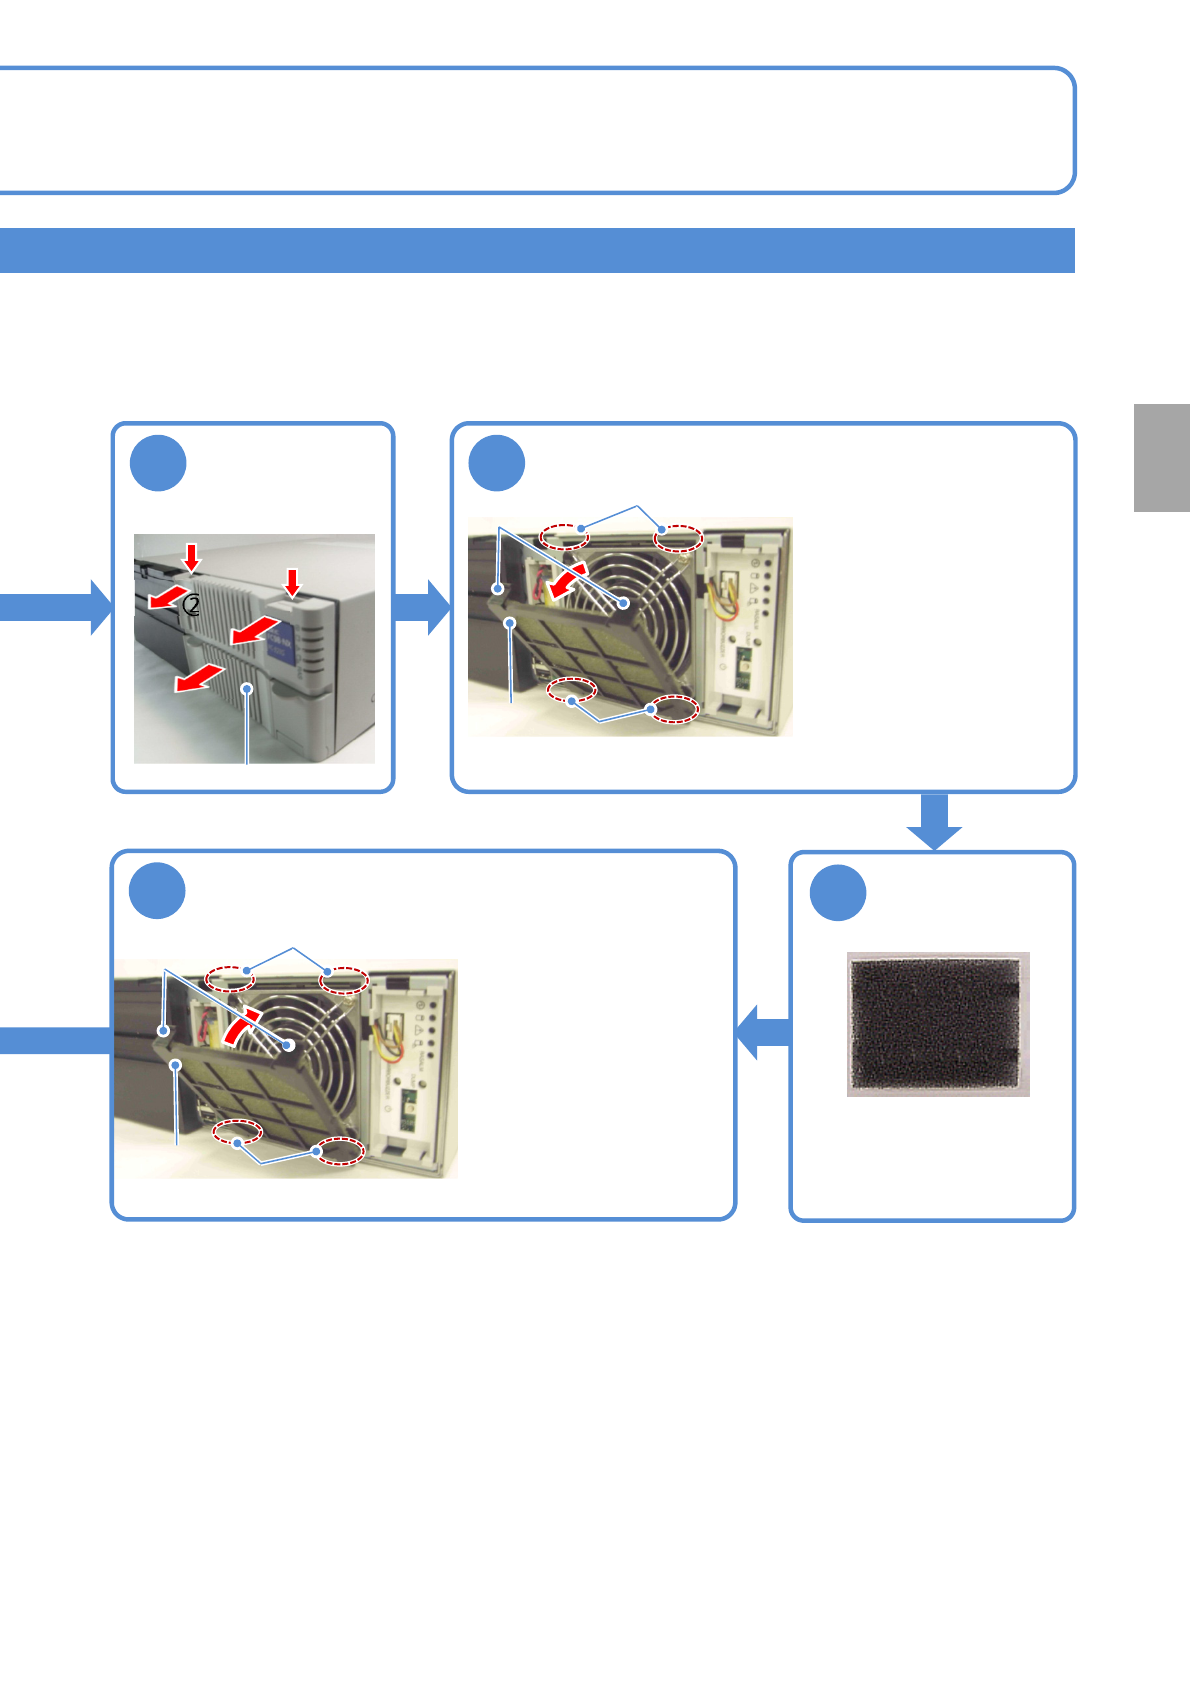
Remove the filter holder
●Remove claws from four
grooves.
①
①
②
②
③
Front cover
●Remove the filter attached
to the filter holder.
●Remove dust with a
vacuum cleaner.
4
5
●Install the filter to the filter
holder.
●Insert claws into four
grooves.
Groove
Groove
Claw
Filter holder
Groove
Groove
Claw
Remove the front
cover from the FA
PC
Attach the filter holder
Filter holder
Remove dust
attached to
the filter