N7201A653E.pdf - 第243页
NPM- TT2 EJM1EE-MB-11 M-02 11 - 1 -4 Replacement 4 Loosen the head fixing bolts ● Open the shutter and move the head to the position where you can see the bolts. shutter Loosen the bolt Lower right of head 1 Upper right …
NPM-TT2 EJM1EE-MB-11M-02
Describes the handling method of a placement head.
Tool used: Torque wrench (N510050388AA), long bit (Hex. opposite side of 5 mm, N510046662AA)
Time required: 10 minutes
1
Maintenance
11-1
6
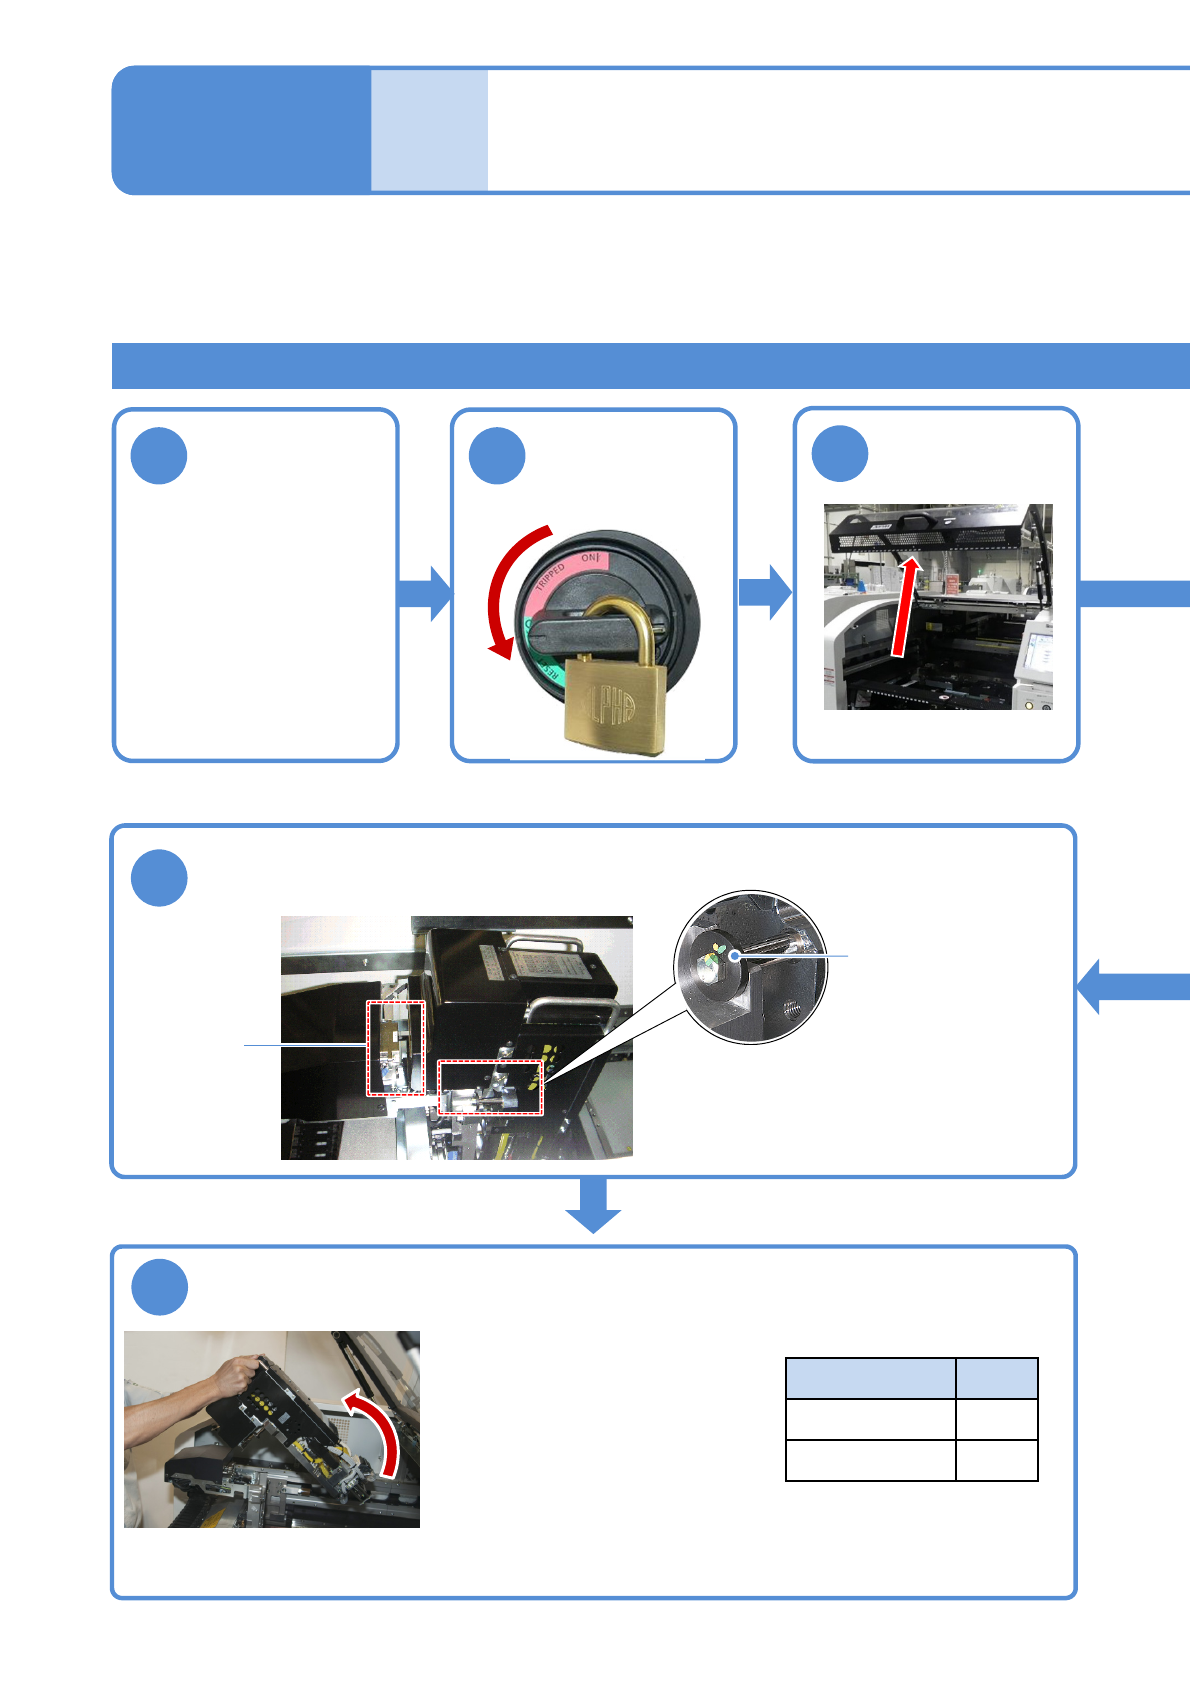
Remove the head
●Hold the handle in the upper art
of the head, and detach the
head with paying attention not to
let it interfere with the cover.
●Store the detached heads on the
head stand.
Type Weight
8-nozzle head
8.3 kg
3-nozzle head
8.6 kg
■Weight of heads
2
Removing a head
Ensure that
the connector
section is
disconnected
●Push and lean the upper part of the head
to the rear to work.
●The head-stopper sections (one each on
the right and the left) prevent the head
from dropping into the machine.
5
Remove the connector
Head stopper
11-1-3
Turn OFF the
power and lock
the machine
OFF
3
Detach the tray
feeder or the
feeder cart
●For a tray feeder
(→ P.14-8)
●For a feeder cart
(→ P.3-2)
Head and nozzle
changer replacement 2
NPM-TT2 EJM1EE-MB-11M-02
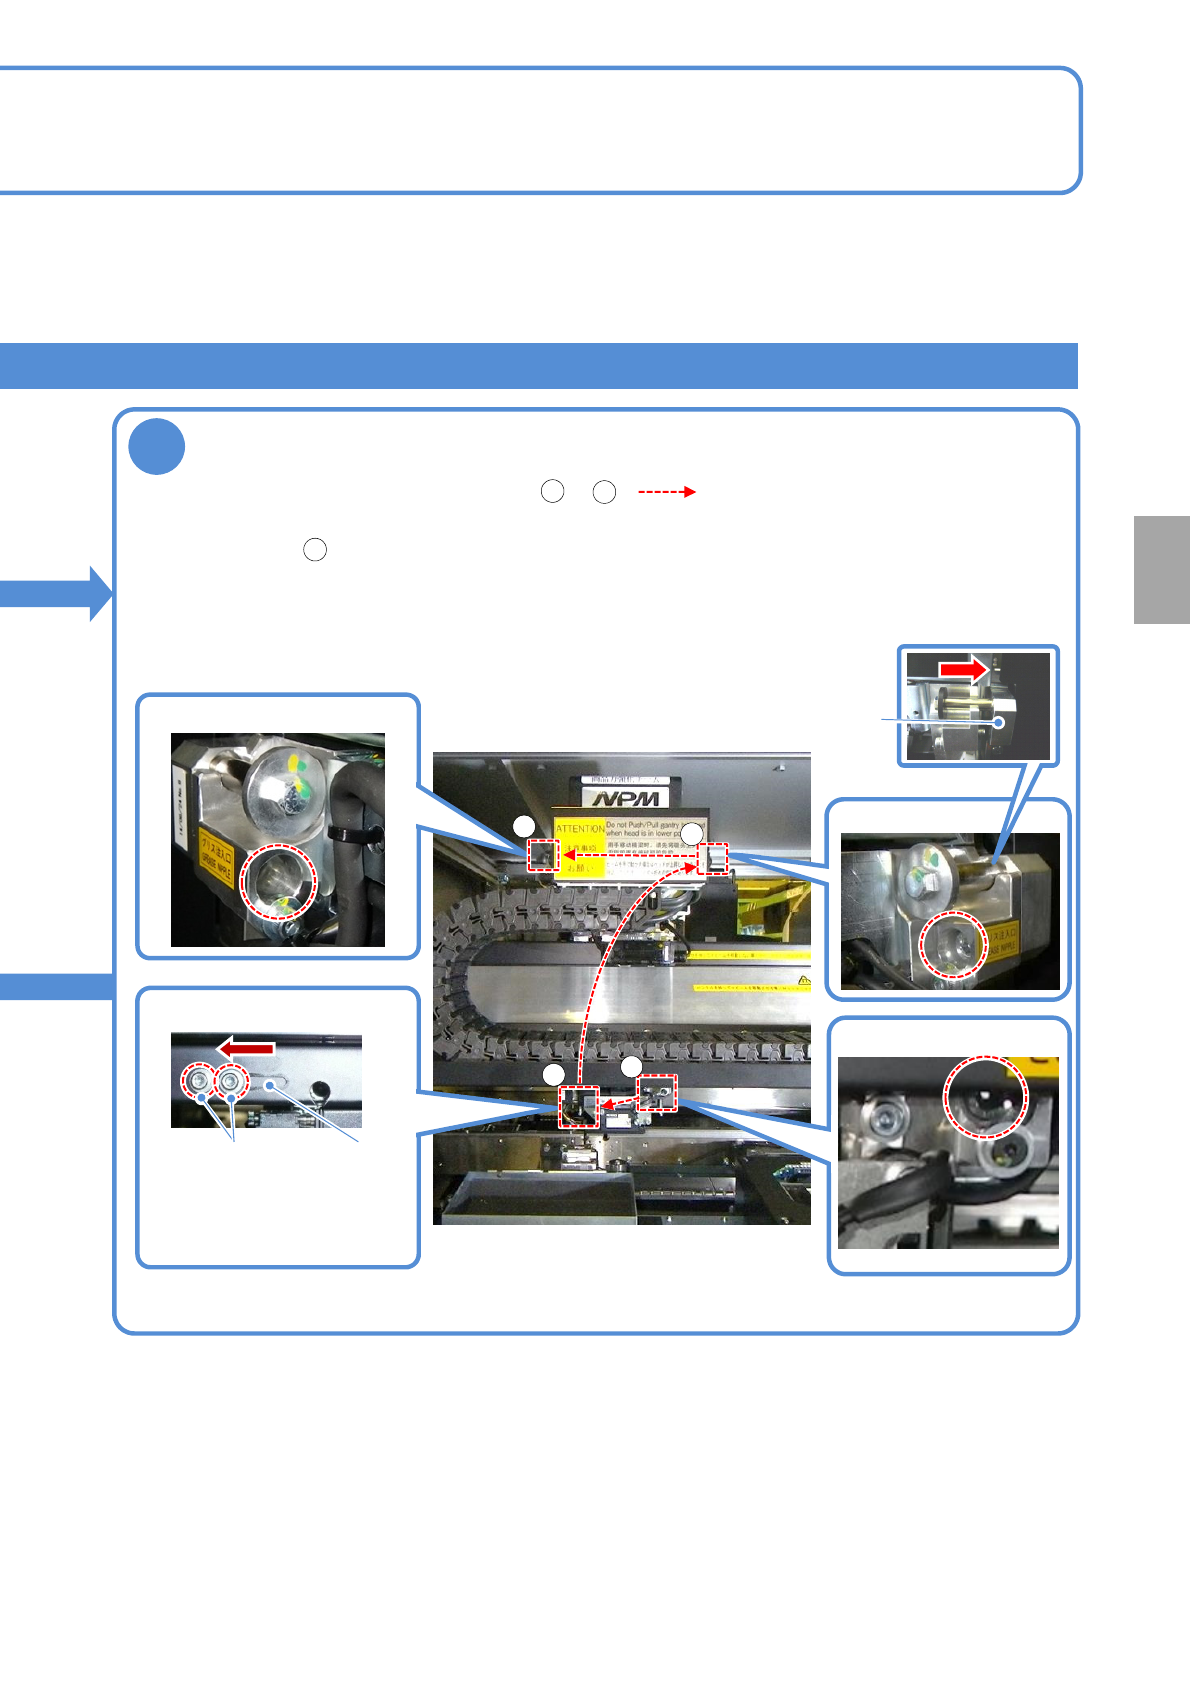
11-1-4
Replacement
4
Loosen the head fixing bolts
●Open the shutter and move
the head to the position
where you can see the bolts.
shutter
Loosen the bolt
Lower right of head
1
Upper right of head
3
Upper left of head
4
Lower left of head
2
Head unit
●For bolts on the upper right of the head, make sure that the screw part of the bolt is
completely removed after sliding the head unit far side of the machine. If the installation
surface is closely attached, entire screw part may not be removed.
●Remove four fixing bolts in the order of to ( ). If you remove the bolts in the
wrong order, the fixing bolts and taps may be damaged.
1
4
3
NPM-TT2 EJM1EE-MB-11M-02
Maintenance
11-1
11-1-5
Head and nozzle
changer replacement 3
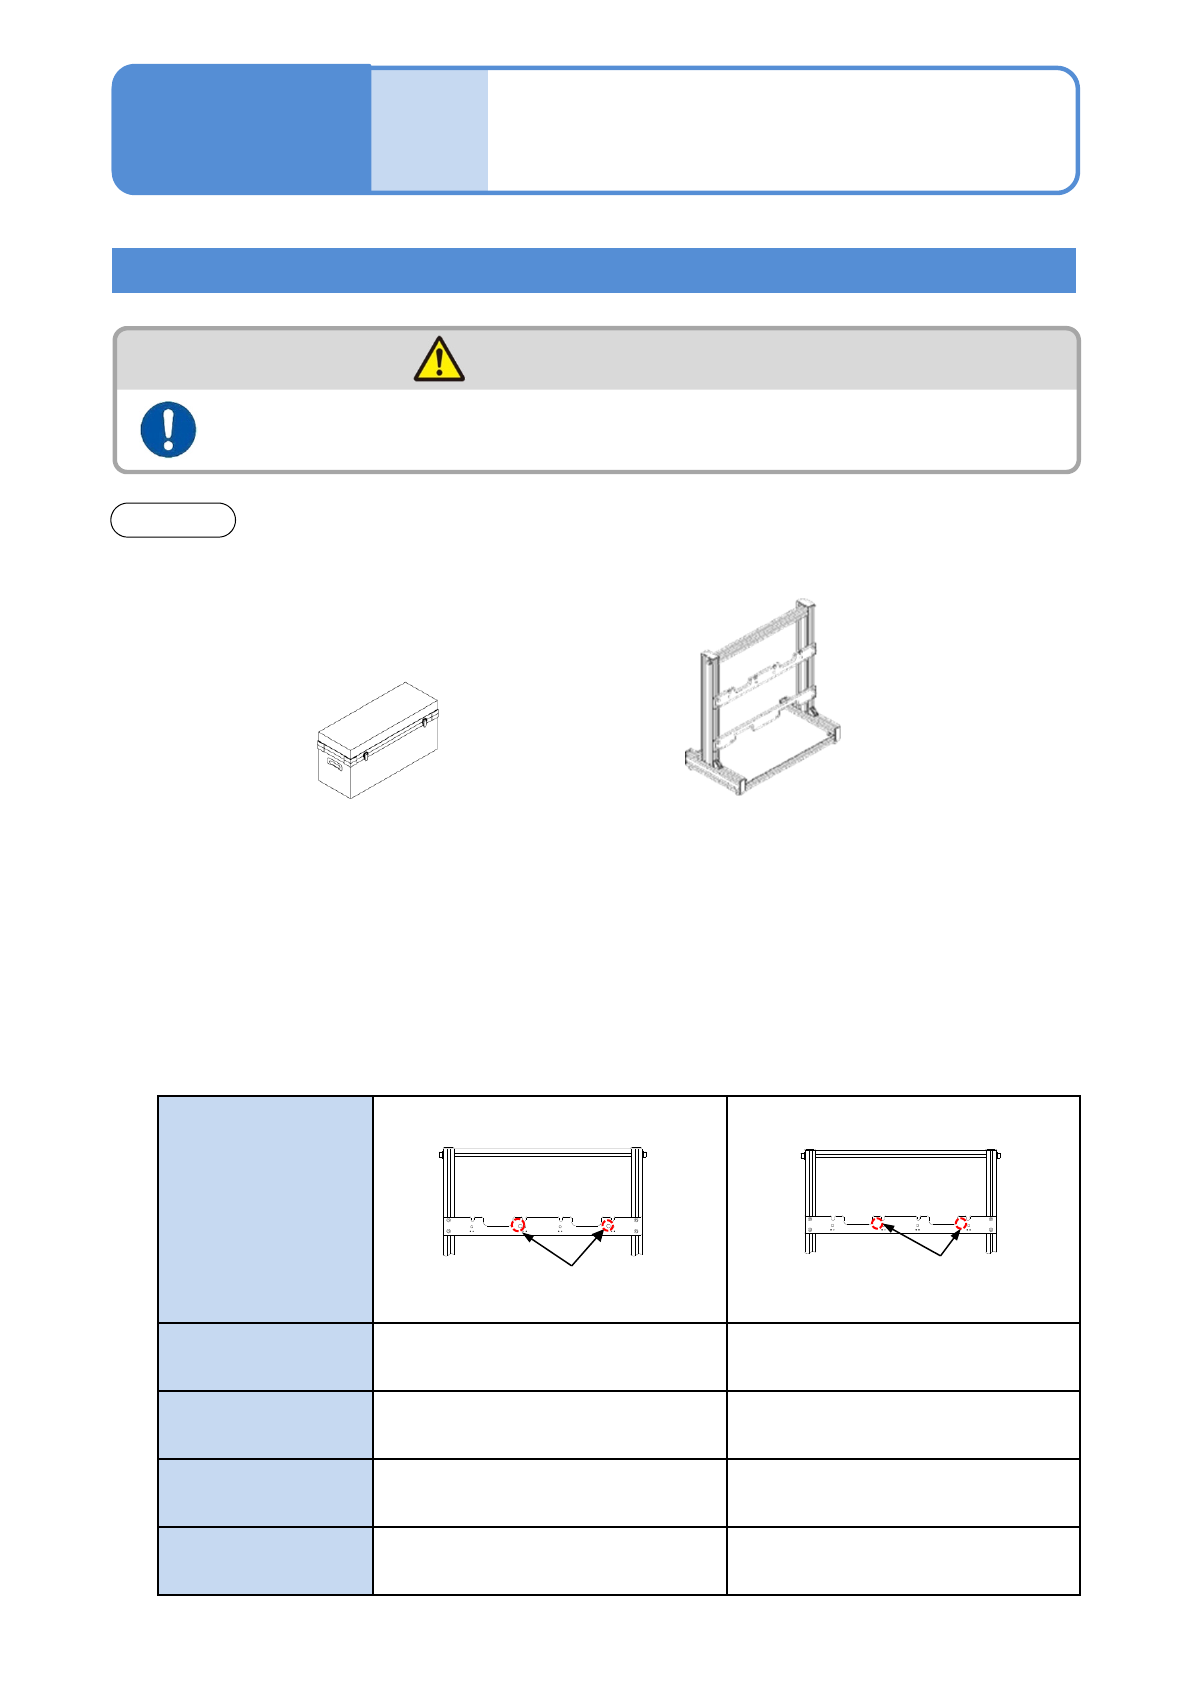
Precautions in placing the head temporarily
CAUTION
NOTICE
Prepare a workbench (0.9 to1.2 m in height) on your own to place the head temporarily.
The removed head should be kept in the head stand or the head storing box (below left).
◆ Head storing box
Model No.: MTKA009253AA
◆ Head stand (option)
Model No.: N610124224AB
Handle the head carefully when carrying it
(Risk of injury due to drop/Risk of back pain)
Appearance of the
stand
10 mm hole x 2 No 10 mm hole
Lightweight
16-nozzle head V2
○ (Applicable) ○ (Applicable)
Lightweight
8-nozzle head
○ (Applicable) X (Not applicable)
4-nozzle head
○ (Applicable) X (Not applicable)
3-nozzle head V2
○ (Applicable) X (Not applicable)
No hole
Be sure to use the head stand (Model No.: 610124224AB) shown above to place the lightweight
8-nozzle head and 4-nozzle head temporarily.
(Model No. is affixed on the nameplate.)
The head stand comes in two types: the one to which lightweight 8-nozzle head, 4-nozzle head
and 3-nozzle head V2 are applicable, and the other to which they are not applicable.
See the table below to find the applicability of the heads.
10mm hole (x2)