N7201A653E.pdf - 第247页
NPM- TT2 EJM1EE-MB-11 M-02 11 - 1 -8 Replacement 6 ● Move the head to the position where you can see the bolt. Lower right of head 1 Upper right of head 3 Upper left of head 4 Lower left of head 2 ● Use the long bit to t…

NPM-TT2 EJM1EE-MB-11M-02
Time required:10 minutes (Time taking to install a head)
Attaching a head 1
11-1-7
1 2
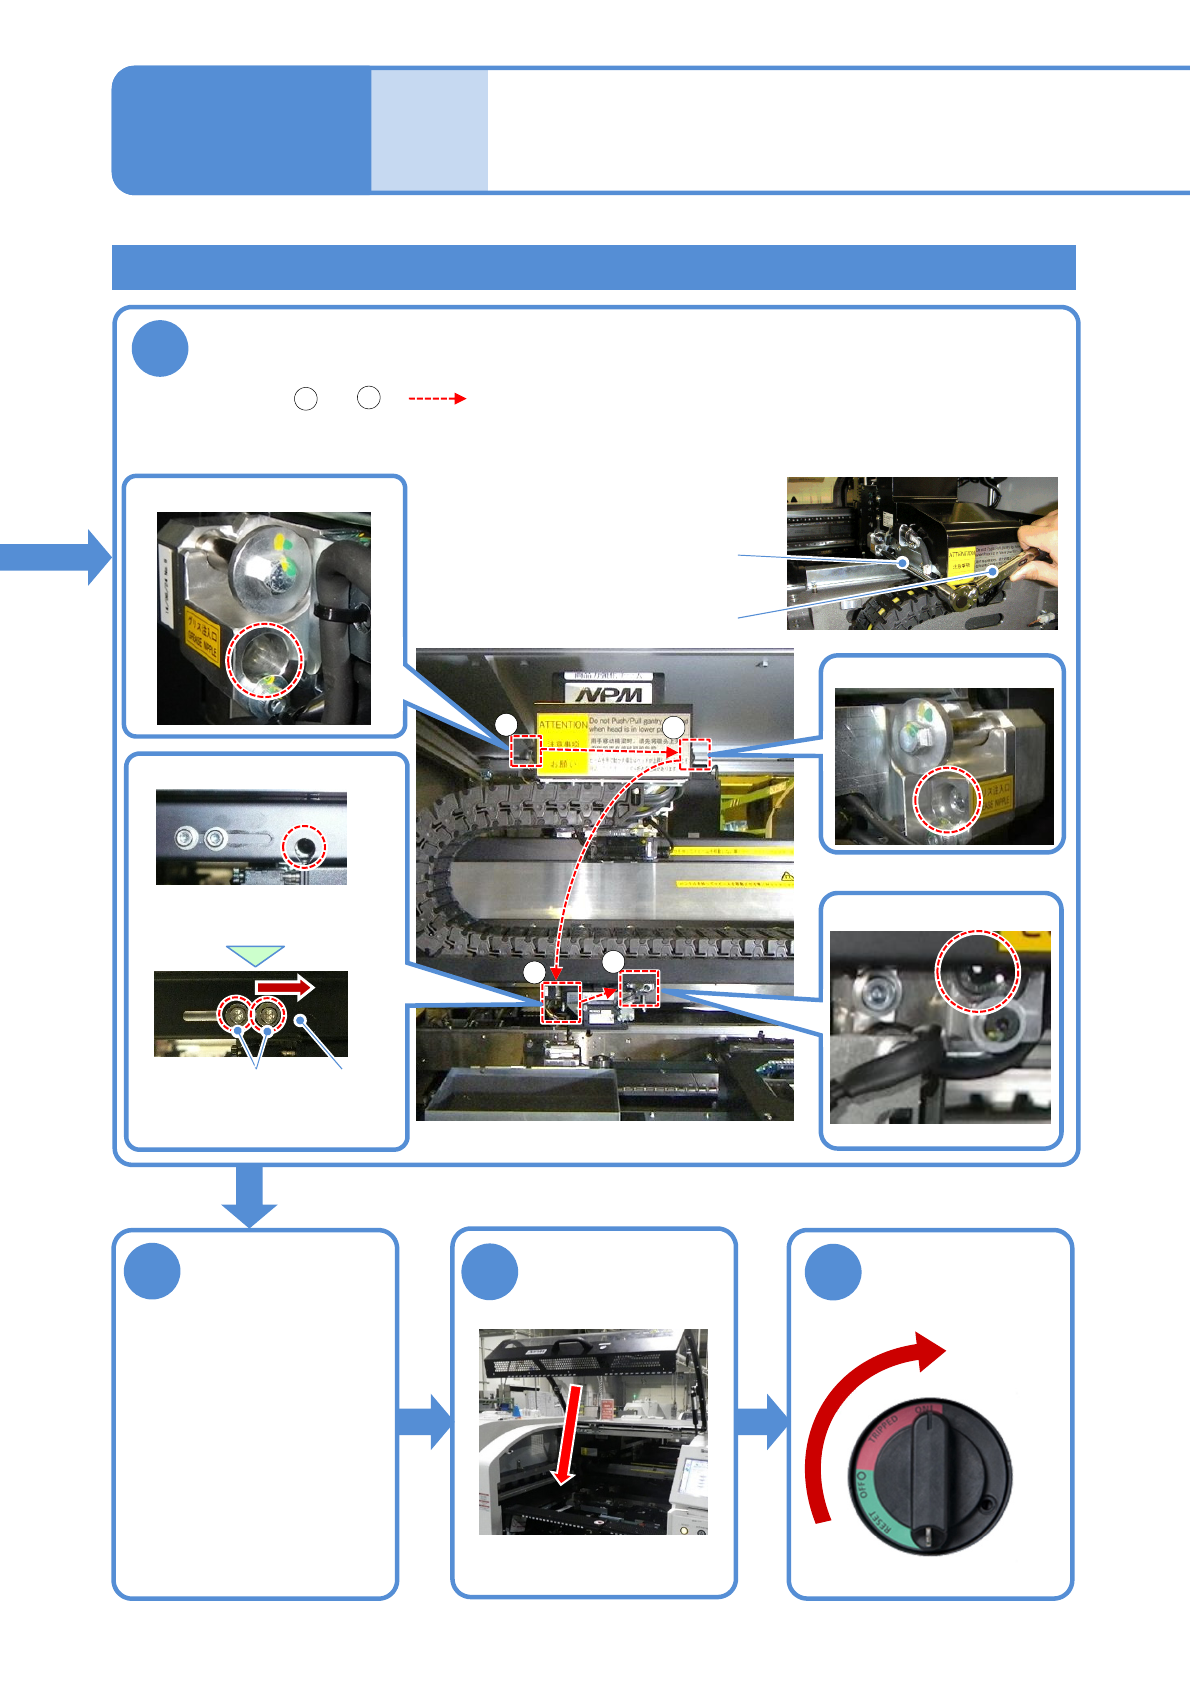
Turn OFF the
power and lock
the machine
OFF
3
Detach the tray
feeder or the
feeder cart
●For a tray feeder
(→ P.14-8)
●For a feeder cart
(→ P.3-2)
NOTICE
When the BGA or CSP is attached
with the 8-nozzle head or 3-nozzle
head, make sure that the multi-
recognition camera unit has a lateral
lighting attached to it.
Lateral lighting
Multi-recognition camera unit
5
Pull the head to the front to insert the
connector section
Connector
Head plate
●Head stopper: (one
each on right and left)
Head stopper
●Hold the handle in the upper part of the head, and hook the head
stopper to X-axis plate with paying attention not to let it interfere with
the cover.
●Confirm the installation surface for any foreign objects beforehand.
X-axis plate
4
Install the head
Maintenance
11-1
Head and nozzle
changer replacement 4

NPM-TT2 EJM1EE-MB-11M-02
11-1-8
Replacement
6
●Move the head to the position
where you can see the bolt.
Lower right of head
1
Upper right of head
3
Upper left of head
4
Lower left of head
2
●Use the long bit to temporarily tighten four fixing bolts in the order of to ( ).
●When temporarily fixing the fixing bolts and , press the head against the head plate with
the connector connected.
●If you temporarily tighten the bolts in the wrong order, the fixing bolts and taps may be
damaged.
1
4
1
2
Long
screwdriver bit
Temporarily tighten fixing bolts to secure the head
Tighten the bolt
shutter
●Tighten the bolt and close
the shutter.
7
To
NPM-TT2 EJM1EE-MB-11M-02
11-1-9
Attaching a head 2
10
8
9
7
Torque wrench
Long bit
●Move the head to the position
where you can see the bolt.
Lower right of head
1
Upper right of head
3
Upper left of head
4
Lower left of head
2
Replace the
nozzle changer
●Use a nozzle changer
that matches the attached
head
Final tighten fixing bolts to secure the head
●Use the long bit to final tighten four fixing bolts to the tightening torque specified below in the
order of to ( )
●If you final tighten the bolts in the wrong order, the fixing bolts and taps may be damaged.
●Standard torque value: 9.8 ±0.5 Nꞏm
1
4
Tighten the bolt shutter
●Tighten the bolt and close the
shutter.
Unlock the
machine and
ON
Maintenance
11-1
Head and nozzle
changer replacement 5