N7201A653E.pdf - 第274页
NPM- TT2 EJM1EE-MB -12M-04 R eplacing the tr ansfer belt of the PCB tr ansfer con v eyor 3 Maintenance 12-1 12-1 -5 Check the PCB transfer (→[Operating Procedure] P.5-2-8) Unlock the machine and ON 14 15
NPM-TT2 EJM1EE-MB-12M-04
12-1-4
10
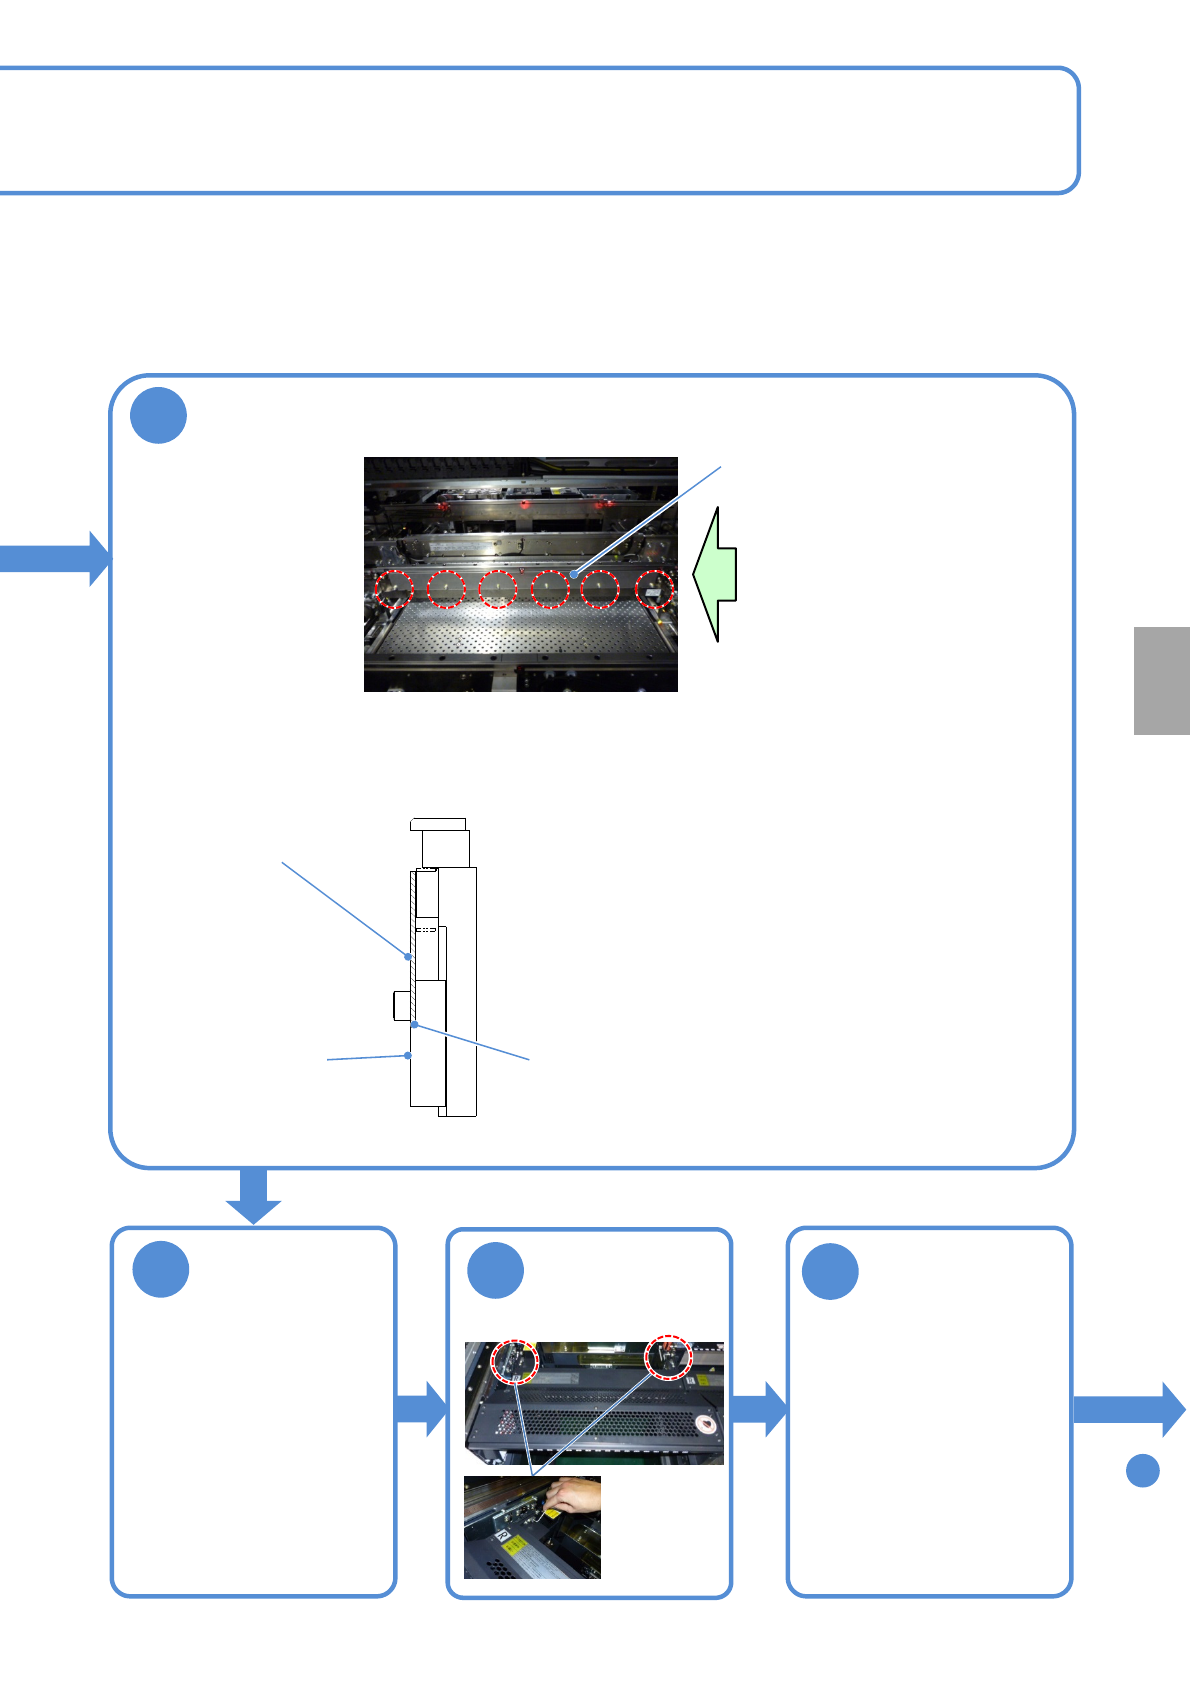
Secure the plate
●Six screws
Plate
■Figure as seen from the arrow direction
Plate
Side B Side A
●Push the plate to the step on Side A and
install it to be paralleled to Side B.
Adjust the belt
tension
(→ P.6-5)
Consumable parts
replacement
●Two
Screws:
M4
Attach the
feeder table
cover (→P.3-3)
To
14
Attach the tray
feeder or the
feeder cart
●For a tray feeder
(→ P.14-8)
●For a feeder cart
(→ P.3-2)
11
12
13
NPM-TT2 EJM1EE-MB-12M-04
Replacing the transfer belt of
the PCB transfer conveyor 3
Maintenance
12-1
12-1-5
Check the PCB
transfer
(→[Operating Procedure]
P.5-2-8)
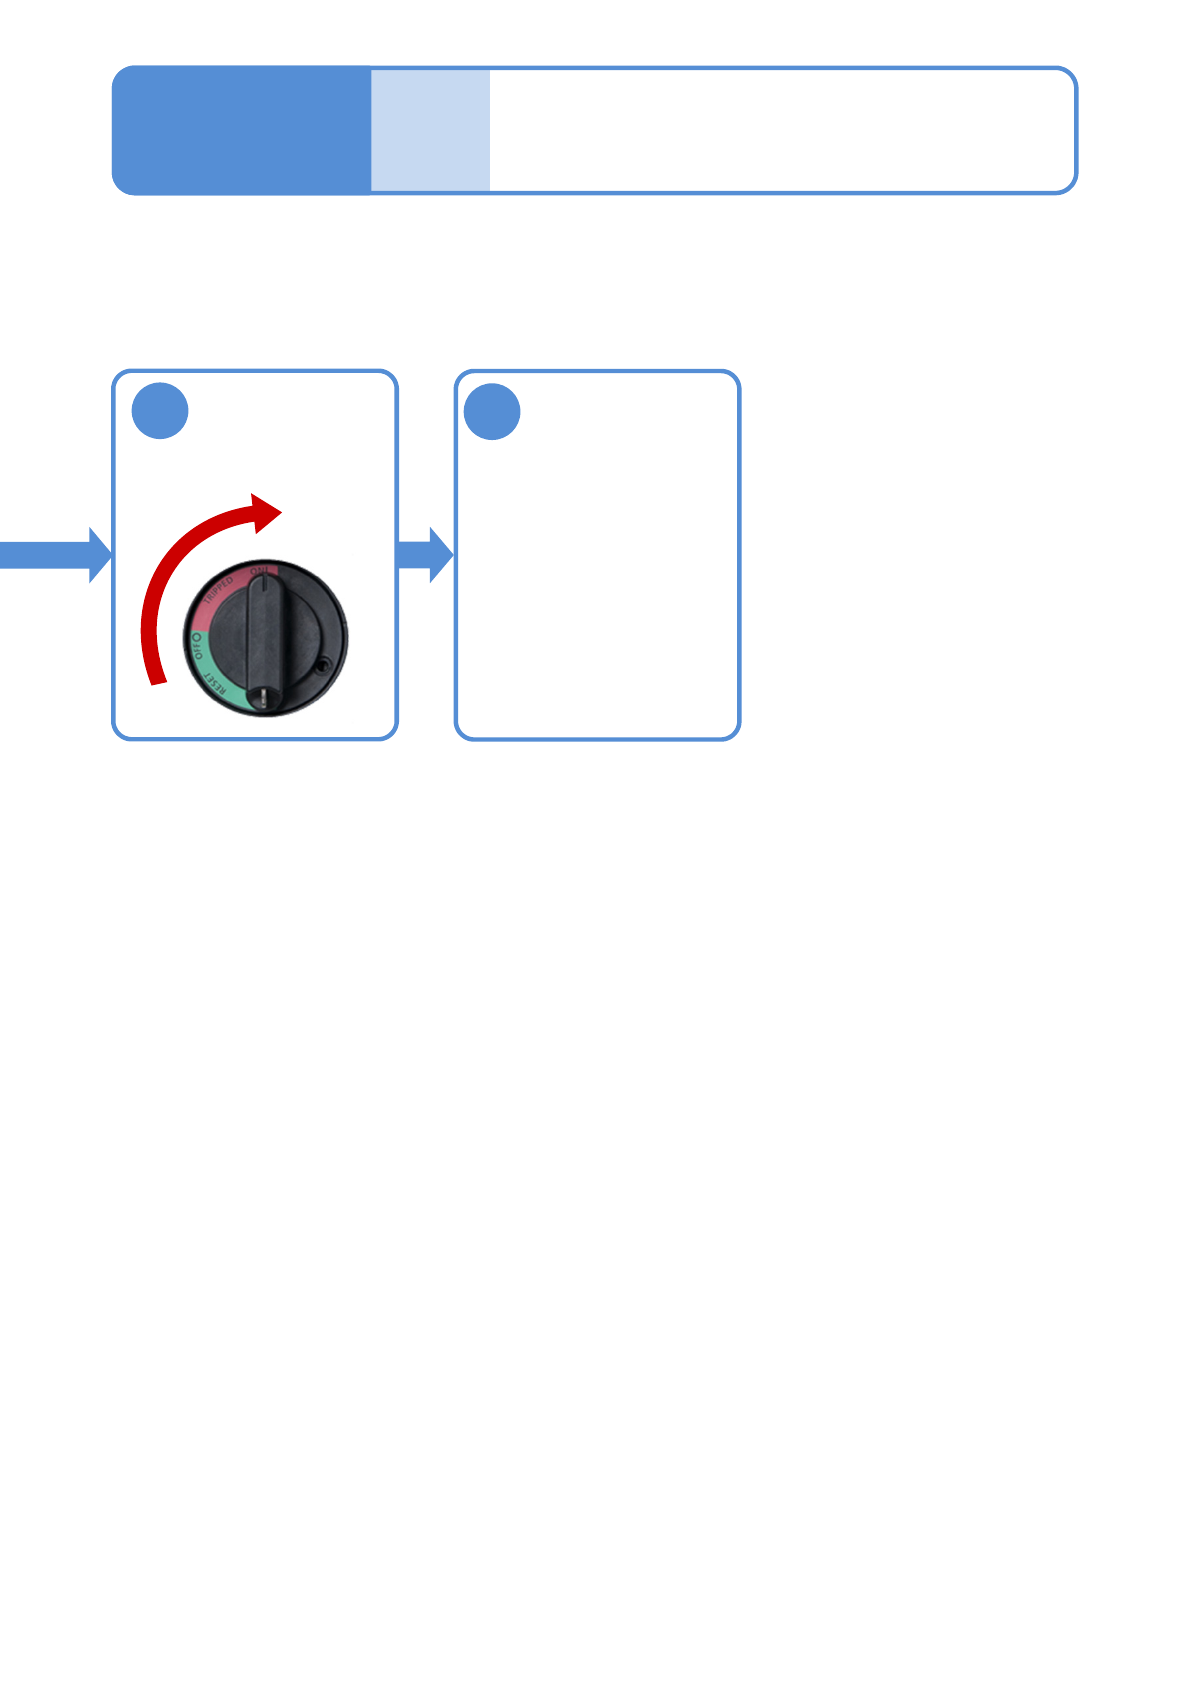
Unlock the
machine and
ON
14
15
NPM-TT2 EJM1EE-MB-12M-04
12-2-1
Consumable parts
replacement
Replacing the transfer belt
of the extension conveyor
(Option) 1
Maintenance
12-2
Taking the front side as an example, the exchange method when the extension conveyor is equipped to the
downstream process is described here.
Tool used: Allen wrench (2 mm) Time required: 30 to 60 minutes
1
2
Detach the tray
feeder or the
feeder cart
● For a tray feeder
(→ P.14-8)
● For a feeder cart
(→ P.3-2)
3
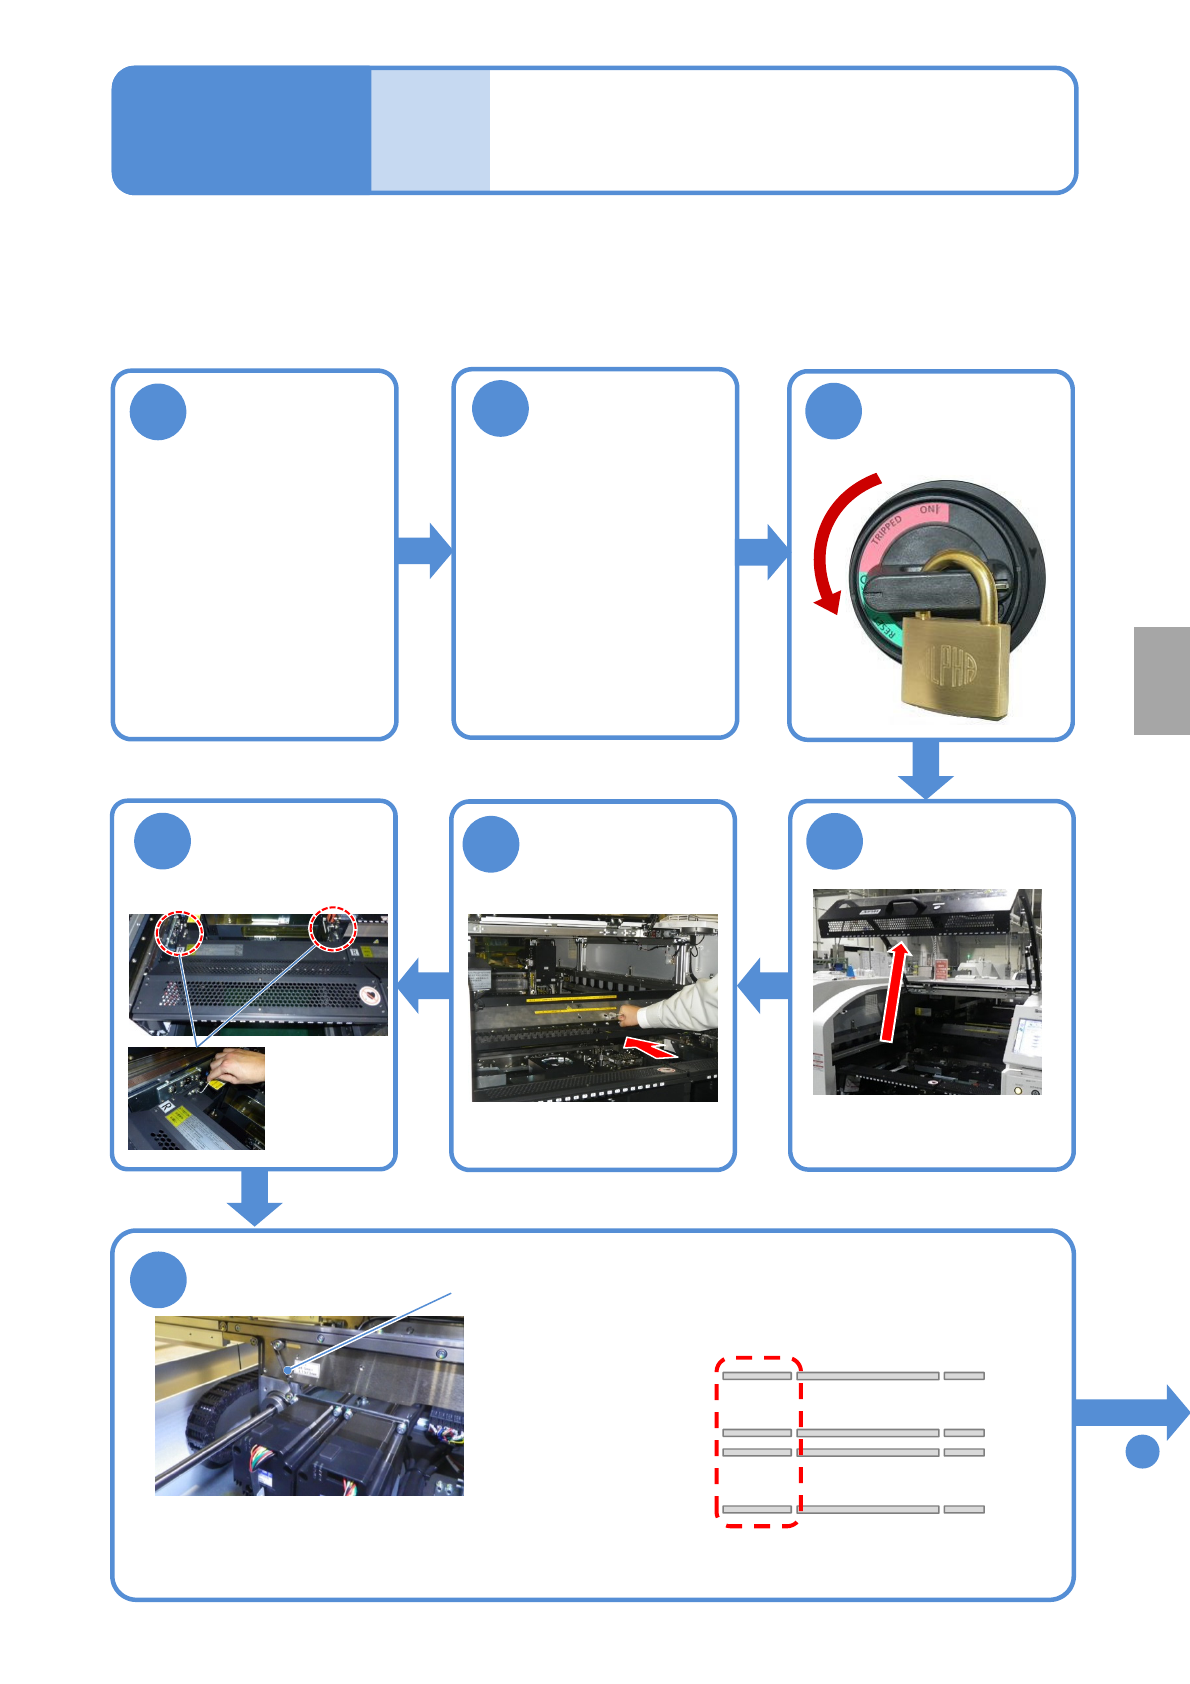
OFF
Turn OFF the
power and lock
the machine
4
5
Push the X-axis
inward
6
●Two
Screws:
M4
Remove the
feeder table
cover (→P.3-3)
7
Remove the belt
● Remove it, pulling out towards you.
●If disposing of the belt, you may cut it
with a wire cutter or nippers to remove.
■2 belts on each lane
Movable side
Fixed side
Movable side
Fixed side
Lane 1
Lane 2
Belt
To
8
(→[ Operating
Procedure] P. 2-5-4)
Set the conveyor
width to 150 mm
(To improve
workability)