N7201A653E.pdf - 第286页
NPM- TT2 EJM1EE-MB -12M-04 Replacing the UPS battery of the F A computer (LNB) 1 6 1 12-3 -9 Rear side of FA computer AC power connector 5 Center bracket Battery cover 7 ① Open the wire stickers (2) holding the conne cto…

NPM-TT2 EJM1EE-MB-12M-04
12-3-8
Replacing the calendar battery in FA PC(LNB)
● Special skills such as BIOS settings are required for replacing the calendar battery. Please contact us.
Consumable parts
replacement
NPM-TT2 EJM1EE-MB-12M-04
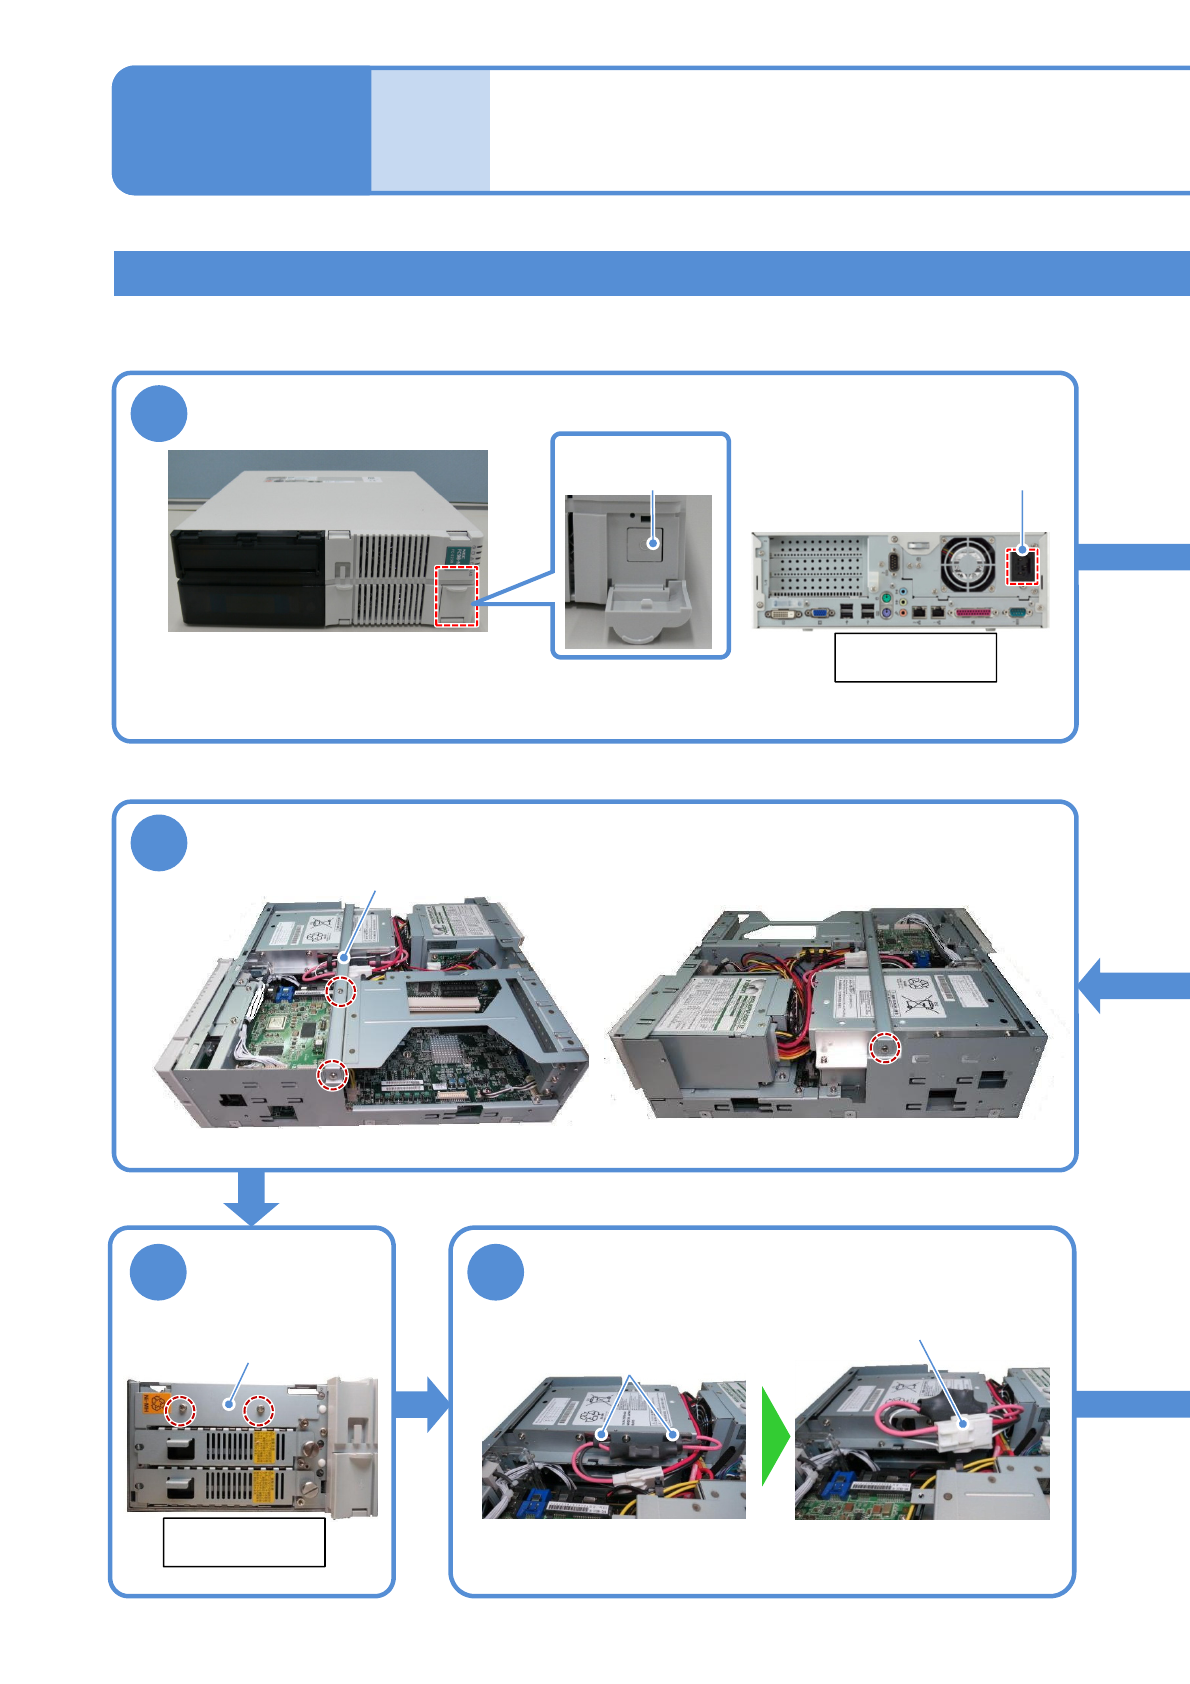
Replacing the UPS battery of the FA computer (LNB) 1
6
1
12-3-9
Rear side of
FA computer
AC power
connector
5
Center bracket
Battery cover
7
①Open the wire stickers (2)
holding the connectors
②Remove the connector
Wire
sticker
connector
Replacing the
batteries 5
Maintenance
12-3
●If a battery is used beyond its service life, the production information in the hard disk may be lost
or the hard disk may be damaged when power failure has occurred.
Turn OFF the power of the FA PC
●To end production, turn OFF the main power supply switches on the machine and then on the LNB.
(→”[LNB] 2.1 Operating Instructions of the Main Power Supply Switch at Production Start/End”)
Main power
supply switch
●Screws (3)
Remove the center bracket
Remove the
battery cover
Remove the UPS battery connector
Front side of
FA computer
●Screws (2)
Tool used: Phillips screwdriver Time required: 30 minutes

NPM-TT2 EJM1EE-MB-12M-04
Remove the screws
2
12-3-10
3
①
②
②
4
①
②
①
①
8
Remove the UPS battery
To
9
Remove the cover
Rear side of
FA computer
Rear side of
FA computer
●Screws (3)
Front side of
FA computer
①Pull the upper side of the cover
while pushing the button in the
upper side of the cover.
②Pull the bottom side of the cover.
●Pull it carefully because the nail
can be broken if you force it to
open.
Remove the front cover
Front cover
Consumable parts
replacement
●The cover is attached with
four claws (inside the cover).
●While opening the cover slightly outward,
remove it.
①Remove screws. ●Screws (6)
②Slide the UPS battery toward the rear side
and remove.