N7201A653E.pdf - 第288页
NPM- TT2 EJM1EE-MB -12M-04 12-3 -11 ● Screws (6) 9 Bracket Bracket 13 14 15 Attach the cover ● Replacement batter y :N510069573AA R eplacing the ba tteries 6 Maintenance 12-3 Replacing the UPS battery of the F A computer…

NPM-TT2 EJM1EE-MB-12M-04
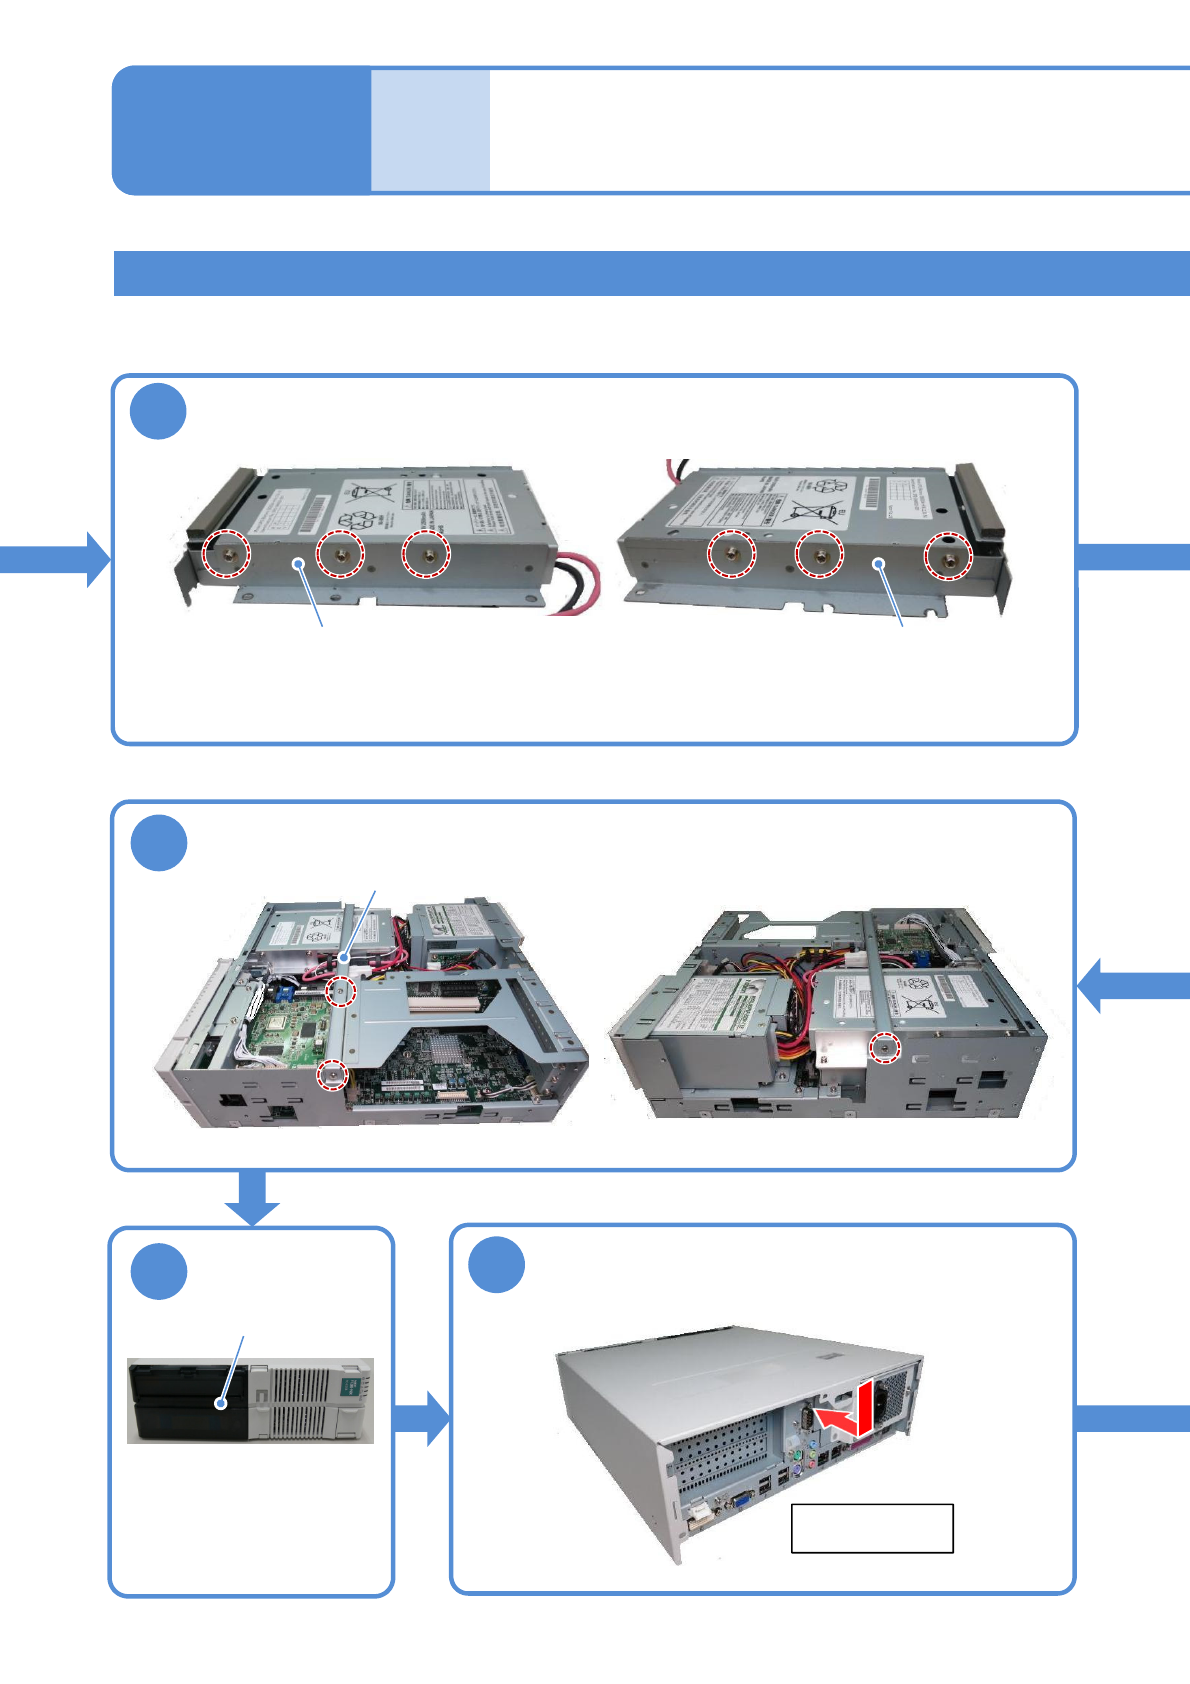
Remove the screws
2
12-3-10
3
①
②
②
4
①
②
①
①
8
Remove the UPS battery
To
9
Remove the cover
Rear side of
FA computer
Rear side of
FA computer
●Screws (3)
Front side of
FA computer
①Pull the upper side of the cover
while pushing the button in the
upper side of the cover.
②Pull the bottom side of the cover.
●Pull it carefully because the nail
can be broken if you force it to
open.
Remove the front cover
Front cover
Consumable parts
replacement
●The cover is attached with
four claws (inside the cover).
●While opening the cover slightly outward,
remove it.
①Remove screws. ●Screws (6)
②Slide the UPS battery toward the rear side
and remove.
NPM-TT2 EJM1EE-MB-12M-04
12-3-11
●Screws (6)
9
Bracket Bracket
13
14
15
Attach the cover
●Replacement battery :N510069573AA
Replacing the
batteries 6
Maintenance
12-3
Replacing the UPS battery of the FA computer (LNB) 2
●Screws (3)
Center bracket
Attach the center bracket
Attach the front
cover
Front cover
●Put two claws into the
bottom side and fit the
other two claws into the
upper side of the cover.
After that, push the whole
cover to install it.
Rear side of
FA computer
Remove two brackets from the old UPS battery and install then to the
new one
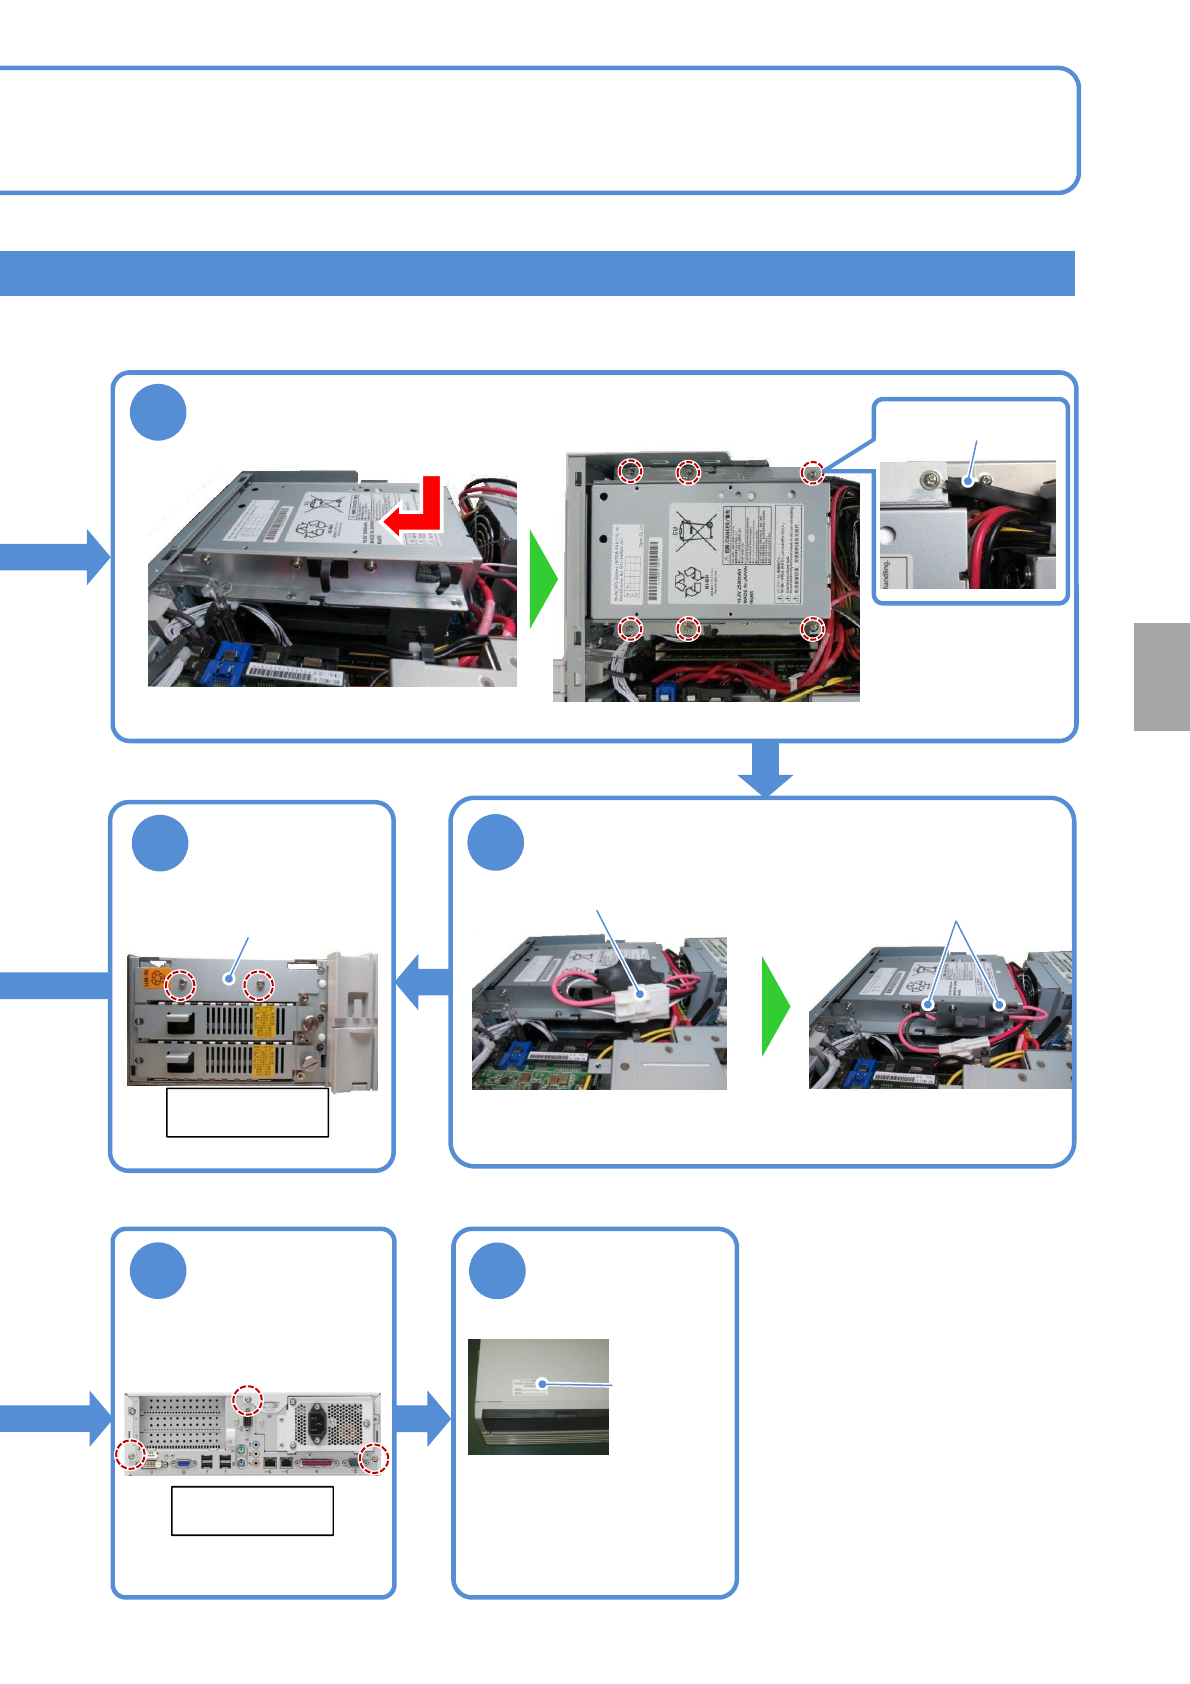
NPM-TT2 EJM1EE-MB-12M-04
12-3-12
10
Attach the UPS battery
②Secure it with six screws.
11
①Plug the connector
Connector
12
Attach the
battery cover
●Screws (2)
Battery cover
Secure with
screws.
16
17
●Screws (3)
Plug the connector of the UPS battery
Wire
sticker
Front side of
FA computer
Rear side of
FA computer
●Affix the label supplied with
the battery and enter the
date for the next
replacement (current
replacement date + 6 years).
Enter the date for
replacement of
the UPS battery
Replacement
date label
Consumable parts
replacement
①Slide the UPS battery toward you and
install.
Earth strap
●The rear left screw
viewed from the
machine front is
tightened together
with the earth strap.
②Fix the cable with wire
sticker