N7201A653E.pdf - 第340页
NPM- TT2 EJ M1EE-MB-13M-0 2 18 + Maintenance 13-7 (The head operate s for measurem ent) 13-7 -3 Close the safety cover 15 16 17 17 18 Height sensor (option) 2 + ● Nozzle Head type Nozzle position Nozzle type 8 No. 3 230 …
NPM-TT2 EJM1EE-MB-13M-02
11
13-7-2
8
Operator
Close the safety cover
9
10
+
(The head moves to the set position)
11
Open the safety cover
13
12
Measurement
part
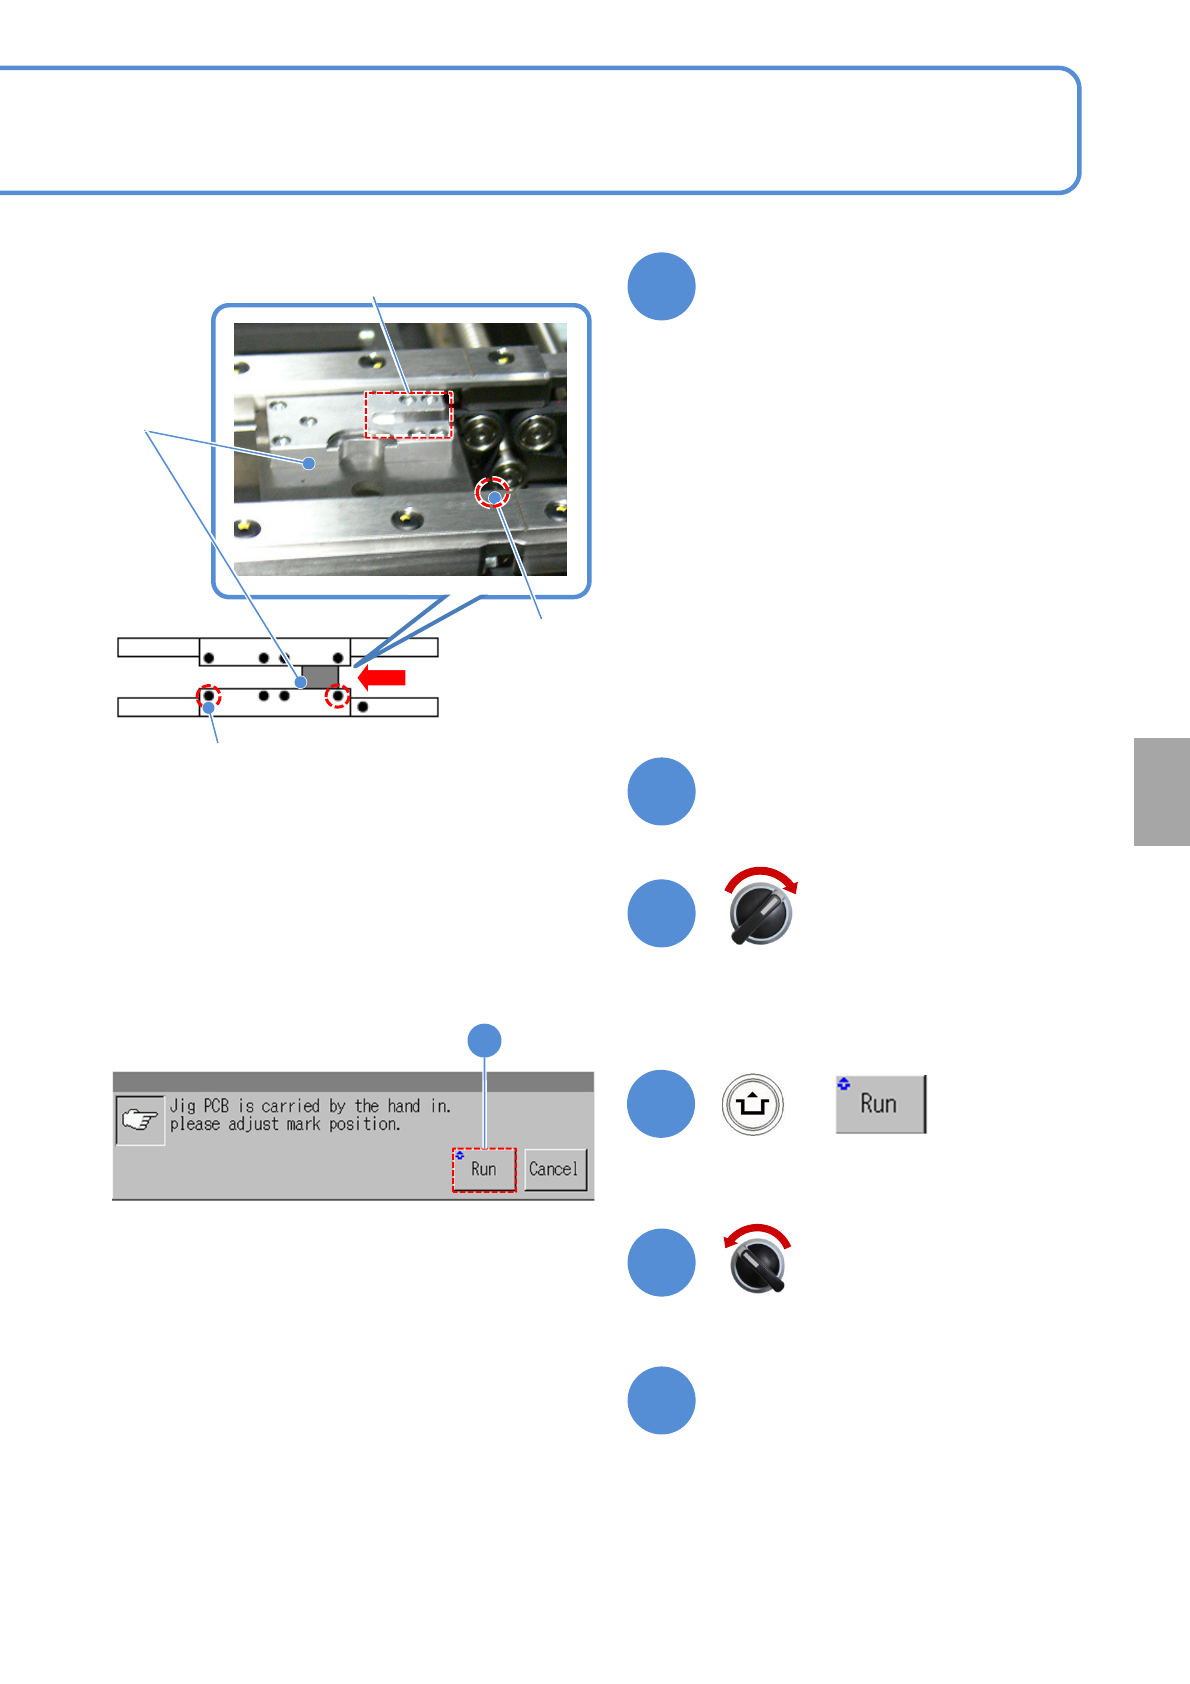
●Confirm that there is no contamination
or stain on the measurement part.
●For calibration of the height sensor,
jigs on both the front and rear heads
are set to lane 1.
●Push the jig to the fixed side on the
rail, and set the jig as the right edge of
the jig matches to the mark on the
conveyor. (The picture on the right
shows for flowing from left to right)
●For flowing from right to left, the left
edge of the jig shall be matched to the
mark on the conveyor.
Slide and set the height sensor
jig from the downstream side
Height
sensor
jig
Calibration
Servo switch ON
Servo switch OFF
Fixed mark
(Left to Right)
Conveyor side
Mark (φ1 hole)
Fixed mark (Right to
Left)
Conveyor side
Mark (φ1 hole)
NPM-TT2 EJM1EE-MB-13M-02
18
+
Maintenance
13-7
(The head operates for measurement)
13-7-3
Close the safety cover
15
16
17
17
18
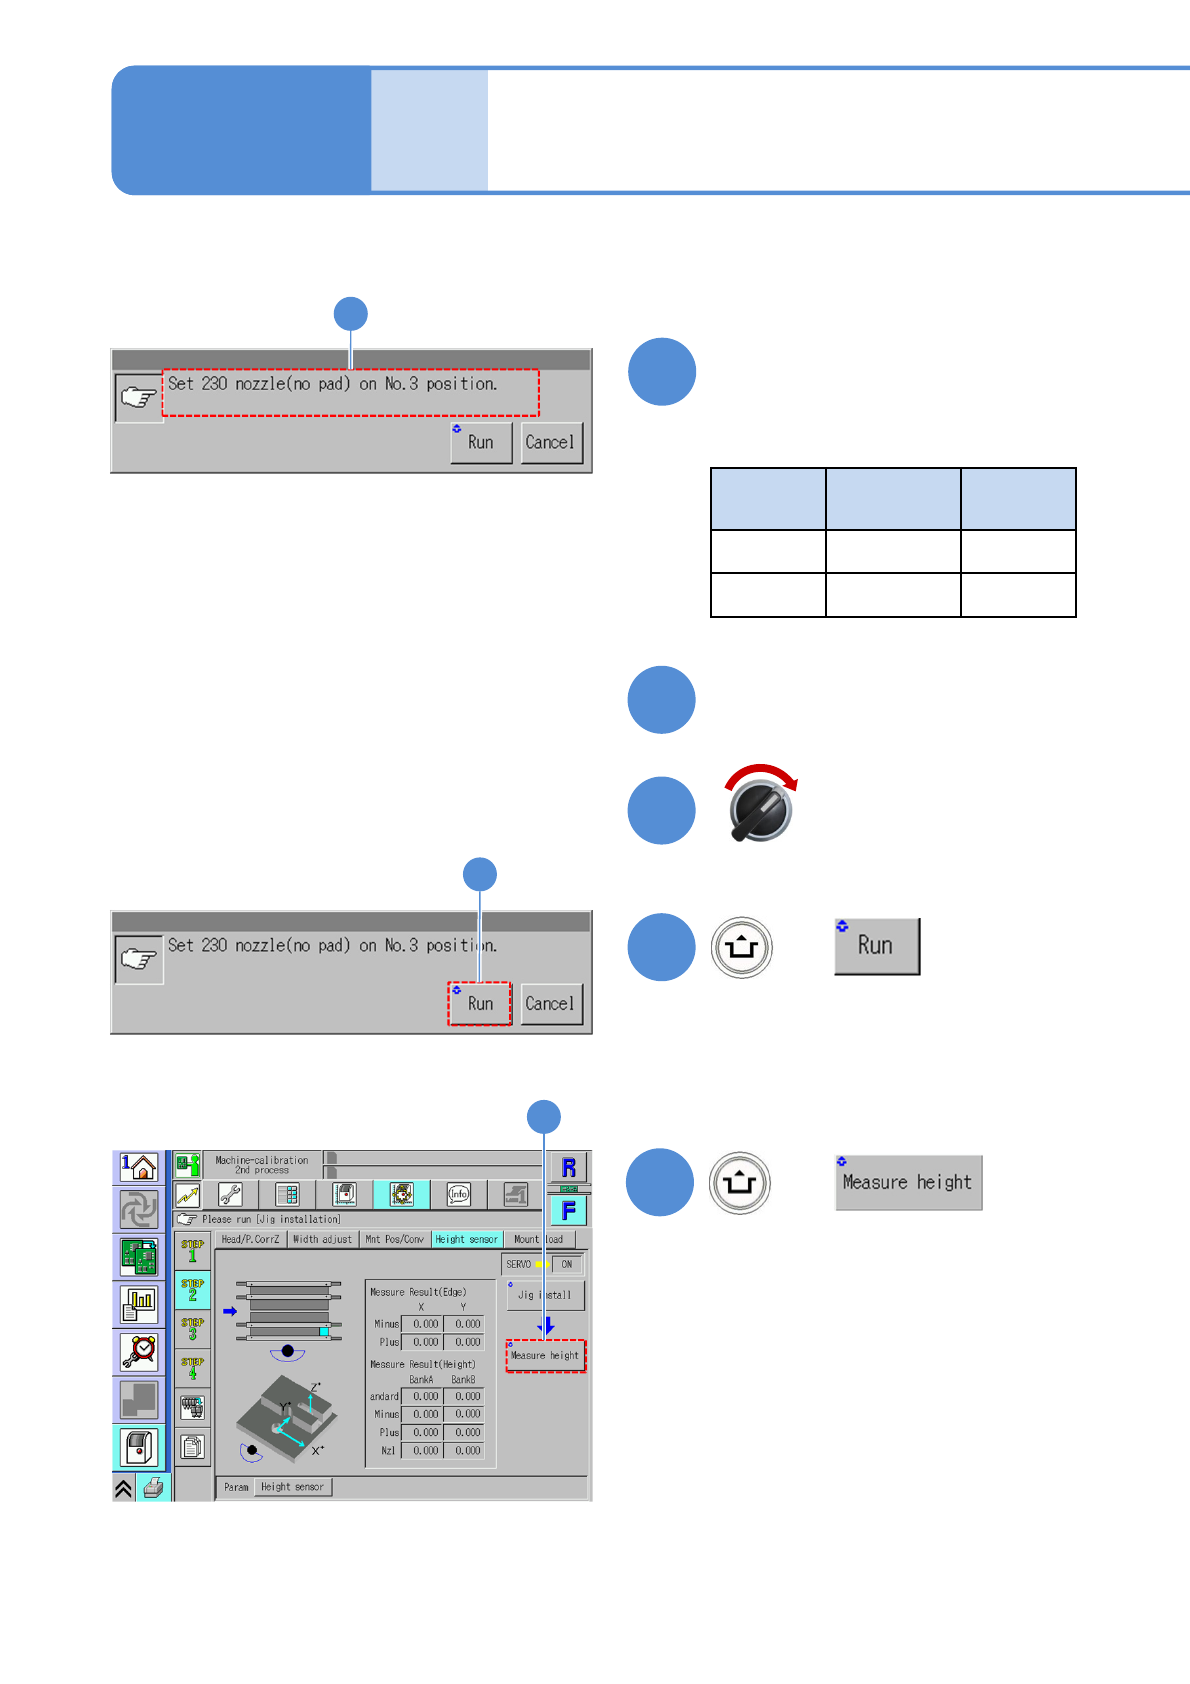
Height sensor (option) 2
+
●Nozzle
Head
type
Nozzle
position
Nozzle
type
8 No. 3 230
3 No. 2 1002
14
Confirm the message and
install the nozzle
(The screen show for 8-nozzle head)
14
Servo switch ON
(The screen show for 8-nozzle head)
NPM-TT2 EJM1EE-MB-13M-02
13-7-4
19
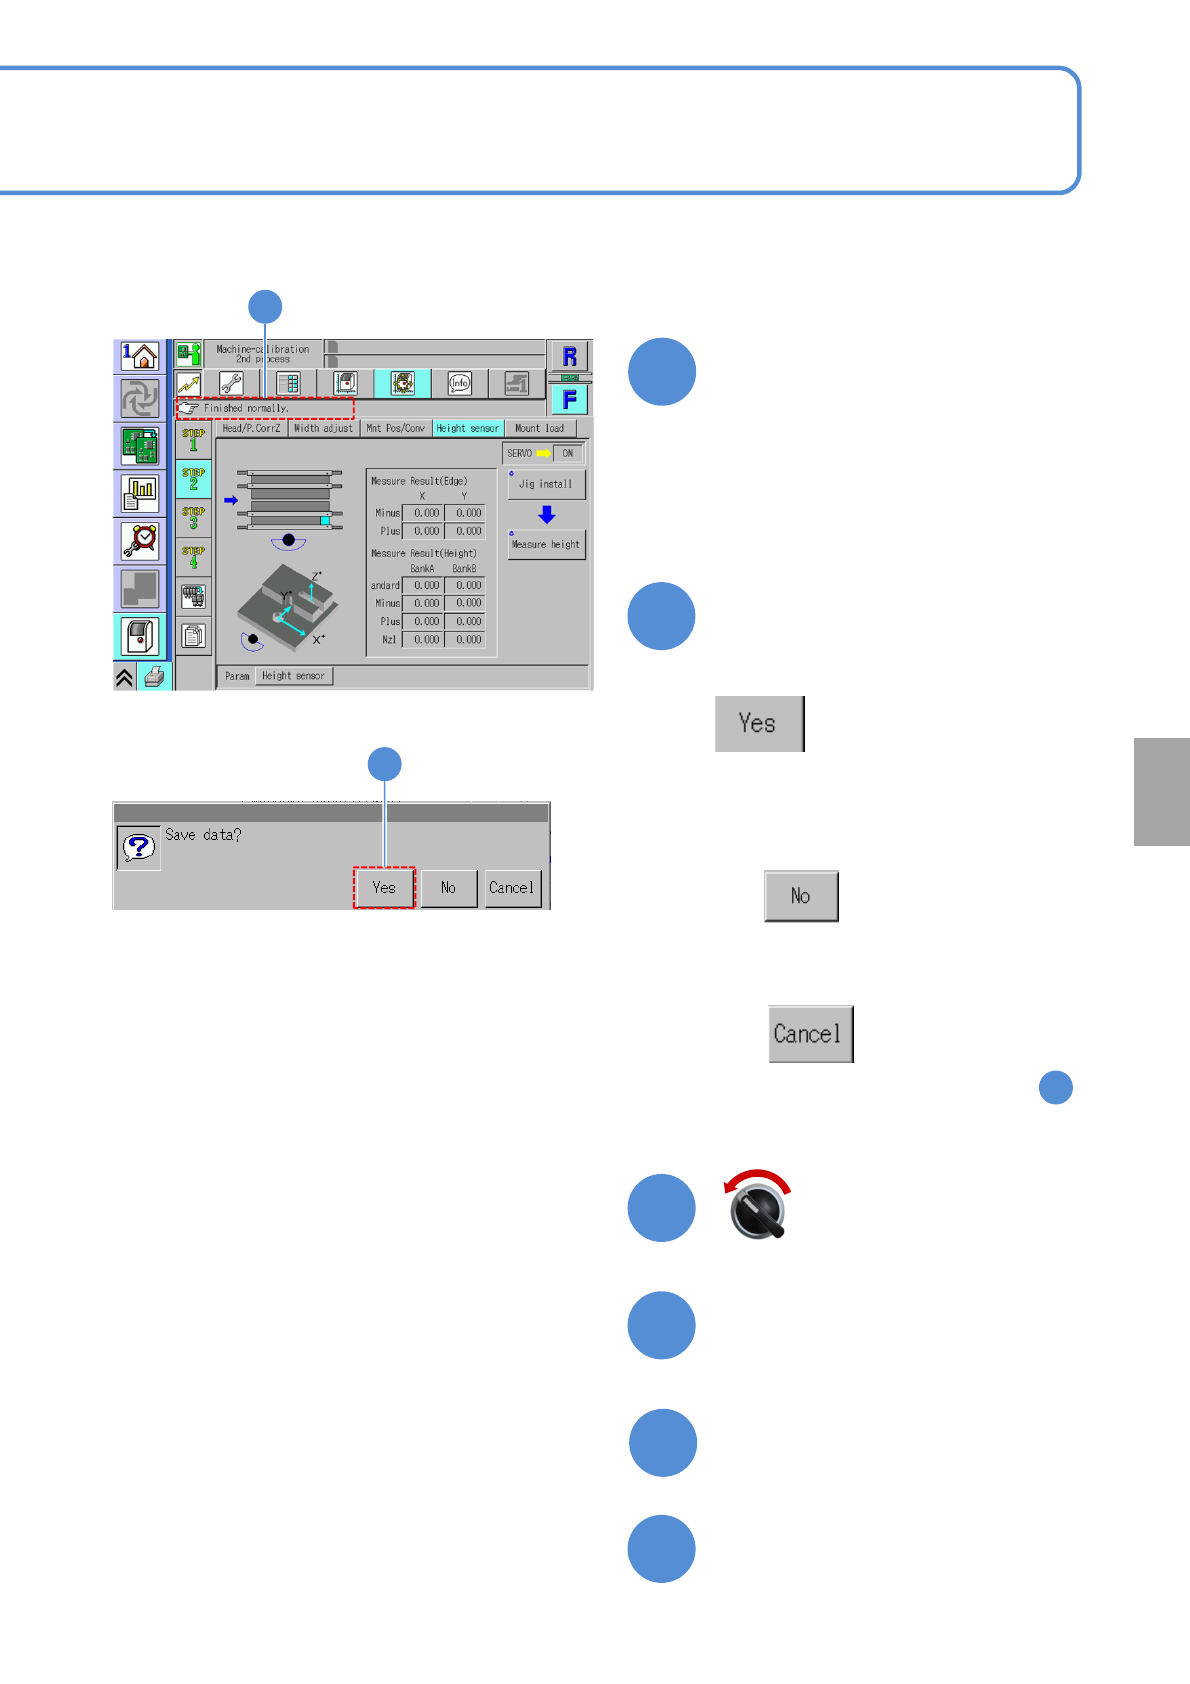
Calibration
23
Remove the nozzle
Open the safety cover
22
21
Confirm that it has been
successfully completed
Close the safety cover
24
19
20
Pressing other menu screen
appears confirmation message
of data save
(The data obtained by calibration is
cleared
(The data obtained by calibration is
saved)
■When you do not save
■To cancel
(The screen remains as it is in )
19
20
(The head moves to the work position)
Servo switch OFF