N7201A653E.pdf - 第346页
NPM- TT2 EJ M1EE-MB-13M-0 2 Place- ment load 11 13-8-1 -3 Placement load 2 + 11 Confirm the message ● To cancel (The screen remains as it is in ) 1 (Each time you press it, the nozzle position № changes) ● Choose the pos…
NPM-TT2 EJM1EE-MB-13M-02
7
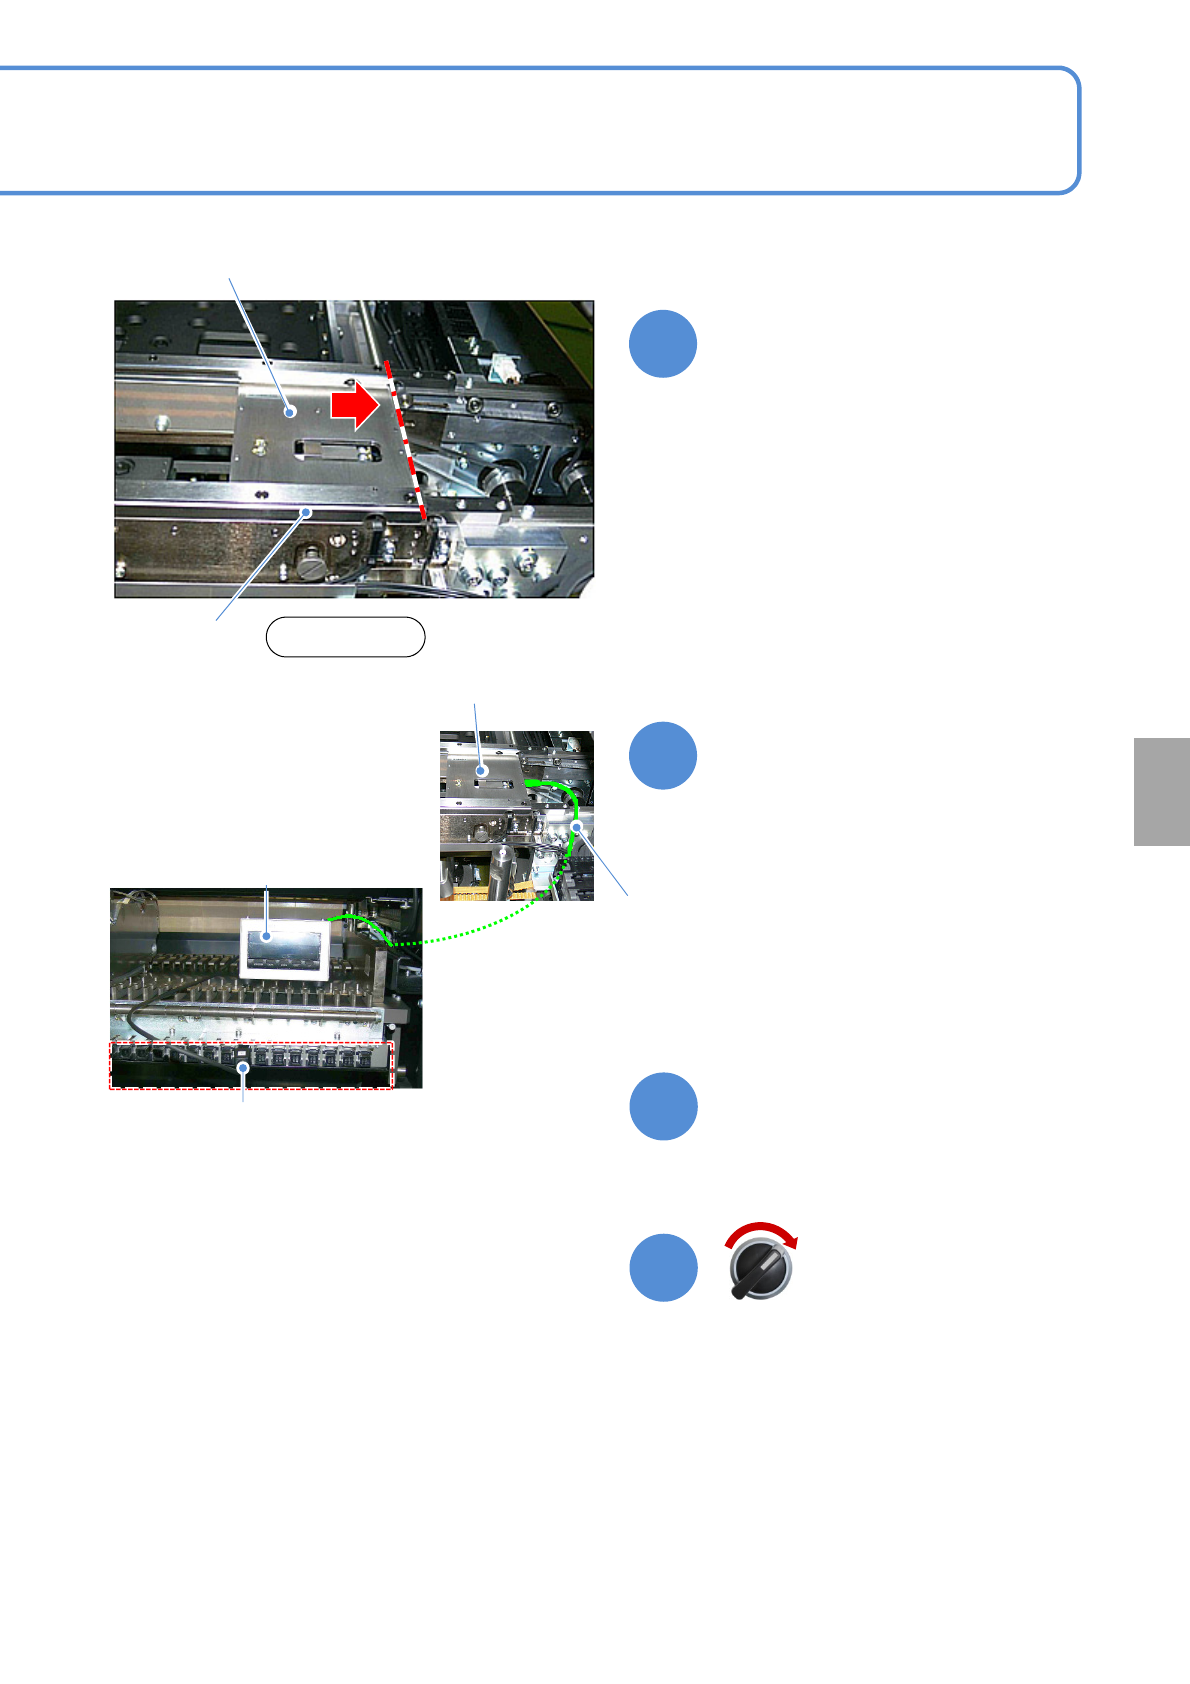
Set the Placement load
measurement jig
●Place the jig against the reference
side of the rail, and set it so that the
right edge of the jig is aligned with the
end face of the conveyor’s PCB clamp.
●If you cannot set a Placement load
measurement jig, manually load the
PCB from the pre-process machine
and set the jig using the workbench
(please prepare yourself).
Placement load
measurement jig
8
Set the power code to any
connector of the feeder cart’s
power supply section
Power supply
section
Prevent the wire from interfering with the head.
(Pass it through the nozzle changer and the
cable carrier)
Load cell meter
Upper rail
Front
13-8-1-2
Placement load
measurement jig
Calibration
9
10
Close the safety cover
Servo switch ON
NPM-TT2 EJM1EE-MB-13M-02
Place-
ment
load
11
13-8-1-3
Placement load 2
+
11
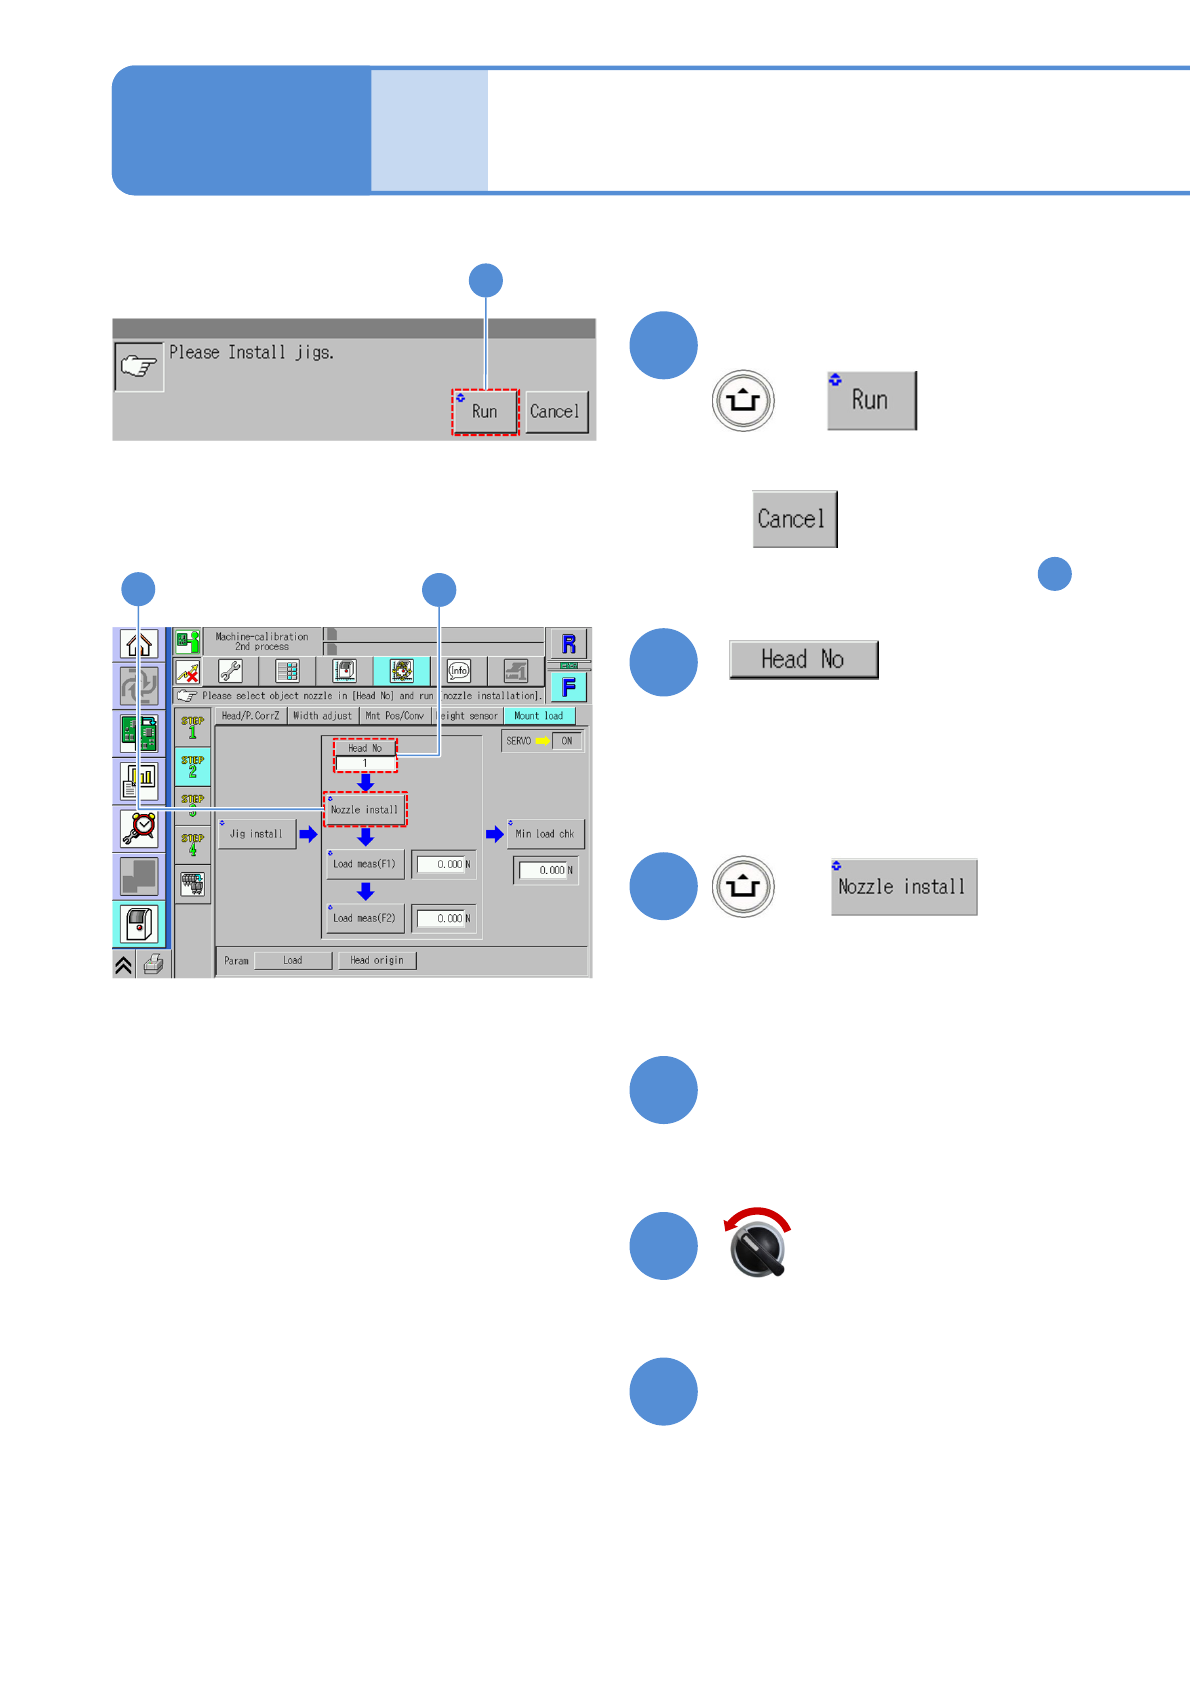
Confirm the message
●To cancel
(The screen remains as it is in )
1
(Each time you press it, the nozzle
position № changes)
●Choose the position to perform
calibration.
+
12
12
13
13
Maintenance
13-8-1
15
16
Open the safety cover
(The head moves to the work position)
14
Prepare to install nozzles
Servo switch OFF
NPM-TT2 EJM1EE-MB-13M-02
Install nozzles
18
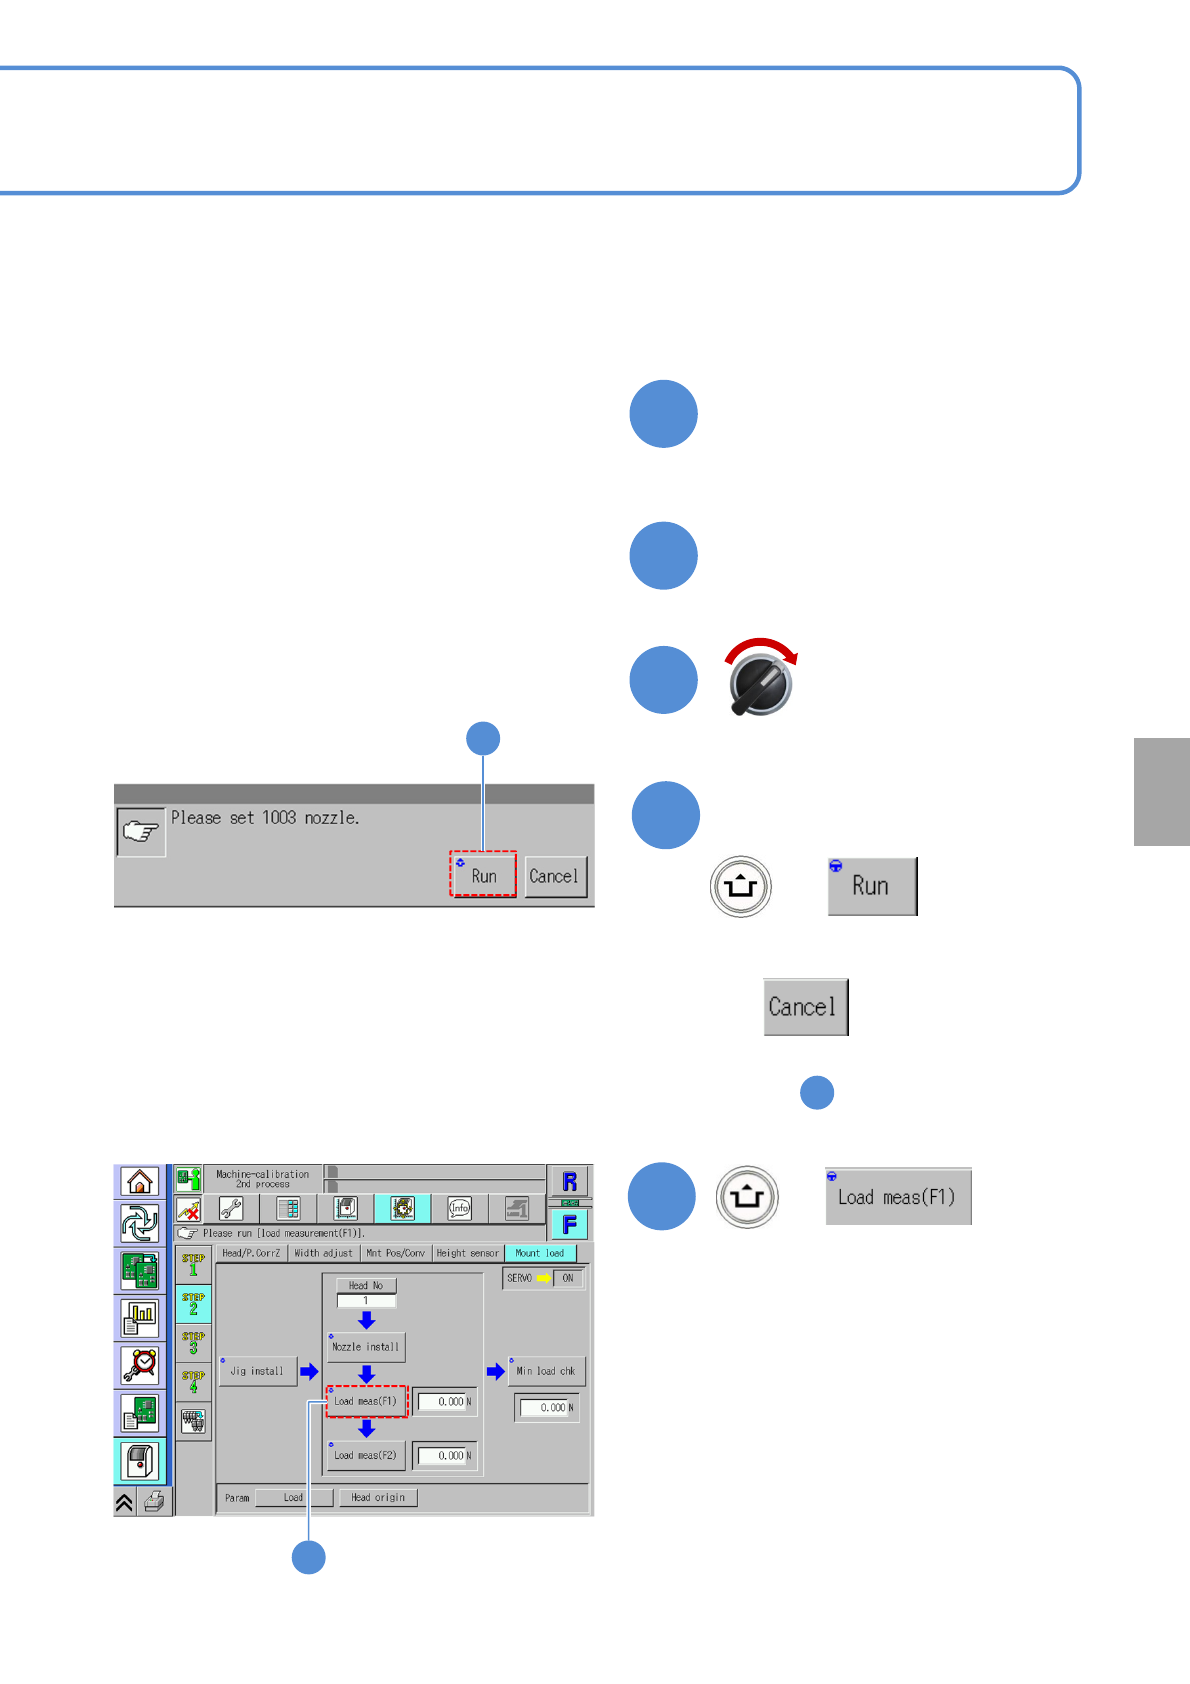
Close the safety cover
17
●Install them to the nozzle positions to
be measured.
(Use 1003 nozzle)
19
13-8-1-4
Calibration
●Reads a stable numerical value being
measured.
Load meas displays the standardized
value rather than the maximum value
since the numerical value goes up
momentarily when the nozzle and the
jig come in contact with each other so
that it becomes difficult to read the
measurement value accurately.
●How to change the load cell meter
display. (→P.13-8-2)
+
(Calibration is carried out)
21
21
+
20
Confirm the message
●To cancel
(The screen remains as it is
in )
1
20
Servo switch ON