N7201A653E.pdf - 第353页
NPM- TT2 EJ M1EE-MB-13M-0 2 44 13-8-1 -10 Calibration Remove Placement load measurement jig Close the safety cover Servo switch ON Servo switch OFF Open the safety cover + Confirm the message ■ To cancel (The screen rema…
NPM-TT2 EJM1EE-MB-13M-02
Place-
ment
load
Placement load 5
13-8-1-9
Maintenance
13-8-1
40
41
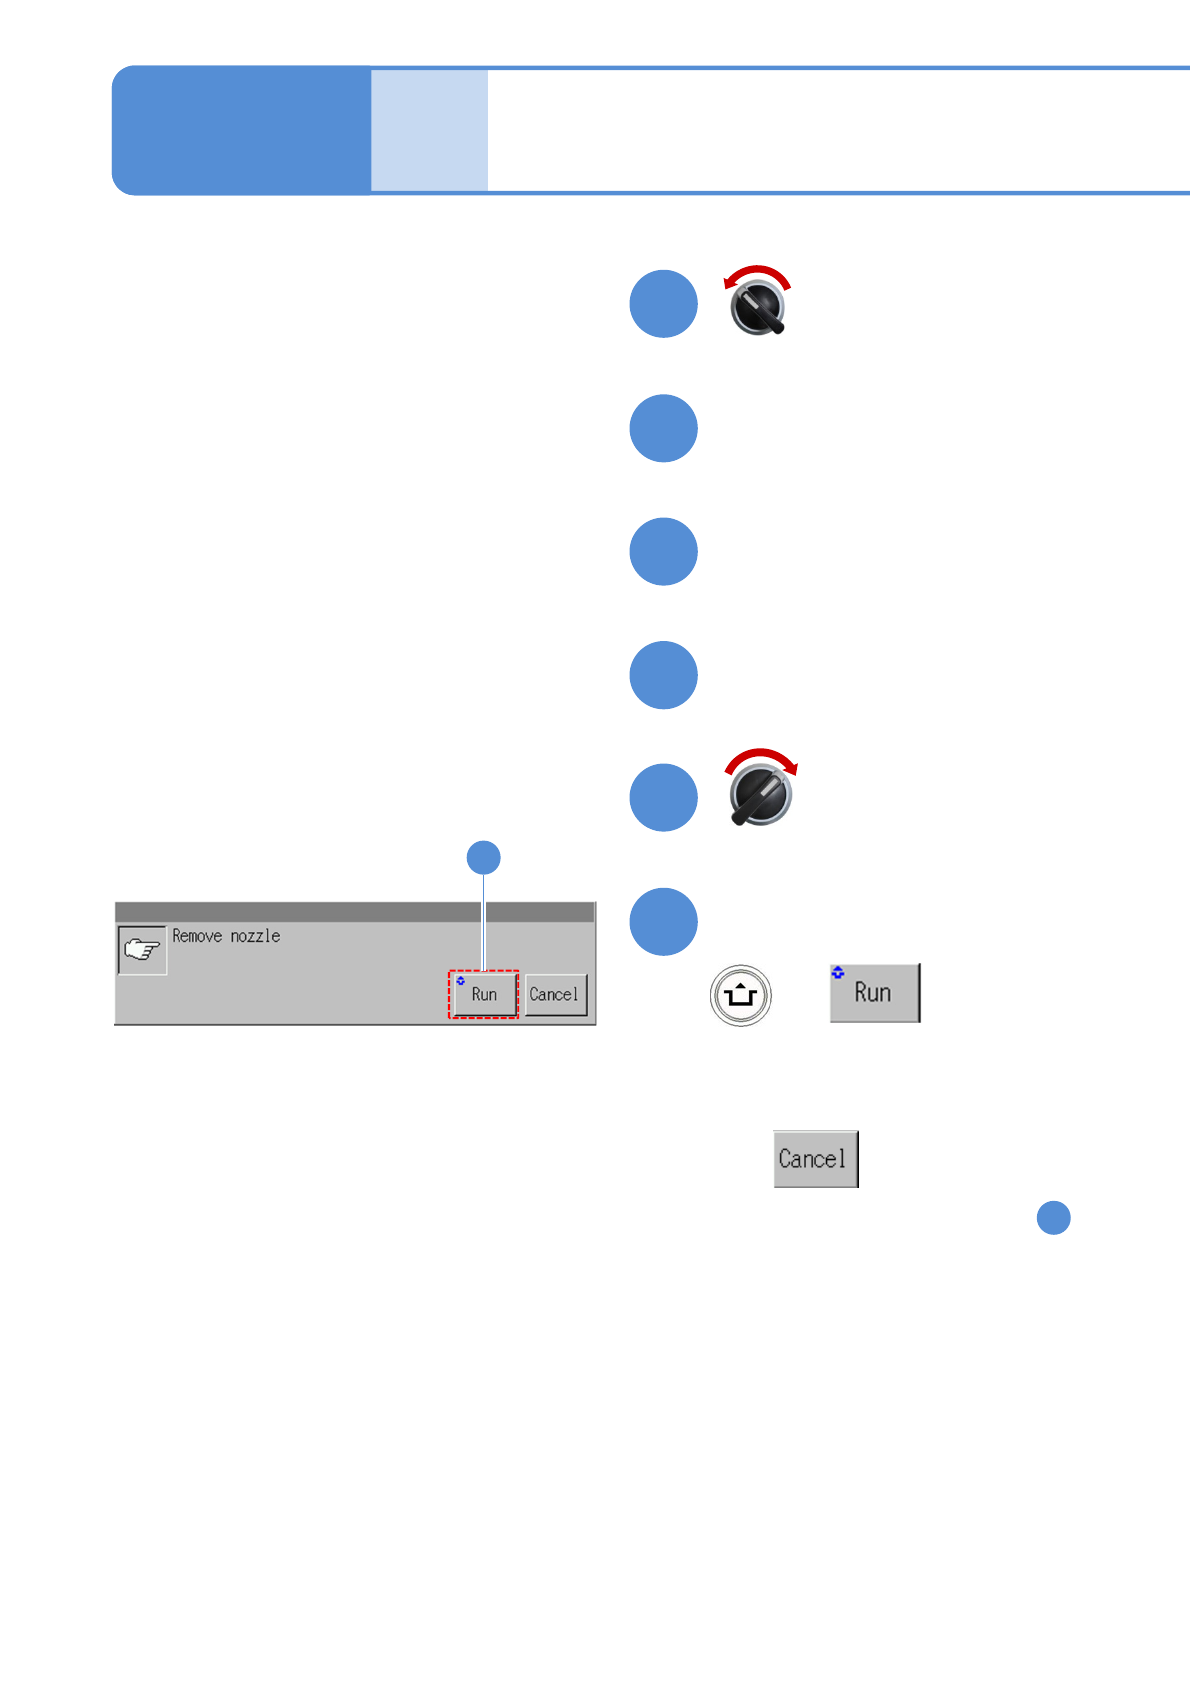
Remove nozzles
Close the safety cover
42
Open the safety cover
38
39
+
43
Confirm the message
■To cancel
(The screen remains as it is in )
34
(The head moves to the retraction
position)
43
Servo switch OFF
Servo switch ON
NPM-TT2 EJM1EE-MB-13M-02
44
13-8-1-10
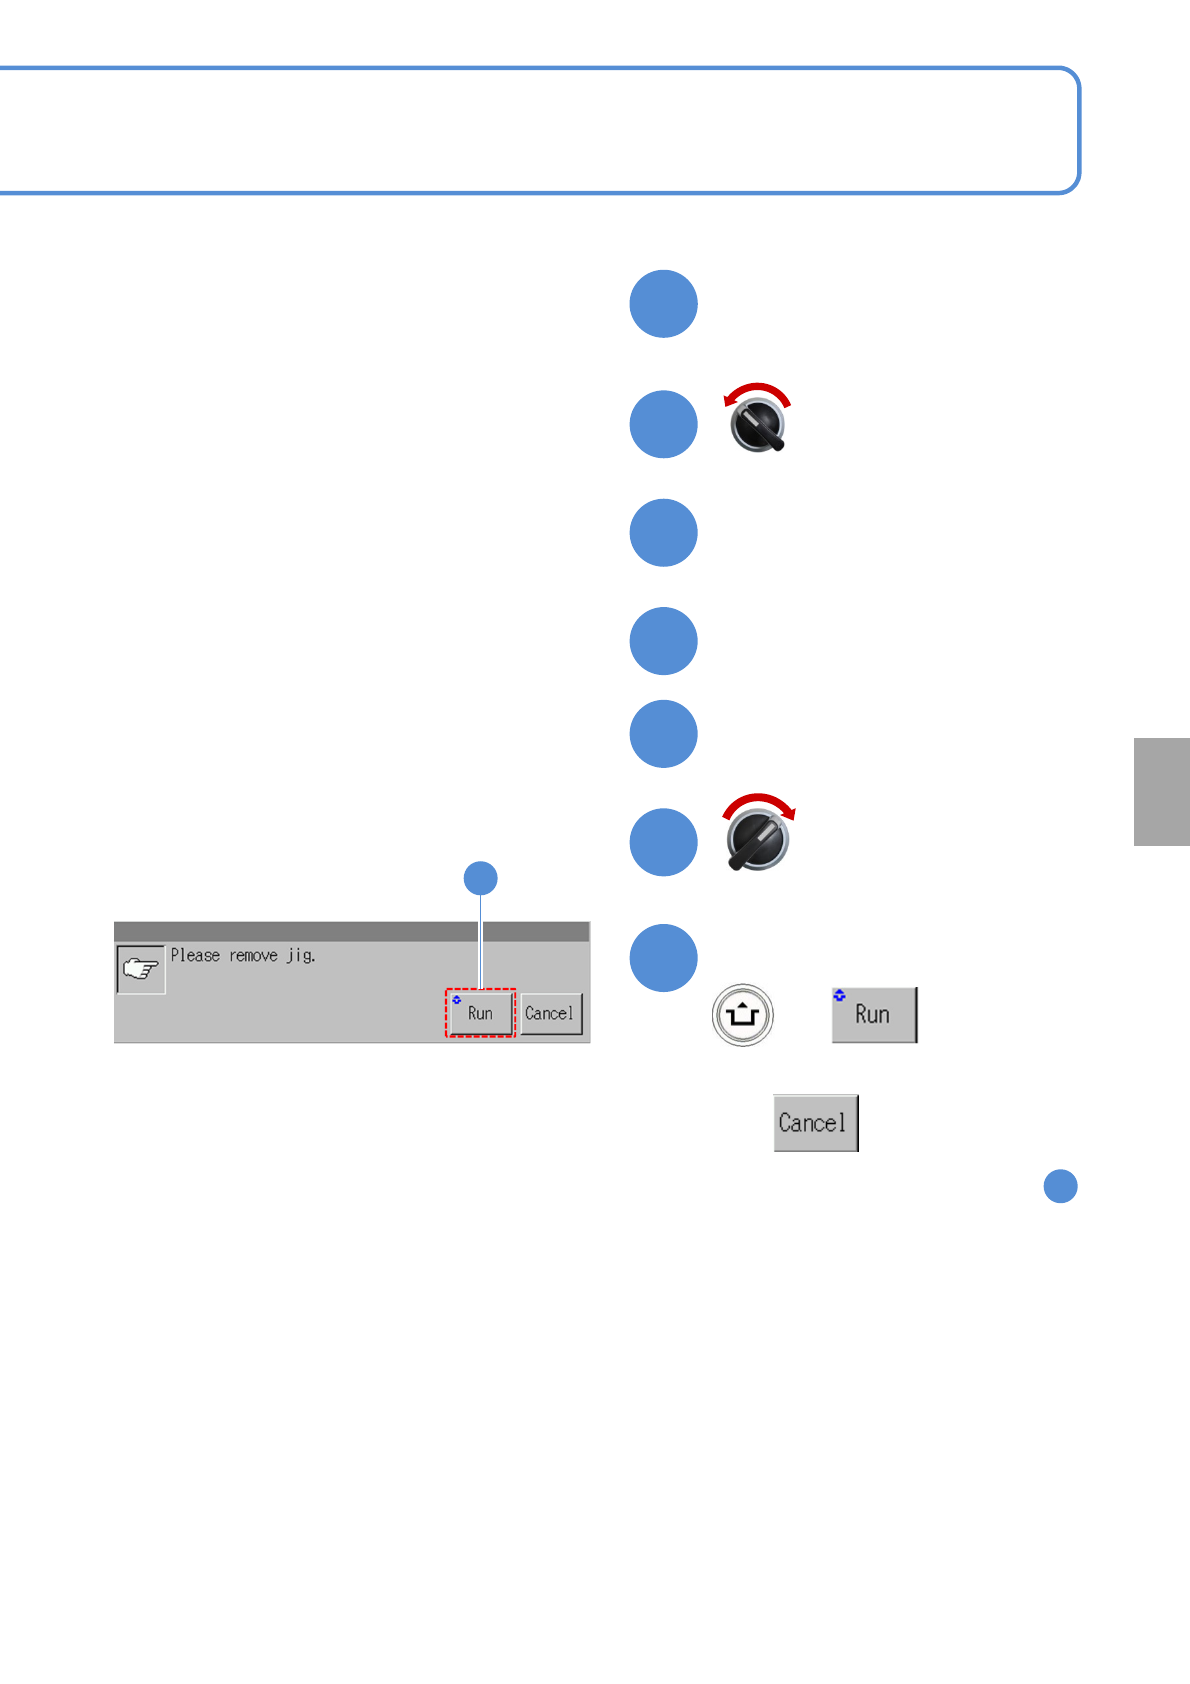
Calibration
Remove Placement load
measurement jig
Close the safety cover
Servo switch ON
Servo switch OFF
Open the safety cover
+
Confirm the message
■To cancel
(The screen remains as it is in )
Prepare to remove jig
47
48
49
45
46
50
34
50
NPM-TT2 EJM1EE-MB-13M-02
Place-
ment
load
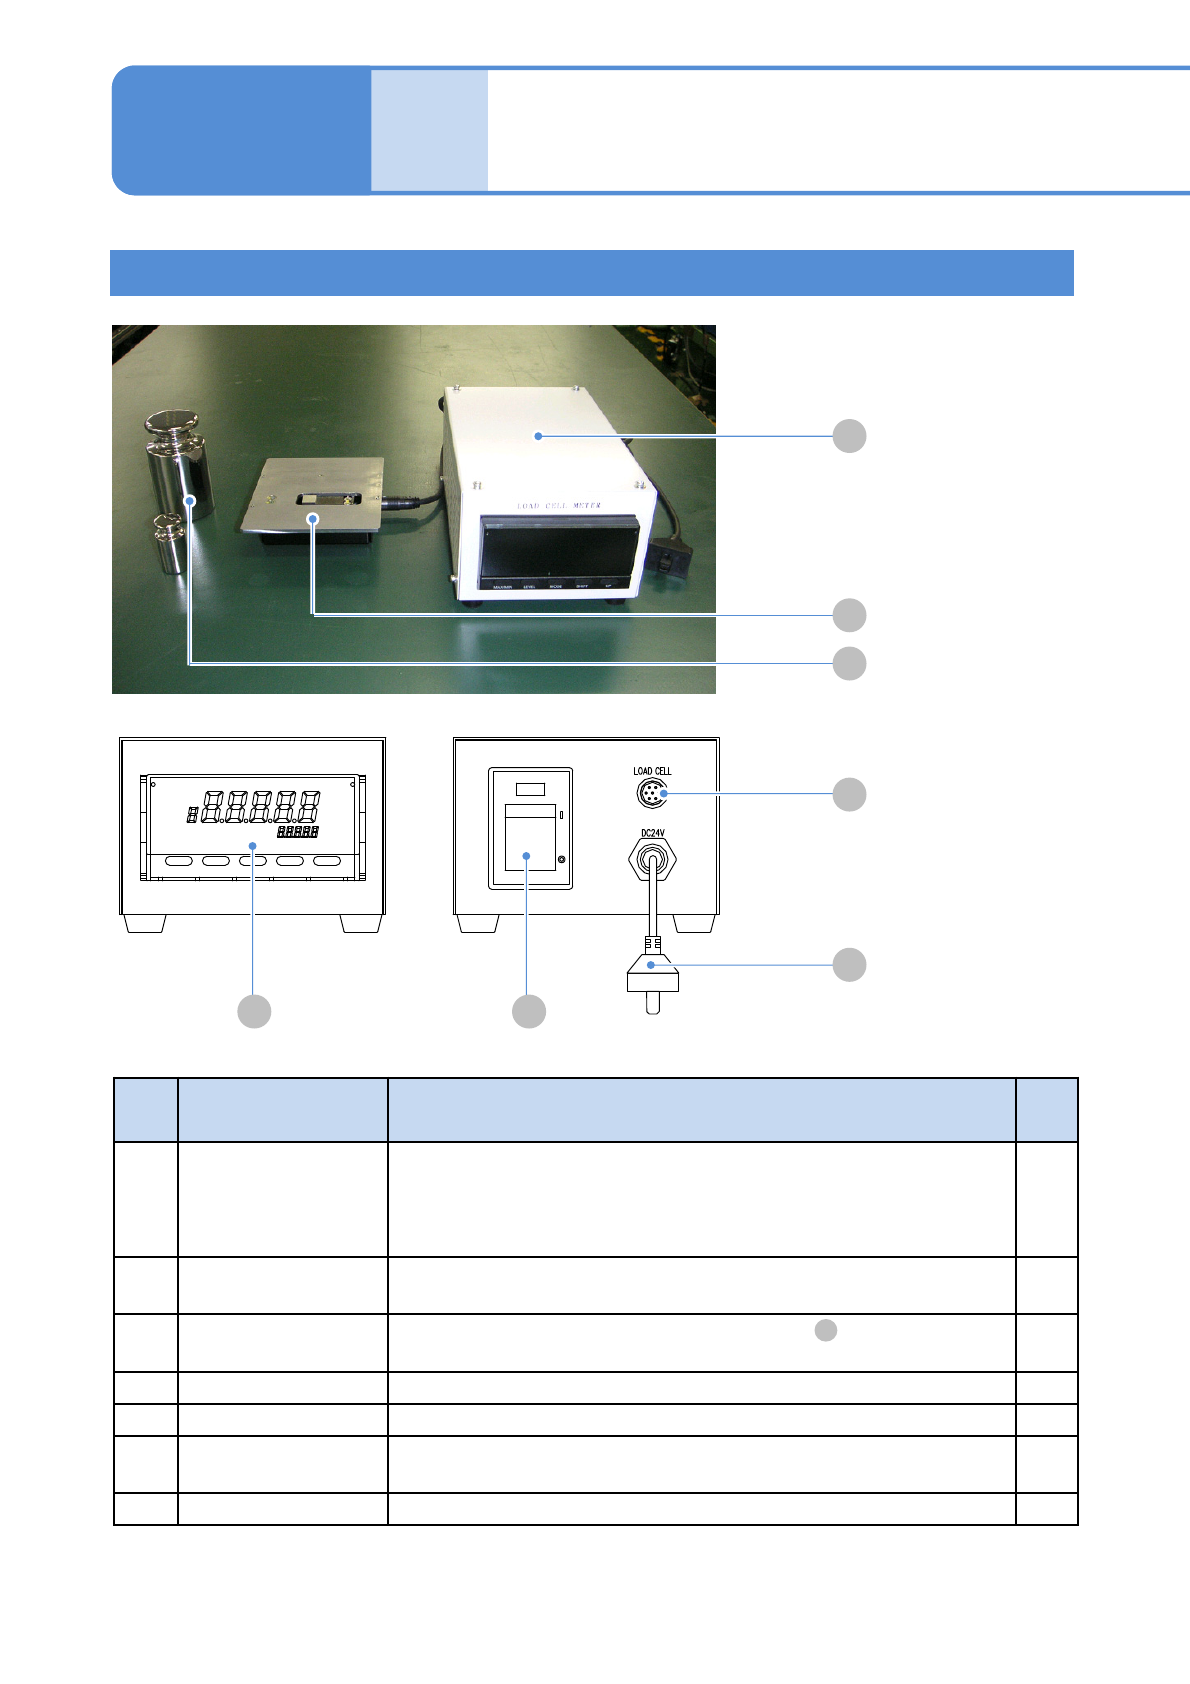
How to use placement
load measurement jig
(option)1
Jig configuration
No. Unit name Function Q’ty
A Load cell meter
The unit designed specifically for the 3-nozzle head that is used, for
example, in the load control calibration to replace the head.
Power supply specs.: 24 V DC 7 VA
Mass: 1.2 kg Dimension: 120 mm(W) x 80mm(H) x 190mm(D)
1
B Load cell
Load measurement sensor. Connect it to the load cell meter to use.
Mass: 600 g
1
C Weight
Weight to calibrate the load cell meter stated in .
Mass: 100 g/1 kg
1
each
D Display Displays a load value.
---
E Power switch Power switch of the load cell meter’s main unit.
---
F
Sensor cable
connector
Connect it to the load cell with the attached cable. ---
G Power cable Connect it to the feeder supply unit and supply the power.
---
13-8-2-1
A
Maintenance
13-8-2
A
B
C
F
G
D E