N7201A653E.pdf - 第419页
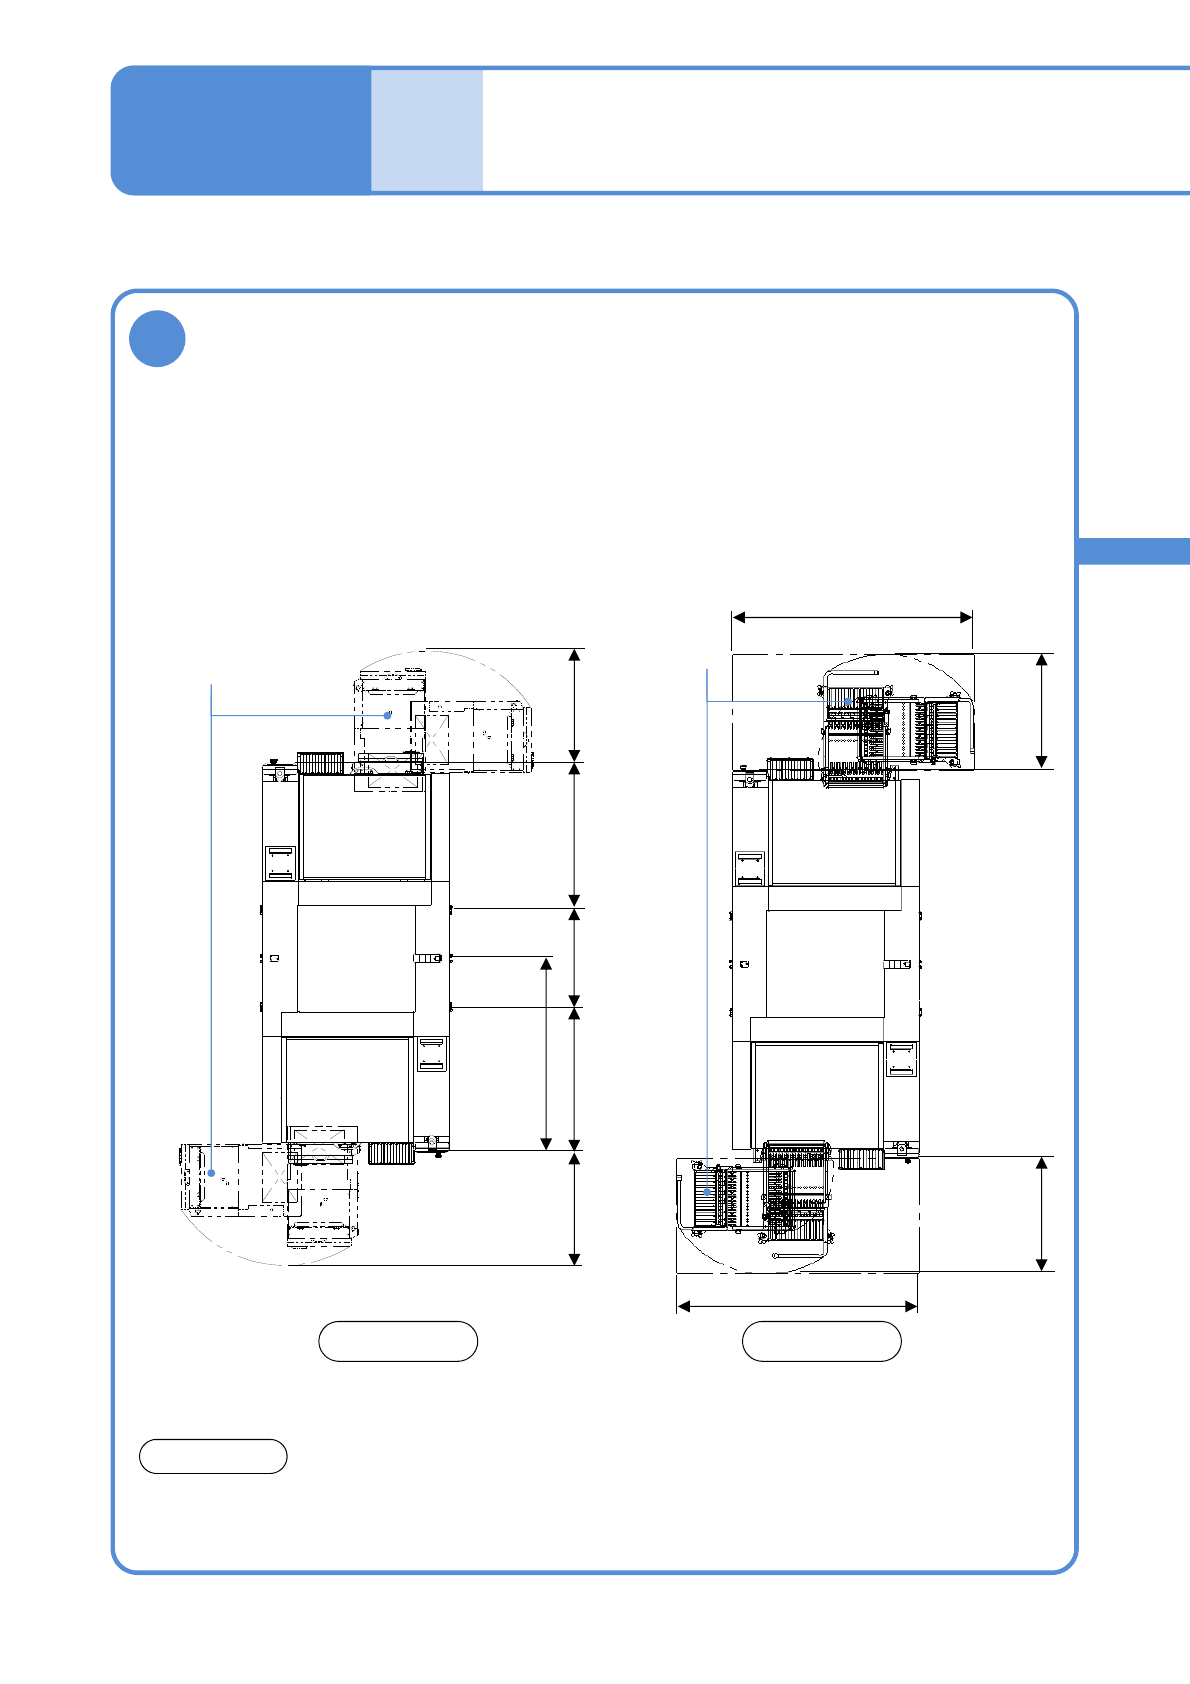
NPM- TT2 EJM1EE-MB-14 M-02 14-3 -2 To 3 AB Single tray feeder (Option) 763 1 831 Feeder cart (Option) 781 1 639 Check the working area Front and rear sides A B Working area (Unit: mm) Installation 2
NPM-TT2 EJM1EE-MB-14M-02
14-3-1
Tool used: Convex, Allen wrench (3 mm, 4 mm), metal ruler, Level gauge, 65 mm spanners (2 pcs)
Installation 1
Maintenance
14-3
1
Install
Temporarily locate the machine along the baseline drawn on the floor and adjust the installation
position.
●Adjust the height and facing of the machine to guarantee a smooth PCB transfer between the
machine and adjacent equipment.
●Keep a 1 to 5 mm space between the machine and adjacent equipment.
●If running a vent under the machine, keep a 40 mm or more space between the machine and the
vent.
(The below figure shows the minimum space and is measured in millimeters (mm))
NOTICE
Front side
781
1 639
781
1 639
763
971
686
1 314
971
763
Feeder cart
(Option)
Single tray
feeder
(Option)
Front side
●Regarding installation, follow the instructions of a specialist.
●Regarding relocation, contact us, please.

NPM-TT2 EJM1EE-MB-14M-02
14-3-2
To
3
AB
Single tray feeder (Option) 763 1 831
Feeder cart (Option) 781 1 639
Check the working area
Front and rear sides
A
B
Working area
(Unit: mm)
Installation
2
NPM-TT2 EJM1EE-MB-14M-02
14-3-3
Maintenance
14-3
Installation 2
3
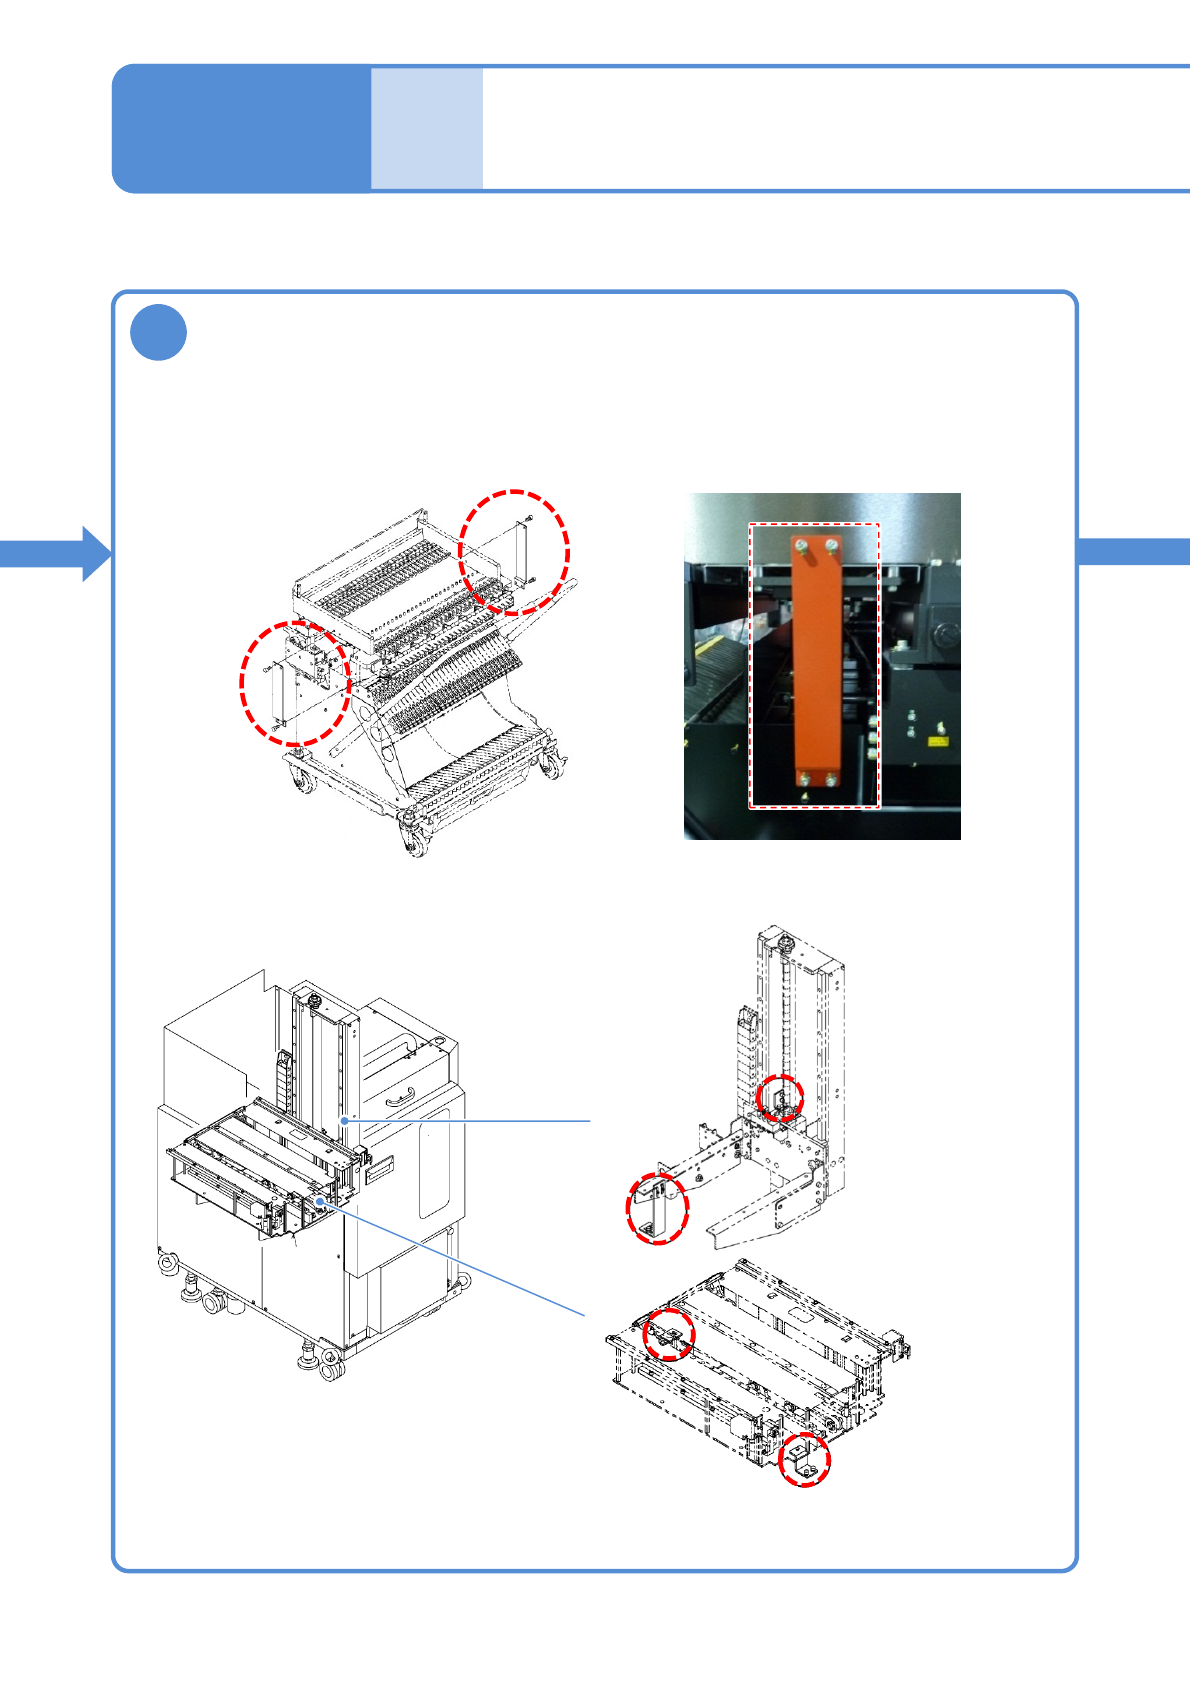
Detach fixing brackets (red) for supply unit
■Fixing brackets for feeder cart (2 locations)
●Store the detached fixing brackets.
●Bracket: 6 locations
■ Fixing brackets for single tray feeder (option) (4 locations)