N7201A653E.pdf - 第443页
NPM- TT2 EJM1EE-MB-14 M-02 14-8 -4 Installation 4 Adjust the height 1. Loose n the lock nuts. 2. Adjust the height using the adjustment nuts. 3. Tighten the lock nuts. Tray feeder Mult- recognition camera ● Adjust the he…
NPM-TT2 EJM1EE-MB-14M-02
14-8-3
How to handle the tray
feeder
(option) 2
Maintenance
14-8
How to attach 1
2
4
1
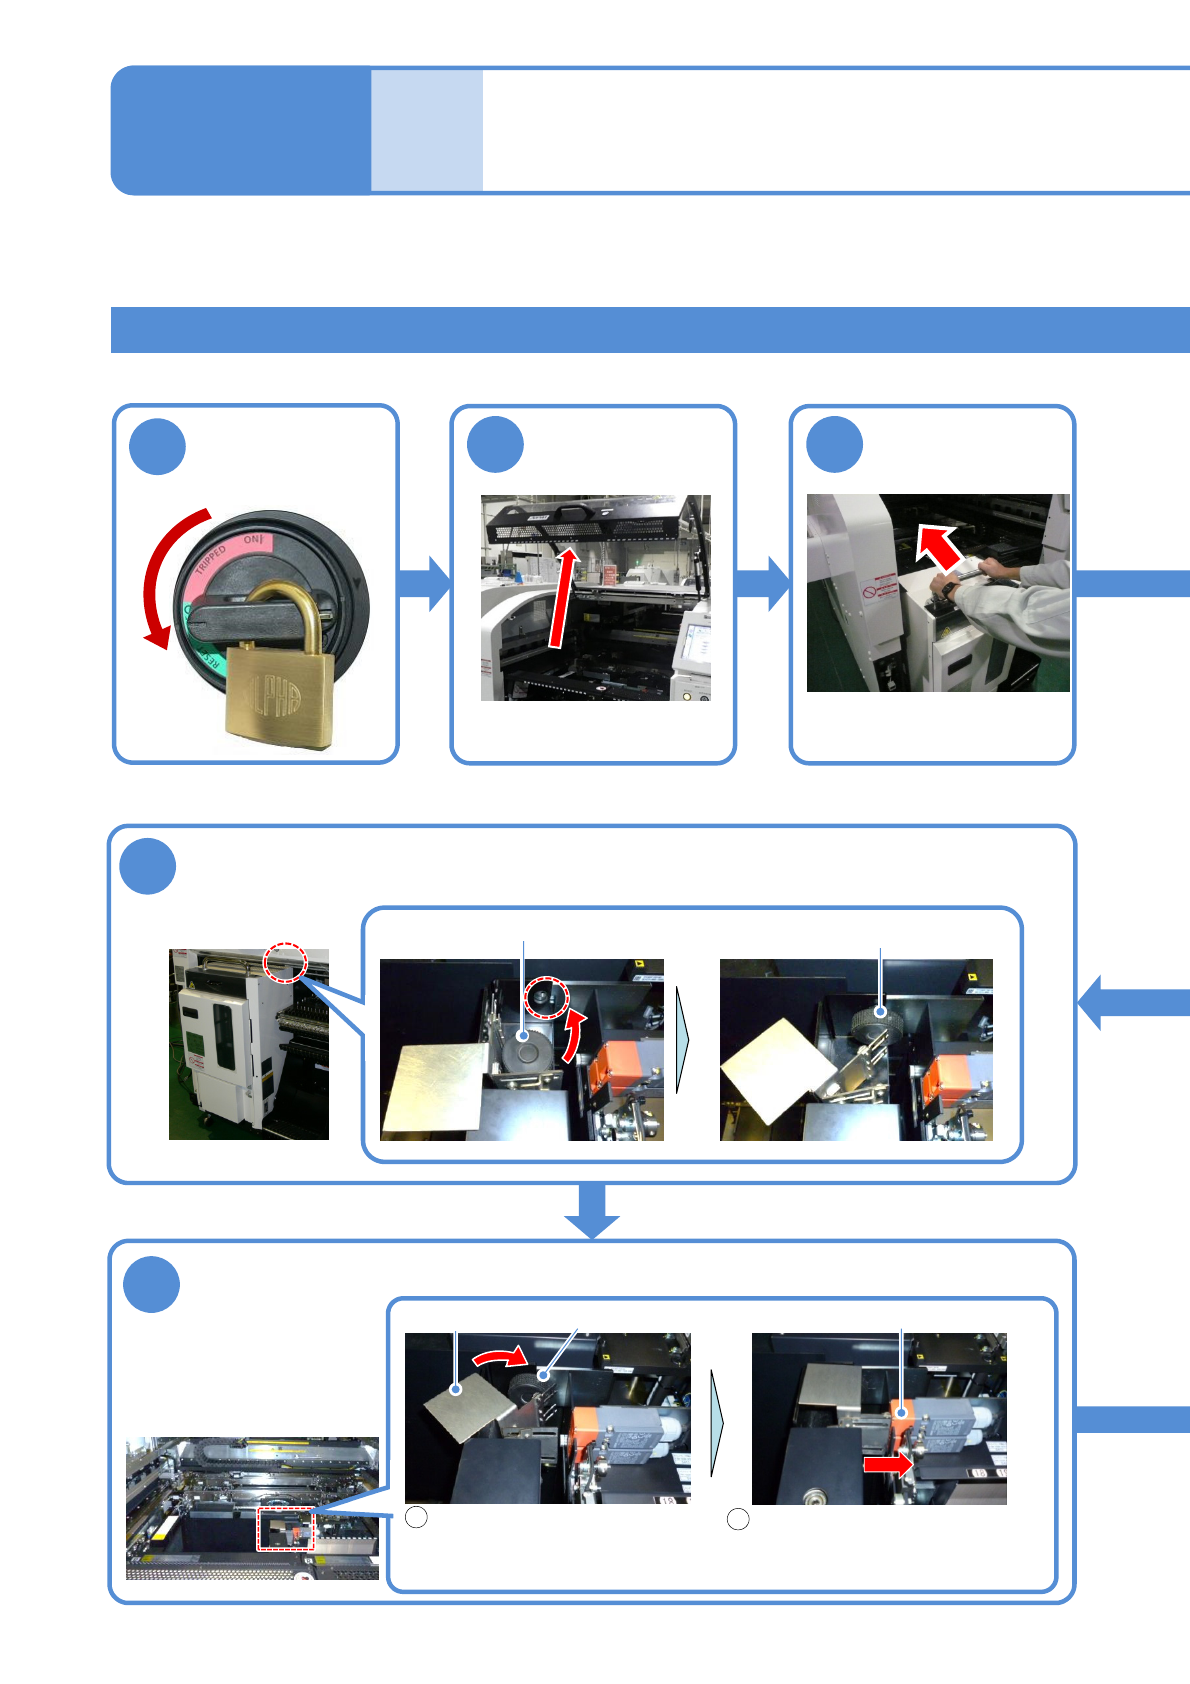
Turn OFF the
power and lock
the machine
OFF
3
●Be careful not to bump it
against the main unit.
Attach the tray
feeder
Time required : 5 minutes
7
Turn ON the safety switch of the tray feeder
Slide the handle to the right and
insert the metal fitting to the
safety switch
Turn the handle 45 degree
clockwise in such a way that it
does not come into contact with
the joint screw B
1
2
Safety switch
Hand
le
Joint screw B
Joint screw B
Fix position
6
Remove the joint screw B and install it to the fix position
The tray feeder is fixed to the machine
NPM-TT2 EJM1EE-MB-14M-02
14-8-4
Installation
4
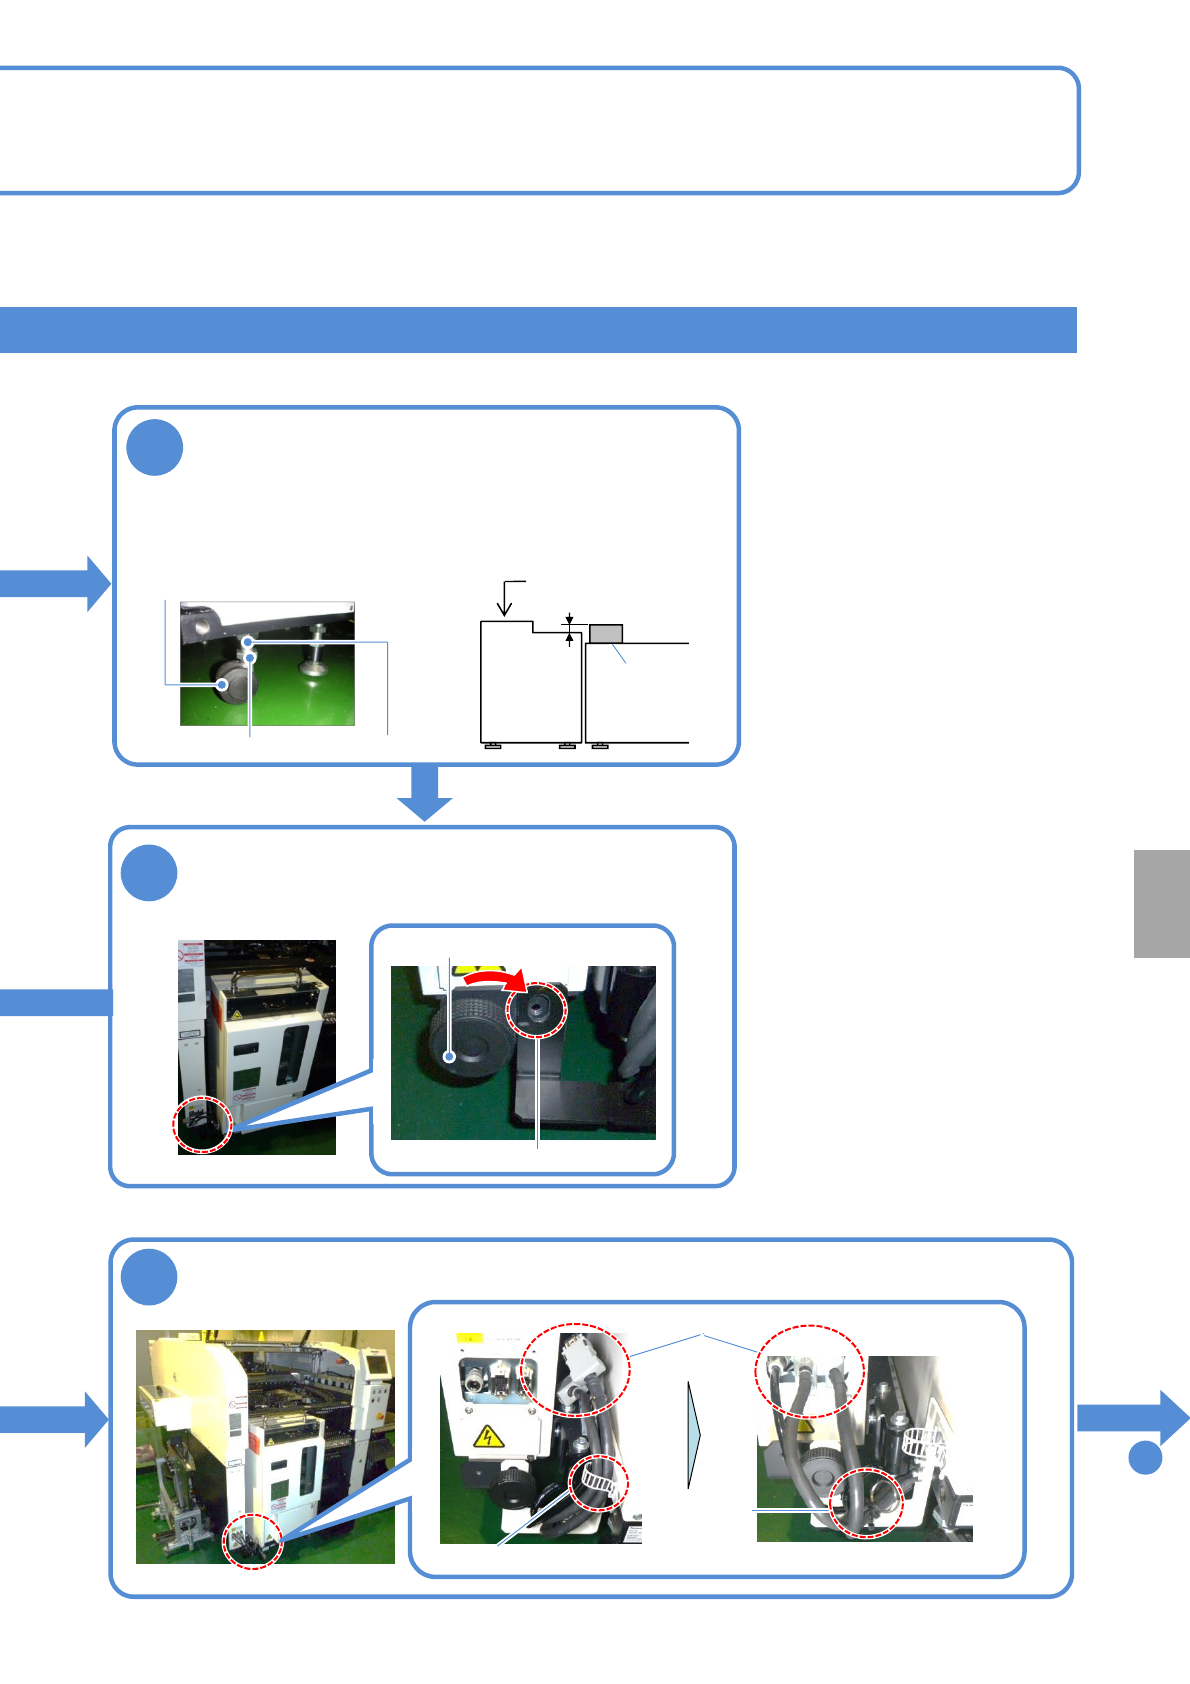
Adjust the height
1. Loosen the lock nuts.
2. Adjust the height using the
adjustment nuts.
3. Tighten the lock nuts.
Tray feeder
Mult-
recognition
camera
●Adjust the height/level of the feeder
as shown in the figure below
The bubble should stay within 1
division (0.1 mm/m)
Lock nut
Adjustment nut
●Casters: 4 pcs
9
To
19 2 mm
Level gauge
Fix location
Joint screw A
5
Remove the joint screw A and install it to the
fix position
The tray feeder is fixed to the machine
Remove the cable and pipe from the cable tie and install to the machine
8
Cable tie
Clamping
band
Cable pipe
●Do not remove the clamping band
NPM-TT2 EJM1EE-MB-14M-02
14-8-5
How to handle the tray
feeder
(option) 3
Maintenance
14-8
How to attach 2
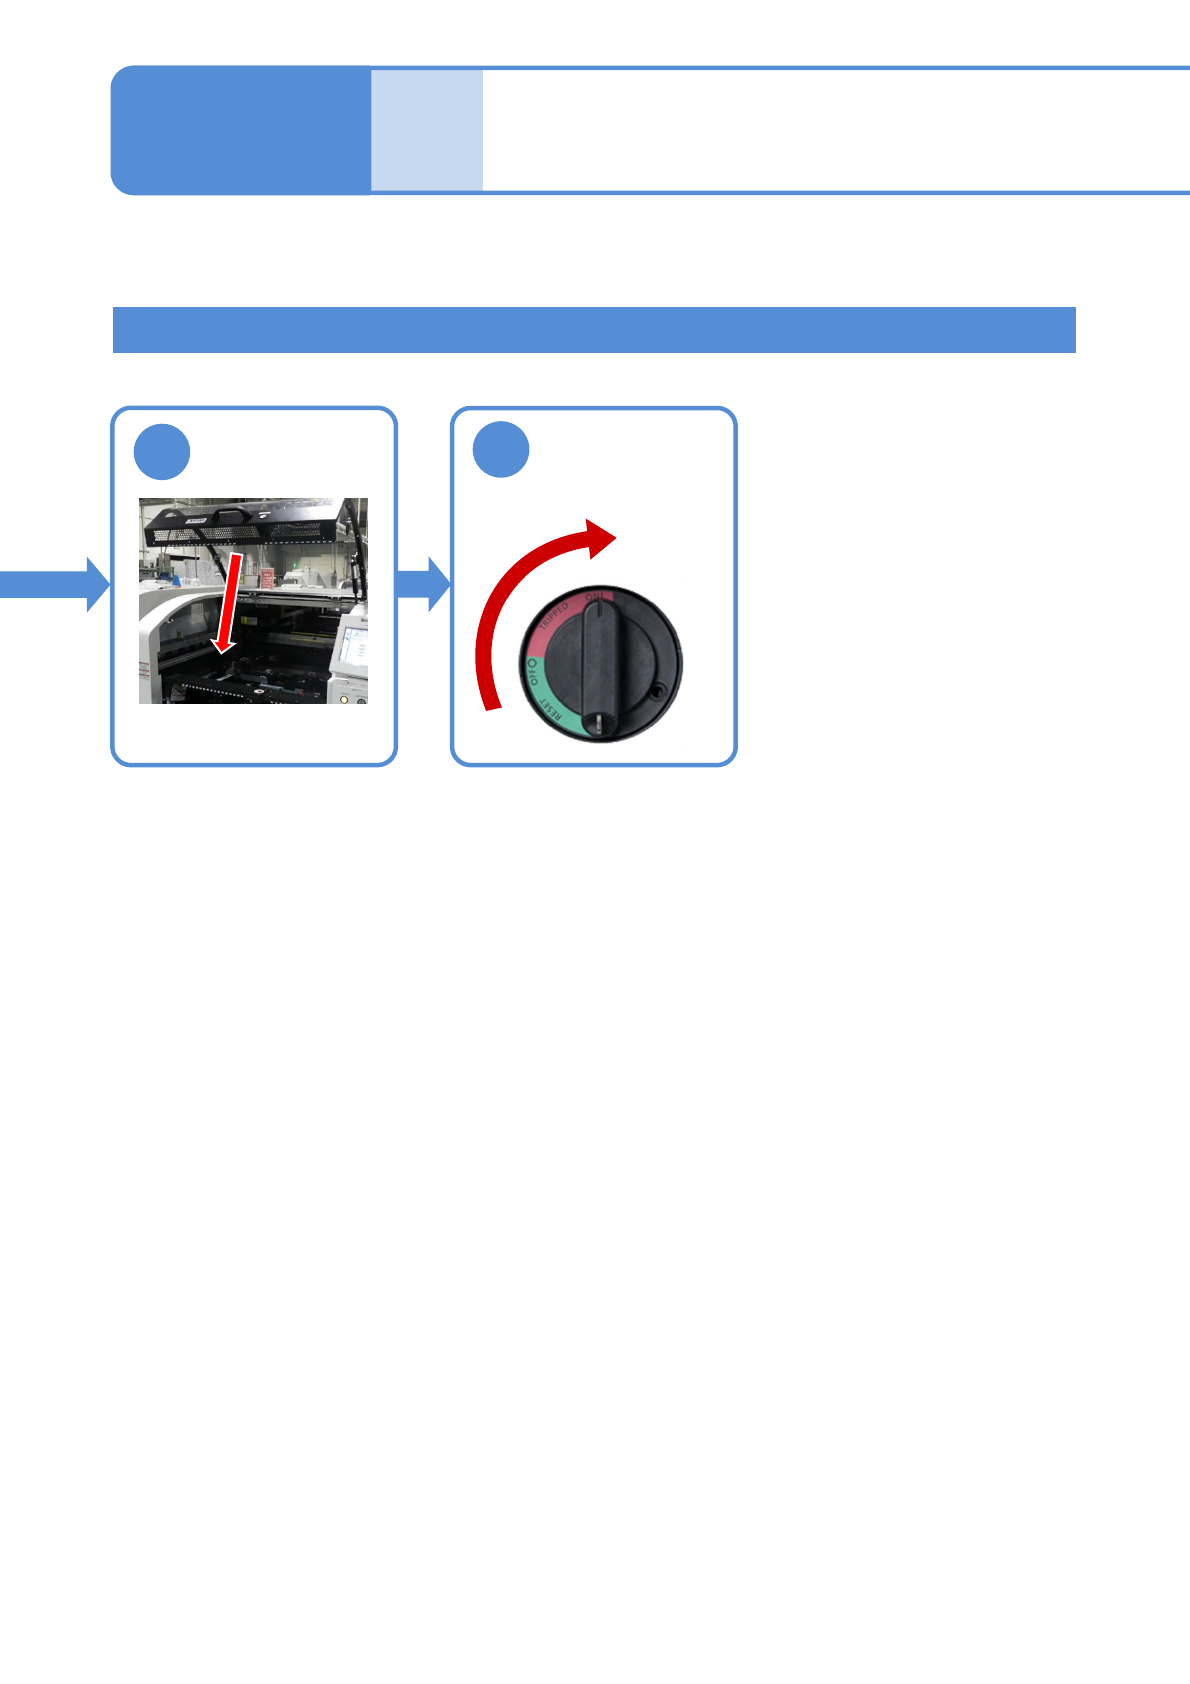
9
10
Unlock the
machine and
ON