N7201A653E.pdf - 第456页
NPM- TT2 EJ M1EE-MB-14M-0 2 14-9 -11 Maintenance 14-9 Ho w to s witch the 17-slot f eeder car t and the single tr ay f eeder 6 ② Switching the 17-slot feeder cart to the single tray feeder 2 11 12 Detach the drive guide …
NPM-TT2 EJM1EE-MB-14M-02
14-9-10
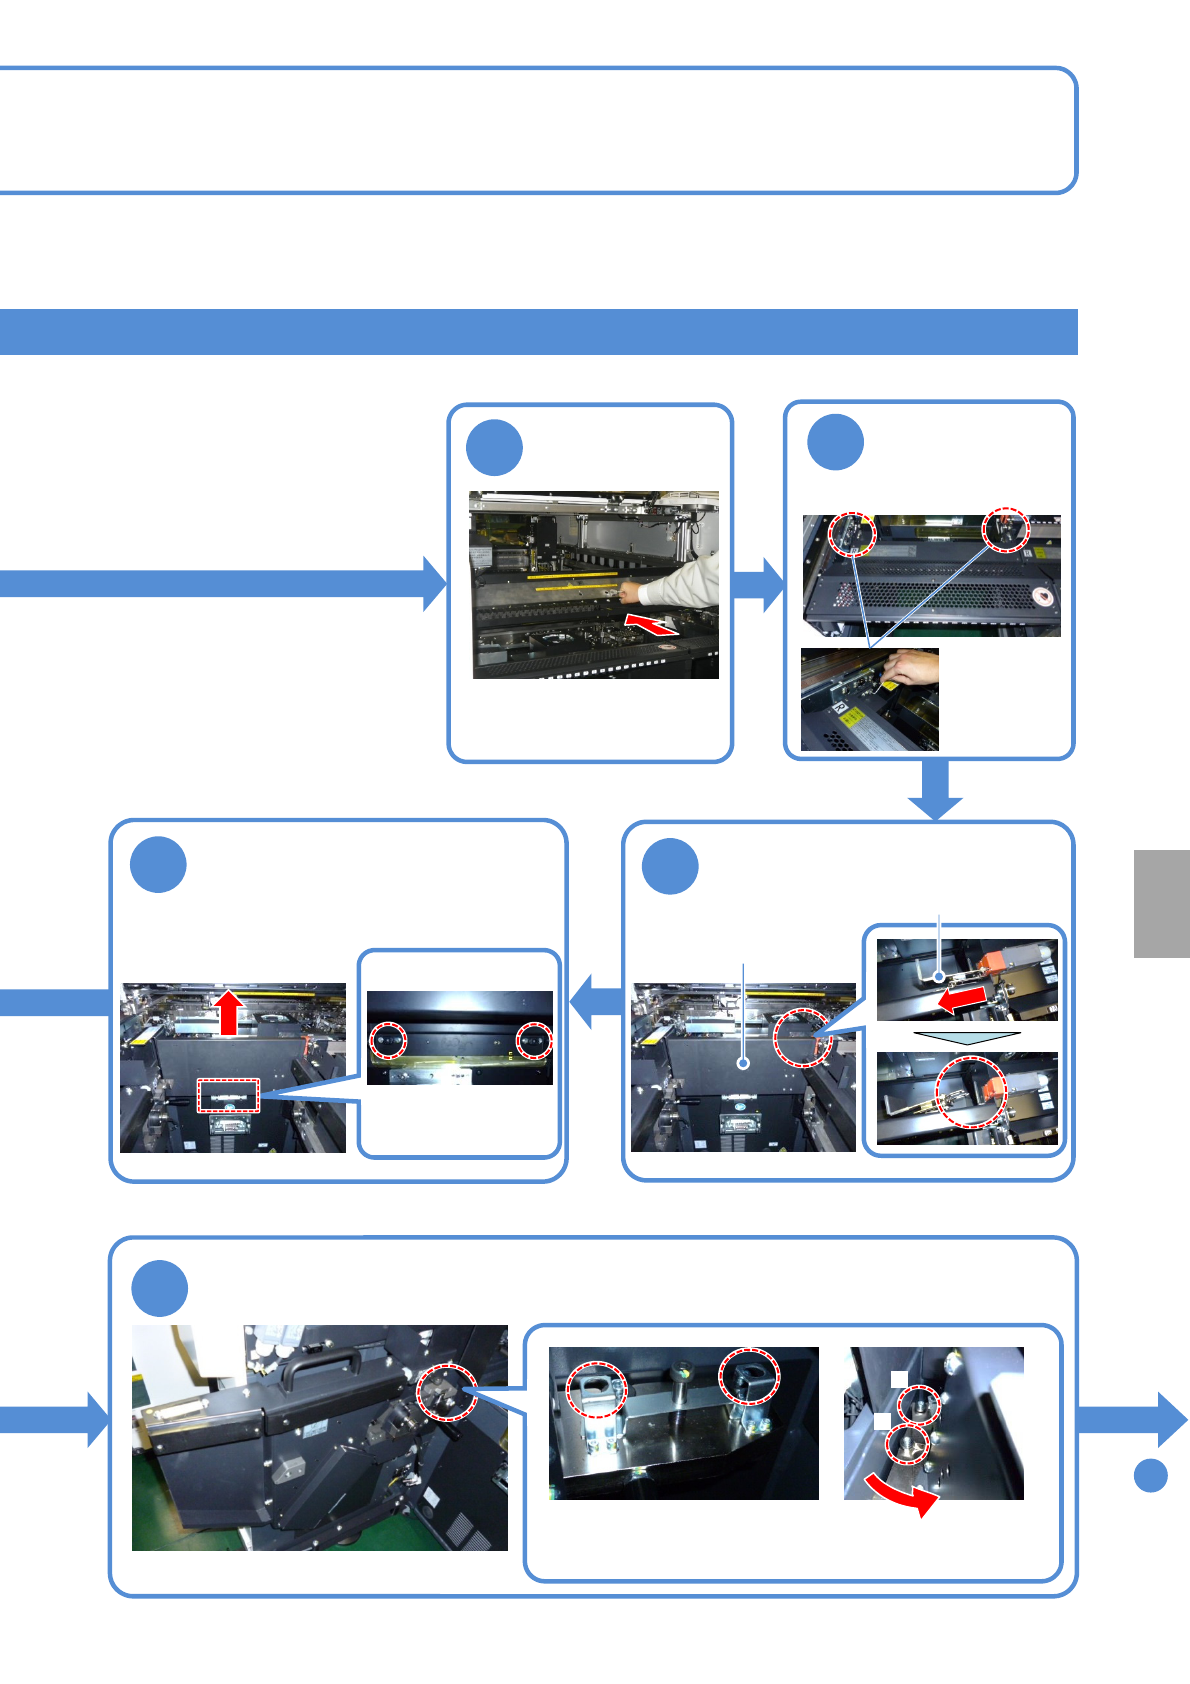
4
To
11
Push it until it goes inward
from the multi-recognition
camera
Push the X-axis
inward
Remove the metal fitting of the
safety cover from the safety
switch
6
10
7
Loosen the screws of the
safety cover and pull the cover
upward to remove
●Screw: M6
2 locations
Loosen the screws of the cart drive unit and remove the unit
B
Turn the unit counterclockwise
to remove from the pin B and
pull it toward you
A
●Screw: M10
2 locations
5
●Screw: M4
2 locations
Detach the
feeder table
cover
Store the removed safety cover to the switch
cart (→P.14-9-1)
Metal fitting
Store the removed cart drive unit to the switch cart (→P.14-9-1)
Safety cover
Installation
NPM-TT2 EJM1EE-MB-14M-02
14-9-11
Maintenance
14-9
How to switch the 17-slot
feeder cart and the single
tray feeder 6
②Switching the 17-slot feeder cart to the single tray feeder 2
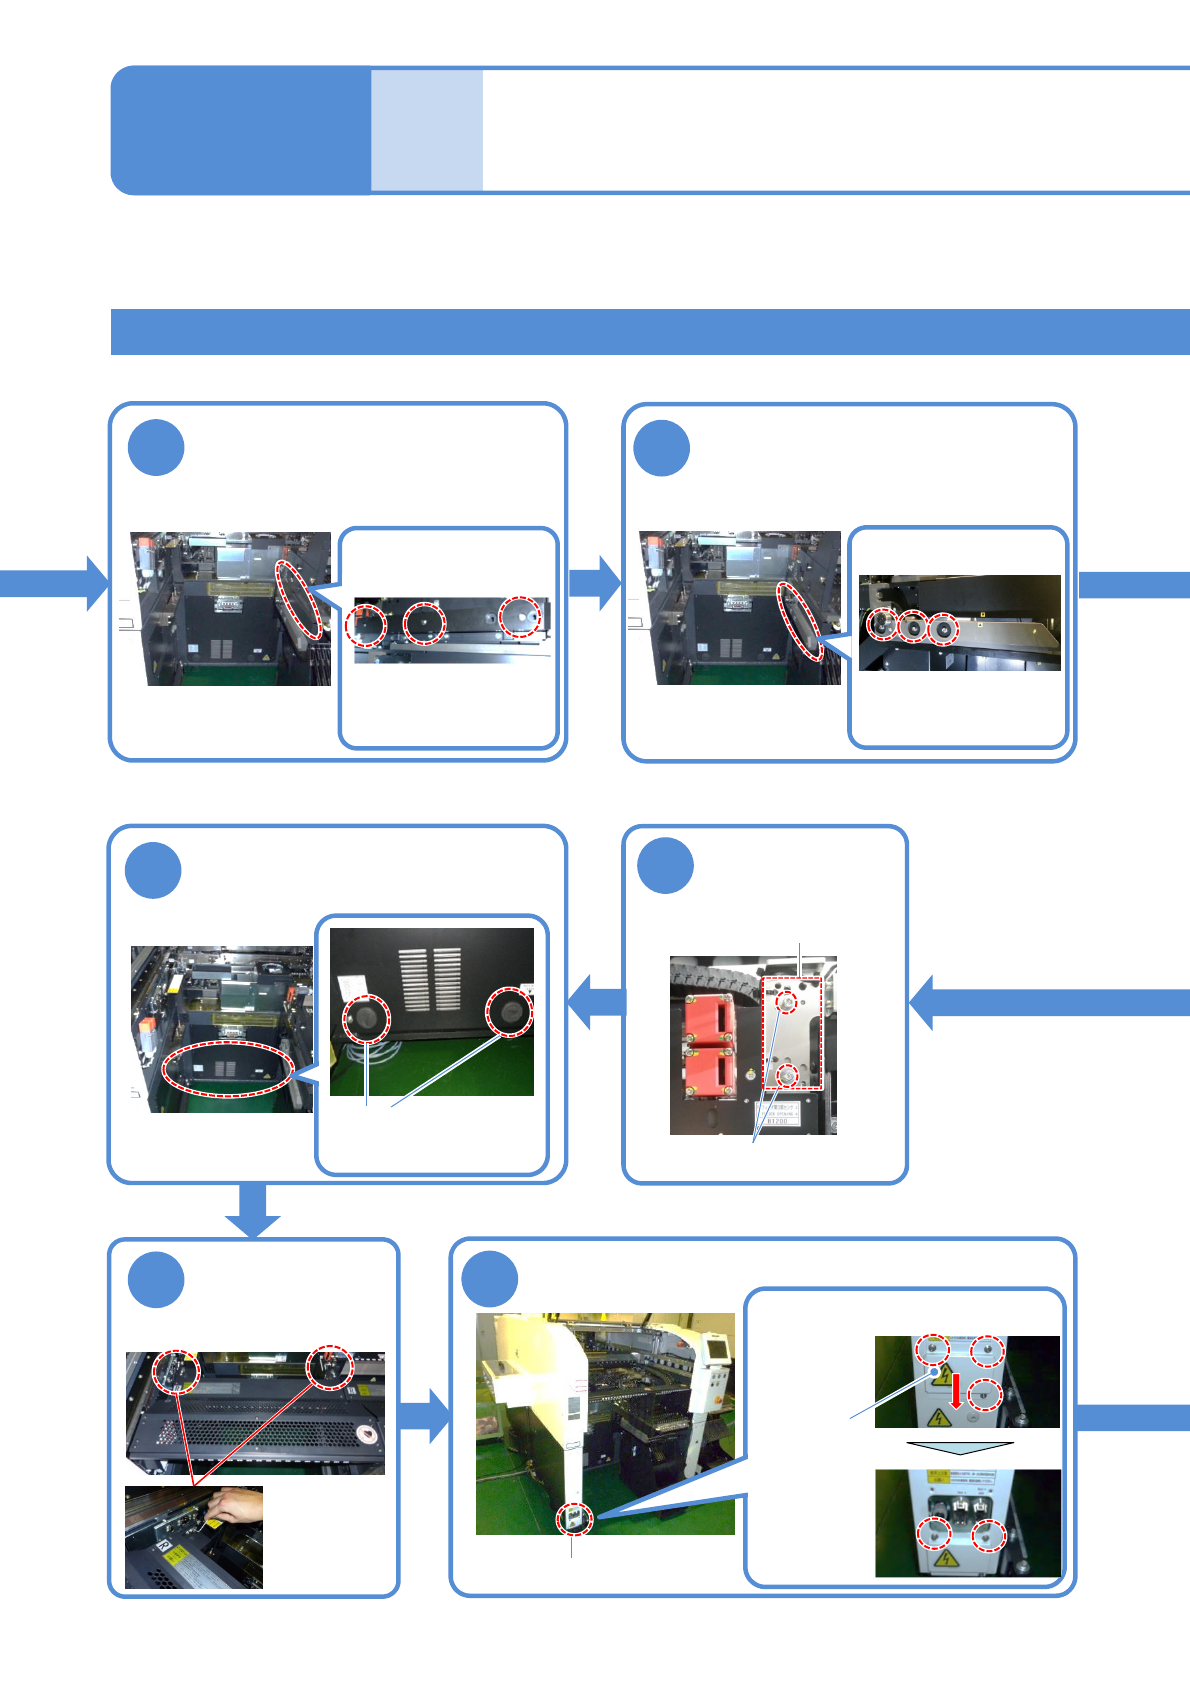
11
12
Detach the drive guide
Detach the cart guide
18
●Screw: M4
2 locations
Attach the feeder
table cover
19
Connector unit
Store the removed drive guide to the switch cart
(→P.14-9-1)
●Screw: M5
3 locations
Store the removed grommet to
the switch cart
(→P.14-9-1)
16
Loosen the
screws of the
sensor bracket
Loosen the screws and slide the
cover lower
●Screw: M4
Loosen
3 screws
Fix the cover
●Screw: M4
Loosen
2 screws
Cover
Remove the cover of the connector unit
Store the removed cart guide to the switch cart
(→P.14-9-1)
●Screw: M5
3 locations
Detach the grommet
Tray feeder joint section
2 locations
17
●Screw: M4 2 locations
Sensor bracket
NPM-TT2 EJM1EE-MB-14M-02
14-9-12
To
22
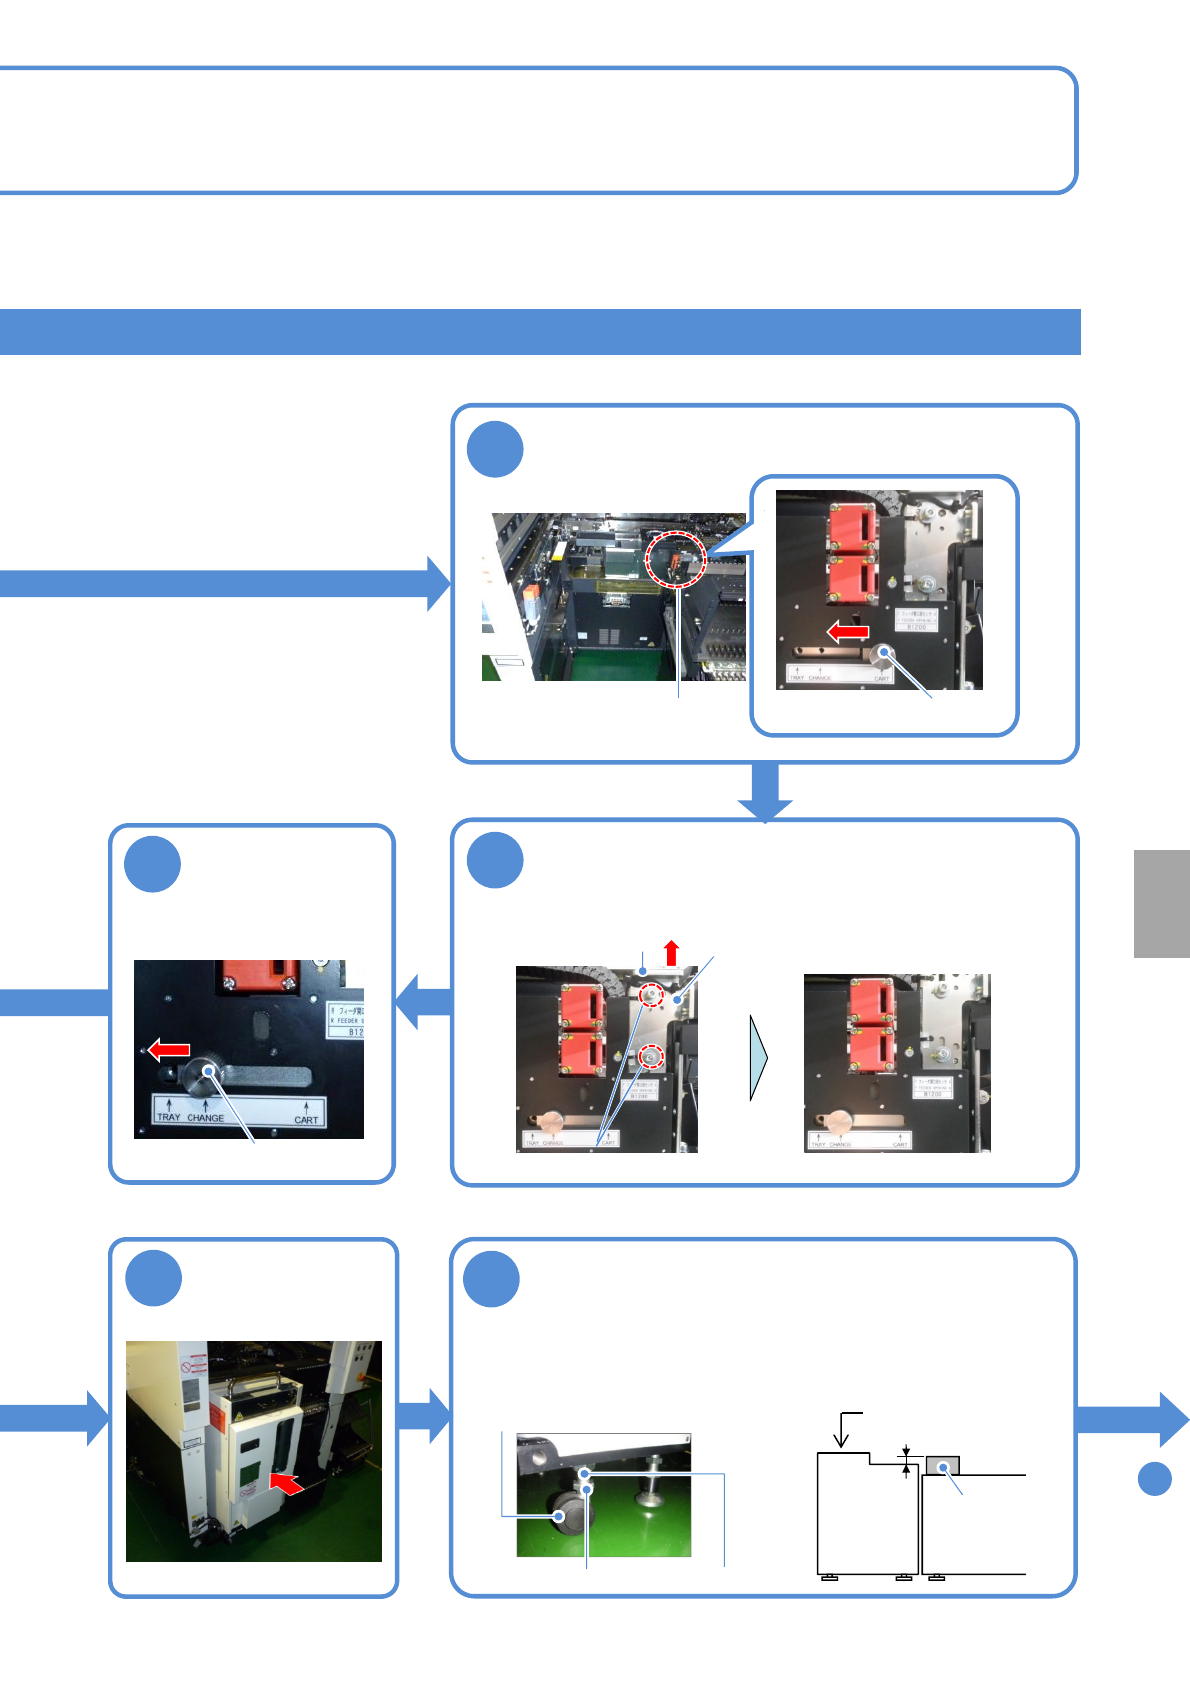
13
Loosen the knob, move it from “TRAY” to
“CHANGE” and fix
Knob
14
19 2 mm
20
Attach the tray
feeder
21
Sensor switch
Installation
Adjust the height
1. Loosen the lock nuts.
2. Adjust the height using the
adjustment nuts.
3. Tighten the lock nuts.
Tray feeder
Mult-
recognition
camera
Level gauge
●Adjust the height/level of the feeder
as shown in the figure below
The bubble should stay within 1
division (0.1 mm/m)
Lock nut
Adjustment nut
●Casters: 4 pcs
15
Loosen the knob,
move it from
“CHANGE” to
“TRAY” and fix
Knob
Loosen the screws, pull the knob, move the
sensor bracket upward and temporarily fix the
screws
Sensor switch
Sensor bracket
●Screw: M4 2 locations
Loosen the screws all the way
knob