N7201A653E.pdf - 第498页
NPM- TT2 EJM1 EE-MB-17M-00 Switc h fr om the 17-slot f eeder car t to the sing le tr ay feeder 3 Maintenance 17-5 Switch the sensor Loosen the knob and fix it at the [CHANGE] position Tighten the screws all the way Pull …
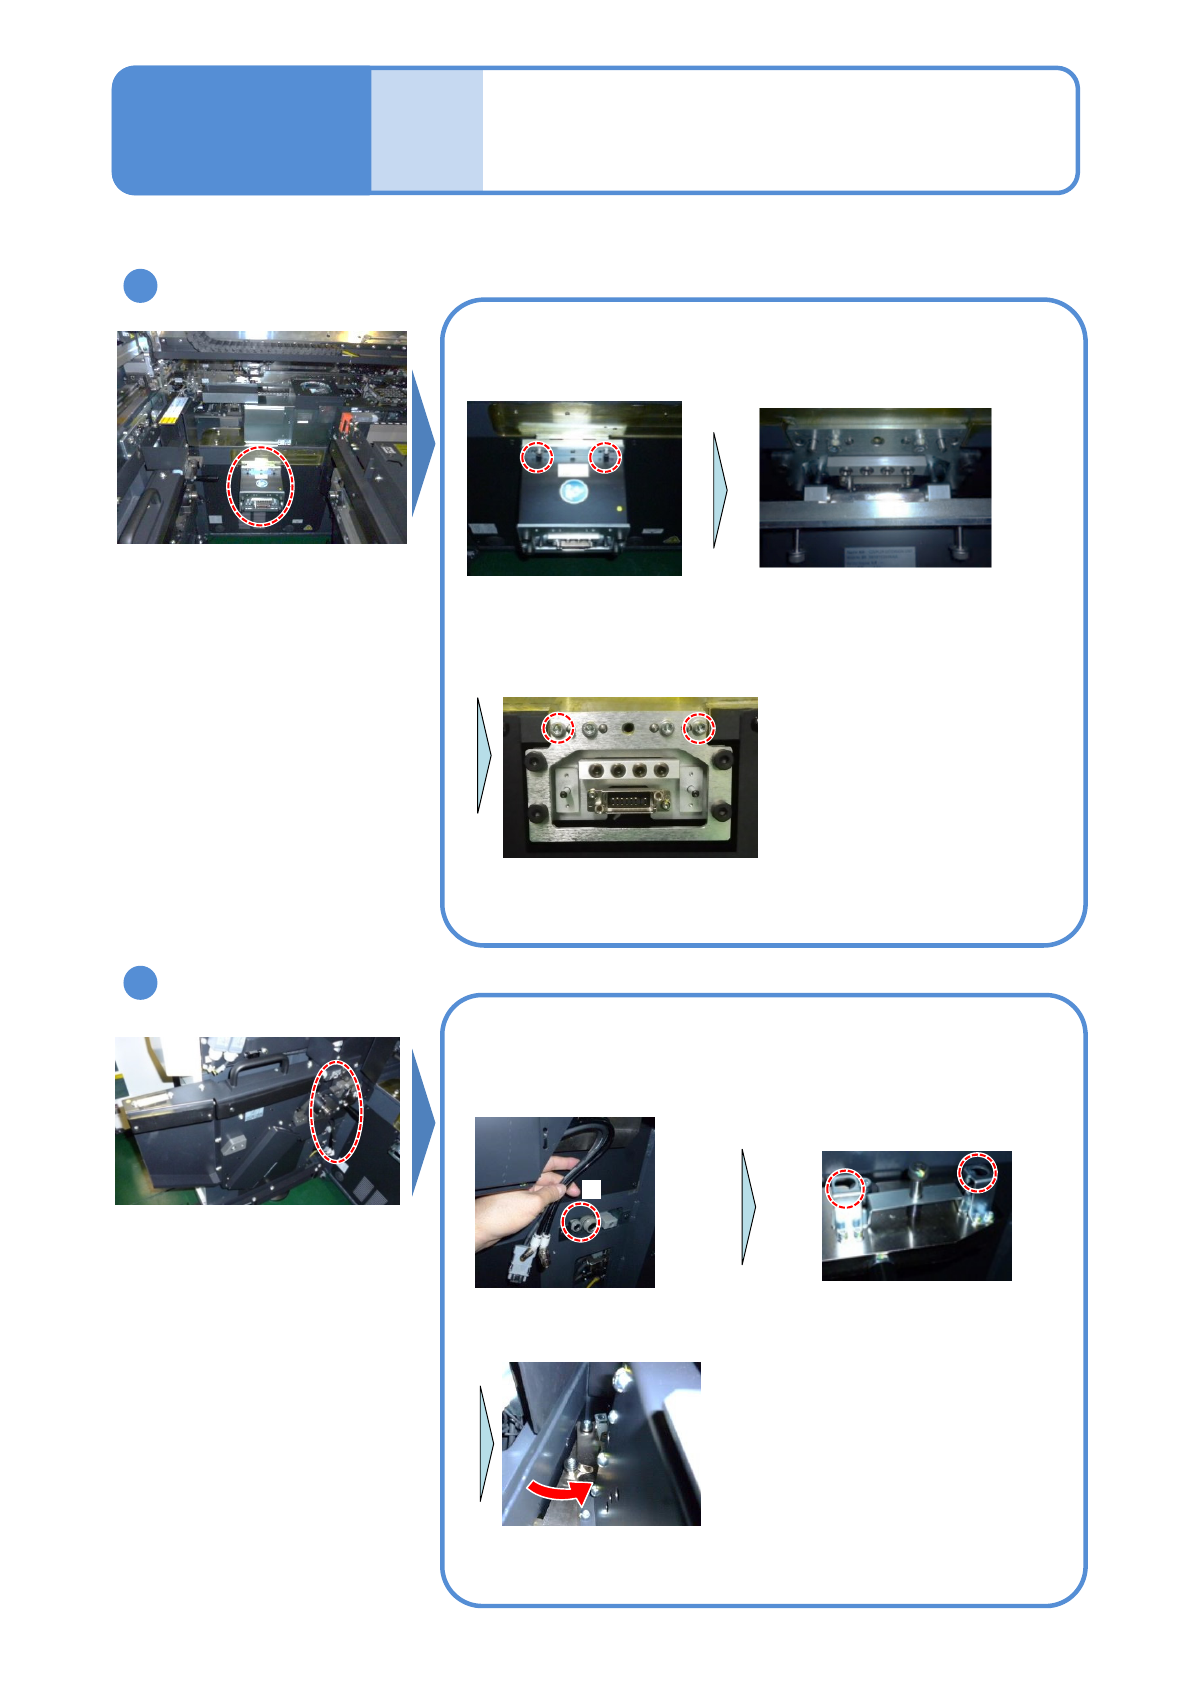
NPM-TT2 EJM1EE-MB-17M-00
Remove the extension drawer
Remove the cart drive unit
Store the removed (a) Cart drive unit in the switch cart
(→P.17-3-1)
C
①Remove the cable and
plug the connectors to ‘C’
Use (f) Short connector of the switch cart (→P.17-3-1)
②Loosen the screws
(8 mm Allen wrench)
③Rotate the cart drive unit in a
counterclockwise and pull it out toward you
●2 locations
17-5-2
6
③Put and tighten the screws
(5 mm Allen wrench)
●2 locations
①Loosen the screws
(5 mm
Allen wrench) ●2 locations
②Remove the extension
drawer
Use (f) Screw: M6 (two pieces) of the switch cart (→P.17-3-1)
Store the removed (e)Extension drawer in the switch cart
(→P.17-3-1)
7
Switch from the 17-slot
feeder cart to the single
tray feeder 2
Maintenance
17-5
NPM-TT2 EJM1EE-MB-17M-00
Switch from the 17-slot
feeder cart to the single
tray feeder 3
Maintenance
17-5
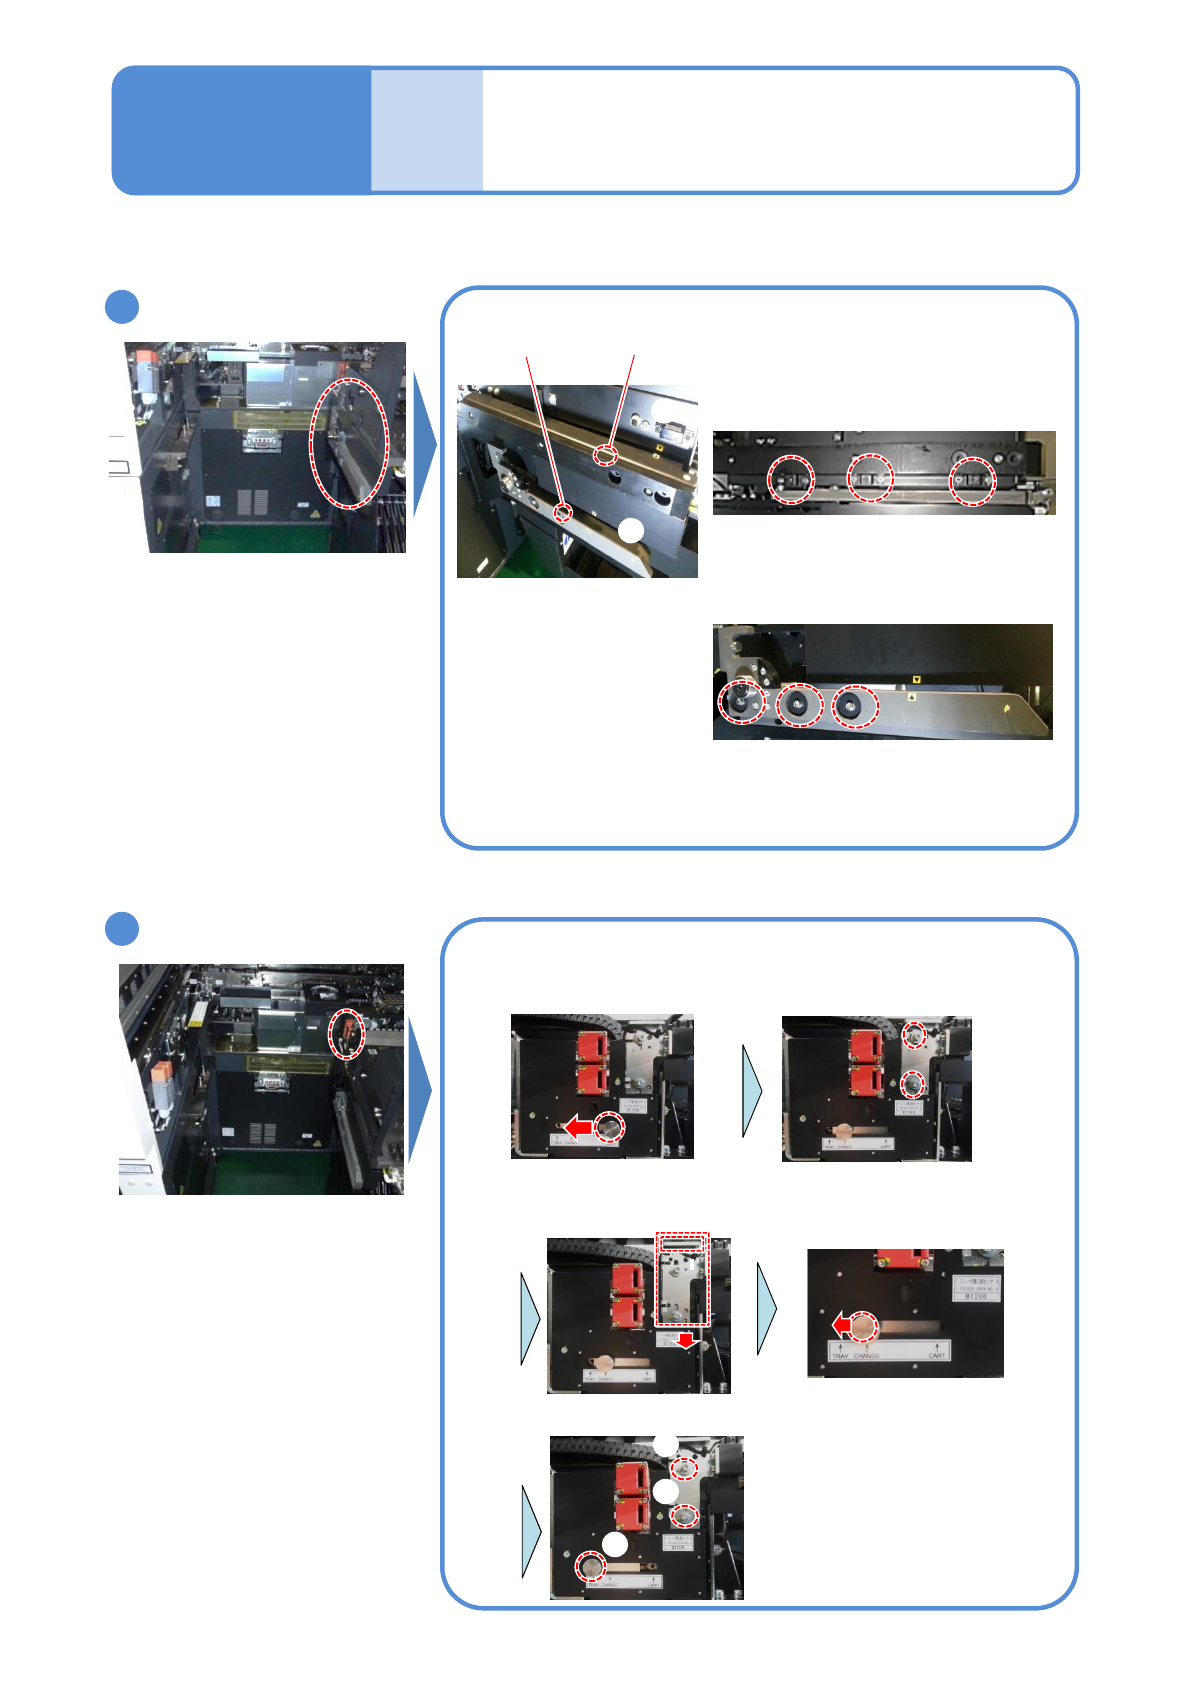
Switch the sensor
Loosen the knob and
fix it at the [CHANGE]
position
Tighten the screws all the way
Pull the knob and move
up the bracket approx. 10
mm
Loosen the knob and
temporarily fix it at the
[CART] position
①Tighten the screws
①
②
②Finally tighten the knob
①
17-5-3
Remove the guides
(two types)
Loosen the screws of (b) Drive guide and (c) Cart guide and
remove them
②Cart guide
①Drive guide
①
②
Store the (b) Drive guide and (c) Cart guide in the switch cart
(→P.17-3-1)
(4 mm Allen wrench) ●3 location
8
9
(4 mm Allen wrench) ●3 location
(3 mm Allen wrench) ●2 location
(3 mm Allen wrench)
●2 location

NPM-TT2 EJM1EE-MB-17M-00
17-5-4
Detach the grommet
(→P.17-2-4)
Attach the feeder table
cover (→ P.17-2-3)
Attach the tray feeder
Attach the tray feeder
Reattach the cover at the bottom side so that the
connectors are exposed
(3 mm Allen wrench)
●3 locations
10 11
12
Adjust the height of the tray
feeder (If not yet to be adjusted)
1. Loosen the lock nuts.
2. Adjust the height using the adjustment
nuts.
3. Tighten the lock nuts.
●Adjust the height/level of the feeder as
shown in the figure below
The bubble should stay within 1 division
(0.1 mm/m)
Lock nut
Adjustment nut
Casters: 4 pcs
19 2 mm
Tray feeder
Multi-
Recognition
camera
Level gauge
13
Switch from the 17-slot
feeder cart to the single
tray feeder 4
Maintenance
17-5
(3 mm Allen wrench)
●2 locations
(Spanner 30 mm)
●Use two spanners