MAN00000772_SI-G200BB_SVCPDFA.pdf - 第185页
Set-up HLGB-10205-01 Fiducial Mark Setup SHEET 1/3 Fiducial Mark Setup [Necessary jigs] 1 Click in an order of MANUAL menu PWB TRANSPOR T tab Set button. The backup plat e rises. 2 Click the LocatorPin Up button on t…

Set-up
HLGB-10204-01
PWB Camera Setup
SHEET
4/4
6 Continuously perform auto calibration.
For auto calibration procedure, refer to the “Auto Calibration (Recognition of relationship between PWB coordinate and
mechanism coordinate)” [HLGB-10304-01] and later.
Set-up
HLGB-10205-01
Fiducial Mark Setup
SHEET
1/3
Fiducial Mark Setup
[Necessary jigs]
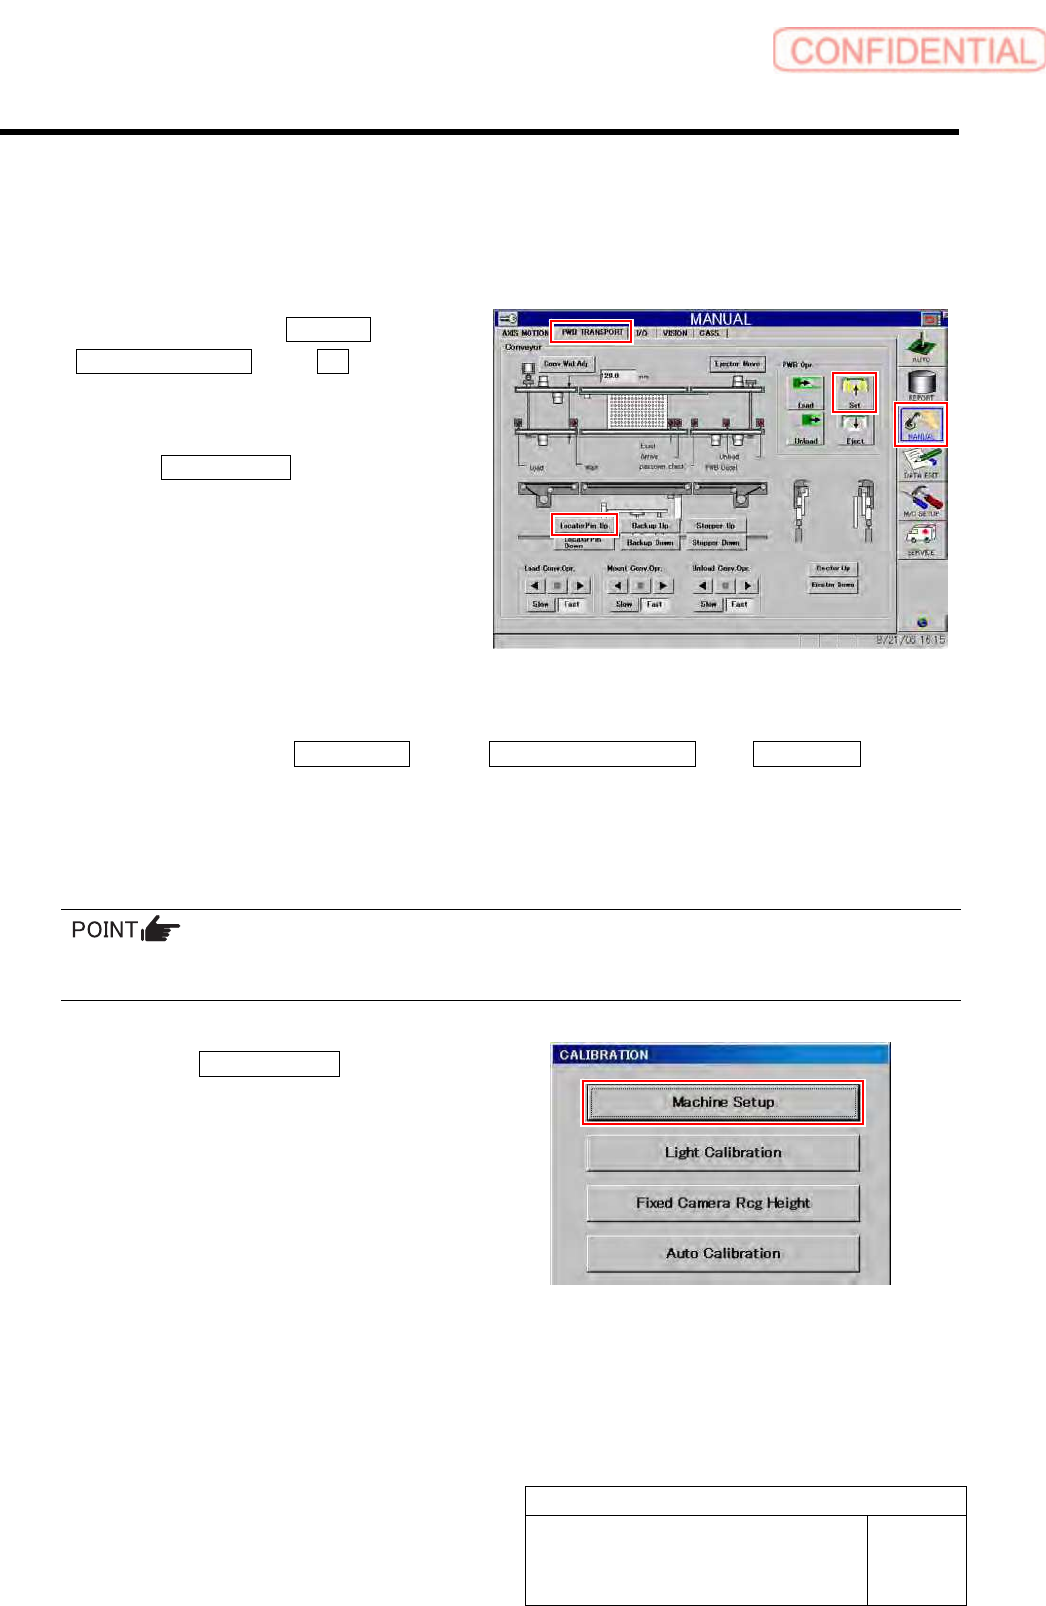
1 Click in an order of MANUAL menu
PWB TRANSPORT tab Set button.
The backup plate rises.
2 Click the LocatorPin Up button on the PWB
TRANSPORT screen.
The locator pin rises.
3 Press the [ORG] button on the operation
panel to perform origin position return.
4 Display Fiducial Mark Setup screen.
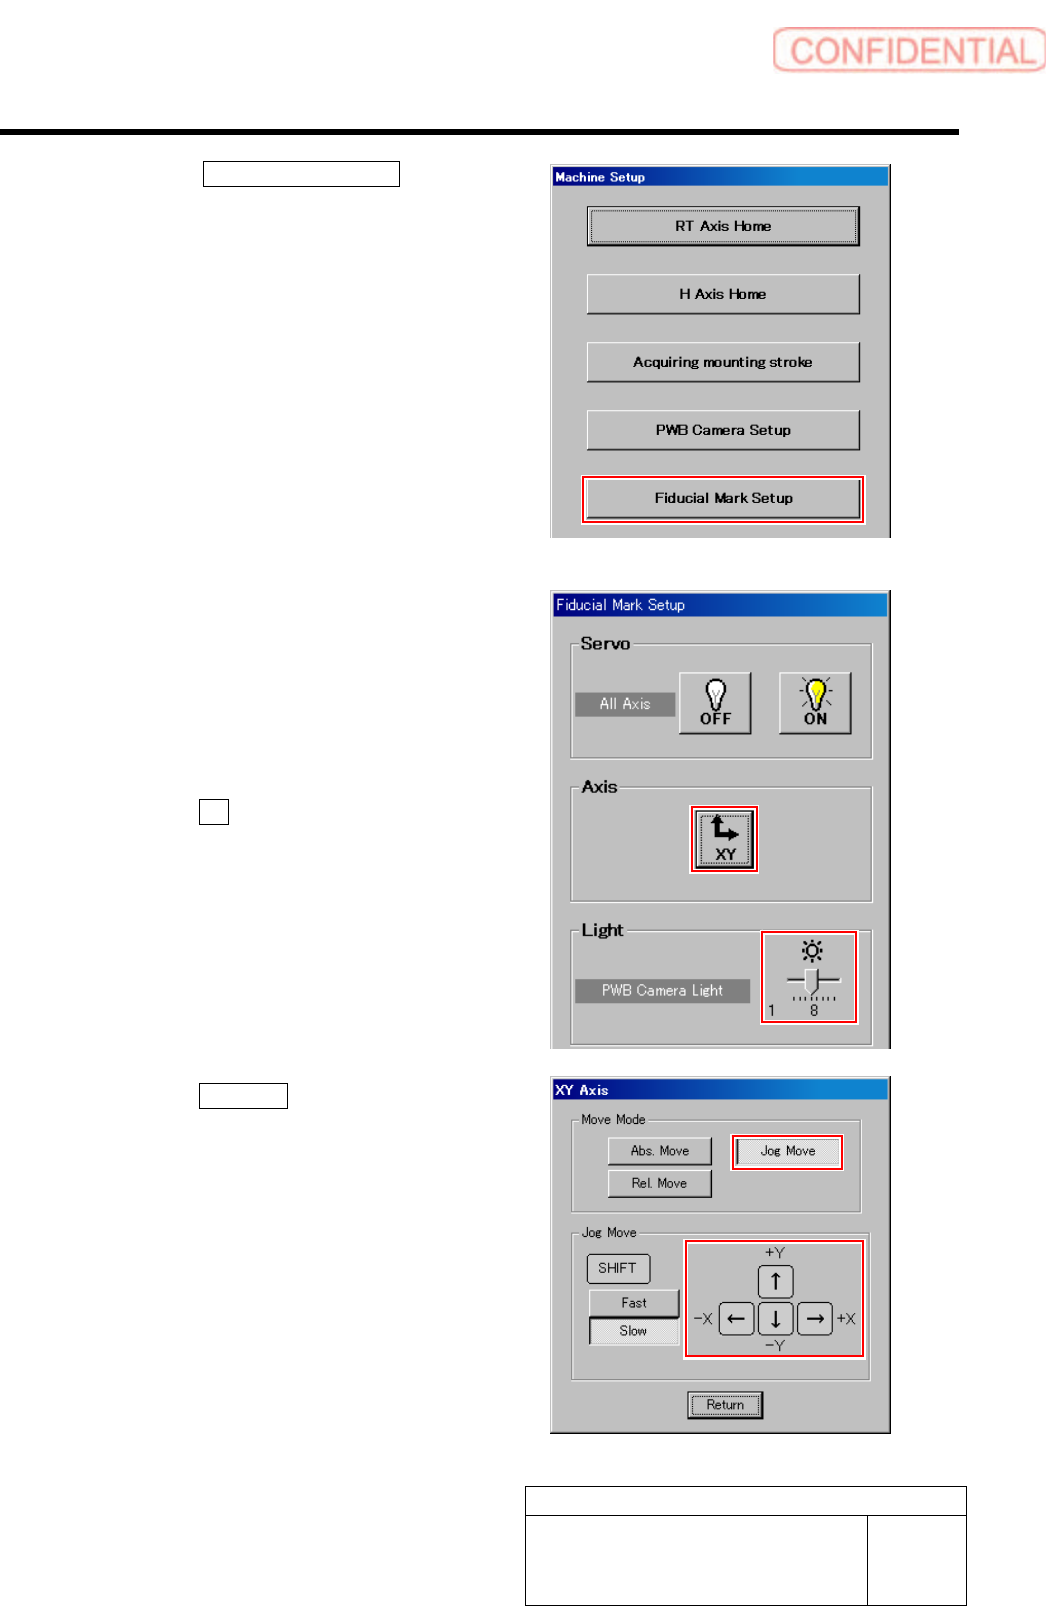
1. Click in an order of M/C SETUP menuM/C MAINTENANCE tabCalibration button.
“Head at opposite position will be moved to noninterference area. Press the [START] button if you are really OK.”
is displayed on the message screen.
2. Press the [START] button on the operation panel.
CALIBRATION screen is displayed.
For procedures when selecting head for which calibration is performed, and when changing calibration jig,
refer to the “How to display calibration screen (HLGB-10105-01)”.
3. Click the Machine Setup button on the
CALIBRATION screen.
Machine Setup screen is displayed.
Set-up
HLGB-10205-01
Fiducial Mark Setup
SHEET
2/3
4. Click the Fiducial Mark Setup button
on the Machine Setup screen.
Fiducial Mark Setup screen is displayed.
5 Set brightness of the PWB camera light to
“6” or “7”.
6 Move the PWB camera onto the locator pin
while checking the PCBOARD DISPLAY
screen.
1. Click the XY button on the Fiducial
Mark Setup screen.
XY Axis screen is displayed.
2. Click the Jog Move button.
3. Press the cursor key to jog-move the
reference camera onto the locator pin.