MAN00000772_SI-G200BB_SVCPDFA.pdf - 第194页
Set-up HLGB-10207-01 RN A xis Origin Offset Setup SHEET 2/4 2 T urn off the servo for RN axis. 1. Click the R.H button on the O RG OFFSET screen. RN/H Axis screen is displayed. 2. Click the OFF button for the RN axis ser…
Set-up
HLGB-10207-01
RN Axis Origin Offset Setup
SHEET
1/4
RN Axis Origin Offset Setup
Perform this working on both heads on the front side and rear side.
[Procedure]
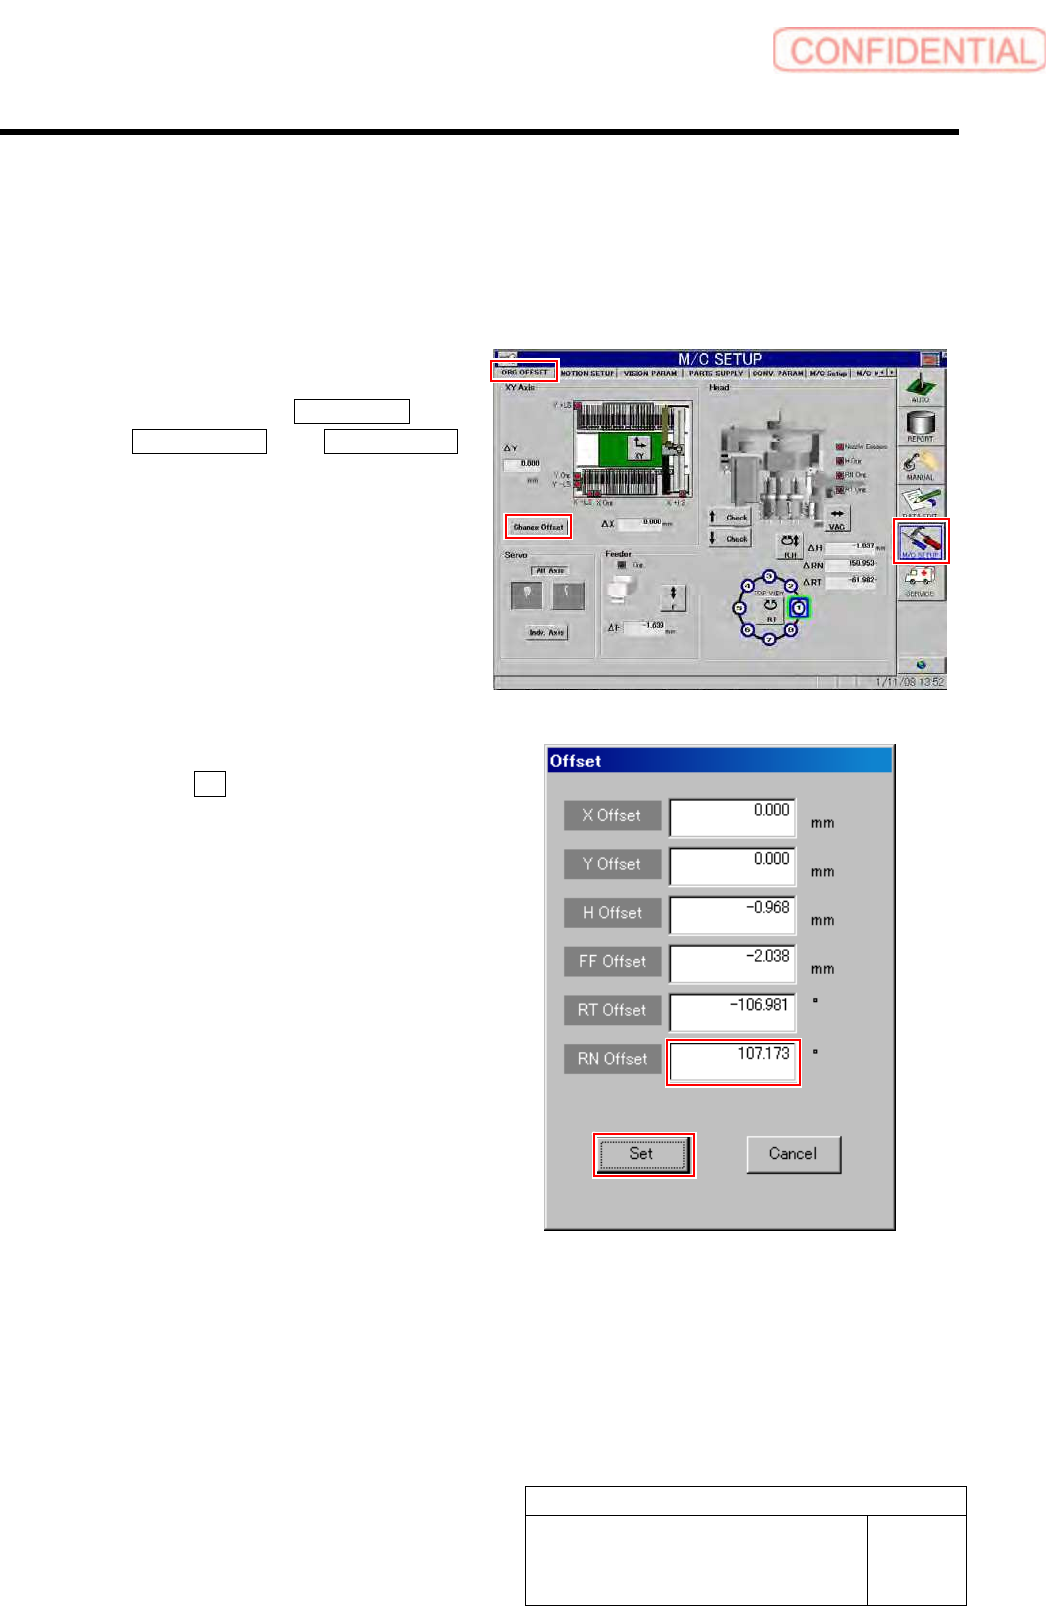
1 Set the RN offset to “0”.
1. Click in an order of M/C SETUP menu
ORG OFFSET tabChange Offset
button.
Change Offset screen is displayed.
2. Input “0” in the RN Offset box, and
click the Set button.
RN offset value is set to “0”.
Set-up
HLGB-10207-01
RN Axis Origin Offset Setup
SHEET
2/4
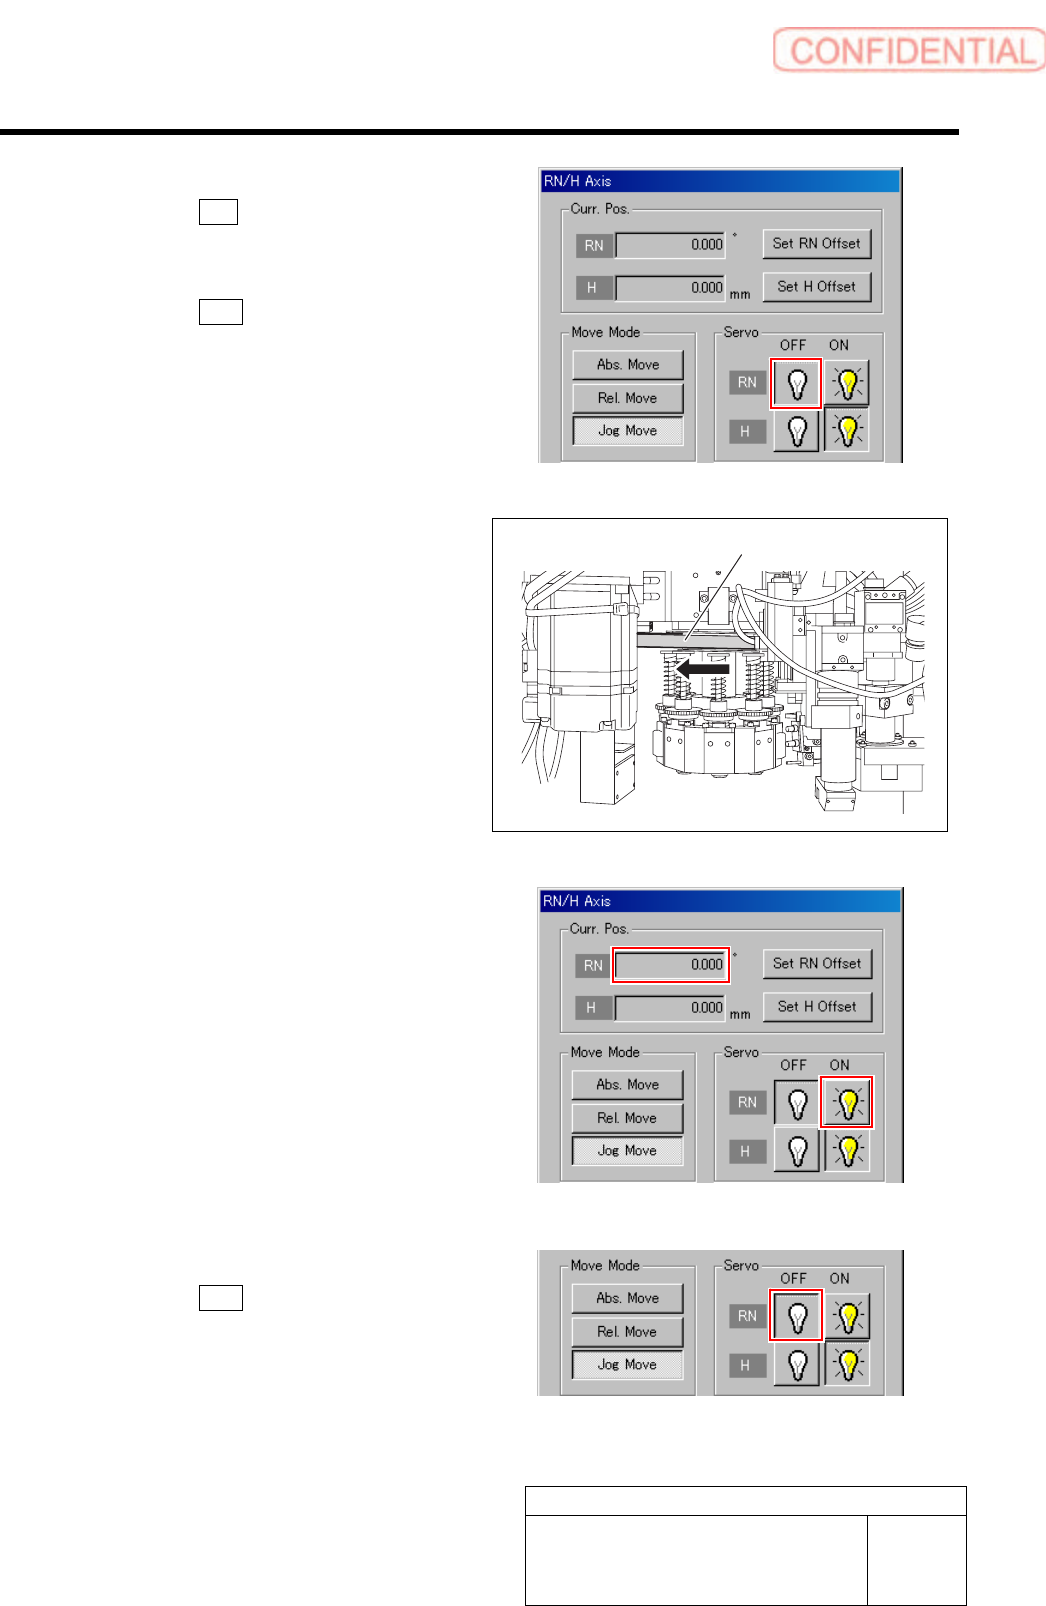
2 Turn off the servo for RN axis.
1. Click the R.H button on the ORG
OFFSET screen.
RN/H Axis screen is displayed.
2. Click the OFF button for the RN axis
servo.
3 Check the rotating angle when rotating the
RN axis belt clockwise.
1. Turn on the servo for the RN axis at a
position where the RN axis is rotated
clockwise and stops.
2. Take note of angle of the RN axis
displayed on the RN/H Axis screen.
(Example: 369.7˚)
4 Turn off the servo for RN axis.
1. Click the OFF button for the RN axis
servo on the RN/H Axis screen.
RN axis belt
Set-up
HLGB-10207-01
RN Axis Origin Offset Setup
SHEET
3/4
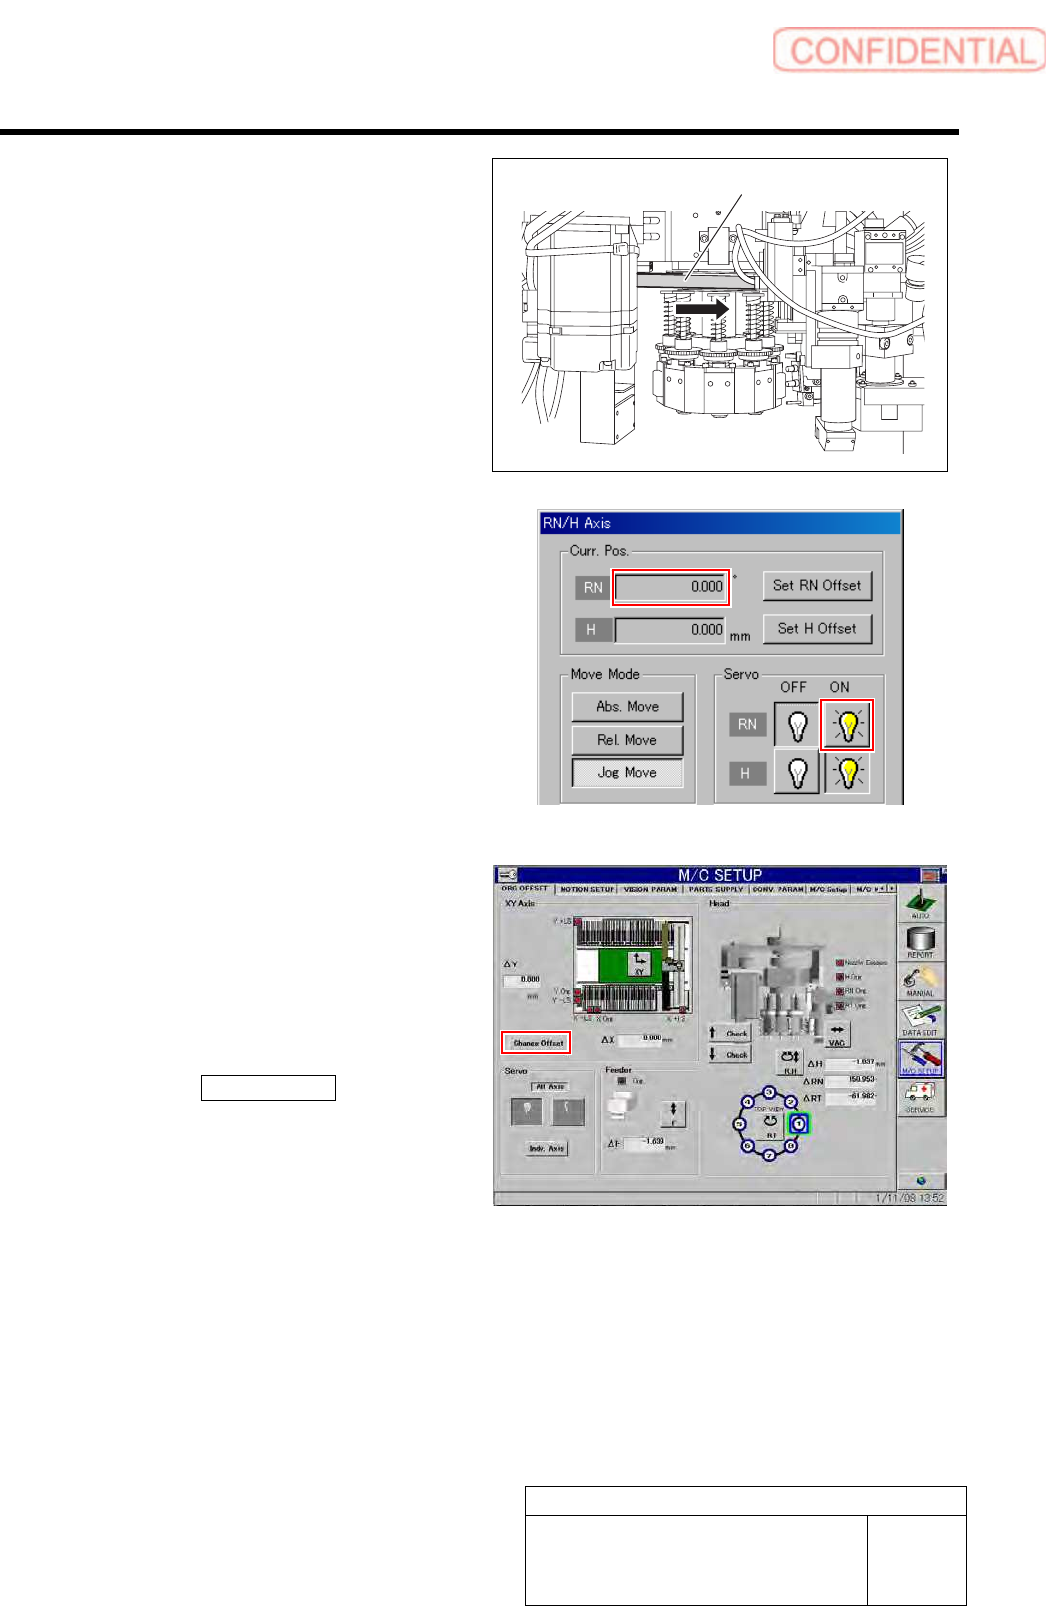
5 Check the rotating angle when rotating the
RN axis belt counterclockwise.
1. Turn on the servo for the RN axis at a
position where the RN axis is rotated
counterclockwise and stops.
2. Take note of angle of the RN axis
displayed on the RN/H Axis screen.
(Example: -149.5˚)
6 Set a half of the value for which the angle
when rotated clockwise and the angle when
rotated counterclockwise are added as a RN
axis offset value.
1. Calculate the offset value of the RN axis.
Example: (369.7 + (-149.5)) / 2 = 110.1
2. Click the Change Offset button on the
ORG OFFSET screen.
Offset screen is displayed.
RN axis belt