MAN00000772_SI-G200BB_SVCPDFA.pdf - 第203页
Calibration HLGB-10301-01 PWB Camera Light Calibration SHEET 2/3 4 Select jig No. of light calibration jig from the list box. 5 Move the PWB camera to above the calibration plate jig. 1. Click the XY button on the PWB Ca…
Calibration
HLGB-10301-01
PWB Camera Light Calibration
SHEET
1/3
PWB Camera Light Calibration
Perform this working on both heads on the front side and rear side.
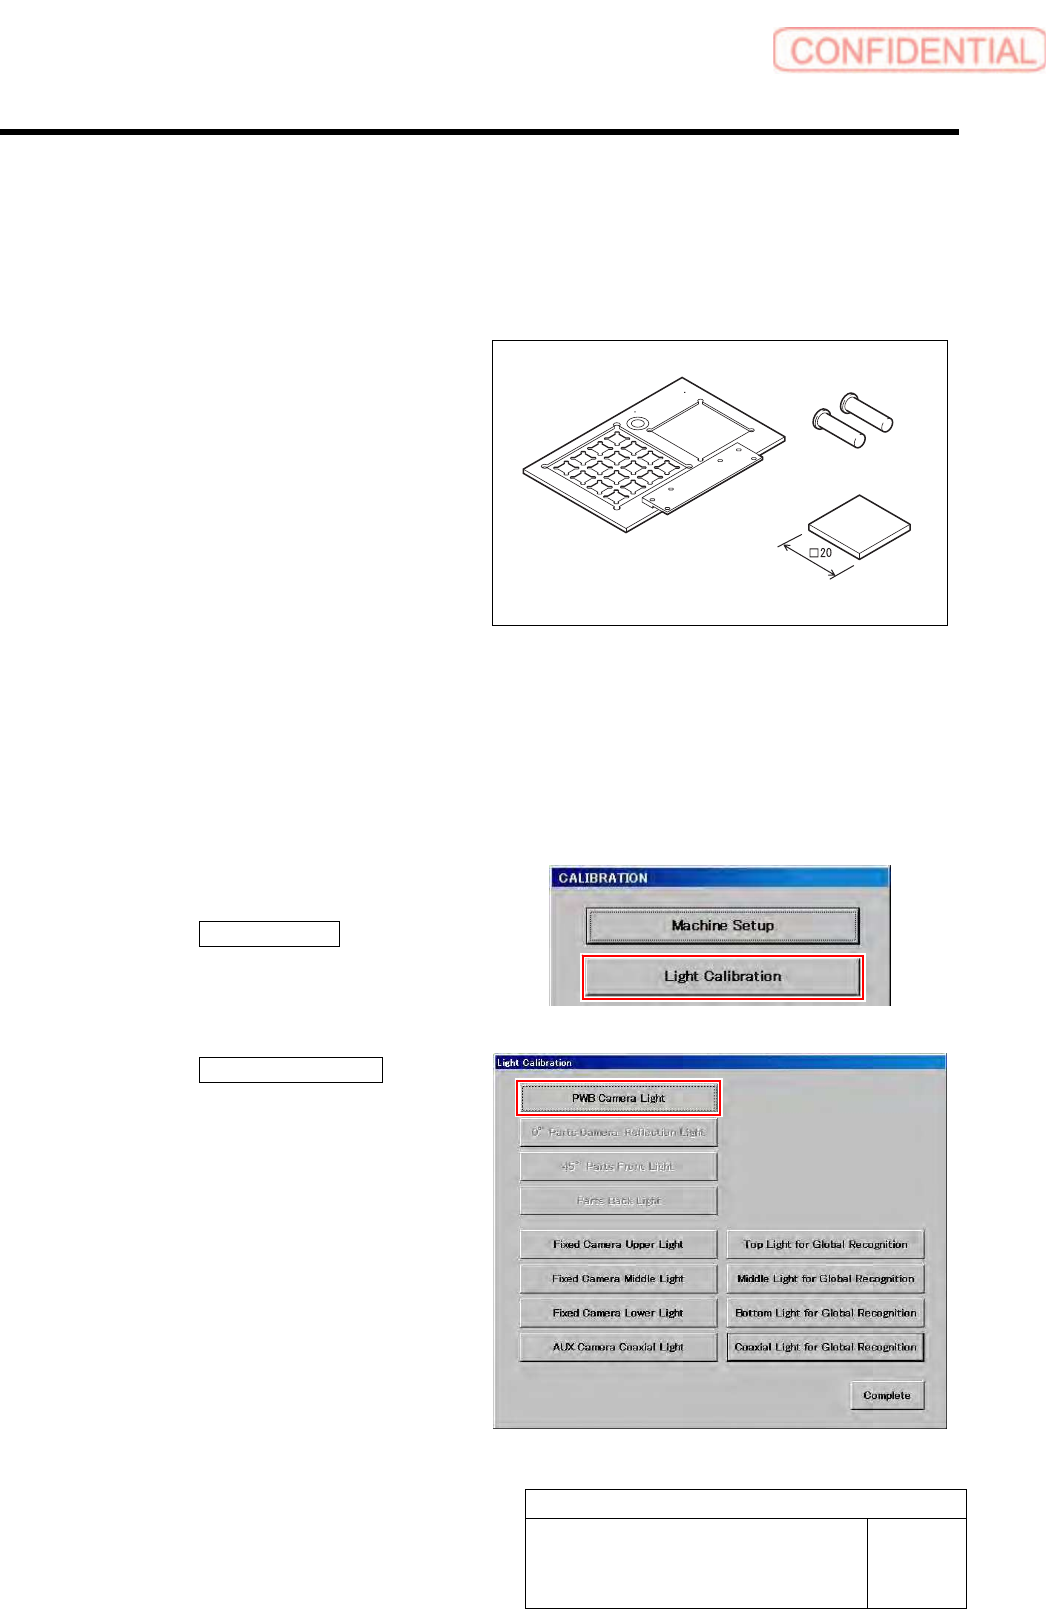
[Necessary jigs]
• Calibration plate jig
• Jig positioning pin
• Light Calibration jig
[Procedure]
1 Install the calibration plate jig.
For mounting method of the calibration plate jig, refer to “Install the Calibration Plate Jig [HLGB-10101-01]”.
2 Press the [ORG] button on the operation panel to perform origin position return.
3 Display a PWB Camera Light screen screen.
1. Click the Machine Setup button on the
CALIBRATION screen.
Machine Setup screen is displayed.
2. Click the PWB Camera Light button
on the Light Calibration screen.
PWB Camera Light screen is displayed.
Calibration plate jig
Jig positioning pin
Light Calibration jig
Calibration
HLGB-10301-01
PWB Camera Light Calibration
SHEET
2/3
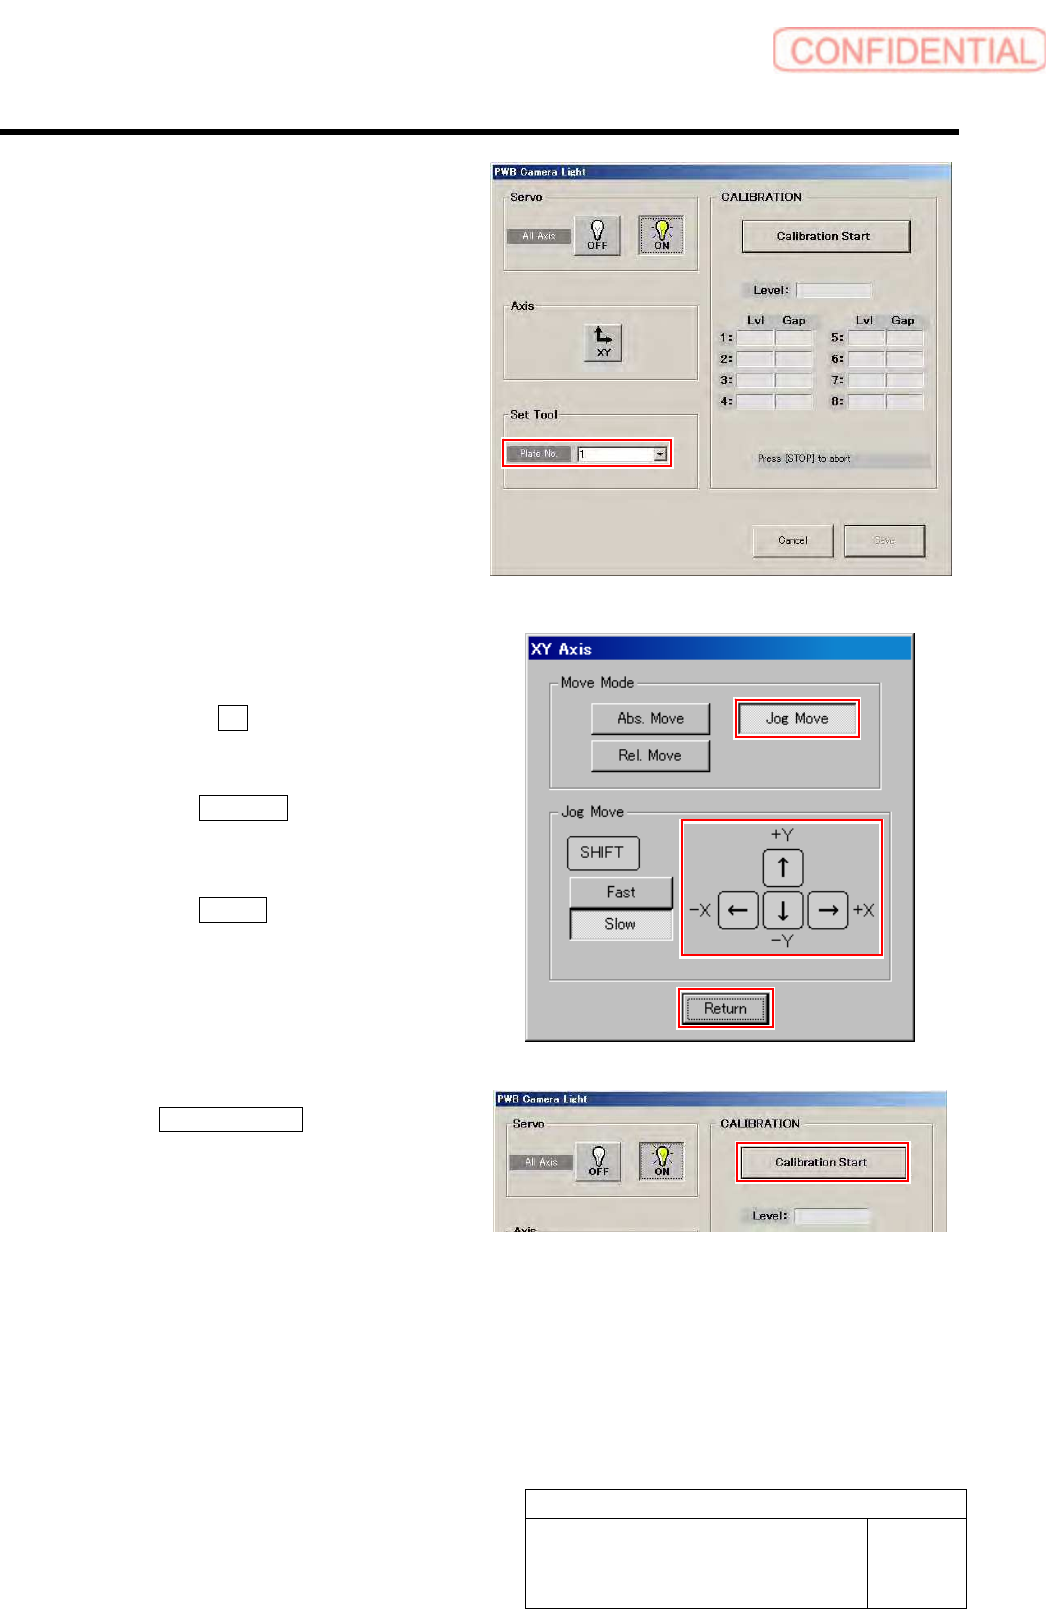
4 Select jig No. of light calibration jig from the
list box.
5 Move the PWB camera to above the
calibration plate jig.
1. Click the XY button on the PWB
Camera Light screen.
XY Axis screen is displayed.
2. Click the Jog Move button.
3. Jog move the PWB camera to above
the calibration plate jig.
4. Click the Return button to return to
the PWB Camera Light screen.
6 Click the Calibration Start button.
“Put jig under PWB camera” is displayed on the
message screen.
Calibration
HLGB-10301-01
PWB Camera Light Calibration
SHEET
3/3
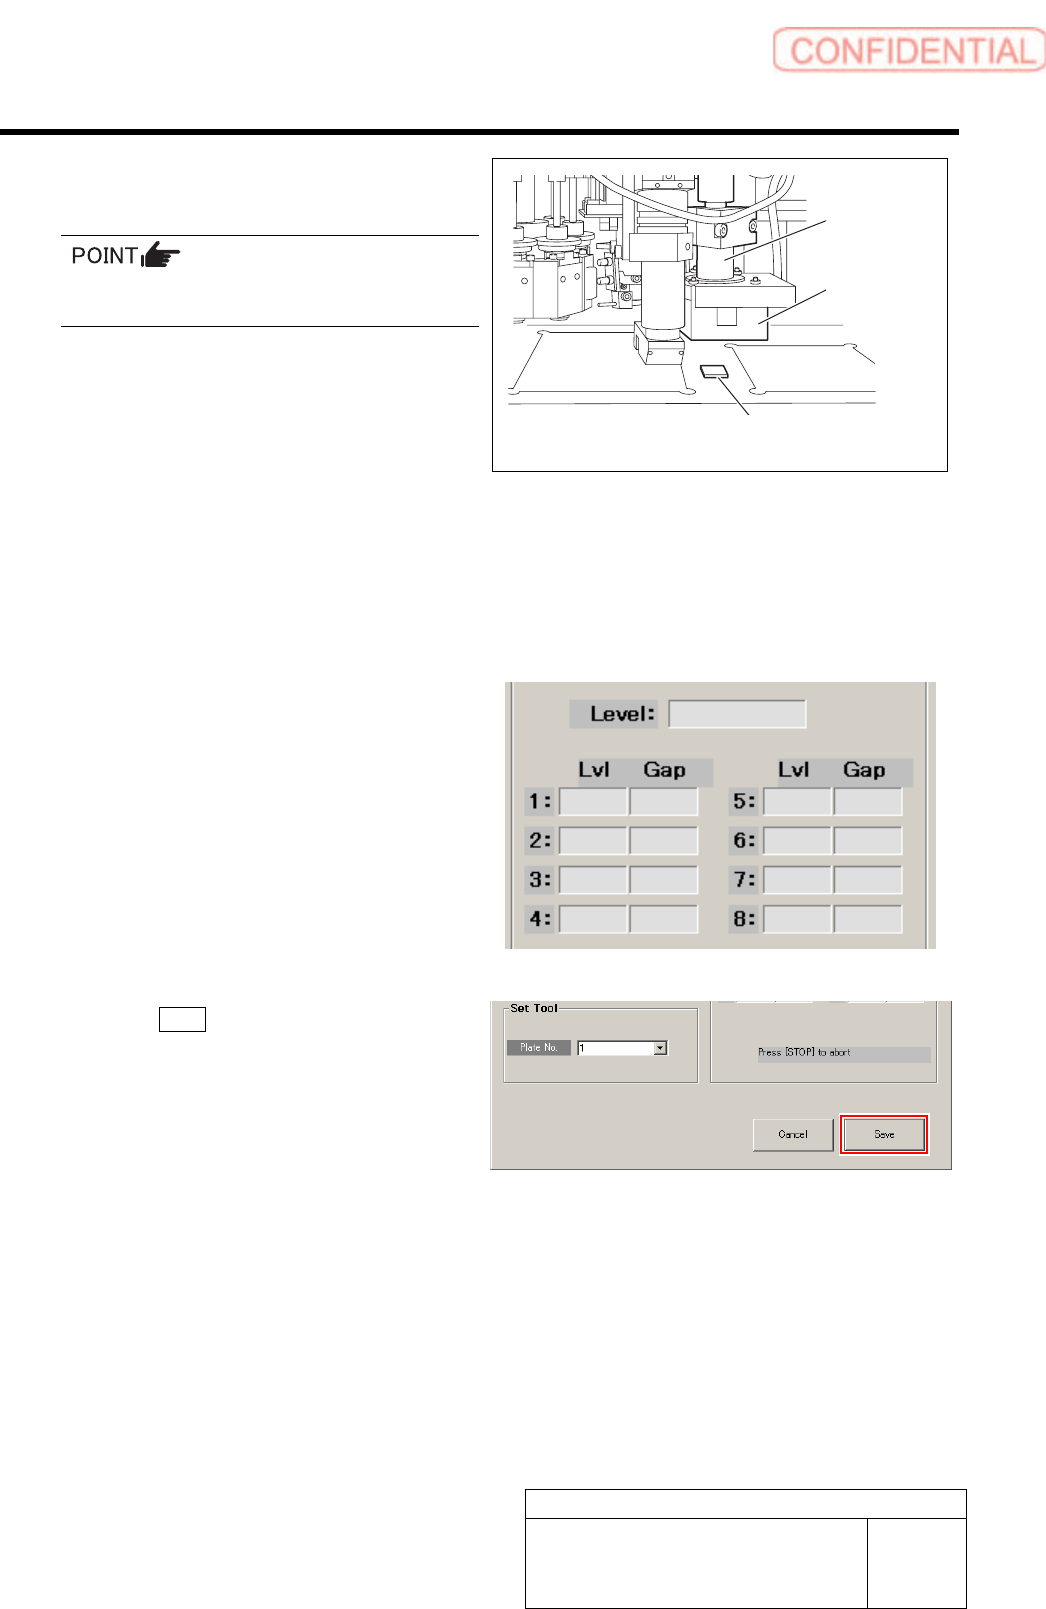
7 Place the light calibration jig on the
calibration plate jig below the PWB camera.
Place it so that center of the PWB camera light
is on the center of light calibration jig.
8 Press the [START] button on the operation
panel.
PWB camera light calibration is started.
After a few minutes, the calibration ends, and Lv1
values from level 1 to 8 and Gap value are displayed
on the PWB Camera Light screen.
9 Check the Gap values of Level 1 to 8.
It is normal if the Gap value is within 0 to 3.
10 Click the Save button.
The Gap values of Lvl 1 to 8 are saved and the PWB
Camera Light screen closes.
11 Remove the light calibration jig.
PWB camera
PWB Camera
Light
Light Calibration jig
(Gloss face is downward)