MAN00000772_SI-G200BB_SVCPDFA.pdf - 第22页
Work Procedure WKGB-10102-01 G200BB Head Maintenan ce SHEET 8/1 1 6 Using the bearing press fitting jig, press the bearing into the spline nut. Do not touch the end plate (black part) on top of the spline nut. 7 Install …
Work Procedure
WKGB-10102-01
G200BB Head Maintenance
SHEET
7/11
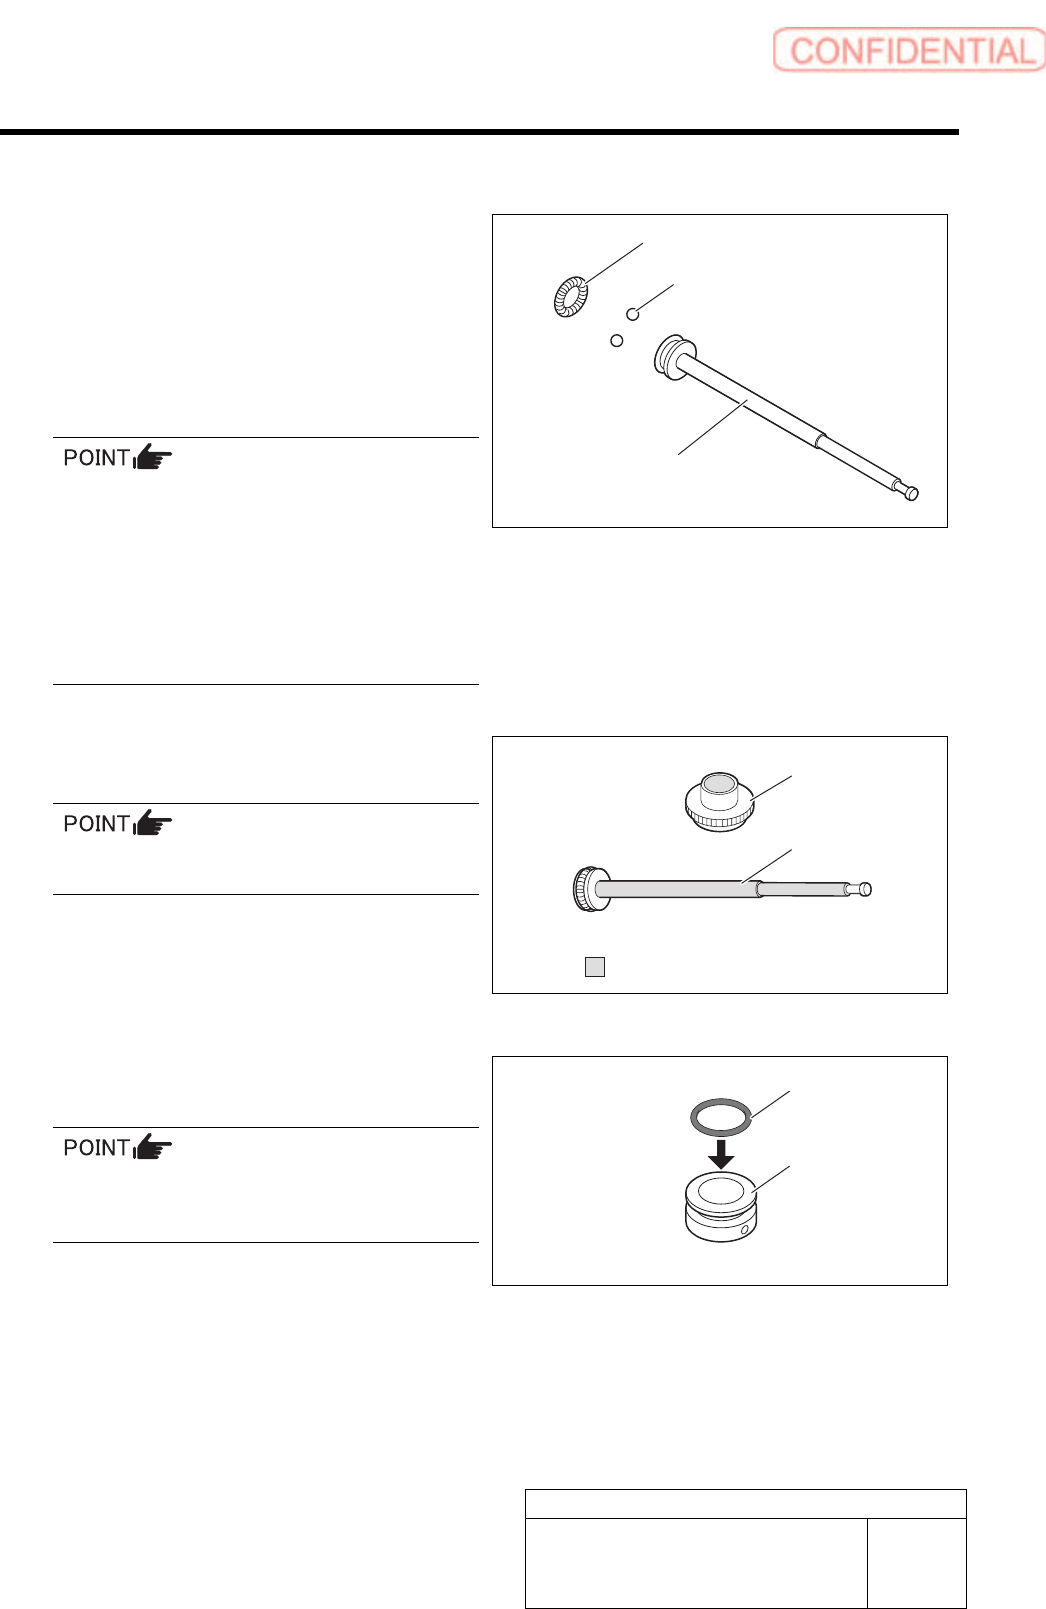
[Reassembling Procedure]
1 Apply AFC grease thinly to the ceramic balls
(2 pcs.), and then attach the balls to the
inner shaft.
2 Apply AFC grease thinly to the nozzle O-ring
spring, and then attach the spring to the
inner shaft.
Do not reuse the nozzle O-ring spring once it has
been removed, otherwise the holding power may
decrease.
Nozzle holding power spec. : 800 [gf] or above
Guideline of nozzle holding force:
When the nozzle is pull down with
your finger, the inner shaft goes down
together with the nozzle.
3 Apply AFC grease thinly to the inner shaft
surface.
Do not apply grease too much. Apply thinly to an
extent that color of AFC grease is not colored.
4 Apply Multi-Purpose Grease thinly to the
small gear.
5 Check O-ring condition of outer collar.
And replace, if it was worn or damaged.
The O-ring is used as a brake. Use caution not to
contaminate the O-ring with oil, grease, and
others.
Inner shaft
Ceramic balls
Nozzle O-ring spring
O-ring
Outer collar
Inner shaft
Small gear
: AFC grease
Work Procedure
WKGB-10102-01
G200BB Head Maintenance
SHEET
8/11
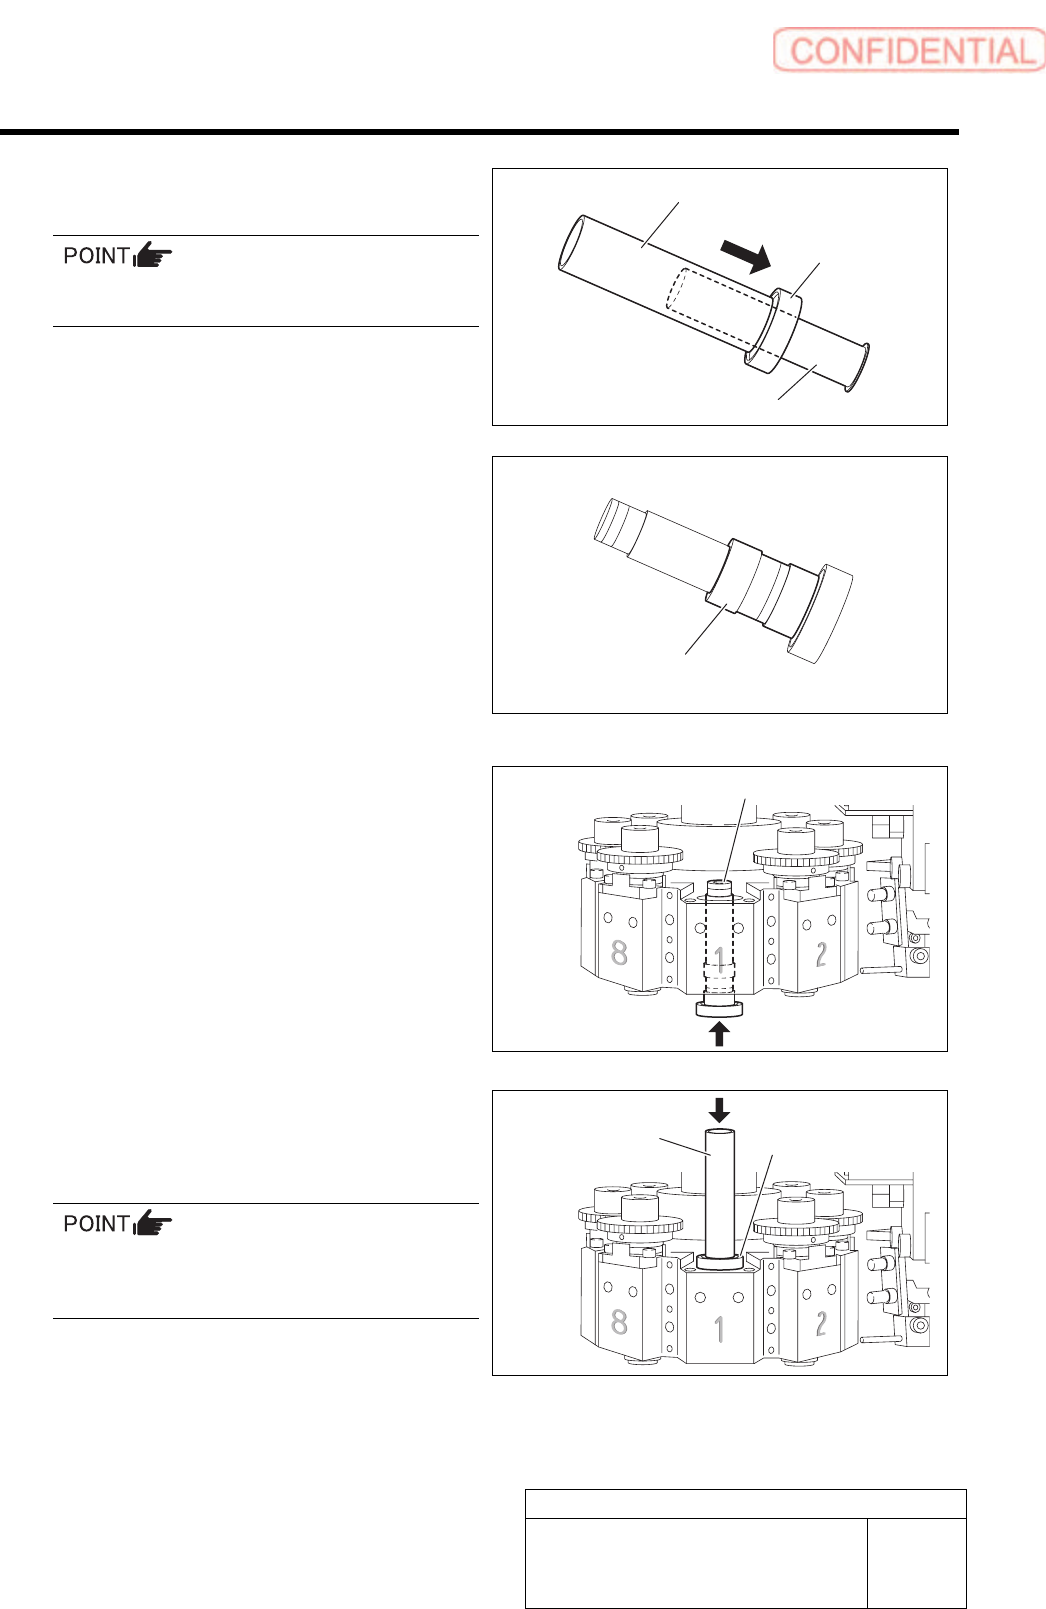
6 Using the bearing press fitting jig, press the
bearing into the spline nut.
Do not touch the end plate (black part) on top of
the spline nut.
7 Install the collar to the spline nut.
8 Insert the spline nut from the bottom side of
the head.
9 Using the bearing press fitting jig, press the
bearing into the head from the top side of
the head.
After attaching the bearing, rotate the spline
nut slowly to make sure that the spline nut
turns smoothly.
Bearing press fitting jig
Bearing
Spline nut
Collar
Spline nut
Bearing press
fitting jig
Spline nut

Work Procedure
WKGB-10102-01
G200BB Head Maintenance
SHEET
9/11
10 Attach the outer collar and secure the spline
nut.
1. Making sure that the set shoe is in the
correct position and orientation,
install the outer collar to the pulling
jig.
2. Place the pulling jig on the top of the
spline nut, and then pull the outer
collar down gently.
3. Remove the pulling jig from the top of
the spline nut.
Set the outer collar position to cover on
the spline nut upper marks.
The set screws should be tightened according to
mark number of spline nut. Take memo the prior
mark position before covering. Use inner spline
4. Remove an inner spline from a spline
nut and insert the spline nut assembling
Spline nut
Pulling jig
Outer collar
spline nut
assembling jig (1)
Set screw
for spline nut positioning to prevent from any
stress on the plastic parts of spline nut.
jig (1) from the bottom side of the spline
nut.