MAN00000772_SI-G200BB_SVCPDFA.pdf - 第264页
Calibration HLGB-10313-01 Mount Accuracy Calibration SHEET 7/1 1 W ait until the parts recognition by the PWB camera ends. 7 Check the displayed result and, if the correction value needs to be applied, click the Apply bu…
Calibration
HLGB-10313-01
Mount Accuracy Calibration
SHEET
6/11
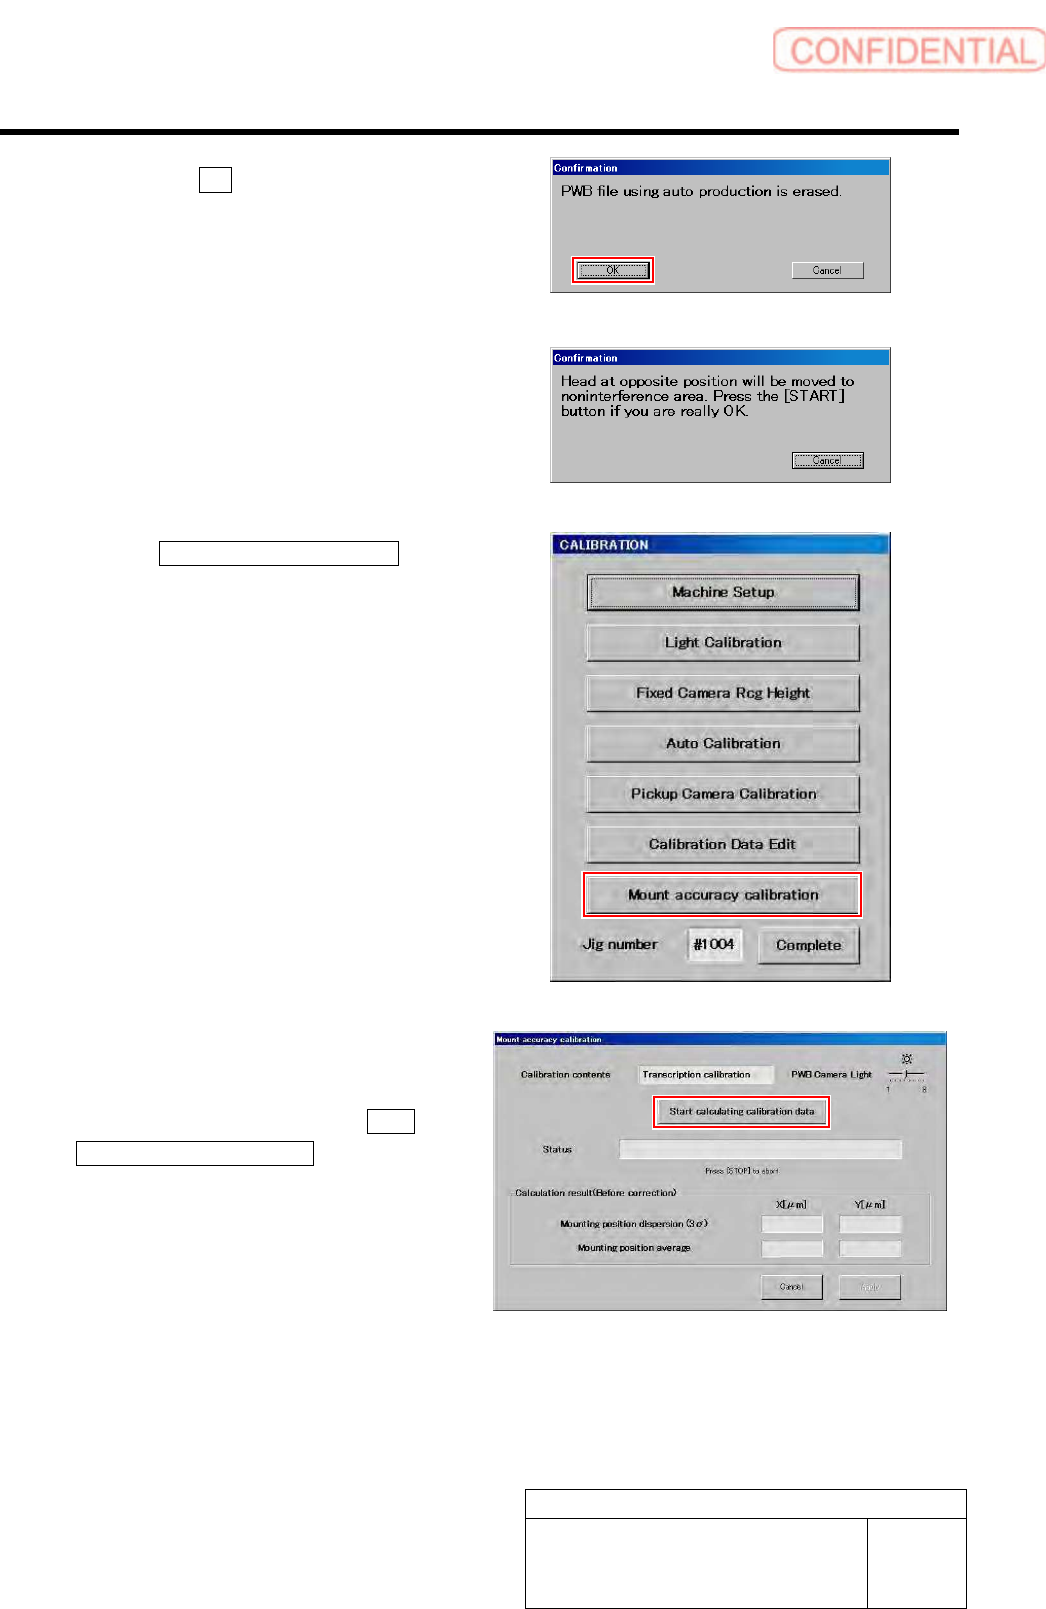
2. Click the OK button on the
confirmation window.
The next confirmation window displays “Head at
opposite position will be moved to
noninterference area. Press the [START] button if
you are really OK.”
3. Press the [START] button on the
operation panel.
CALIBRATION screen is displayed.
5 Click the Mount accuracy calibration button.
Mount accuracy calibration screen is displayed.
6 Make sure the message “Transcription
calibration” is displayed in the Calibration
contents field, and then click the Start
calculating calibration data button.
Calibration
HLGB-10313-01
Mount Accuracy Calibration
SHEET
7/11
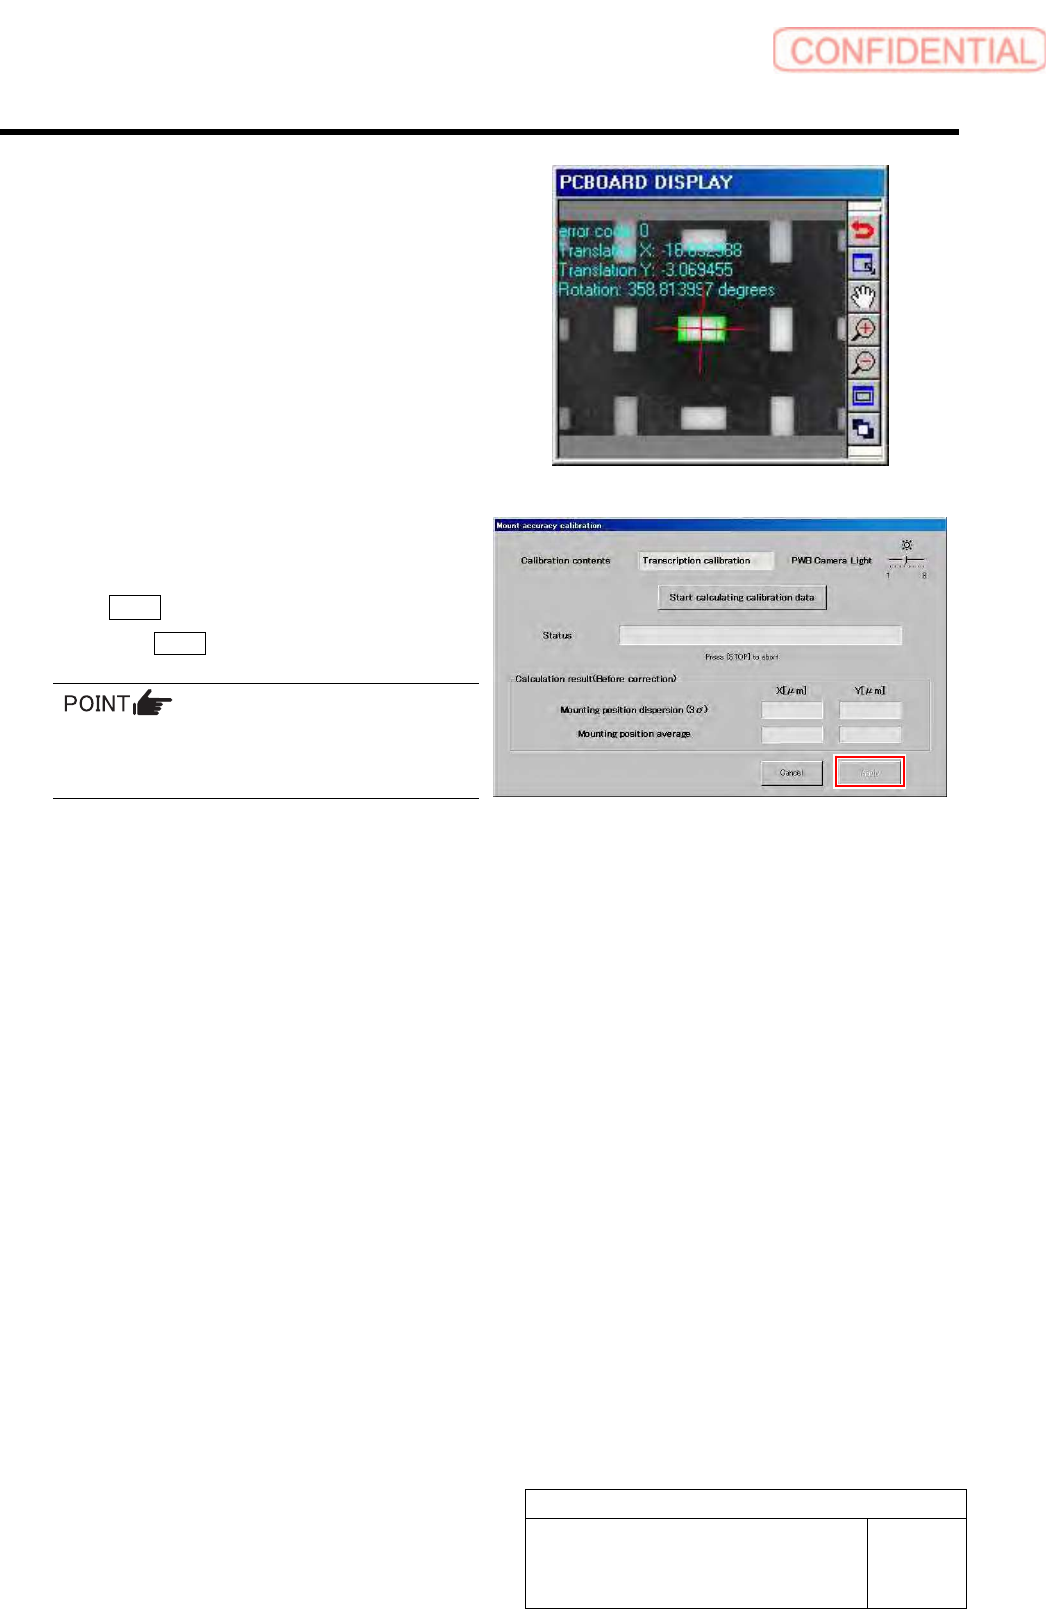
Wait until the parts recognition by the PWB camera
ends.
7 Check the displayed result and, if the
correction value needs to be applied, click
the Apply button.
When the Cancel button is clicked, the process ends
without executing the calibration.
When the calculation result is 3Sigma <
±35[µm] and Avg < 10[µm], the catalog SPEC
(±50[µm] CPK > 1.0 or above) is satisfied.
Calibration
HLGB-10313-01
Mount Accuracy Calibration
SHEET
8/11
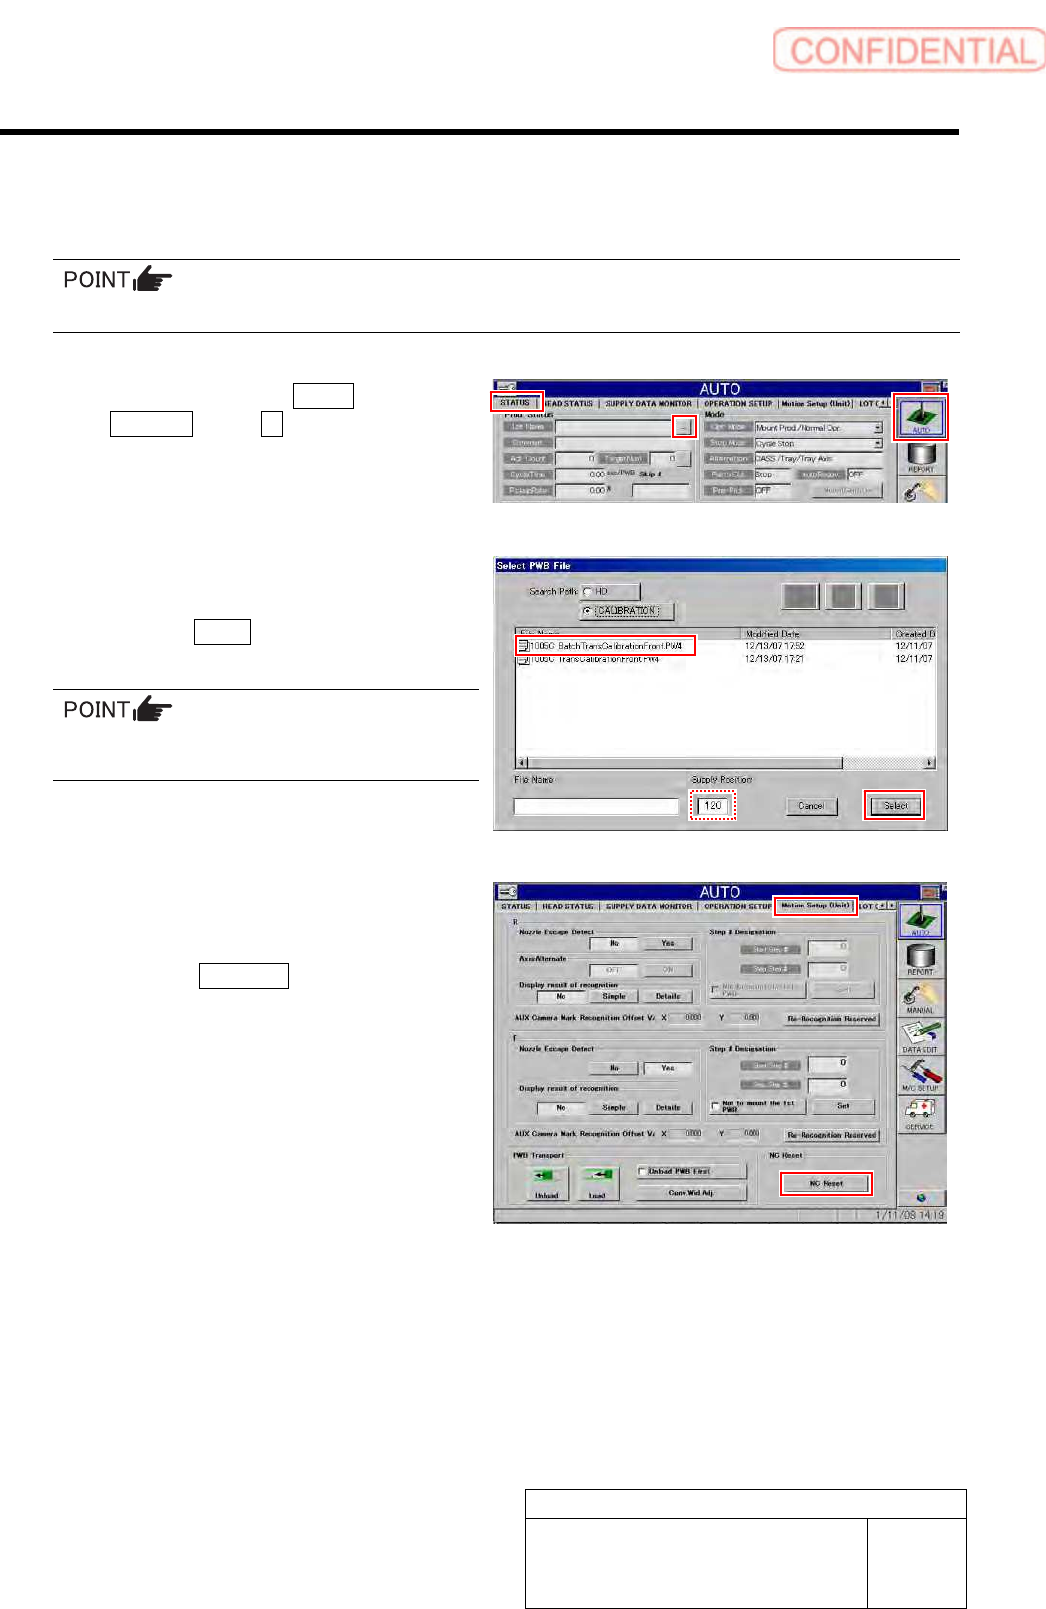
[Batch recognition calibration]
1 Read machine data of “1005C BatchTransCalibrationFront.PW4.”
To execute the calibration for the rear head, select “1005C BatchTransCalibrationRear.PW4”.
1. Click in an order of AUTO menu
STATUS tab … button.
Select PWB File screen is displayed.
2. Select “
1005C
BatchTransCalibrationFront.PW4
”, and
click the Select button.
In the Supply Position field, enter the supply
unit number on which you placed the cassette.
2 Perform NC reset and then check MOTION
Setup.
1. Click the NC Reset button on the
MOTION Setup (Unit) screen.