MAN00000772_SI-G200BB_SVCPDFA.pdf - 第268页
Calibration HLGB-10313-01 Mount Accuracy Calibration SHEET 11 / 11 W ait until the parts recognition by the PWB camera ends. 7 Check the displayed result and, if the correction value needs to be applied, click the Apply …
Calibration
HLGB-10313-01
Mount Accuracy Calibration
SHEET
10/11
2. Click the OK button on the
confirmation window.
The next confirmation window displays “Head at
opposite position will be moved to
noninterference area. Press the [START] button if
you are really OK.”
3. Press the [START] button on the
operation panel.
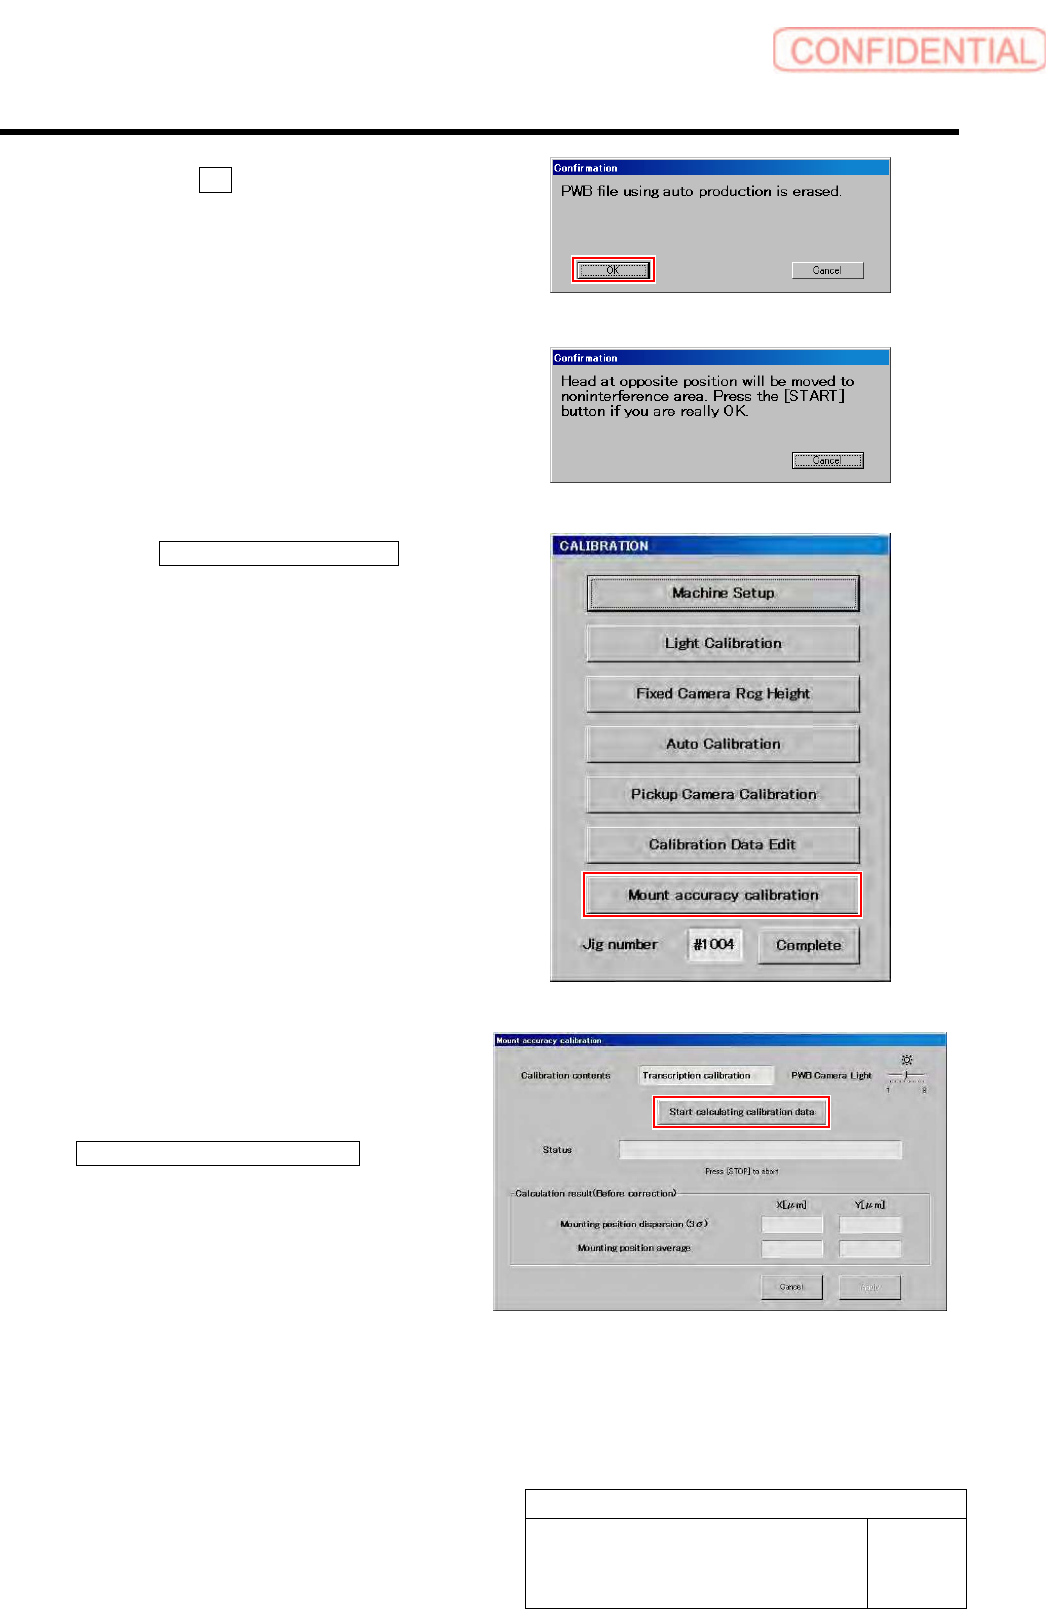
CALIBRATION screen is displayed.
5 Click the Mount accuracy calibration button.
Mount accuracy calibration screen is displayed.
6 Make sure the message “Global
transcription calibration” is displayed in the
Calibration contents field, and then click the
Start calculation calibration data button.
Calibration
HLGB-10313-01
Mount Accuracy Calibration
SHEET
11/11
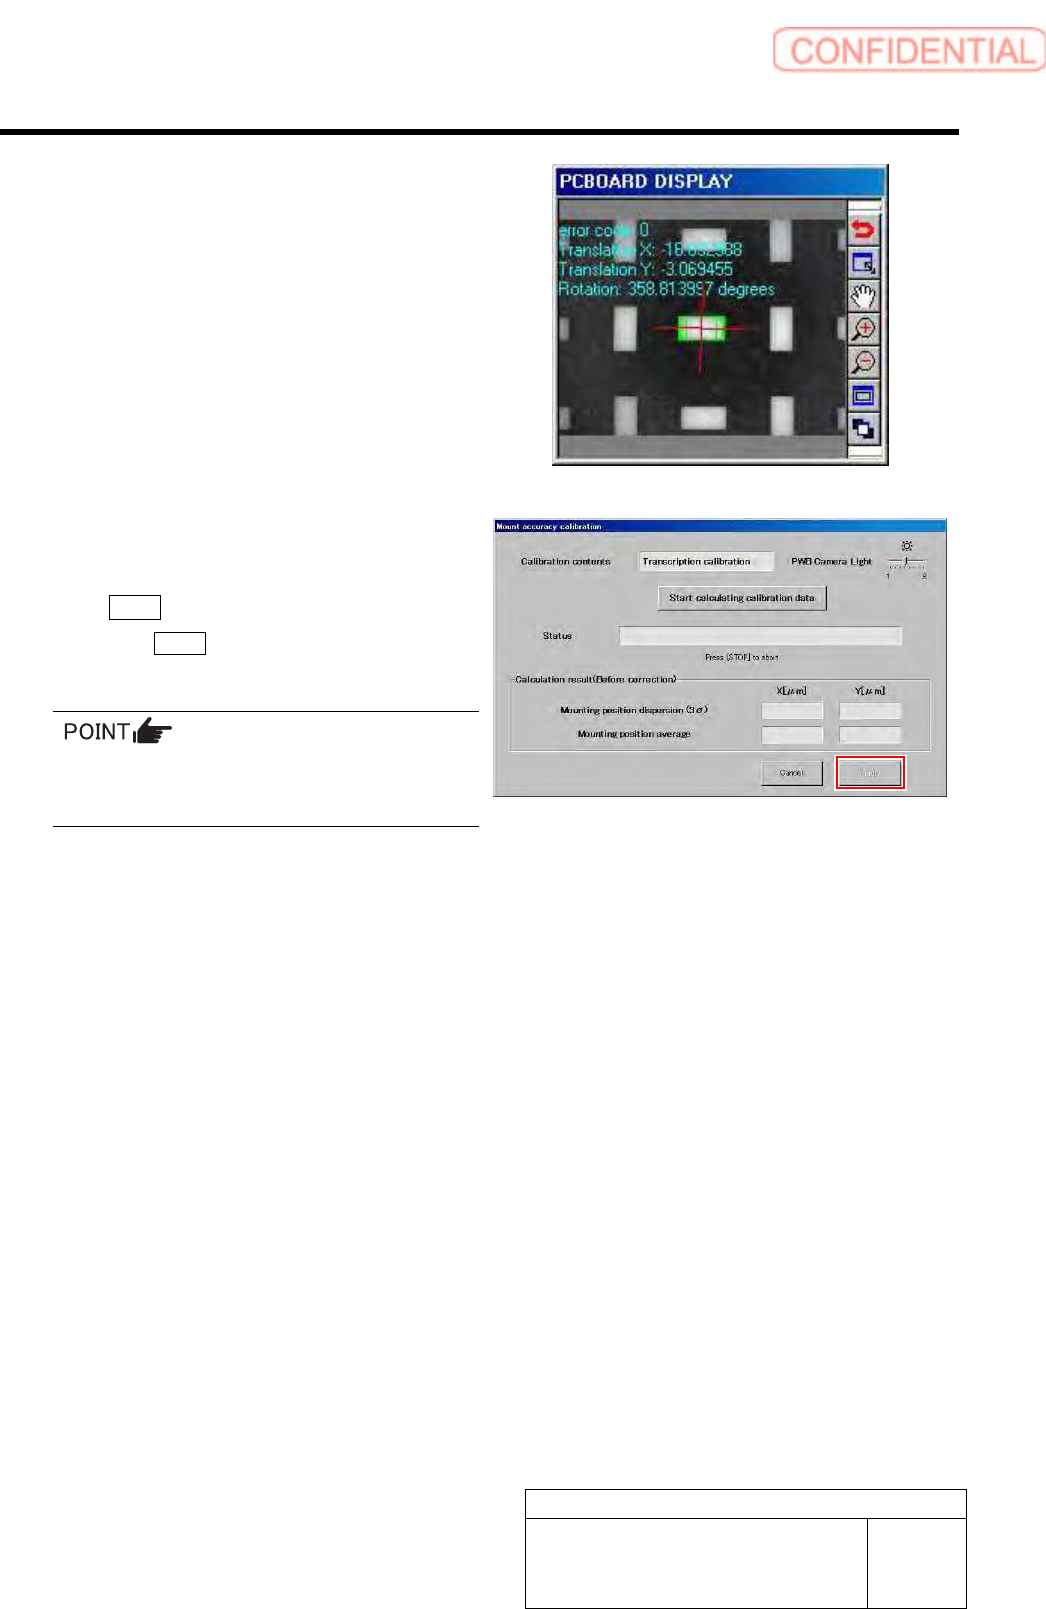
Wait until the parts recognition by the PWB camera
ends.
7 Check the displayed result and, if the
correction value needs to be applied, click
the Apply button.
When the Cancel button is clicked, the process ends
without executing the calibration.
When the calculation result is 3Sigma <
±40[µm] and Avg < 10[µm], the catalog SPEC
(±60[µm] CPK > 1.0) is satisfied.
Calibration
HLGB-10314-01
XY Axis Software Limit Setup
SHEET
1/11
XY Axis Software Limit Setup
[Setup procedure]
1 Use the following calculating equations to carry out coordinate calculation of software limit for each
axis.
Front side X-Axis
SOFT_LIMIT_PLUS=(X coordinate of front Z101) +798.7
SOFT_LIMIT_MINUS=(X coordinate of front Z101) +69.7
Front side Y-Axis
SOFT_LIMIT_PLUS=(Y coordinate of front Z101) +653.9
SOFT_LIMIT_MINUS=(Y coordinate of front Z101) -26.8
Rear side X-Axis
SOFT_LIMIT_PLUS=(X coordinate of rear Z101) -73.8
SOFT_LIMIT_MINUS=(X coordinate of rear Z101) -802.7
Rear side Y-Axis
SOFT_LIMIT_PLUS=(Y coordinate of rear Z101) +26.7
SOFT_LIMIT_MINUS=(Y coordinate of rear Z101) -653.7
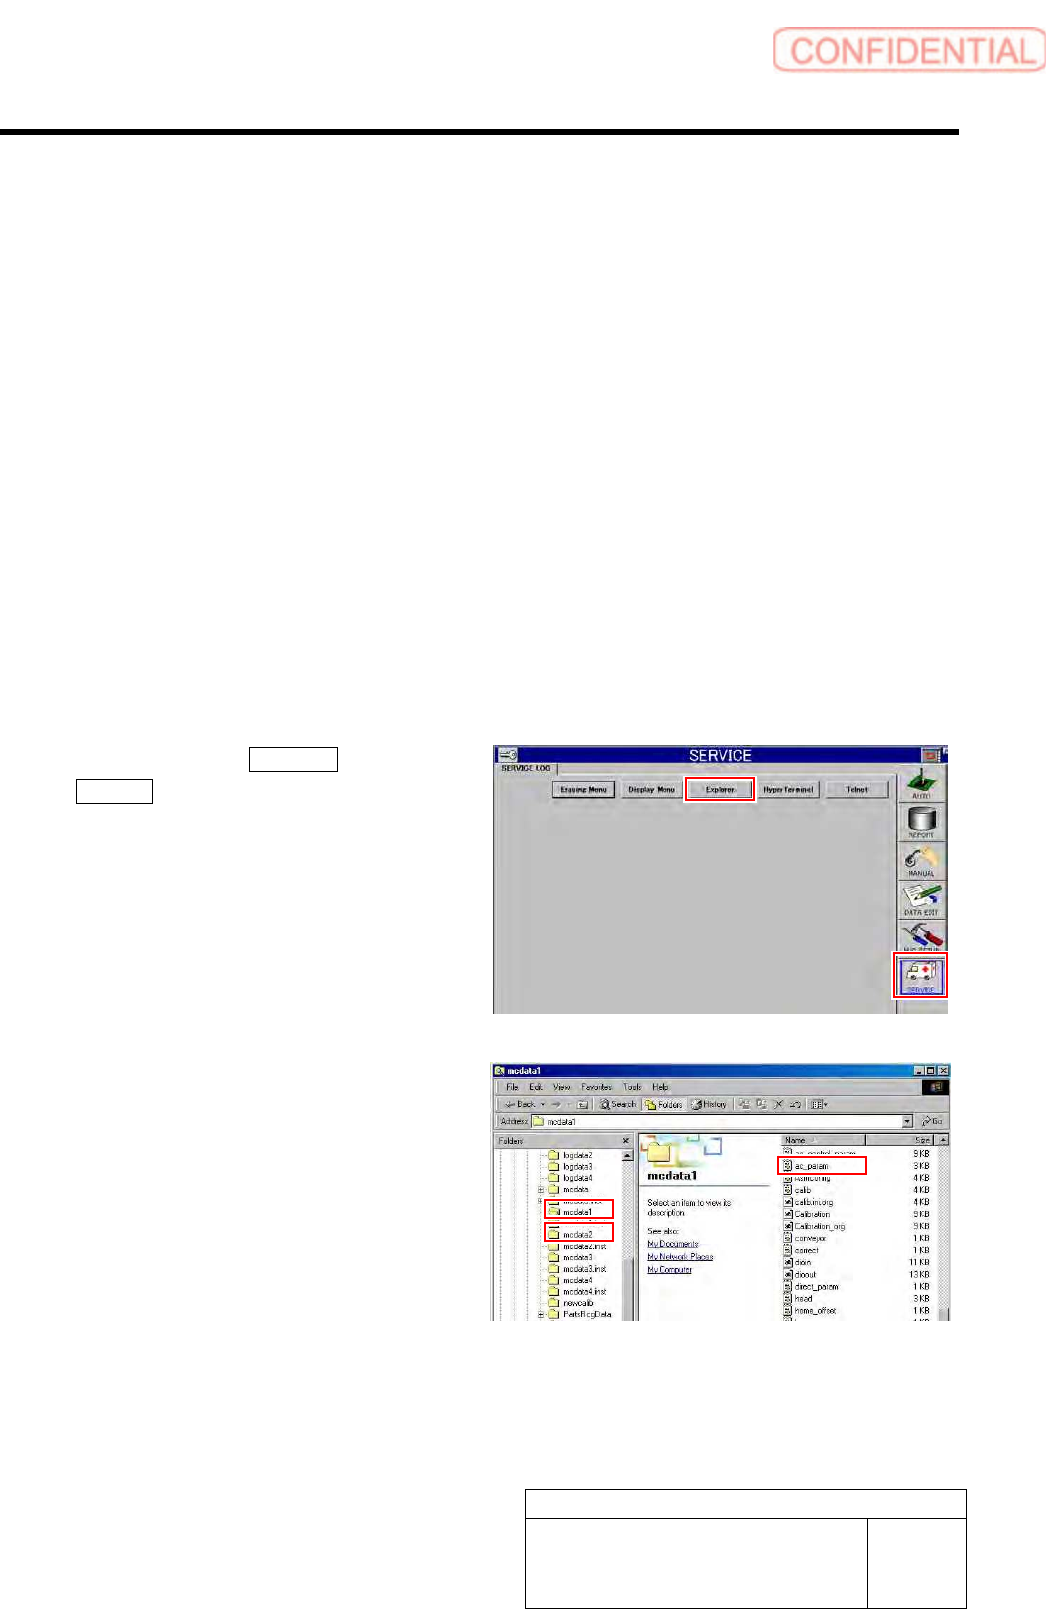
2 Click in an order of SERVICE menu
Explorer button.
Explorer screen is displayed.
3 Put ac_param.ini file for front side and rear
side into a rewritable status.
1. For the front side, open Properties
window for ac_param.ini file in
C:¥asm¥mcdata1.
2. For the rear side, open Properties
window for ac_param.ini file in
C:¥asm¥mcdata2.
Right-click the file and select “Properties” from
the shortcut menu to open the Properties window.