MAN00000772_SI-G200BB_SVCPDFA.pdf - 第53页
Install Tray Unit (Including machine modification) SHEET 14/73 WKGB-10104-03 Installing Tray Unit (Including machine modification) 4 Connection of serial DIO connector (OP2-OP3) Connect the SDR-OP2, SDR-OP3 on the tray c…
Install Tray Unit (Including machine modification)
SHEET
13/73
WKGB-10104-03
Installing Tray Unit
(Including machine modification)
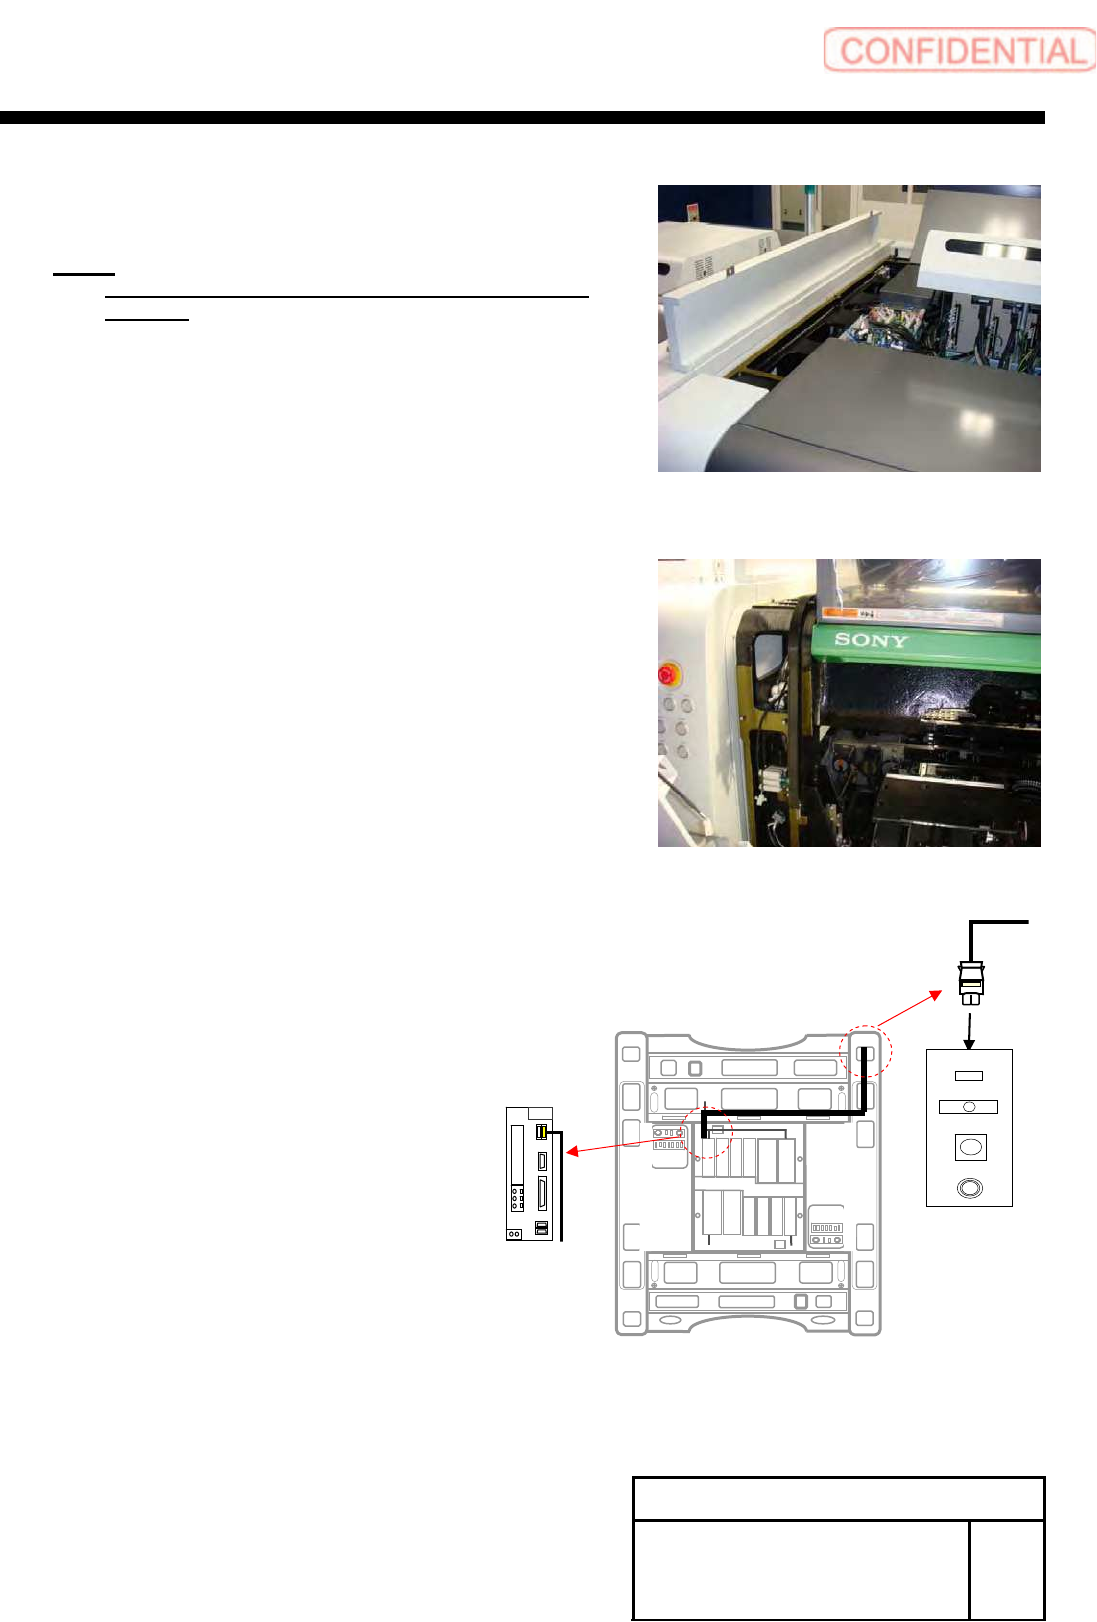
3. Loosen the CP4x8 to remove the sealing on the
right side.
NOTE:
The bolts fixing the side sealing are on the front
and rear.
4. Loosen the CP5x10 to remove the right rear
shoulder cover.
5. Connect the CN6 on the RN axis motor driver from
the TY-MLOUT on the tray coupling I/F plate with
the servo communication cable.
Front
CN6
T
Y
-MLOUT
TY-CTLO
TY-ACOUT
AIR
Install Tray Unit (Including machine modification)
SHEET
14/73
WKGB-10104-03
Installing Tray Unit
(Including machine modification)
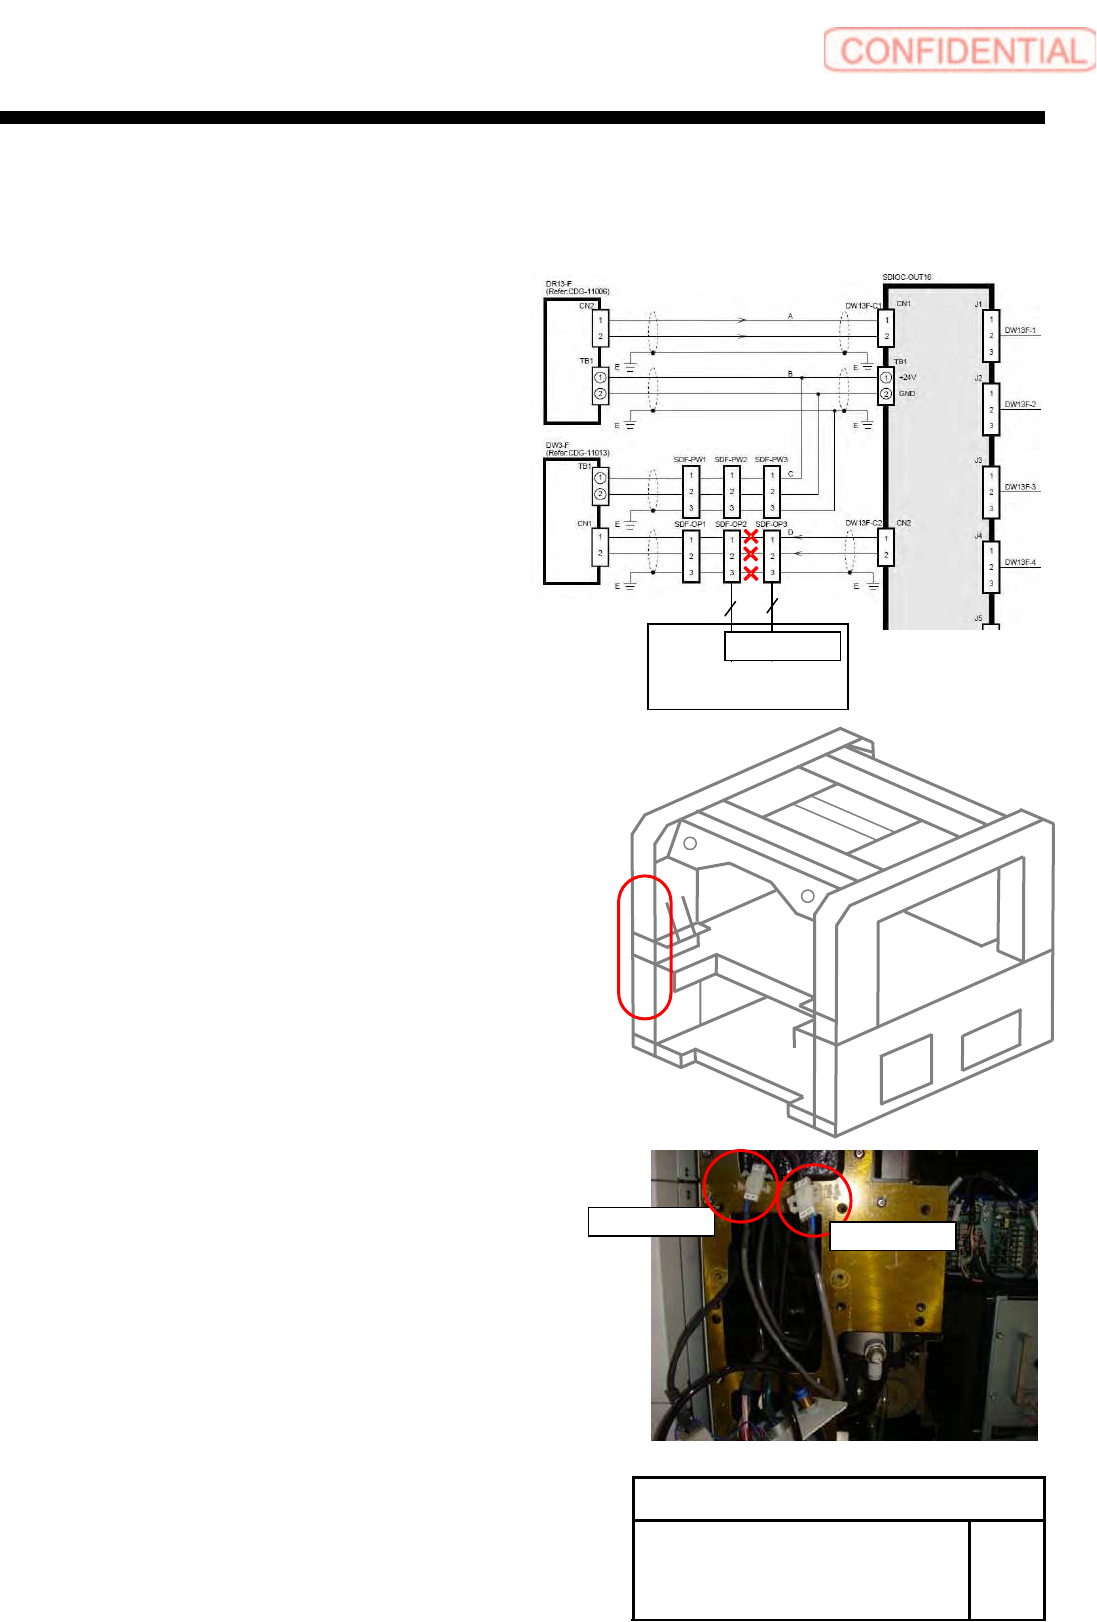
4 Connection of serial DIO connector
(OP2-OP3)
Connect the SDR-OP2, SDR-OP3 on the tray coupling I/F plate.
1. Remove the existing
cable ”SDR-OP2<=======>SDR-OP3.”
REAR
SDR-OP2
SDR-OP3
3
3
Tray coupling I/F panel
TY-CTLOUT
Install Tray Unit (Including machine modification)
SHEET
15/73
WKGB-10104-03
Installing Tray Unit
(Including machine modification)
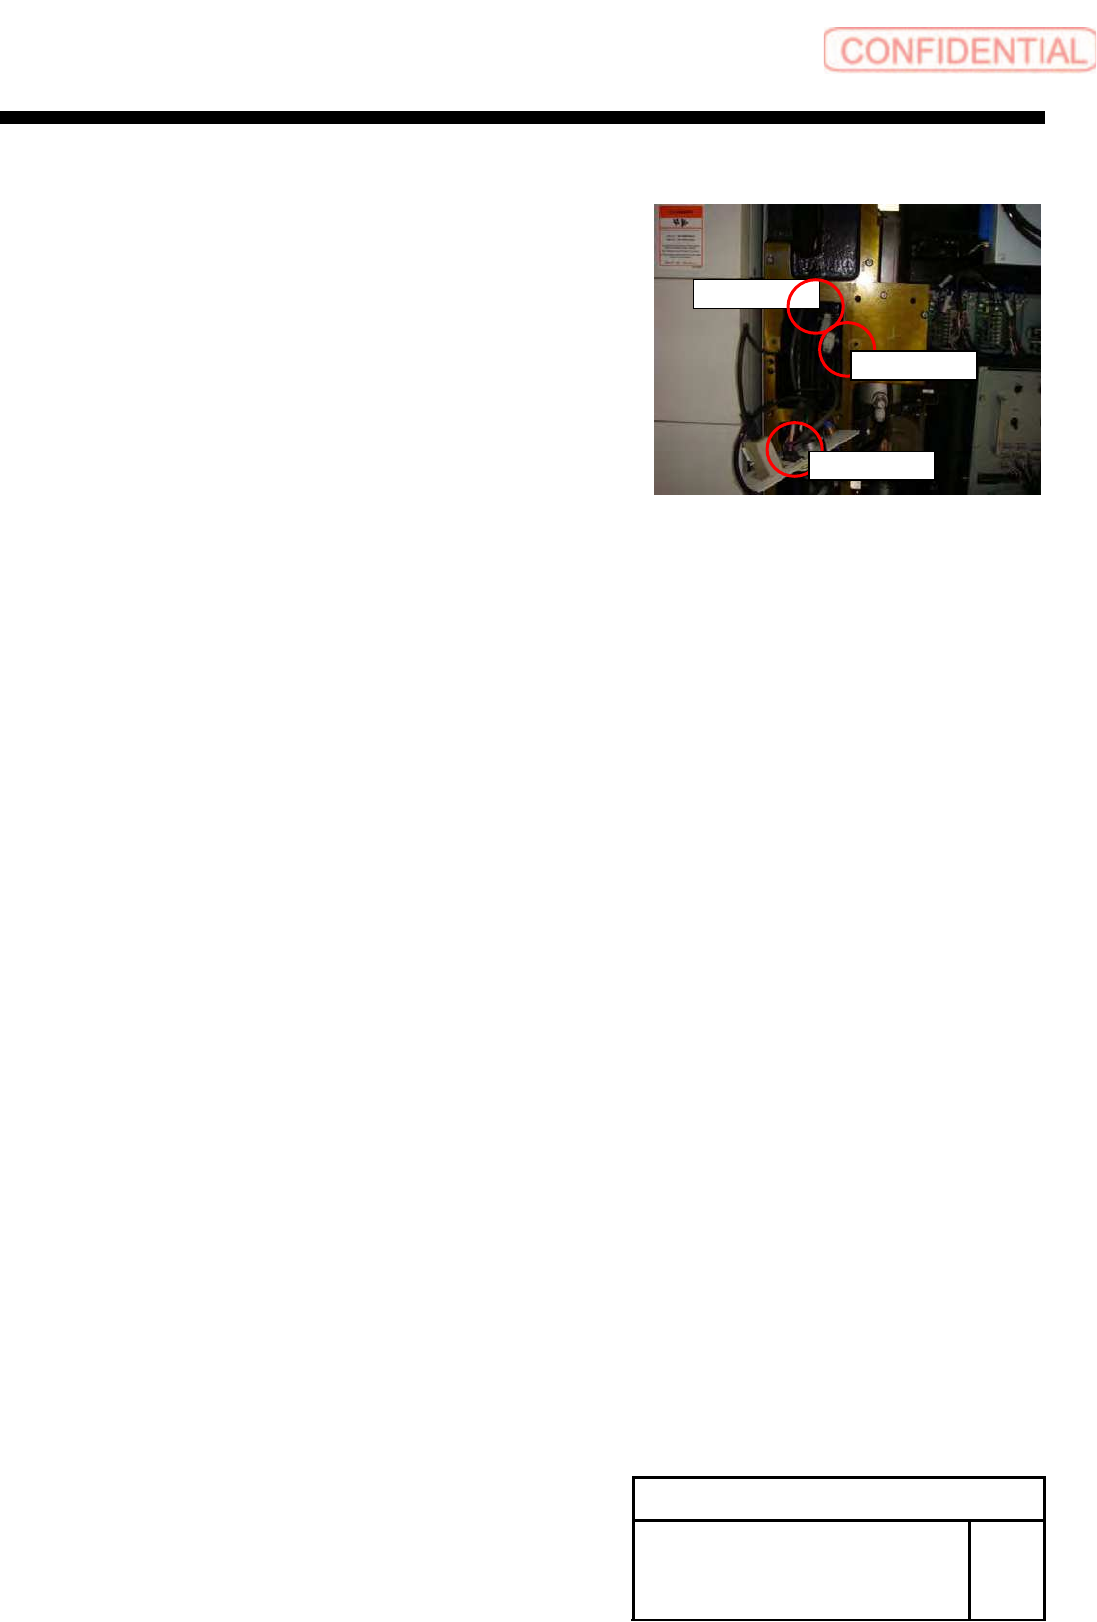
2. Connect the TY-CTROUT on the tray coupling I/F
bracket, and the SDR-OP2, SDR-OP3.
3. Fix the shoulder cover with the 2-CP5x10.
4. Fix the side sealing with the 2-CP5x10.
5. Install the packen box with the 6-+T5x6.
6. Install the top plate on the front side with the
2-CP4x45.
7. Install the top plate on the rear side with the
2-CP4x45.
SDR-OP2
SDR-OP3
TY-CTROUT