WaferTransportSolutionManual.pdf - 第53页
HEAVY PALLET RAILS REPLACEMENT PROCEDURES Chapter Issue 1 August 11 Wafer Transport Solutio n 1.45 REPLACEMENT PROCE DURES T o update a machine from st andard rails to the heavy p allet rail (HPR) system or to replace as…
HEAVY PALLET RAILS
ADJUSTMENTS & SETTINGS
1.44 Wafer Transport Solution Chapter Issue 1 August 11
Snugger Pressure Snugger pressure is set in production to give sufficient pressure to grip the pallet
without any lateral movement. The pressure regulator is located on the front
right hand side of the chase; the set pressure for an application should not be
altered. When a product change takes place, if the pallet used is significantly
different to the previous one, movement can occur.
1. Test for grip with the pallet in the rails with snugger pressure applied.
2. If the pallet can be moved, the pressure needs to be adjusted.
3. The pressure is nominally set to 3.45Bar.
4. If the pressure is set lower than this, increase it on the regulator to achieve
the nominal value.
5. Repeat Step 2 to check if lateral movement is still possible.
6. The recommended settings are shown in the table below.
Important. Do not exceed the highest setting; the maximum snugger
movement is 0.7mm. Over snugging causes unwanted stresses on the front
beam, affecting alignment offsets, causing misalignment issues on the rail.
Pressure Settings Regulator
Lowest Setting 80N @ 3.30Bar
Nominal Setting 100N @ 3.45Bar
Highest Setting 120N @ 3.60Bar
HEAVY PALLET RAILS
REPLACEMENT PROCEDURES
Chapter Issue 1 August 11 Wafer Transport Solution 1.45
REPLACEMENT PROCEDURES
To update a machine from standard rails to the heavy pallet rail (HPR) system
or to replace assemblies, refer to document: Machine Performance Upgrade
reference number 602215*1 Document part number 201322.
Compatibility The Wafer Transport Solution is compatible with the following DEK machines:
• Galaxy
• Europa
• Photon
• Horizon 01iX/02iX/03iX
• Horizon ApiX
NOTE
The Wafer Transport Solution is not compatible with machines fittied with the
Rapid Transport Conveyor (RTC).
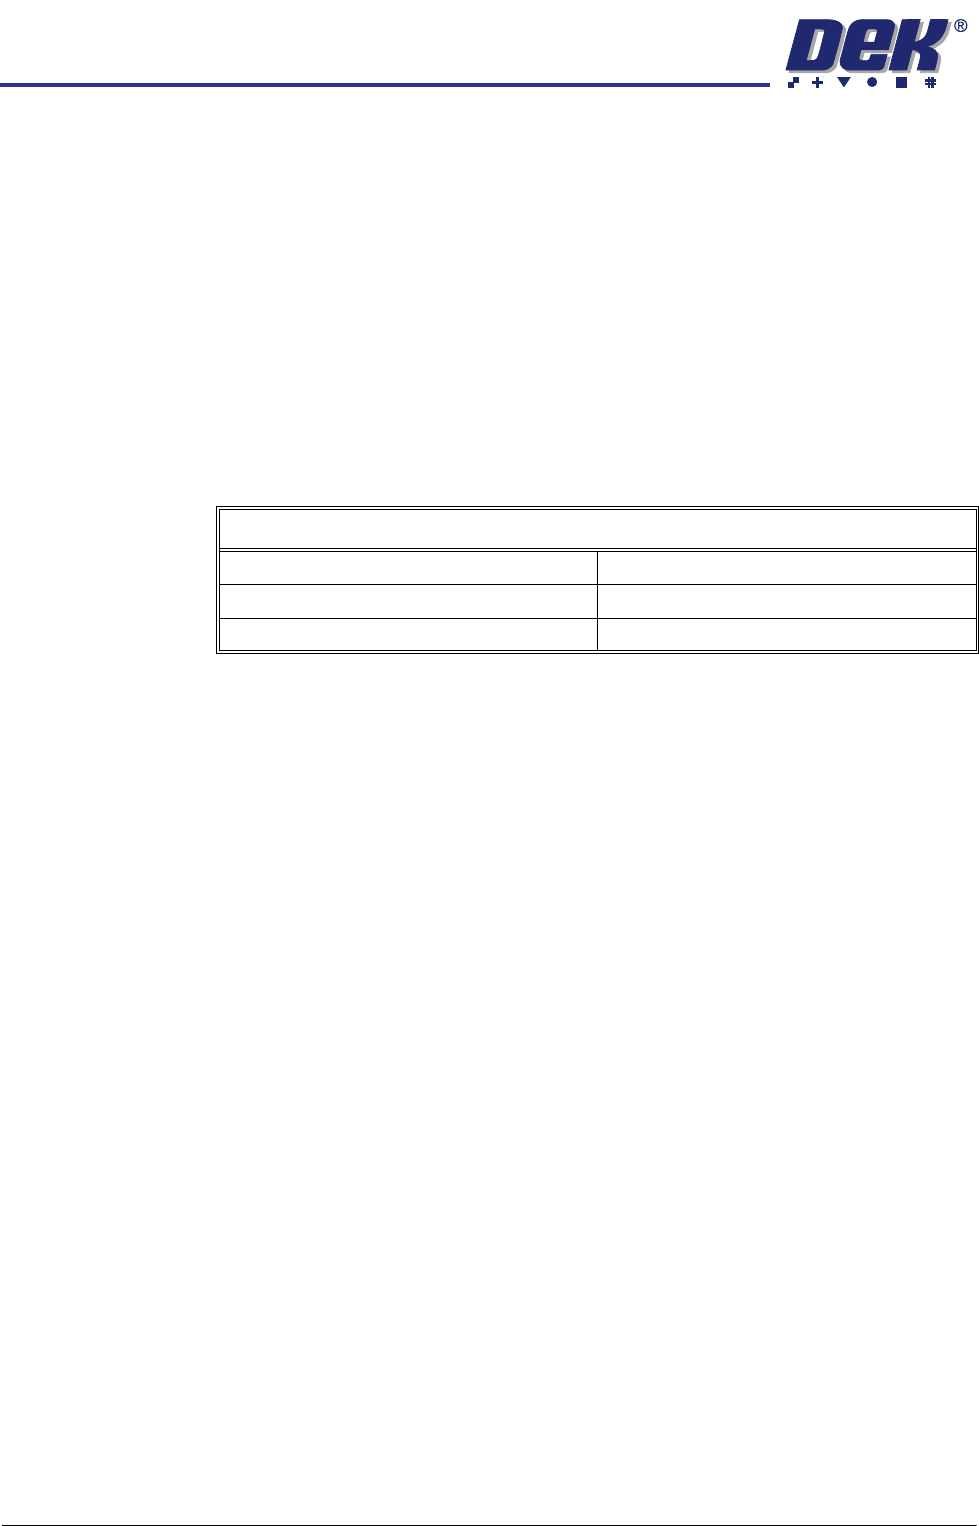
Belt Replacement To replace belts, first move the belt drive shaft, which couples the front and rear
transport belts, out of the way.
NOTE
Do not remove the drive shaft completely away from the rear transport rail
bearing.
1. On the front transport rail; remove the four drive shaft hub bolts using a 3mm
Allen key.
2. Carefully slide the drive shaft hub out of the way.
3. Slide the drive shaft through the rear transport rail bearing; leave about half
of its length so that it freely balances without support.
Moving the Drive Shaft
Drive Shaft Hub
Drive Shaft
Front Transport Rail
HEAVY PALLET RAILS
REPLACEMENT PROCEDURES
1.46 Wafer Transport Solution Chapter Issue 1 August 11
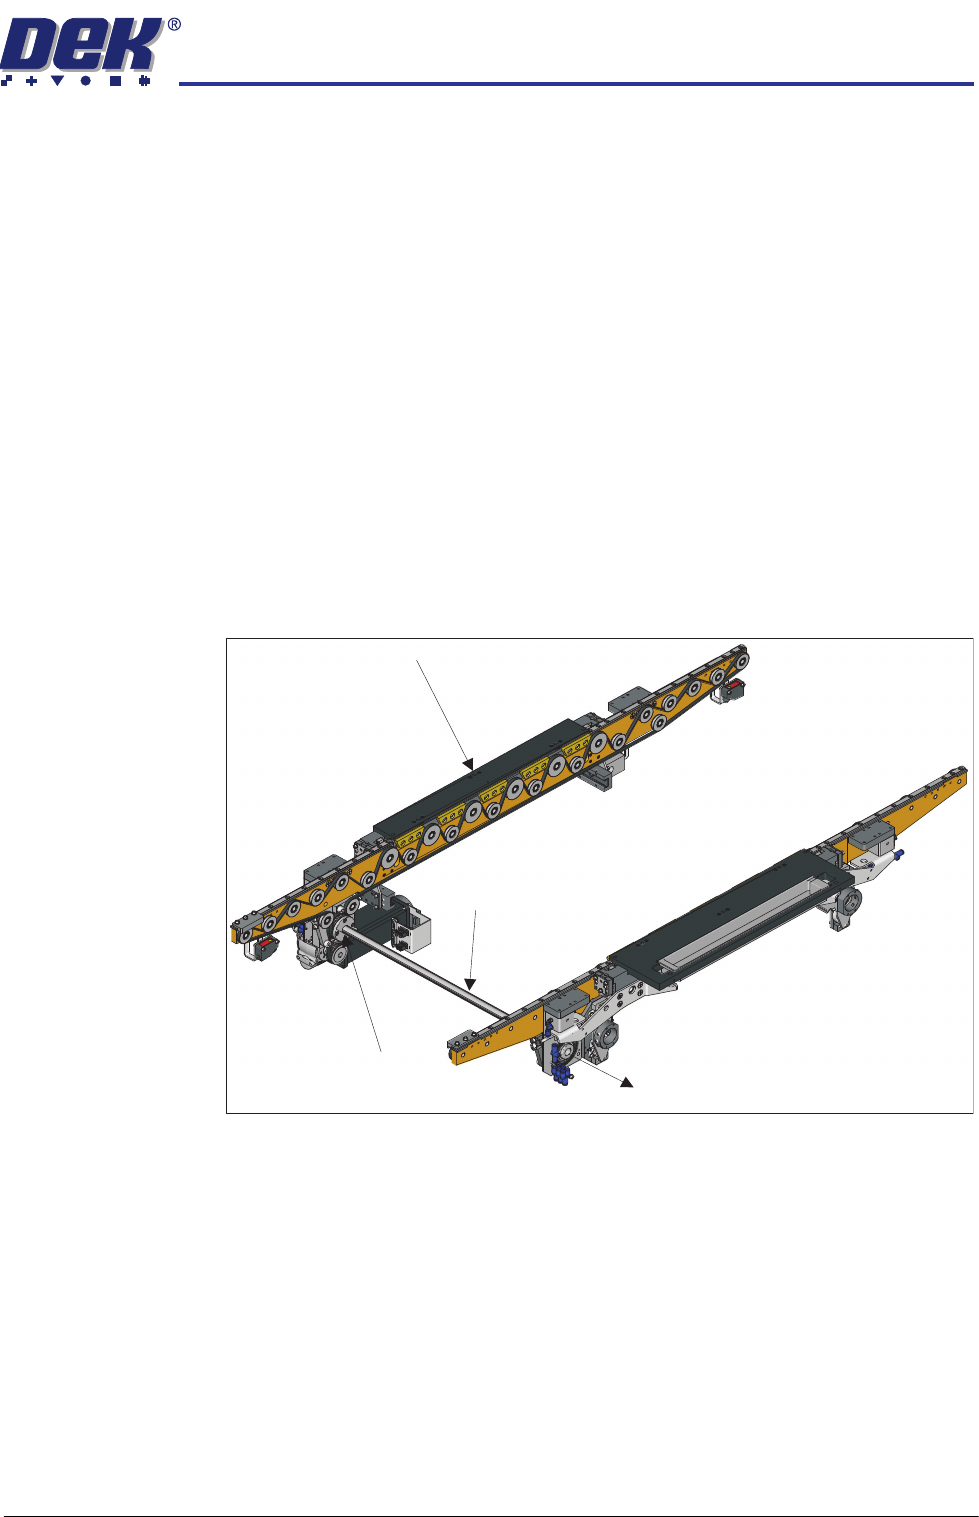
Transport Belts To replace a transport belt:
1. Ensure the drive shaft is out of the way, see previous procedure.
2. Slacken the transport belt tensioner by turning the bolt anti-clockwise using
a 5mm Allen key.
3. When slack, remove the belt from all of the pulleys, taking note of how to
reroute the belt for replacement.
4. Replace the belt; route it correctly around the pulleys and re-tension it. (See
belt tension settings in the Adjustments and Settings section of this Chapter
for details).
View on Underside of the Front Rail
Transport Belt
Tensioner
Drive Belt
Transport Belt
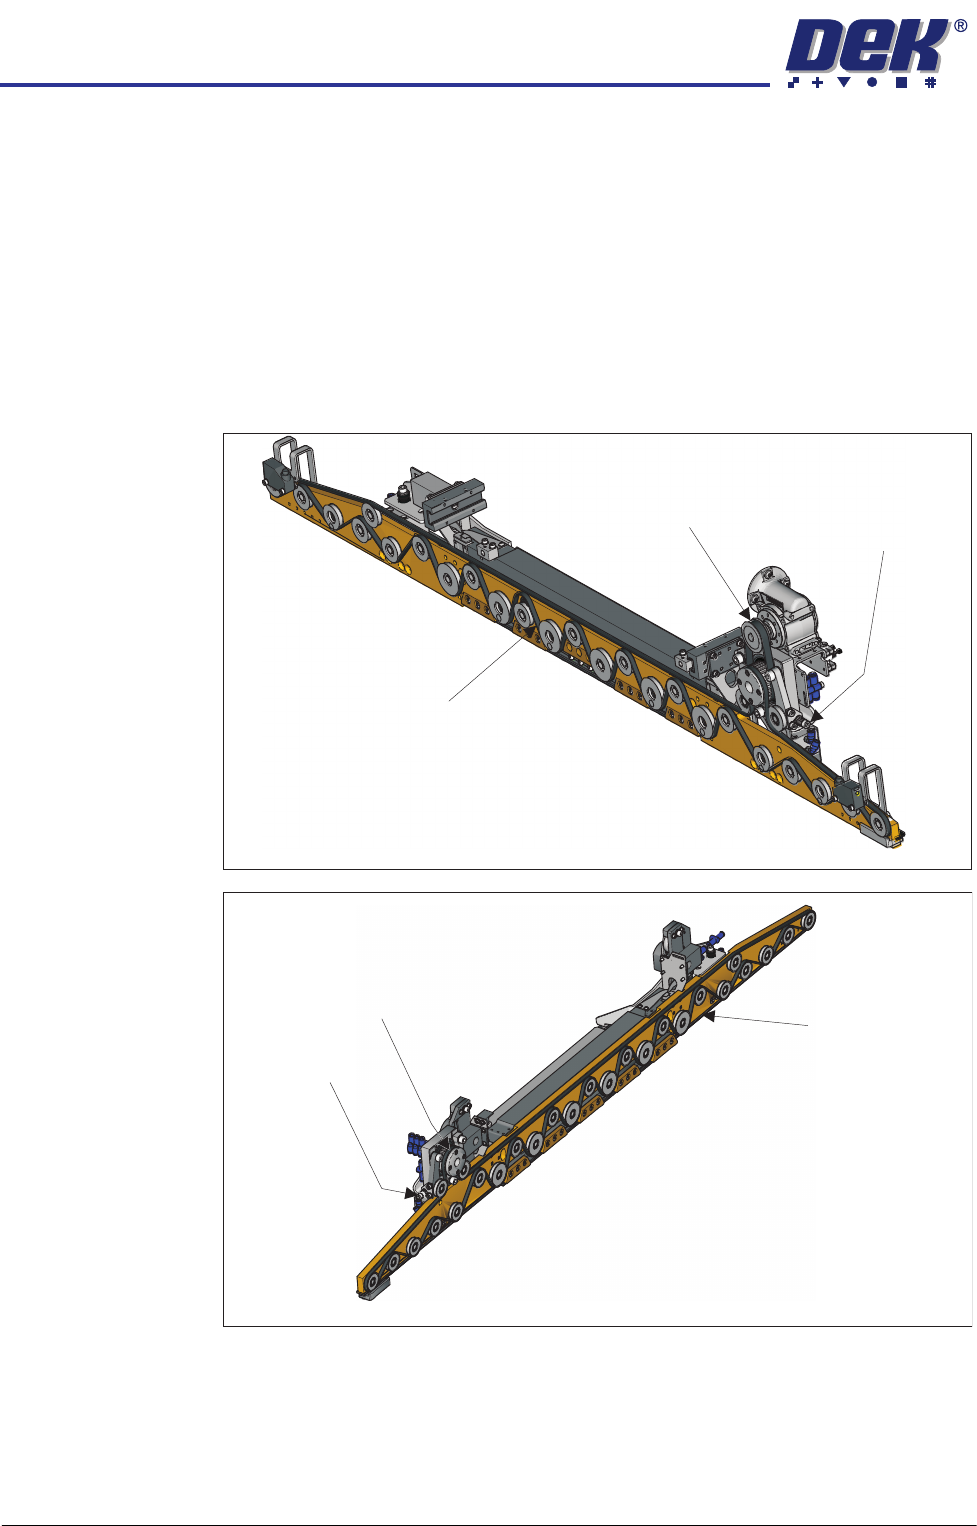
View on Underside of the Rear Rail
Transport Belt
Tensioner
Drive Belt
Transport Belt