00198711-01_UM_X-Serie-S_EN.pdf - 第283页
Instruction manual SIPLACE X-Series S 5 Tasks at the placement machine From software version 713.0 Edition 11/2019 5.14 Docking the component trolley in or out 283 5.14.4 Docking the component trolley 5 Fig. 5.14 - 3 Com…
5 Tasks at the placement machine Instruction manual SIPLACE X-Series S
5.14 Docking the component trolley in or out From software version 713.0 Edition 11/2019
282
5
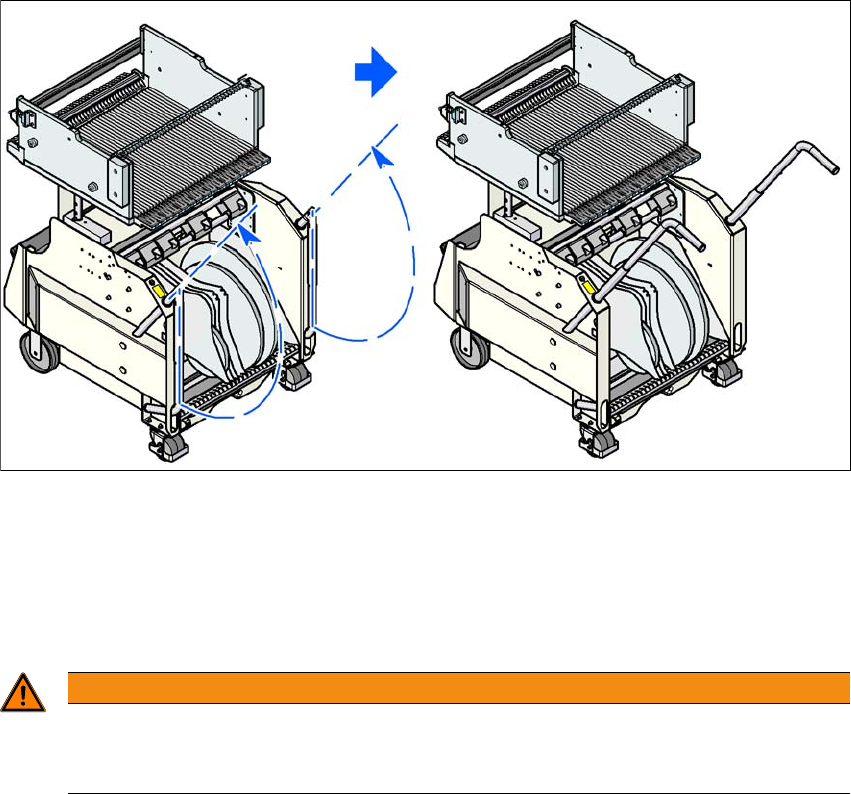
Fig. 5.14 - 2 Component trolley - swivel handles up to push
With both hands on the handles, pull the component trolley out of the placement machine.
5.14.3 Safety instructions for moving the component trolley
5
Always hold the handles with both hands when you want to move the component trolley.
Remember that a component trolley with the full complement of feeder modules can tip over
sideways or forward on gradients of 20° or more.
Make sure that the surface on which the trolley is moved has a significantly smaller gradient.
Be careful not to collide with obstacles. The trolley could tip forward if it is traveling fast
enough.
WARNING
Avoid accidents!
To prevent accidents, ALWAYS follow the rules listed below when you move the compo-
nent trolley.
Instruction manual SIPLACE X-Series S 5 Tasks at the placement machine
From software version 713.0 Edition 11/2019 5.14 Docking the component trolley in or out
283
5.14.4 Docking the component trolley
5
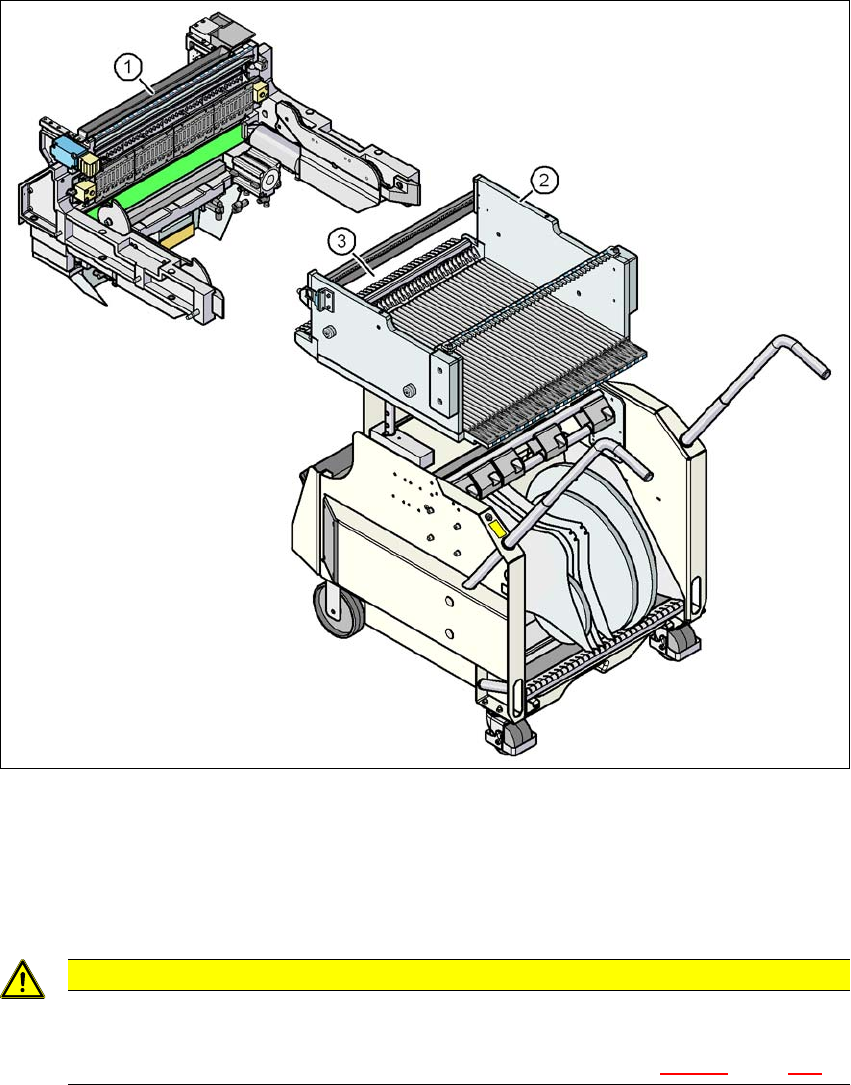
Fig. 5.14 - 3 Component trolley and COT insert, SIPLACE X-Series S
(1) Component trolley docking unit, SIPLACE X-Series S
(2) SIPLACE X-Series S component trolley
(3) Locking latches
5
CAUTION
Pushing in component trolley!
When pushing the component trolley into the placement machine, make sure that
you do not hit obstacles with the locking latches (item 3 in fig. 5.14 - 3
, page 283).
5 Tasks at the placement machine Instruction manual SIPLACE X-Series S
5.14 Docking the component trolley in or out From software version 713.0 Edition 11/2019
284
5
5
Carefully push the component trolley into the placement machine as far as the stop.
5
Press the button on the respective placement machine location until the trolley is completely
docked in.
Push the sleeve (item 1 in fig. 5.14 - 4, page 285) on both handles up and swivel the handle
down (item 2 in fig. 5.14 - 4
, page 285).
PLEASE NOTE
Cut tapes flush
If you do not cut tapes off flush at the front end of the X feeder modules, the emptied
tapes will not enter the empty tape duct.
Cut the tapes off flush, before you dock the component trolley into place.
CAUTION
Position of placement head!
Check that the placement head is outside the range of the component trolley.
PLEASE NOTE
Docking only possible if protective cover is closed
Close the protective covers.