ASM贴片机CPP头半年保养 - 第39页
14 6-monthly CPP Mount the front plate 5 min 1 / 3 CAUTION!Refer to safety instructions in user manual before commencing Mainten- ance NOTICE! ESD guidelines are to be followed Tool: T12, T19, T21, T30, T47, T77, T78 We…

14 6-monthly CPP Mount the front plate 5 min 1 / 3
CAUTION!Refer to safety instructions in user manual before commencing Mainten-
ance
NOTICE! ESD guidelines are to be followed Tool:
T12, T19, T21, T30, T47, T77, T78
Wear Part:
W16
Consumables:
C8
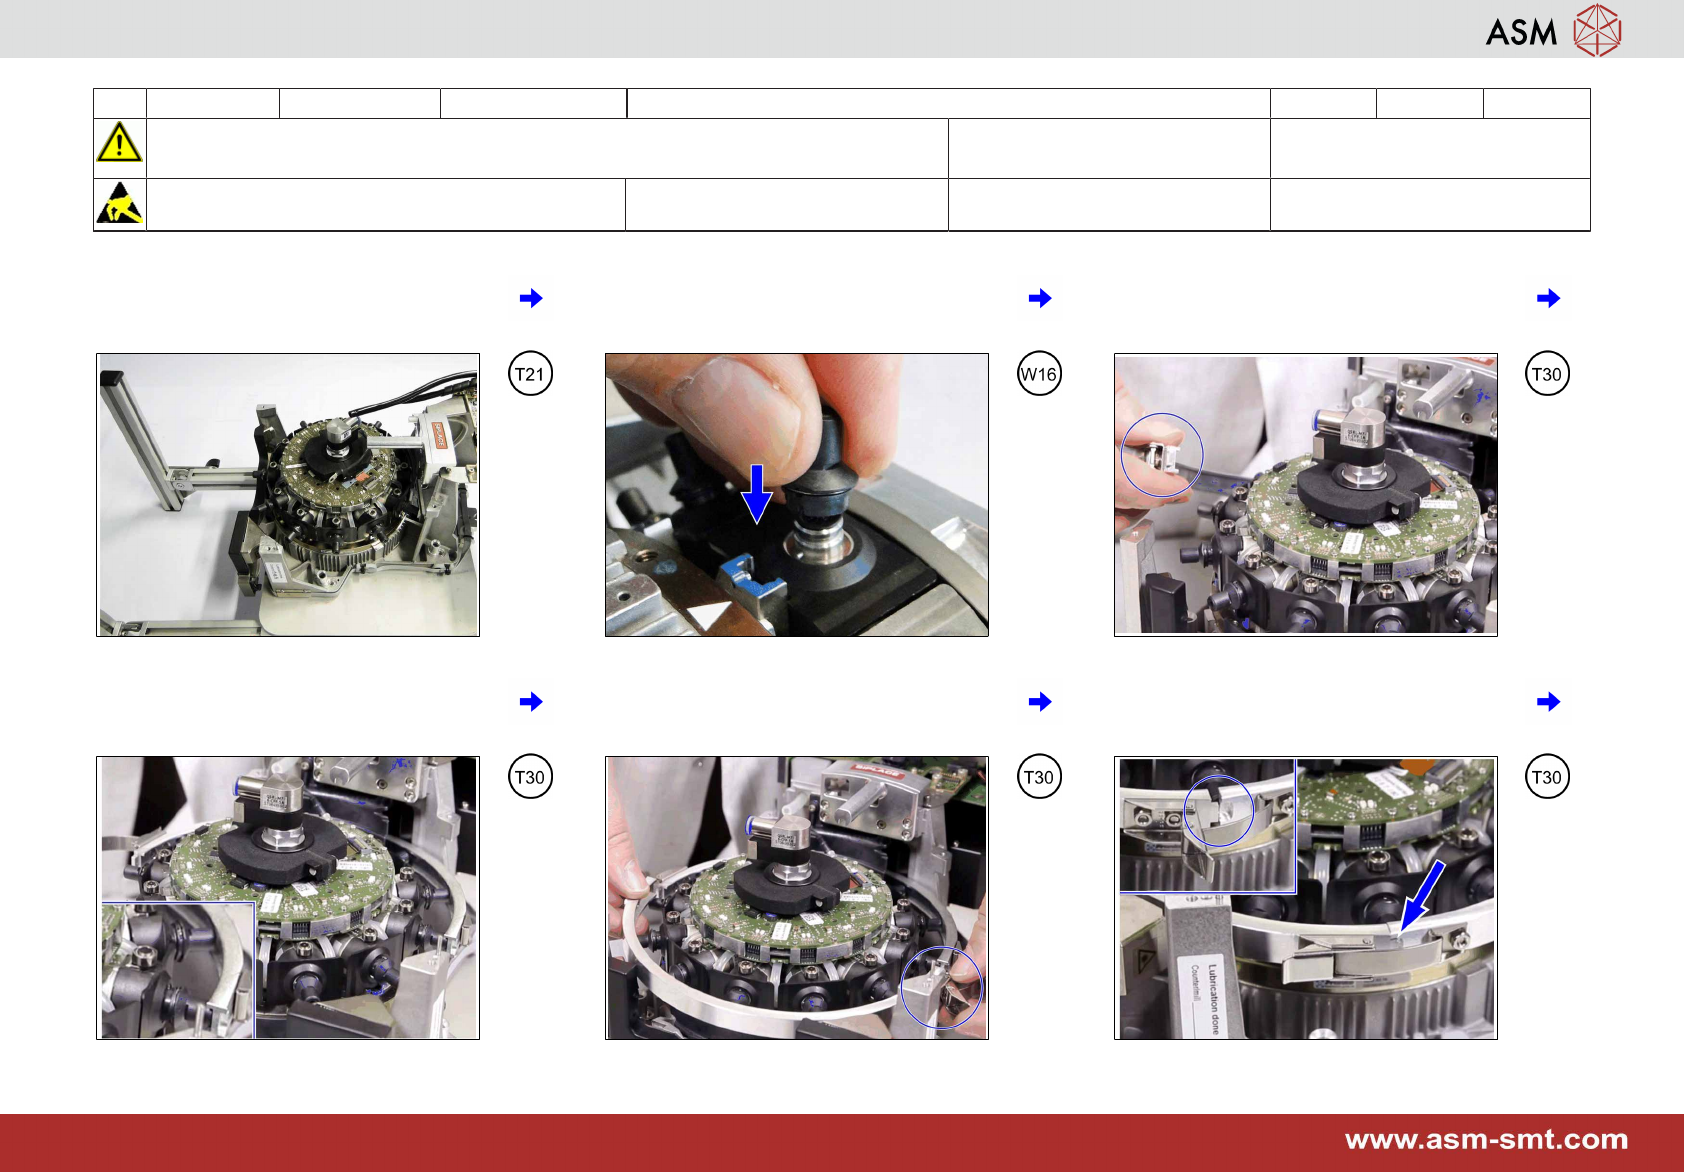
1 Proceed with the head stand flat on the
table.
2 Put a calibration nozzle 2057 onto seg-
ment 1.
3 Slide in the first part of the DP mount ten-
sion ring. Note: Ensure the lock is on the
left.
4 Position it properly on the nozzles. 5 Insert in the second part of the DP mount
tension ring. Note: Ensure the lock is on
the right.
6 Align the two parts and close the locking
on both sides. Ensure the correct position
of the notch.
14 6-monthly CPP Mount the front plate 5 min 2 / 3
CAUTION!Refer to safety instructions in user manual before commencing Mainten-
ance
NOTICE! ESD guidelines are to be followed Tool:
T12, T19, T21, T30, T47, T77, T78
Wear Part:
W16
Consumables:
C8
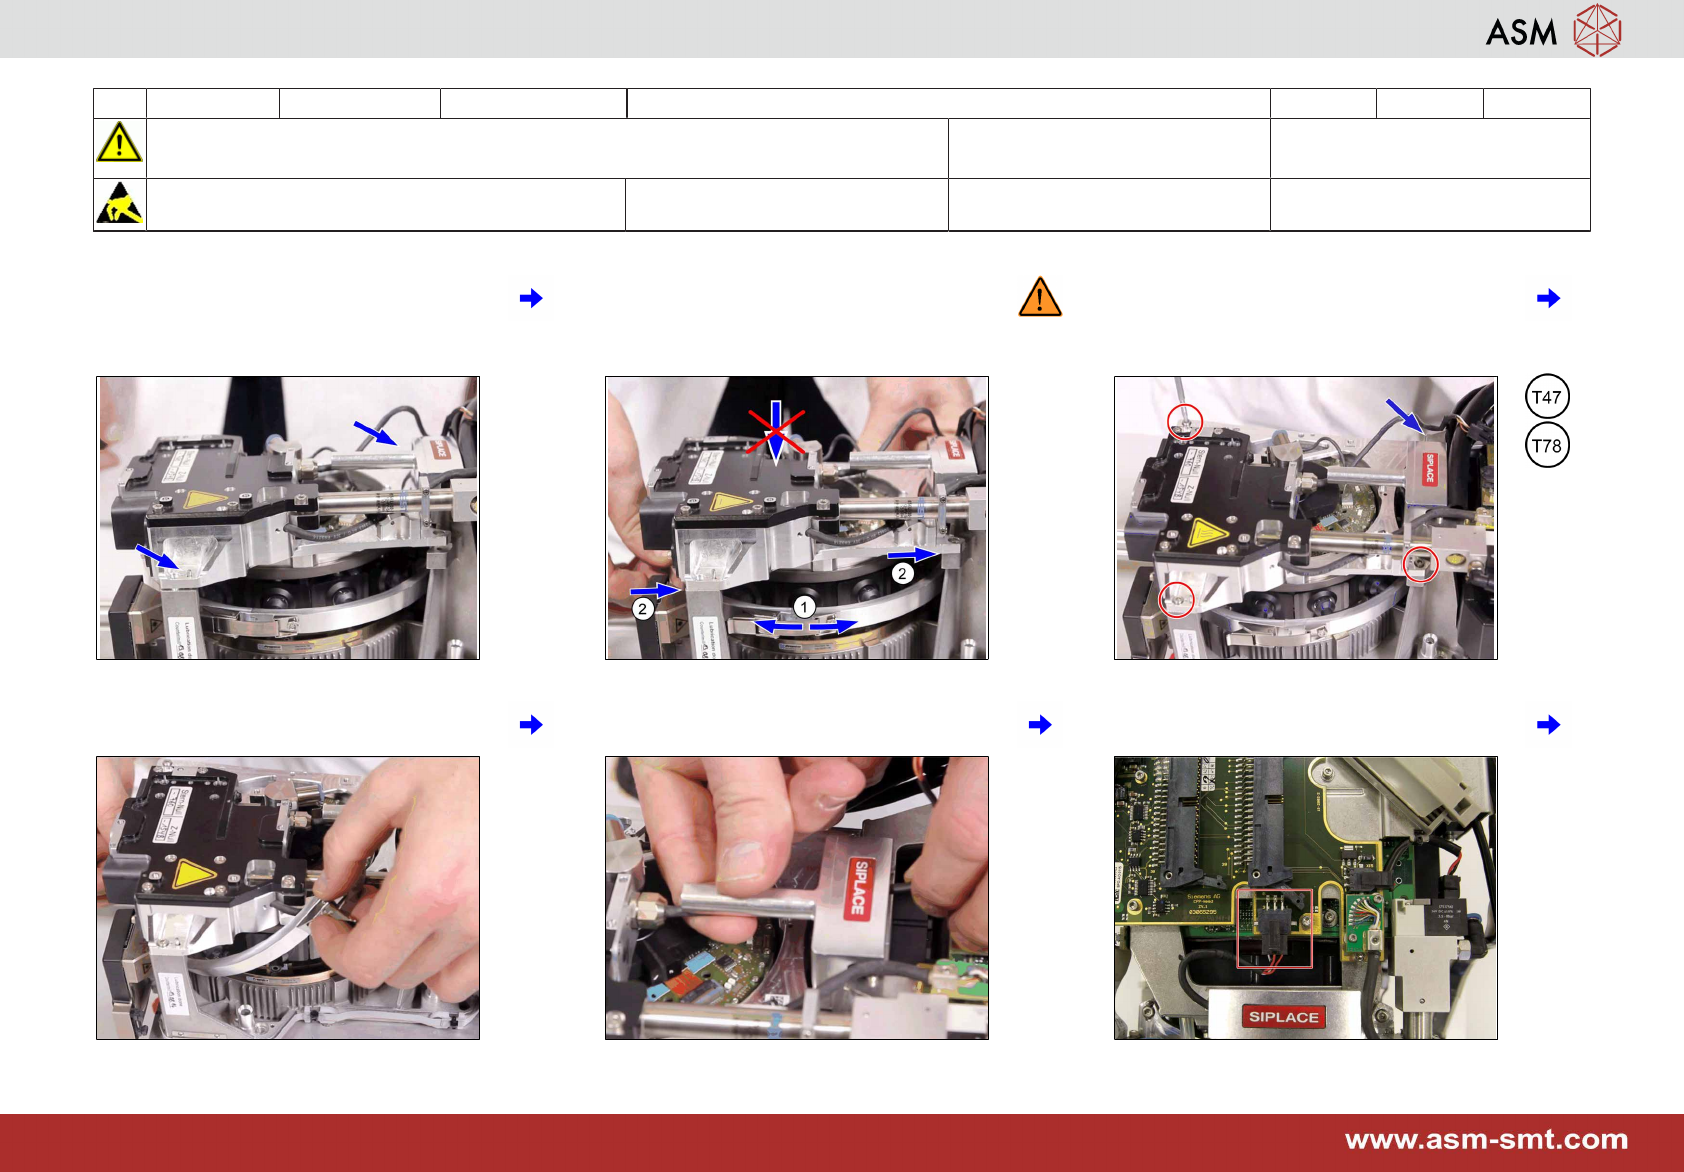
7 Put the front plate onto the centering pins
at the back part of the head.
8 Move the star (1) until the front plate falls
into place (2). Don't press onto the front
plate as this can damage the ball bear-
ings.
9 Fix the 4 screws with a torque of 0,85 Nm.
10 Twist DP mount tension ring carefully
while removing it.
11 Mount the cable into the handle. 12 Plug-in the cable.