ASM贴片机CPP头半年保养 - 第41页
14 6-monthly CPP Mount the front plate 5 min 3 / 3 CAUTION!Refer to safety instructions in user manual before commencing Mainten- ance NOTICE! ESD guidelines are to be followed Tool: T12, T19, T21, T30, T47, T77, T78 We…
14 6-monthly CPP Mount the front plate 5 min 2 / 3
CAUTION!Refer to safety instructions in user manual before commencing Mainten-
ance
NOTICE! ESD guidelines are to be followed Tool:
T12, T19, T21, T30, T47, T77, T78
Wear Part:
W16
Consumables:
C8
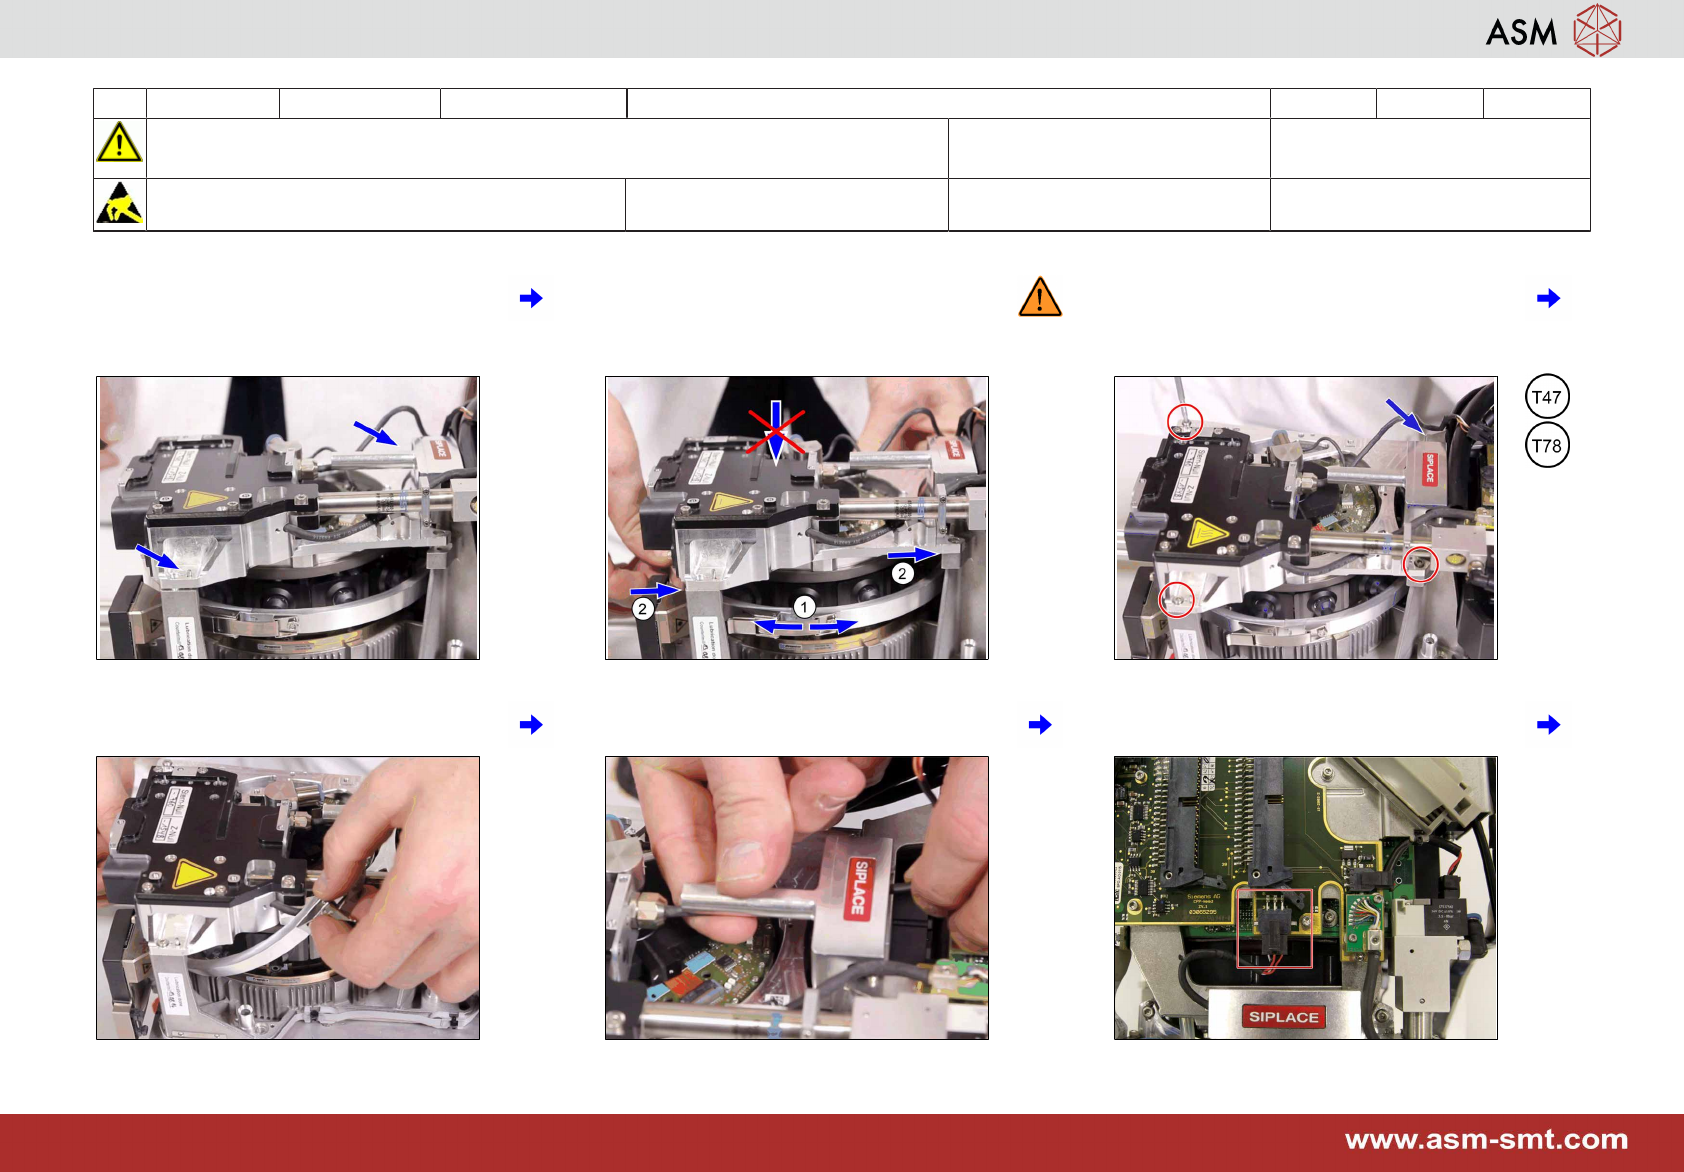
7 Put the front plate onto the centering pins
at the back part of the head.
8 Move the star (1) until the front plate falls
into place (2). Don't press onto the front
plate as this can damage the ball bear-
ings.
9 Fix the 4 screws with a torque of 0,85 Nm.
10 Twist DP mount tension ring carefully
while removing it.
11 Mount the cable into the handle. 12 Plug-in the cable.
14 6-monthly CPP Mount the front plate 5 min 3 / 3
CAUTION!Refer to safety instructions in user manual before commencing Mainten-
ance
NOTICE! ESD guidelines are to be followed Tool:
T12, T19, T21, T30, T47, T77, T78
Wear Part:
W16
Consumables:
C8
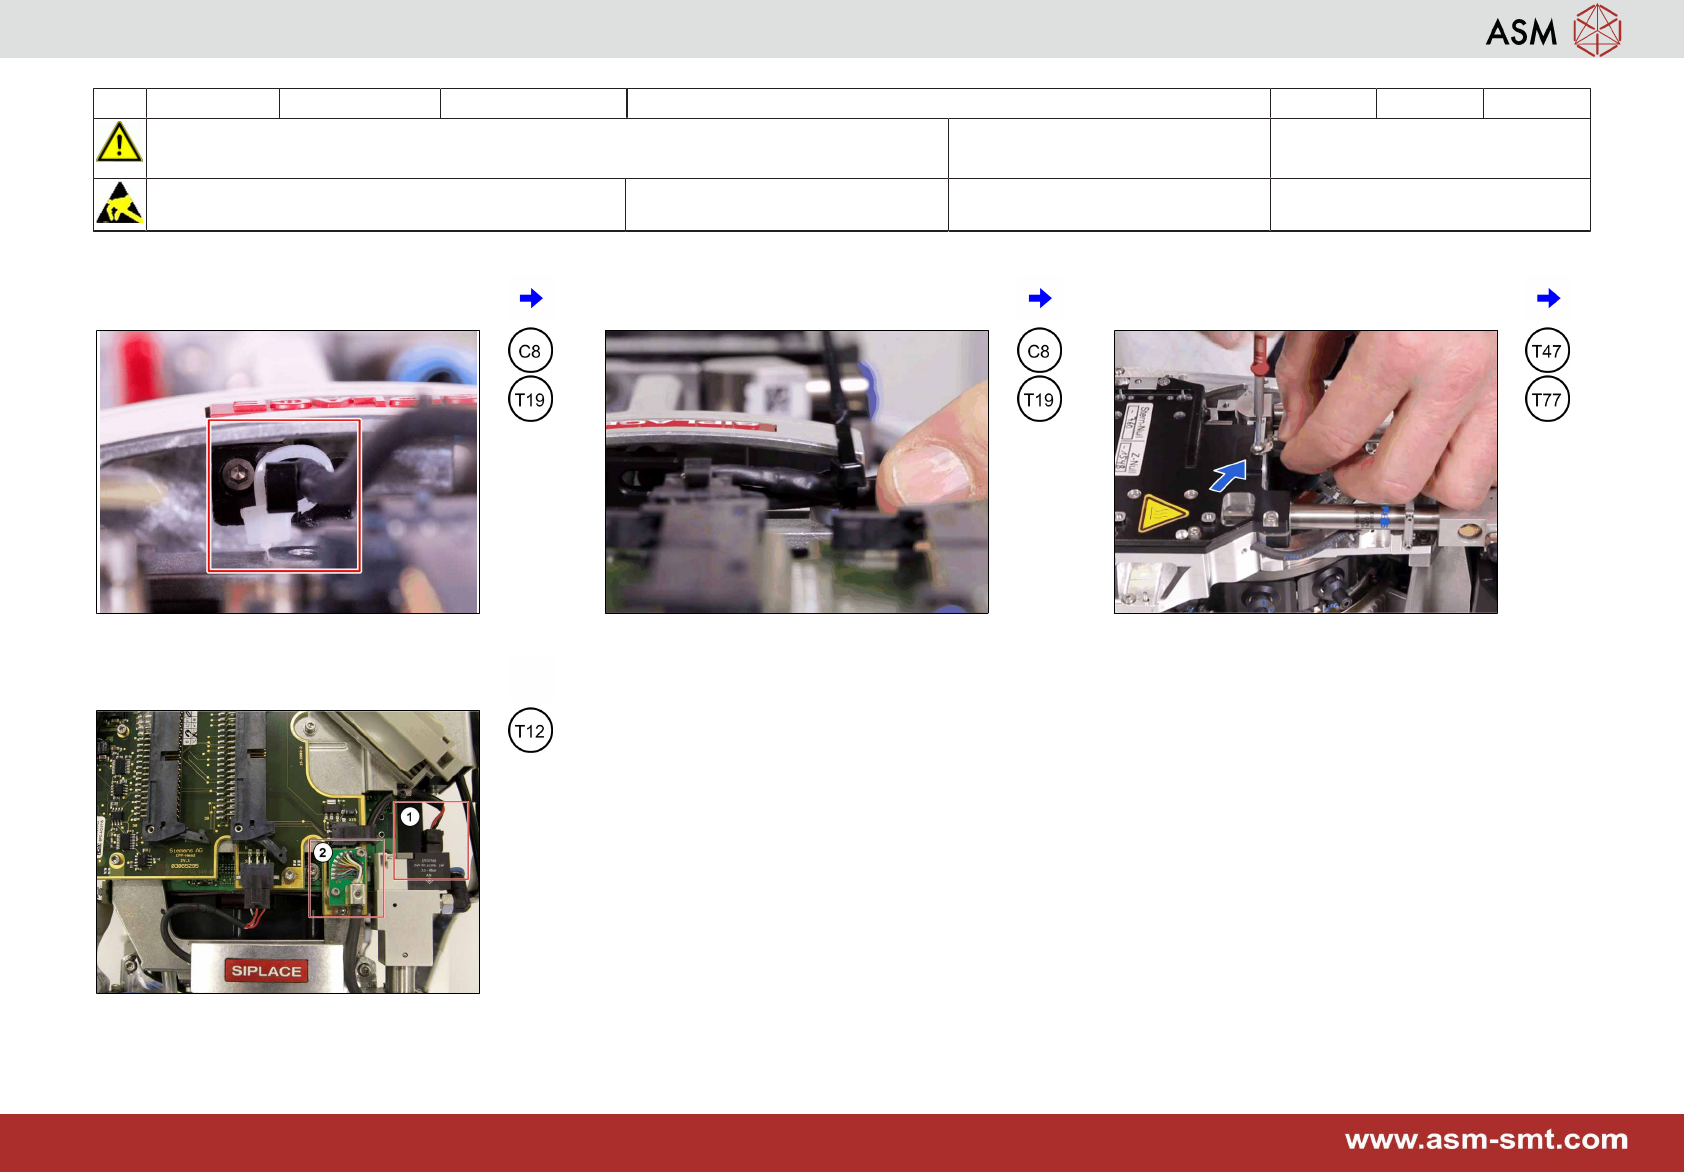
13 Fix the cable with a cable tie at the center
of the holder (version with short cable).
14 Fix the cable with a cable tie at the side of
the holder (version with long cable).
15 Fix the earth cable at the front plate.
16 Plug in the cables (1) and fix the con-
nector with the two screws (2).