ASM贴片机CPP头半年保养 - 第58页
21 6-monthly CPx+TH Appendix: Maintain the Pressure Regulator Valve (PRV) 10 min 4 / 7 CAUTION!Refer to safety instructions in user manual before commencing Mainten- ance NOTICE! ESD guidelines are to be followed Tool: …
21 6-monthly CPx+TH Appendix: Maintain the Pressure Regulator Valve (PRV) 10 min 3 / 7
CAUTION!Refer to safety instructions in user manual before commencing Mainten-
ance
NOTICE! ESD guidelines are to be followed Tool:
T44, T46, T53, T69, T80
Wear Part:
W28, W42, W45, W46
Consumables:
C3, C5, C11, C19, C22
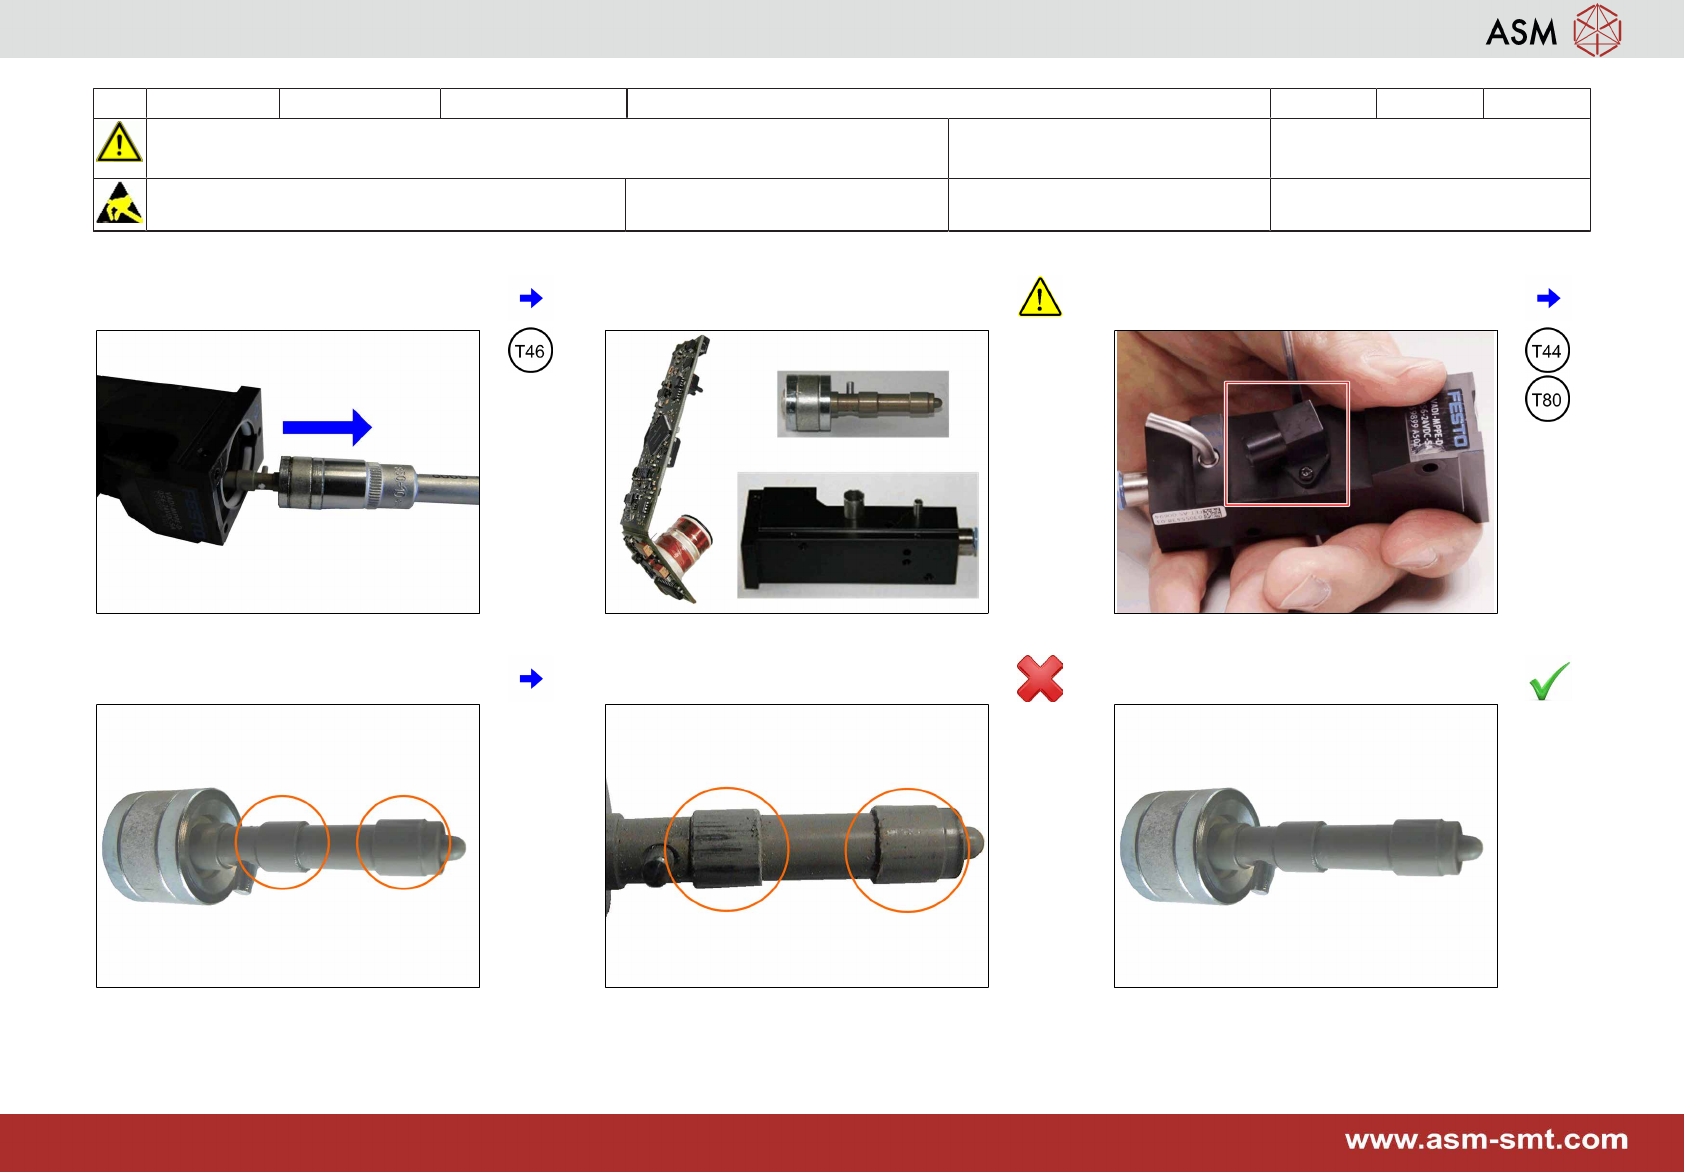
13 Remove the plunger. 14 The PRV parts are aligned and are not
to be mixed among PRVs.
15 Remove the elbow connector (CPP only).
16 Check the plunger for damage. 17 If not OK exchange the complete PRV. 18 If OK proceed with next step.
21 6-monthly CPx+TH Appendix: Maintain the Pressure Regulator Valve (PRV) 10 min 4 / 7
CAUTION!Refer to safety instructions in user manual before commencing Mainten-
ance
NOTICE! ESD guidelines are to be followed Tool:
T44, T46, T53, T69, T80
Wear Part:
W28, W42, W45, W46
Consumables:
C3, C5, C11, C19, C22
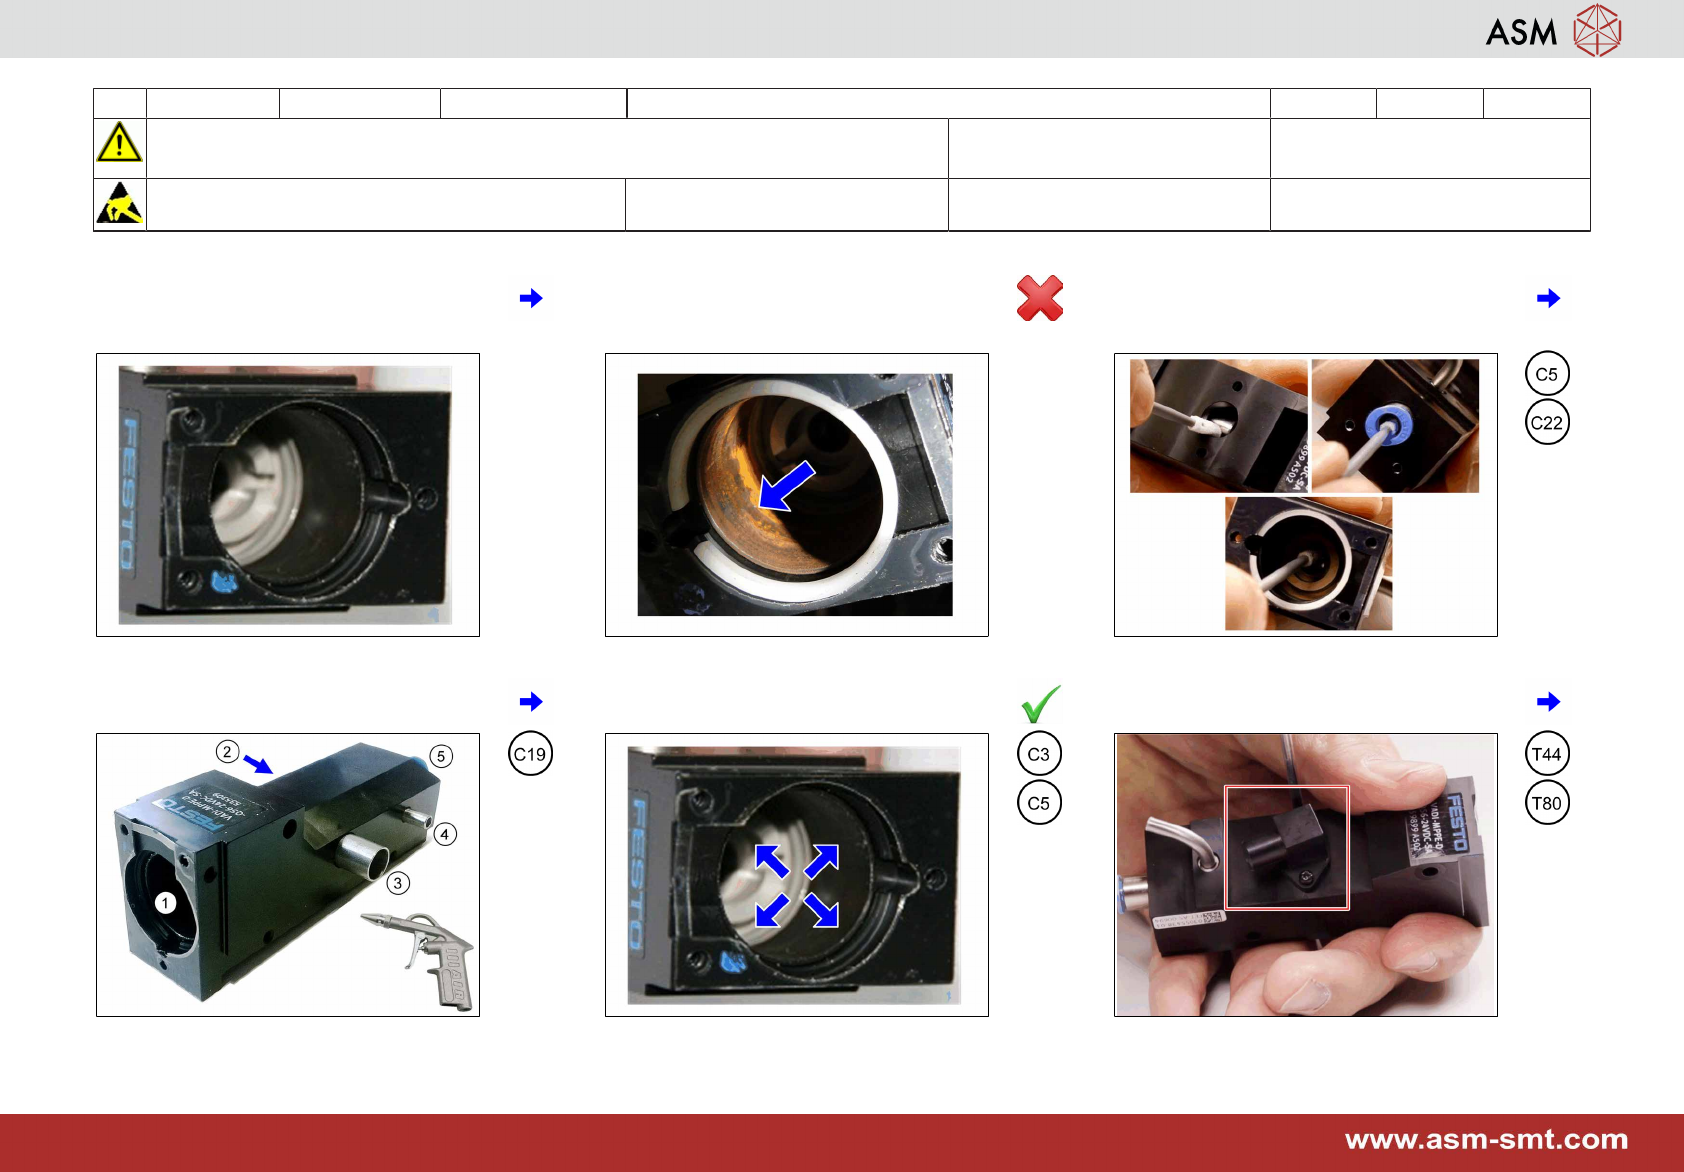
19 Check the inside of the PRV for damage. 20 If not OK exchange the complete PRV. 21 If OK clean the seating of the plunger tip
and the ventury until the cleaning stick
comes out without being polluted.
22 Air gun all openings of the PRV housing
starting at (1).
23 Clean the inside of the housing. 24 Mount the elbow connector (CPP only)
and fix it with a torque of 0,2 Nm.
21 6-monthly CPx+TH Appendix: Maintain the Pressure Regulator Valve (PRV) 10 min 5 / 7
CAUTION!Refer to safety instructions in user manual before commencing Mainten-
ance
NOTICE! ESD guidelines are to be followed Tool:
T44, T46, T53, T69, T80
Wear Part:
W28, W42, W45, W46
Consumables:
C3, C5, C11, C19, C22
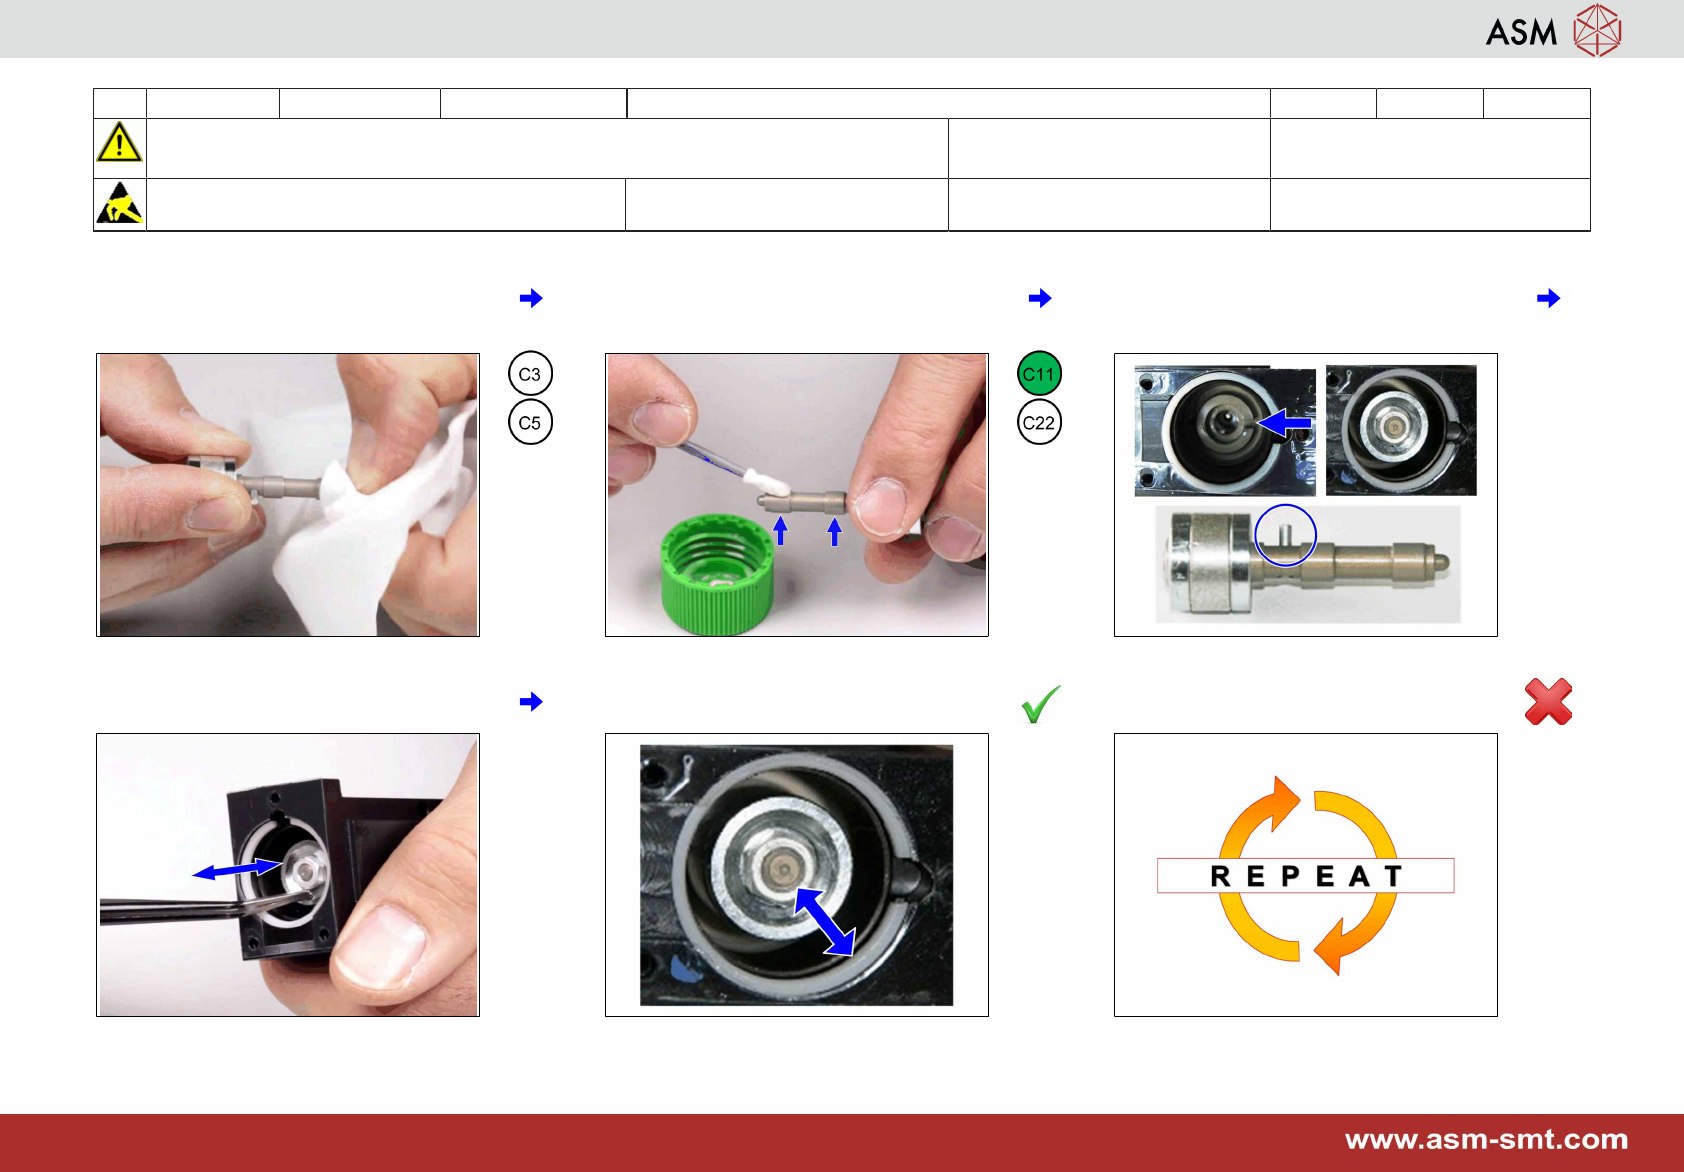
25 Clean the plunger especially at the tip. 26 Grease the plunger slightly at the raised
positions only and put it back into the
housing.
27 The pin of the plunger must engage in the
notch.
28 Check the plunger is moving easily. 29 If OK proceed with step 31. 30 If not OK remove the plunger and repeat
step 16 to 28.