ASM贴片机CPP头半年保养 - 第61页
21 6-monthly CPx+TH Appendix: Maintain the Pressure Regulator Valve (PRV) 10 min 7 / 7 CAUTION!Refer to safety instructions in user manual before commencing Mainten- ance NOTICE! ESD guidelines are to be followed Tool: …
21 6-monthly CPx+TH Appendix: Maintain the Pressure Regulator Valve (PRV) 10 min 6 / 7
CAUTION!Refer to safety instructions in user manual before commencing Mainten-
ance
NOTICE! ESD guidelines are to be followed Tool:
T44, T46, T53, T69, T80
Wear Part:
W28, W42, W45, W46
Consumables:
C3, C5, C11, C19, C22
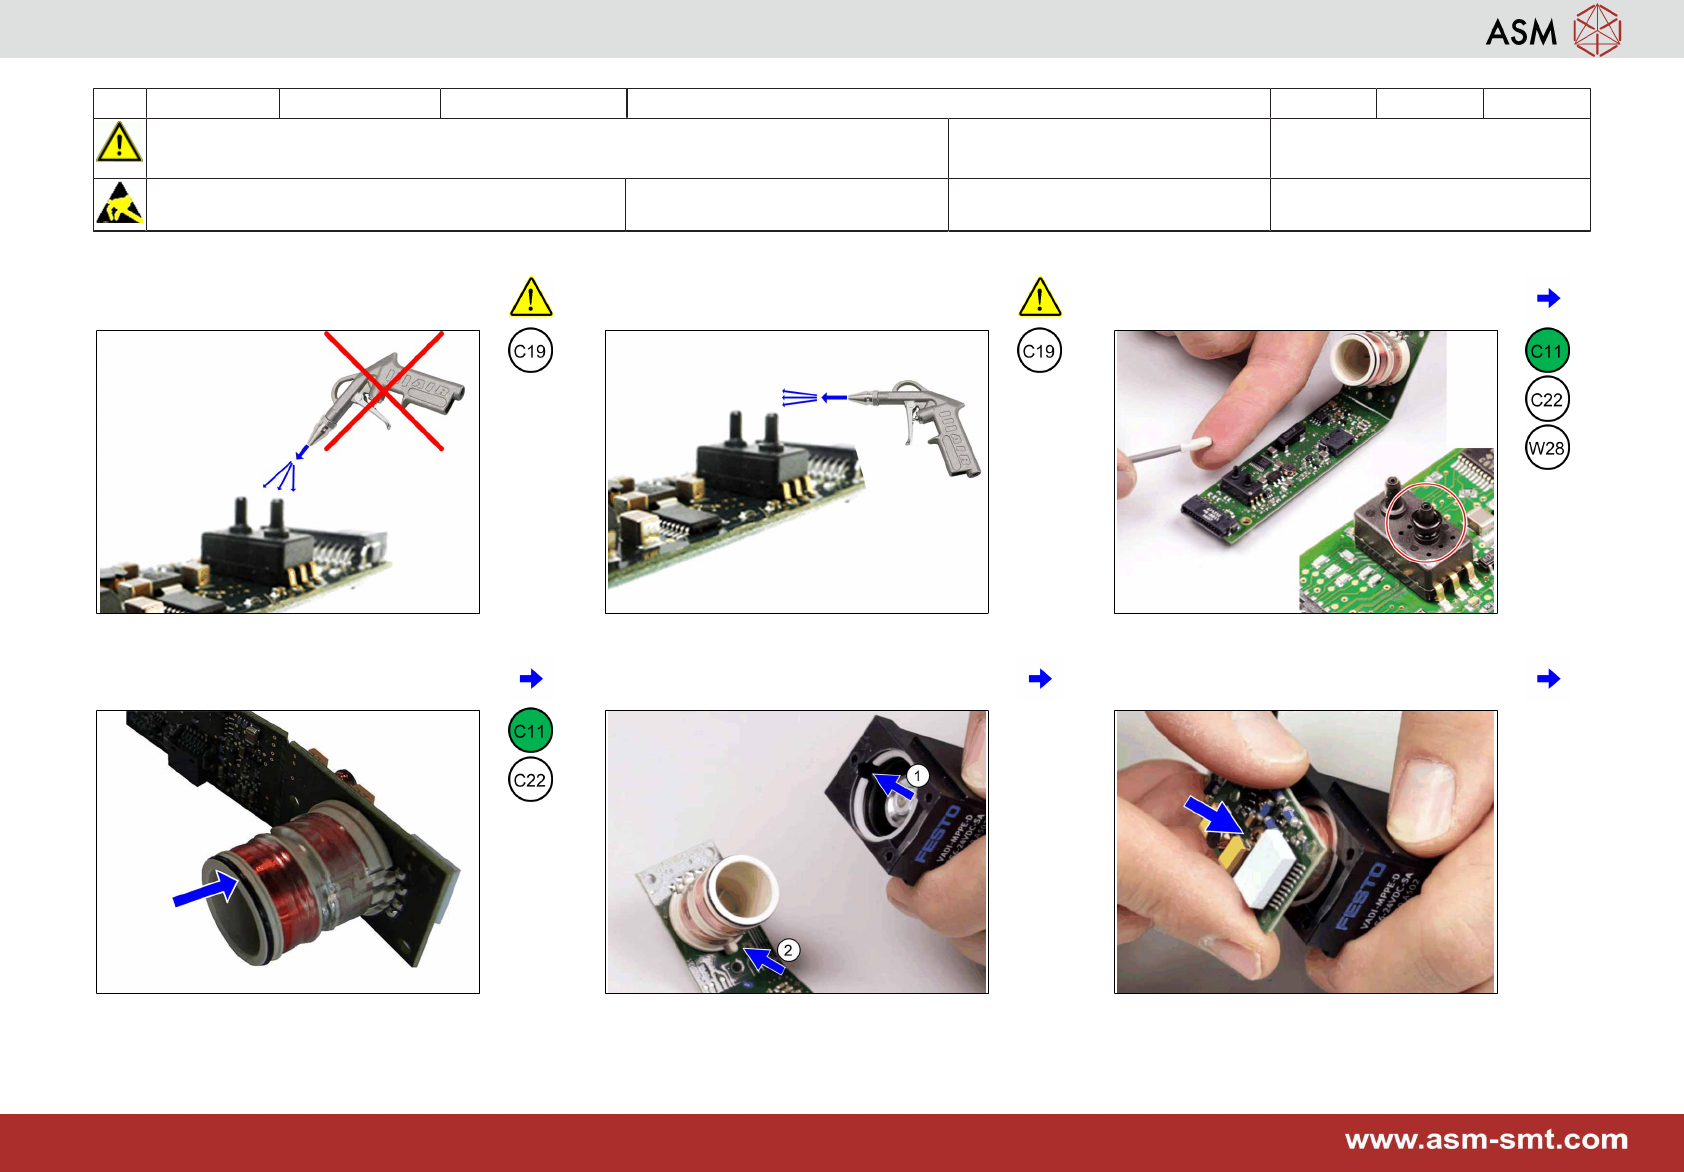
31 Don't blow from above as this will dam-
age the sensor!
32 Clean the vacuum sensor from the side
only!
33 Lubricate slightly the O-ring and put it onto
the vacuum sensor.
34 Lubricate slightly the O-ring on the coil. 35 Align the plastic ring with the notch in the
housing.
36 Insert the coil to mount the PCBs onto the
housing.
21 6-monthly CPx+TH Appendix: Maintain the Pressure Regulator Valve (PRV) 10 min 7 / 7
CAUTION!Refer to safety instructions in user manual before commencing Mainten-
ance
NOTICE! ESD guidelines are to be followed Tool:
T44, T46, T53, T69, T80
Wear Part:
W28, W42, W45, W46
Consumables:
C3, C5, C11, C19, C22
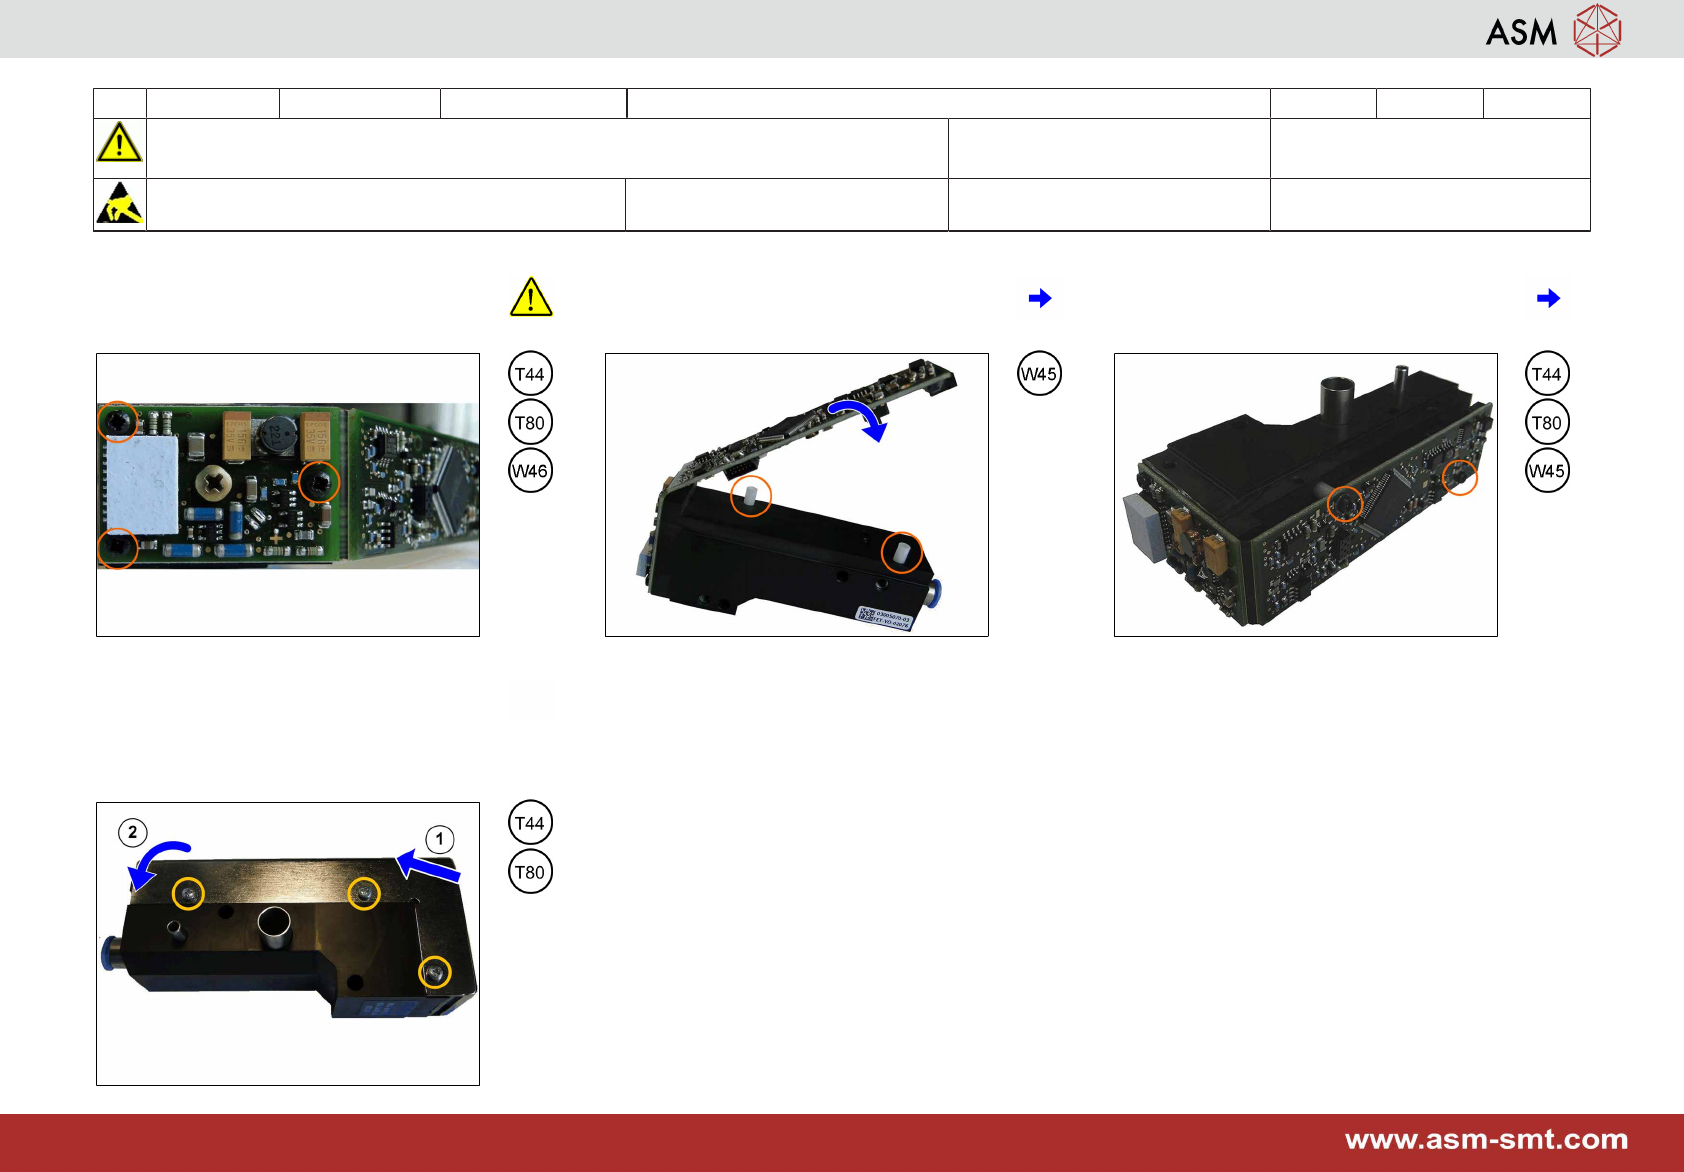
37 Turn the 3 self tapping screws first to the
left checking for the thread before tighten-
ing them with a torque of 0,20 Nm.
38 Insert both plastic jackets and put on the
PCB.
39 Turn the 2 screws slightly to the left check-
ing for the thread before tightening them
with a torque of 0,20 Nm.
40 Put on the cover starting at the top (1) and
close it over the PCB (2). Turn the 2
screws slightly to the left checking for the
thread before tightening them with a
torque of 0,20 Nm.