00195467-01_Installation Manual Setup Center 2.2.pdf - 第55页
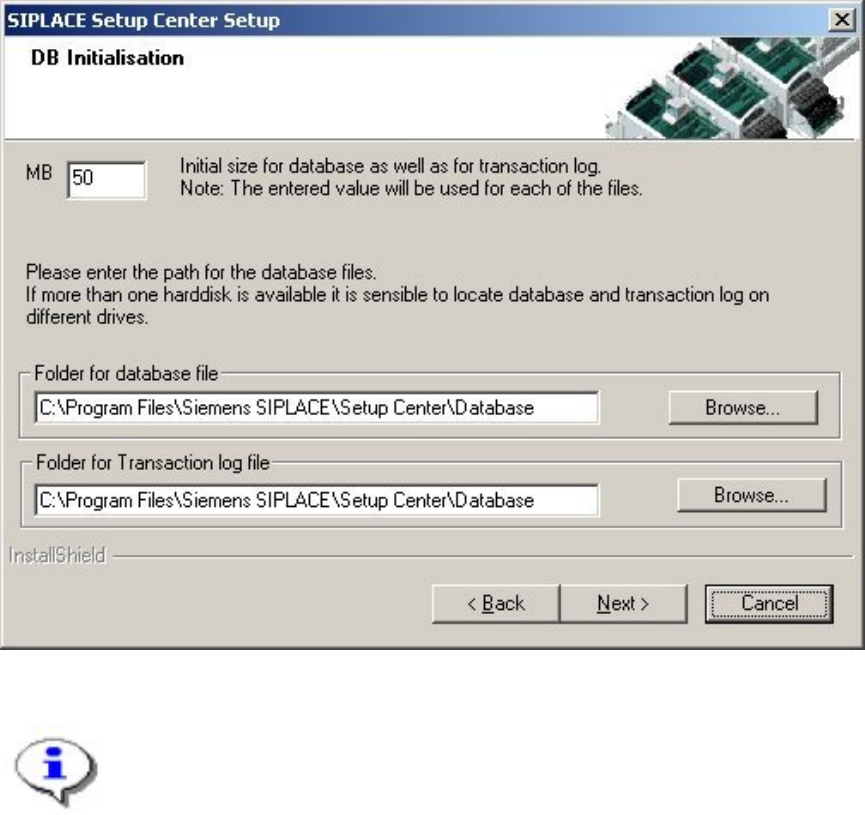
Installation Manual SIPLACE Setup Center 2.2 Step 4 Enter the information required to be con nected with the SQL Server and database in the " DB Initialization " dialog box. The figure you enter in the MB t…
SIPLACE Setup Center 2.2 Installation Manual
Step 3a
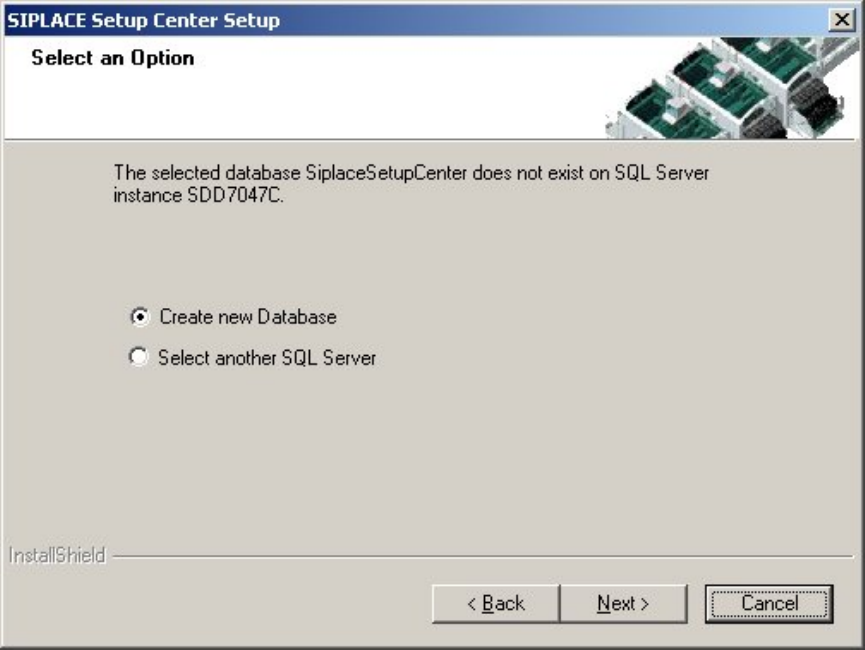
The following dialog appears, in case neither database with the name "SiplaceSetupCenter"
nor the correct version exists:
Figure 5-21 "Select an Option" dialog box
4
Choose Select another SQL Server instance, you return to the previous dialog.
Click Next to create a new database.
54 of 90
Installation Manual SIPLACE Setup Center 2.2
Step 4
Enter the information required to be connected with the SQL Server and database in the "DB
Initialization" dialog box.
The figure you enter in the MB text box defines the size of the SIPLACE Setup Center
database files (default: 50) which are to be created during the installation.
Confirm the default value or enter the size you want in the MB text box.
Figure 5-22 "DB Initialization" dialog box
Note
The specified size is only an initial value. The database will grow automatically as
required. However, only the database administrator is capable of freeing up unused
disk space. In the "database files" edit field, enter the directory in which the
SIPLACESetupCenter.mdf file is to be created. In the transaction log files edit
field, enter the name of the directory in which the SIPLACESetupCenter.mlf
database file is to be created.
55 of 90
-
SIPLACE Setup Center 2.2 Installation Manual
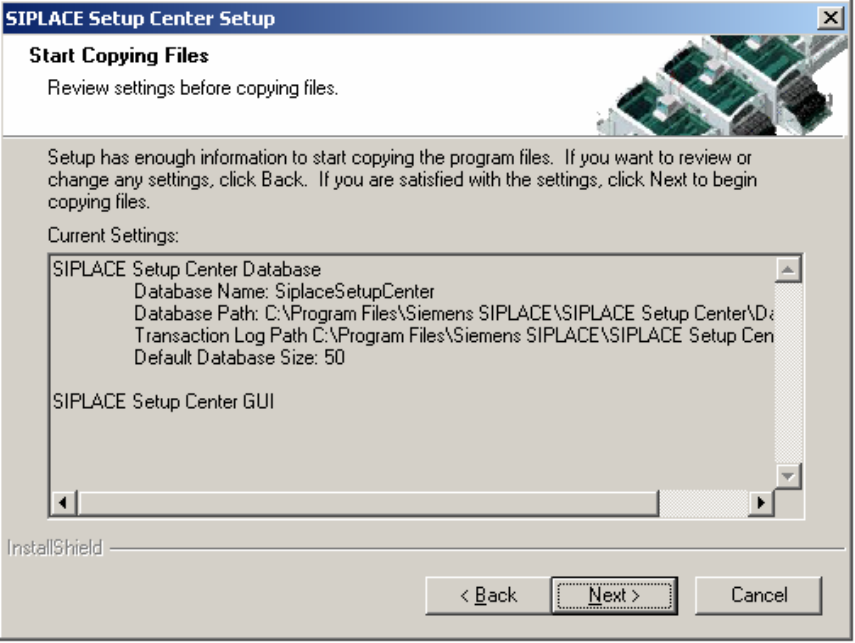
Step 5
The "Start Copying Files" dialog box gives you a chance to check the information again,
which you have entered during the previous steps.
V3.0.1.43_MCHnocheckout
Figure 5-23 "Start Copying Files" dialog box
Click Next if you accept all the information entered.
If you want to change any settings, click the Back button until you get back to the dialog box
in question.
There, enter your changes and click Next to continue as usual.
56 of 90