00196378-0102_UM X-Feeder_EN.pdf - 第49页
Operating Tape Feeder Modules Inserting / Removing the Spacer (Tape Support) Setting Up the Fe eder Module User Manual X Feeder M odules SIPLACE Family 49 4.2.1.2 Spacer on 8 mm Feeder Modules The spacer (tap supp ort fo…
Operating Tape Feeder Modules
Setting Up the Feeder Module Inserting / Removing the Spacer (Tape Support)
48 User Manual X Feeder Modules SIPLACE Family
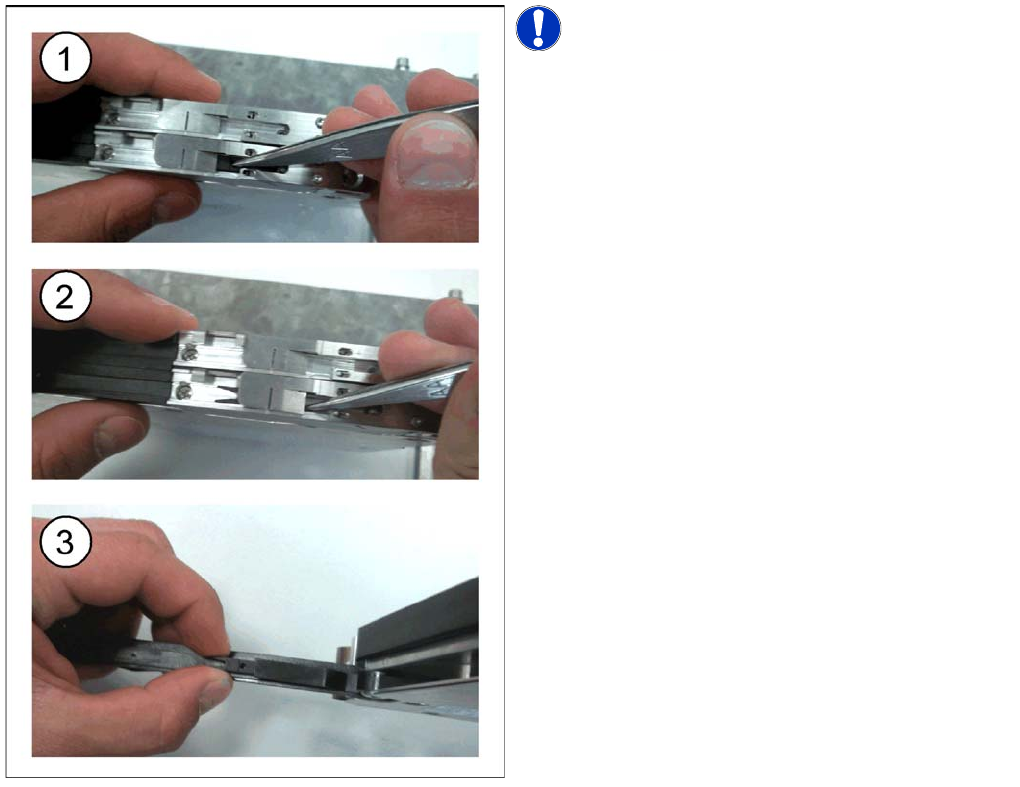
Removing the Spacer
NOTICE! The lock mechanism prevents the
spacer from moving.
►(1) Open the pickup window and lift the spacer out of
the centering holes using tweezers or a screwdriver.
►(2) Push the spacer backwards.
►(3) If the spacer is not needed you can store it in the
foil removal flap.
Operating Tape Feeder Modules
Inserting / Removing the Spacer (Tape Support) Setting Up the Feeder Module
User Manual X Feeder Modules SIPLACE Family 49
4.2.1.2 Spacer on 8 mm Feeder Modules
The spacer (tap support for paper tapes only) should be installed in the following cases:
▪ If components of size 0402 or smaller are set up on the feeder.
▪ If non-contact pickup is enabled for paper tapes, which means that the component is sucked in with-
out being touched.
An installed spacer must be removed for processing all other tape materials.
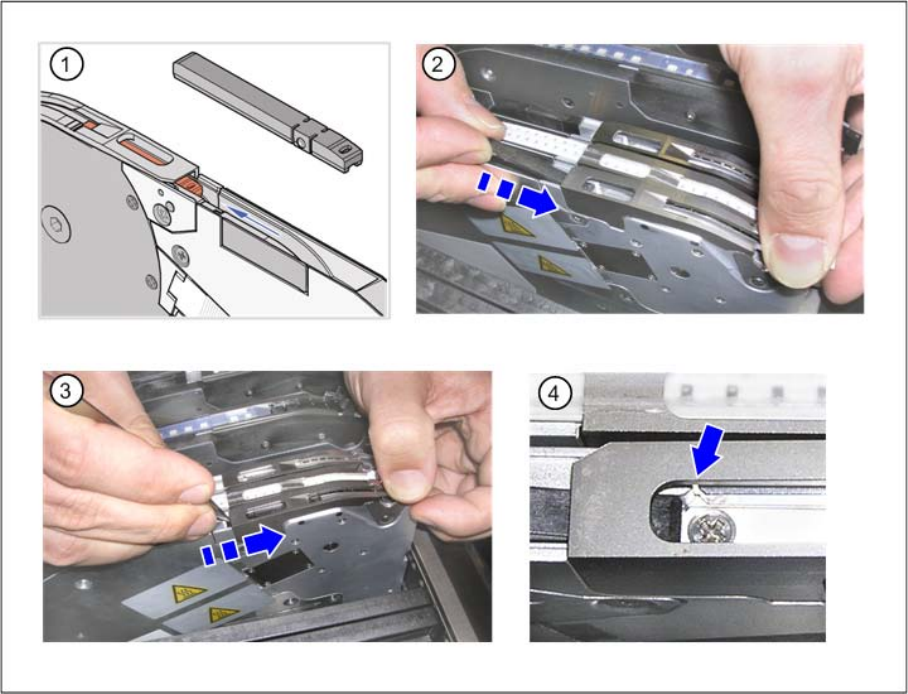
Inserting the spacer
Figure (1) shows a spacer for X feeder modules.
To insert the spacer, proceed as follows:
►(2) Open the pickup window and insert the spacer into the track.
►(3) Push the spacer forward under the pickup window.
►(4) Make sure that the centering pins on the underside of the spacer are located in the centering holes
of the track channel.
Operating Tape Feeder Modules
Setting Up the Feeder Module Inserting / Removing the Spacer (Tape Support)
50 User Manual X Feeder Modules SIPLACE Family
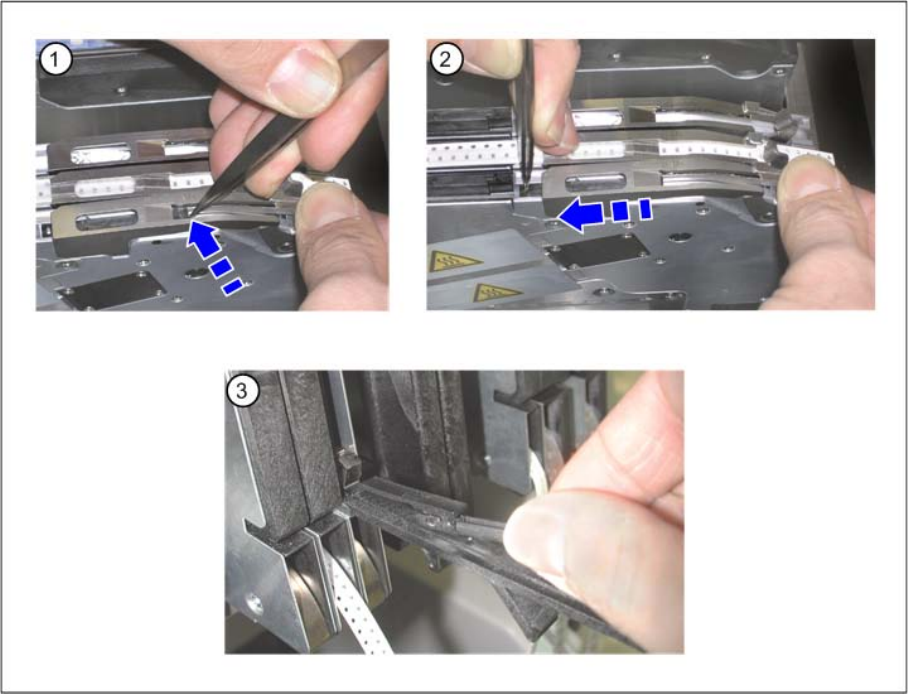
Removing the spacer
►(1) Open the pickup window and lift the spacer out of the centering holes using tweezers or a screw-
driver.
►(2) Push the spacer backwards.
►(3) If the spacer is not needed you can store it in the foil removal flap.