3OM-1286-007_w.pdf - 第317页
6-84 AJQEDT -ID 3.2.3 How to delete a nozzle type (1) Select the nozzle data to be deleted. (2) Press the icon ( ). The following "Confirmation" dialog box opens. Fig. 3F75 (3) When the [YES] button is pressed, …
6-83
AJQEDT-ID
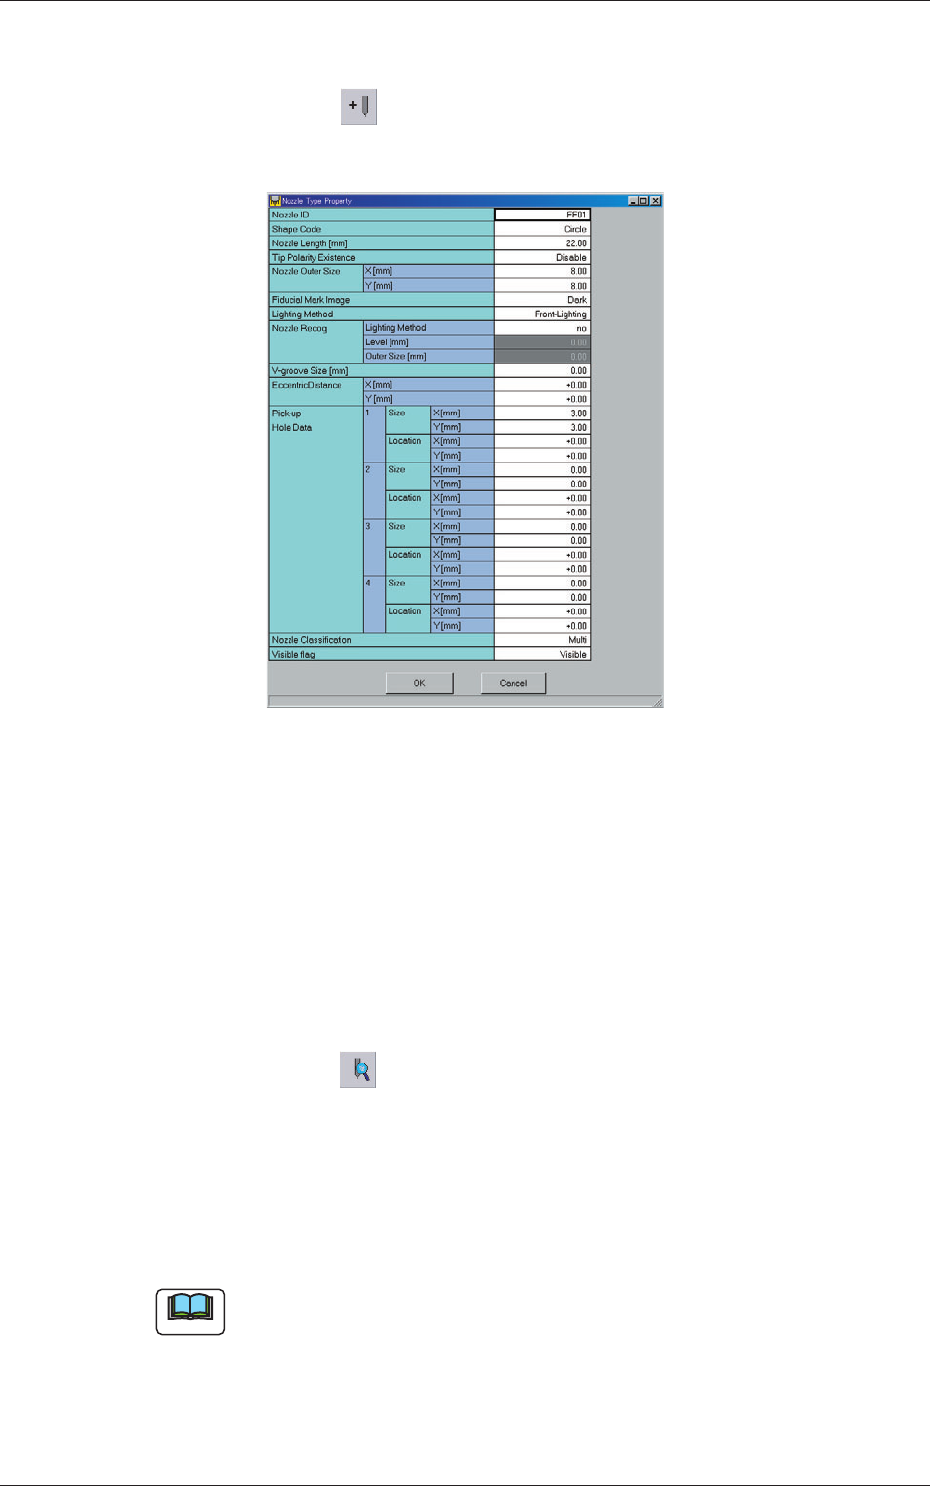
3.2.1 Addition of New Nozzle Type
(1) Press the icon ( ).
The "Nozzle Type Property" window opens.
Fig. 3F74
(2) Enter parameters (nozzle data) in the text boxes.
(3) Press the [OK] button.
The nozzle data is added as new one.
3.2.2 How to change a nozzle type
(1) Select the nozzle data to be changed.
(2) Press the icon (
).
The "Nozzle Type Property" window opens.
(3) Change the data.
(4) Press the [OK] button.
The nozzle data is changed.
Note
When the [Cancel] button is pressed in the "Nozzle Type Property"
window, the window closes without newly adding or modifying the data.
0606-005
3.2 Nozzle Data
6-84
AJQEDT-ID
3.2.3 How to delete a nozzle type
(1) Select the nozzle data to be deleted.
(2) Press the icon (
).
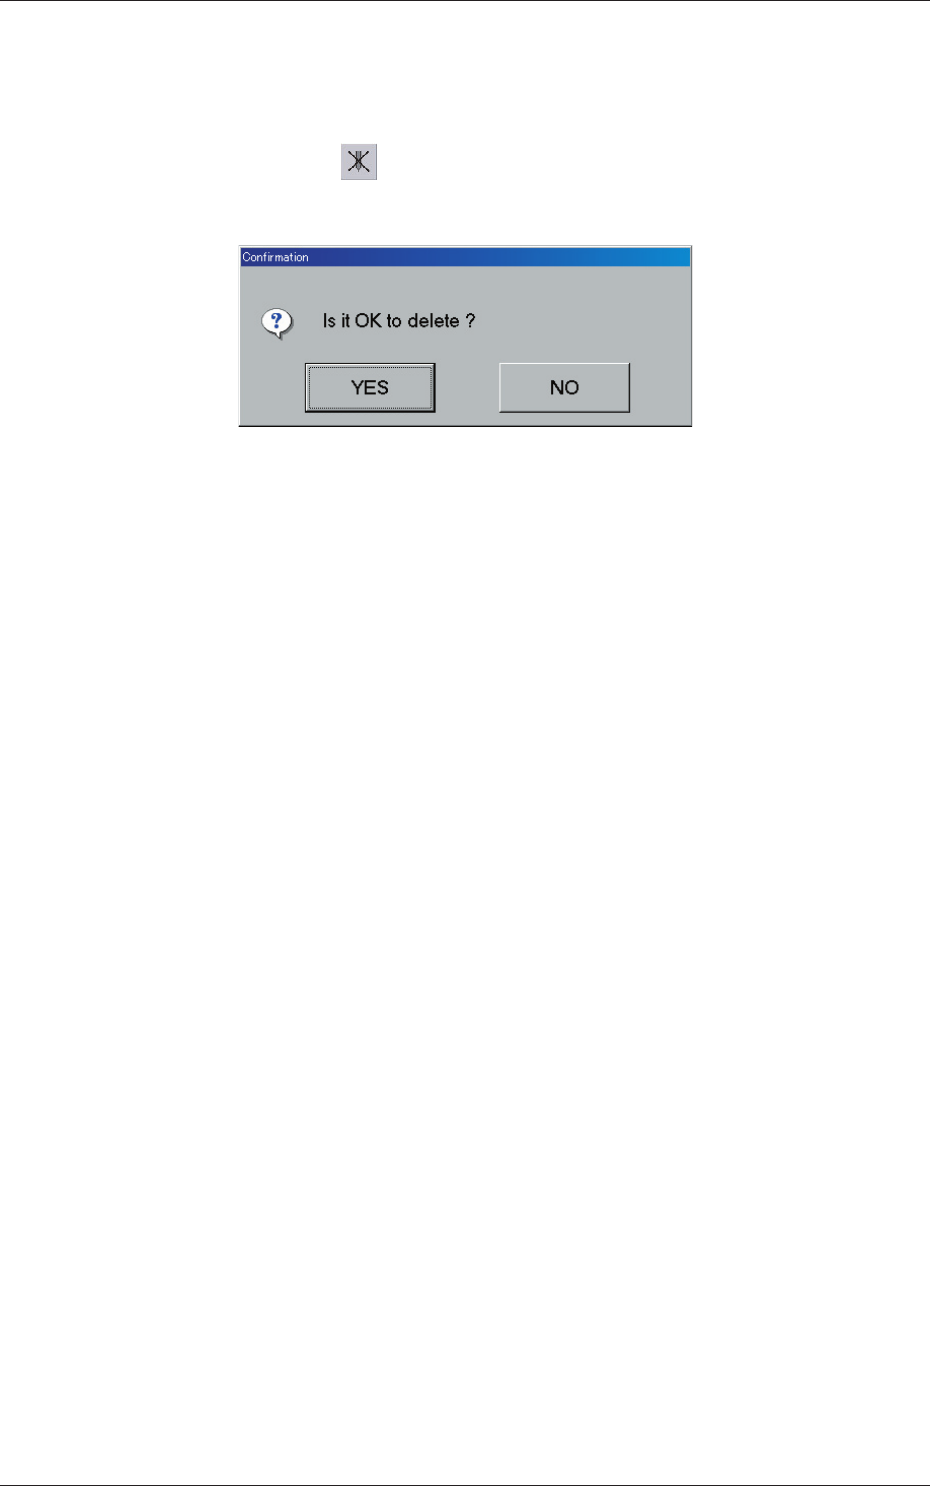
The following "Confirmation" dialog box opens.
Fig. 3F75
(3) When the [YES] button is pressed, the selected nozzle data is deleted.
When the [NO] button is pressed, the deletion of the selected nozzle
data is canceled.
0606-005
3.2 Nozzle Data
6-85
AJQEDT-ID
0606-005
4. Machine Setup
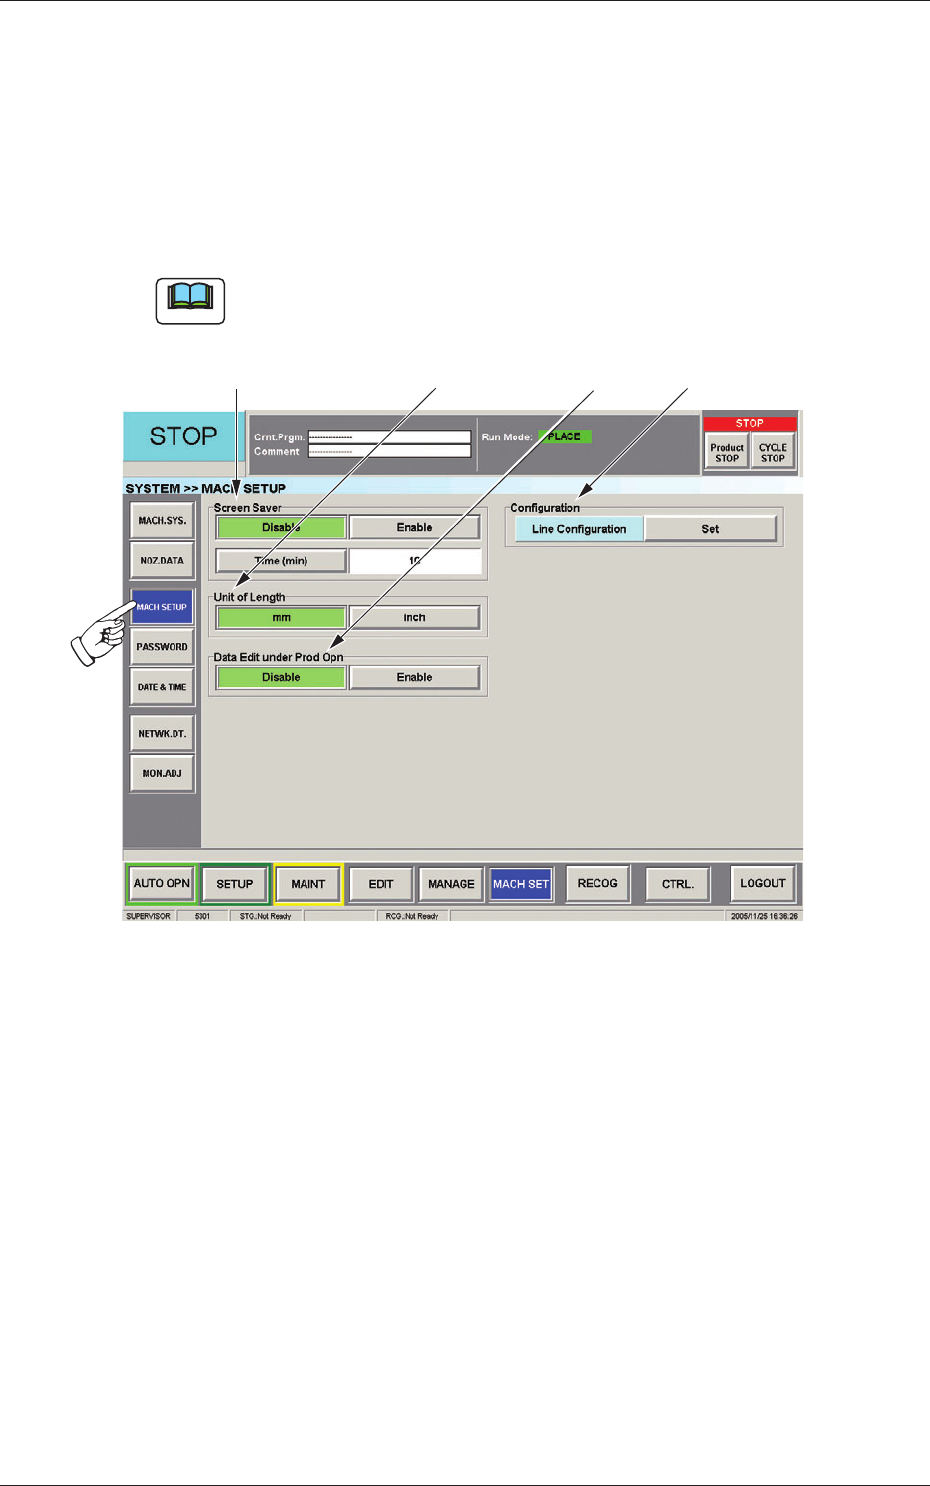
The screen saver function can be set, and the unit of length can be specified,
and the data for the current production can edited.
When the [MACH SETUP] button on the "MACH SET" menu bar is
pressed, the "MACH SETUP" window opens.
Note
When the [MACH SET] button on the main menu bar is pressed, the
"MACH SETUP" window appears as an initial one.
[3][2][1]
[4]
Fig. 3F76 "MACH SETUP" Window
4. Machine Setup